43217 Disney™ Up House Review

Review by Ben Groot (SAFOLs Member, CapeLUG Member)

My family and I enjoy watching Disney movies together, often with some home-made popcorn. We have watched Disney’s Up several times, with the DVD sitting in our collection. When we saw that Lego was releasing a set for this movie, it was high on our wanted list. Many people will also recall that one of the set’s designers, Ollie Gregory, visited South Africa earlier this year. I was unfortunately not able to get a signed box of this set.

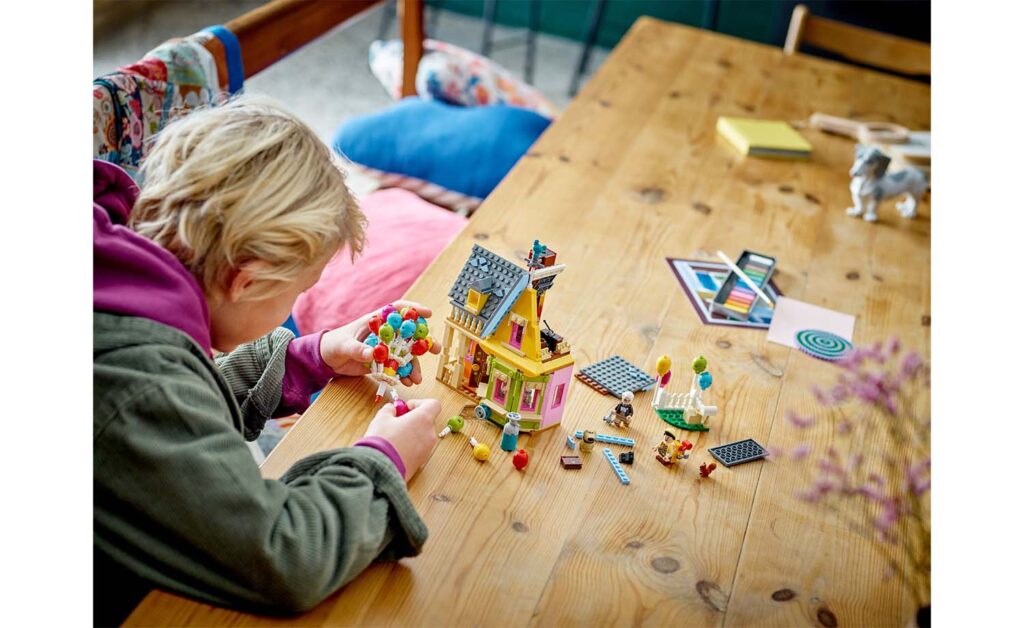
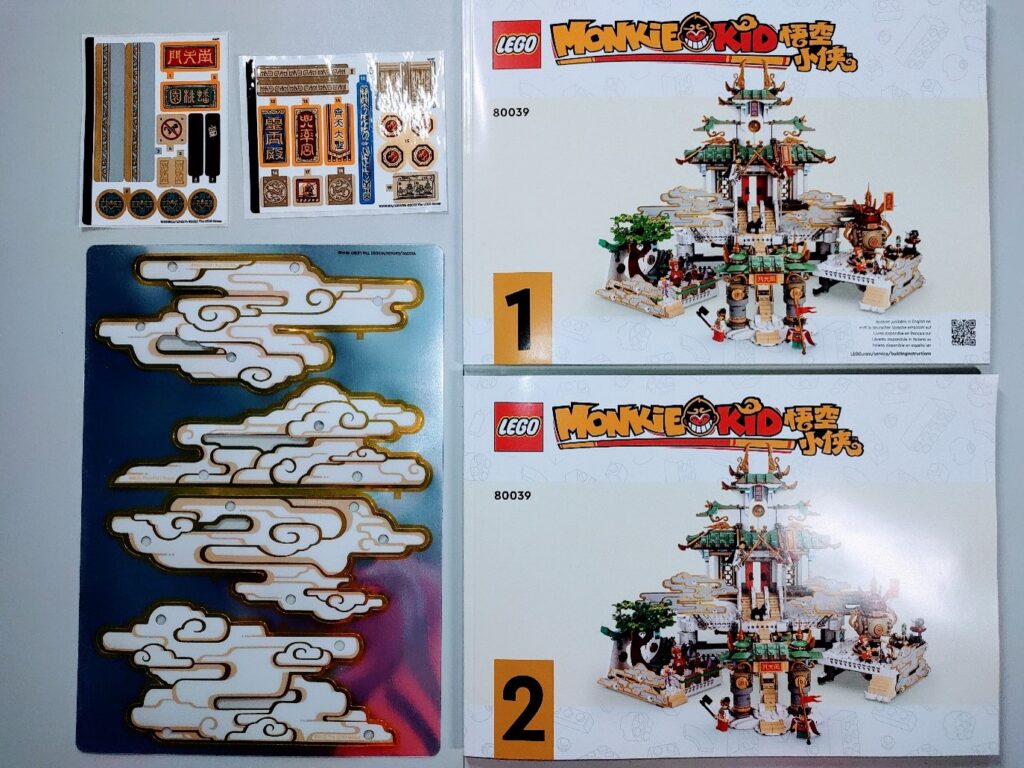
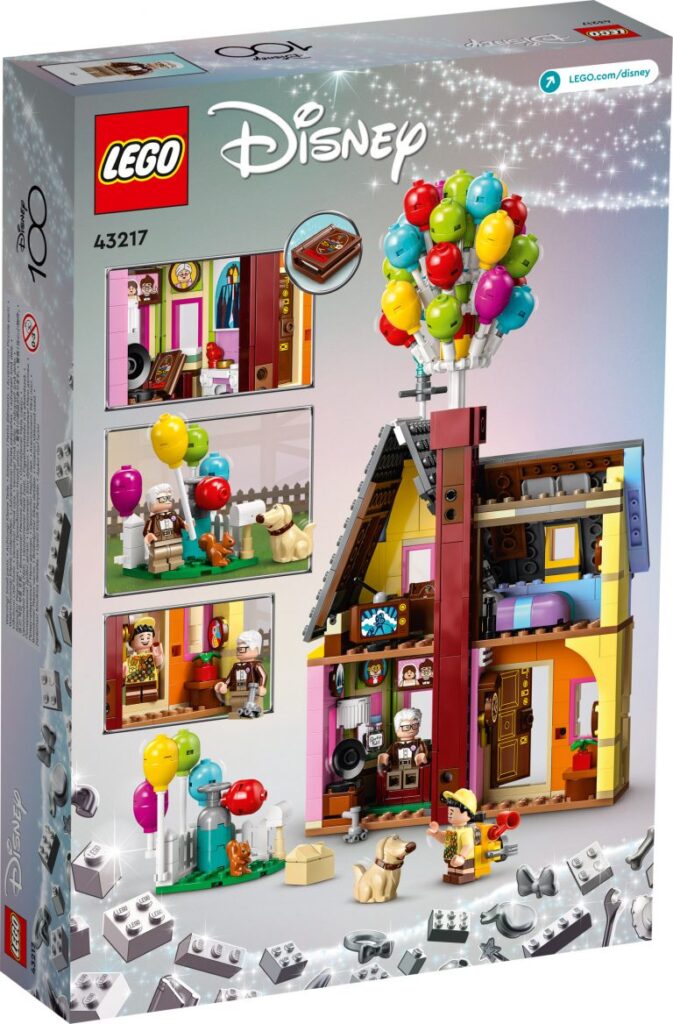
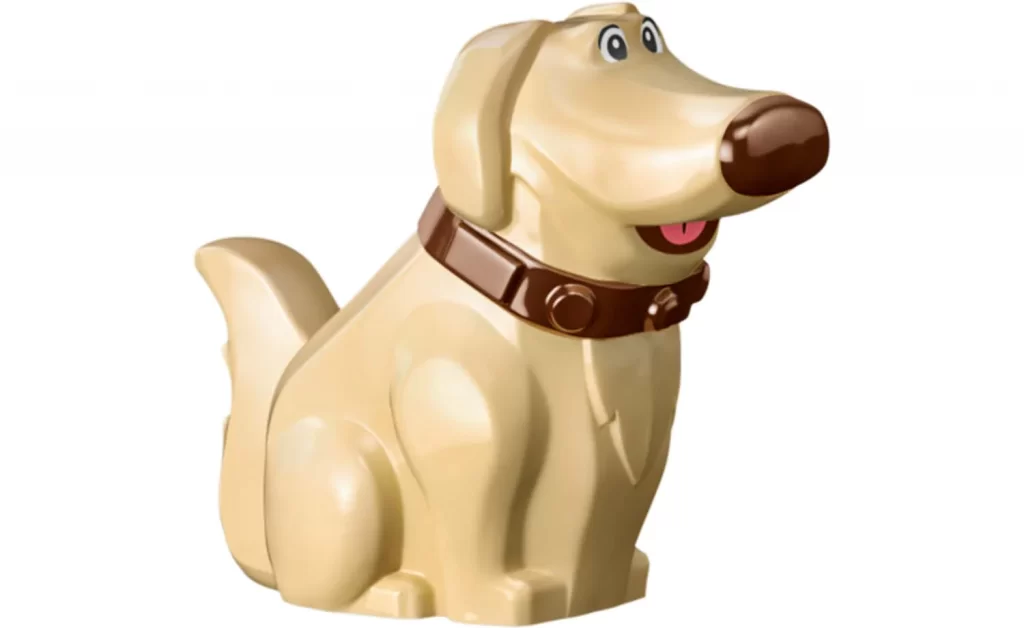
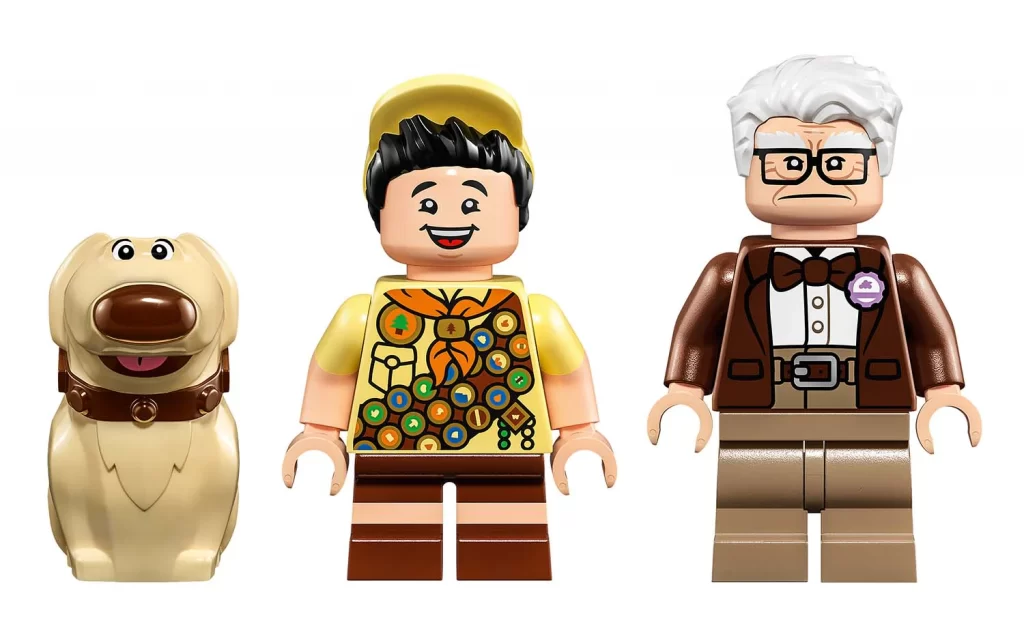
The box contains the instruction manual, a sticker sheet, and four numbered bags. In each of the first three bags a different minifigure is included: Russel, Carl and Dug the dog. The set contains 598 parts, with 6 unique elements, other than the minifigs.

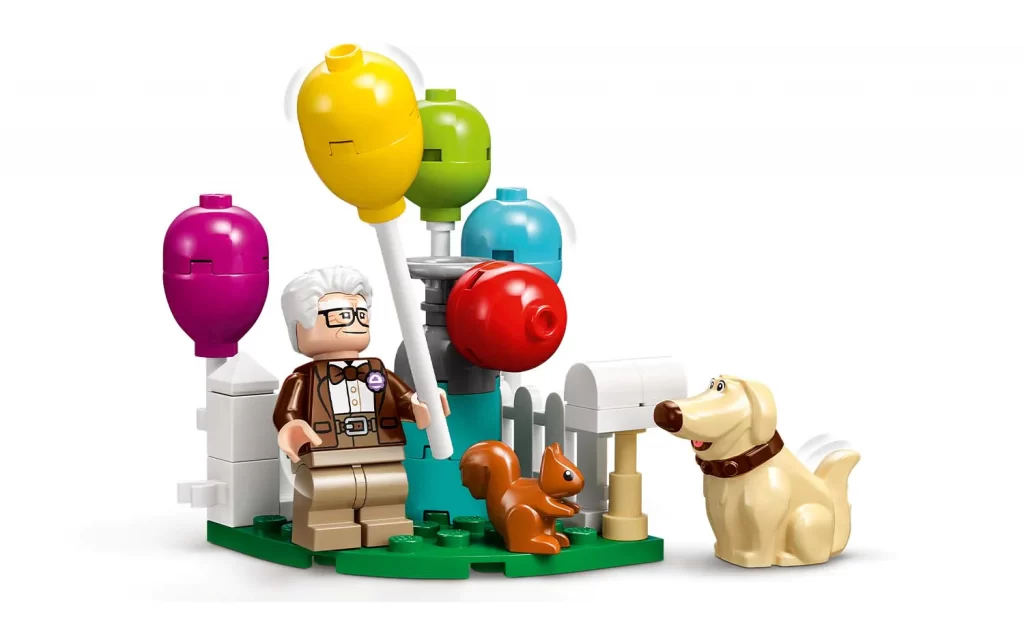
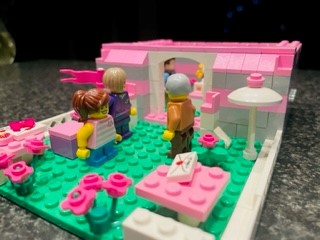
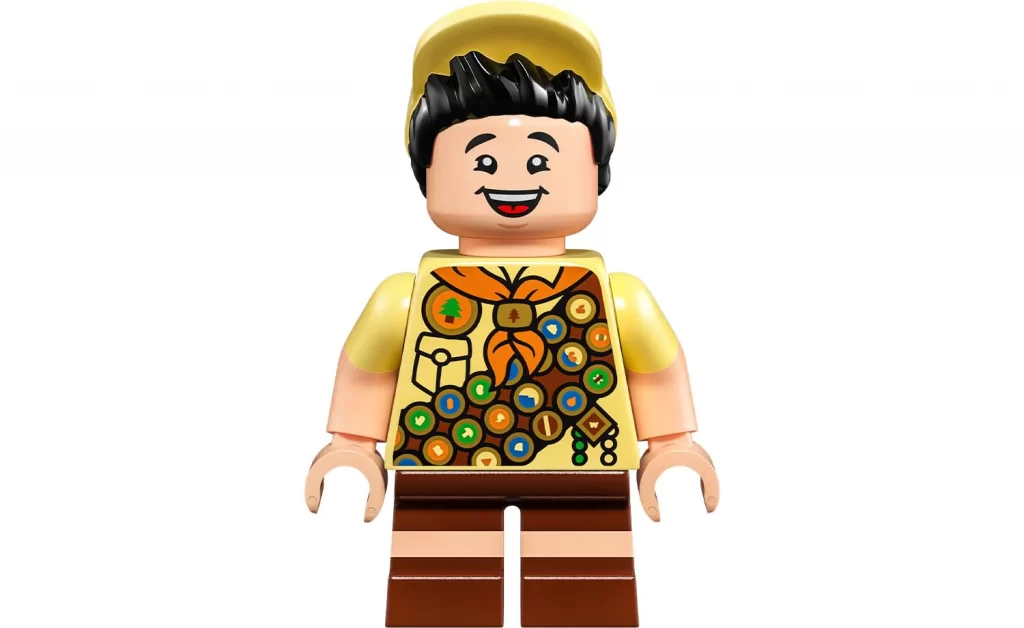
Starting with the minifigs, they are portrayed very accurately. Both Carl and Russel have the double-sided minifig head: Russel’s head has a smile on one side and a big smile on the other, whilst Carl has his well-known scowl on one side and a smile on the other. He also sports his walking cane.

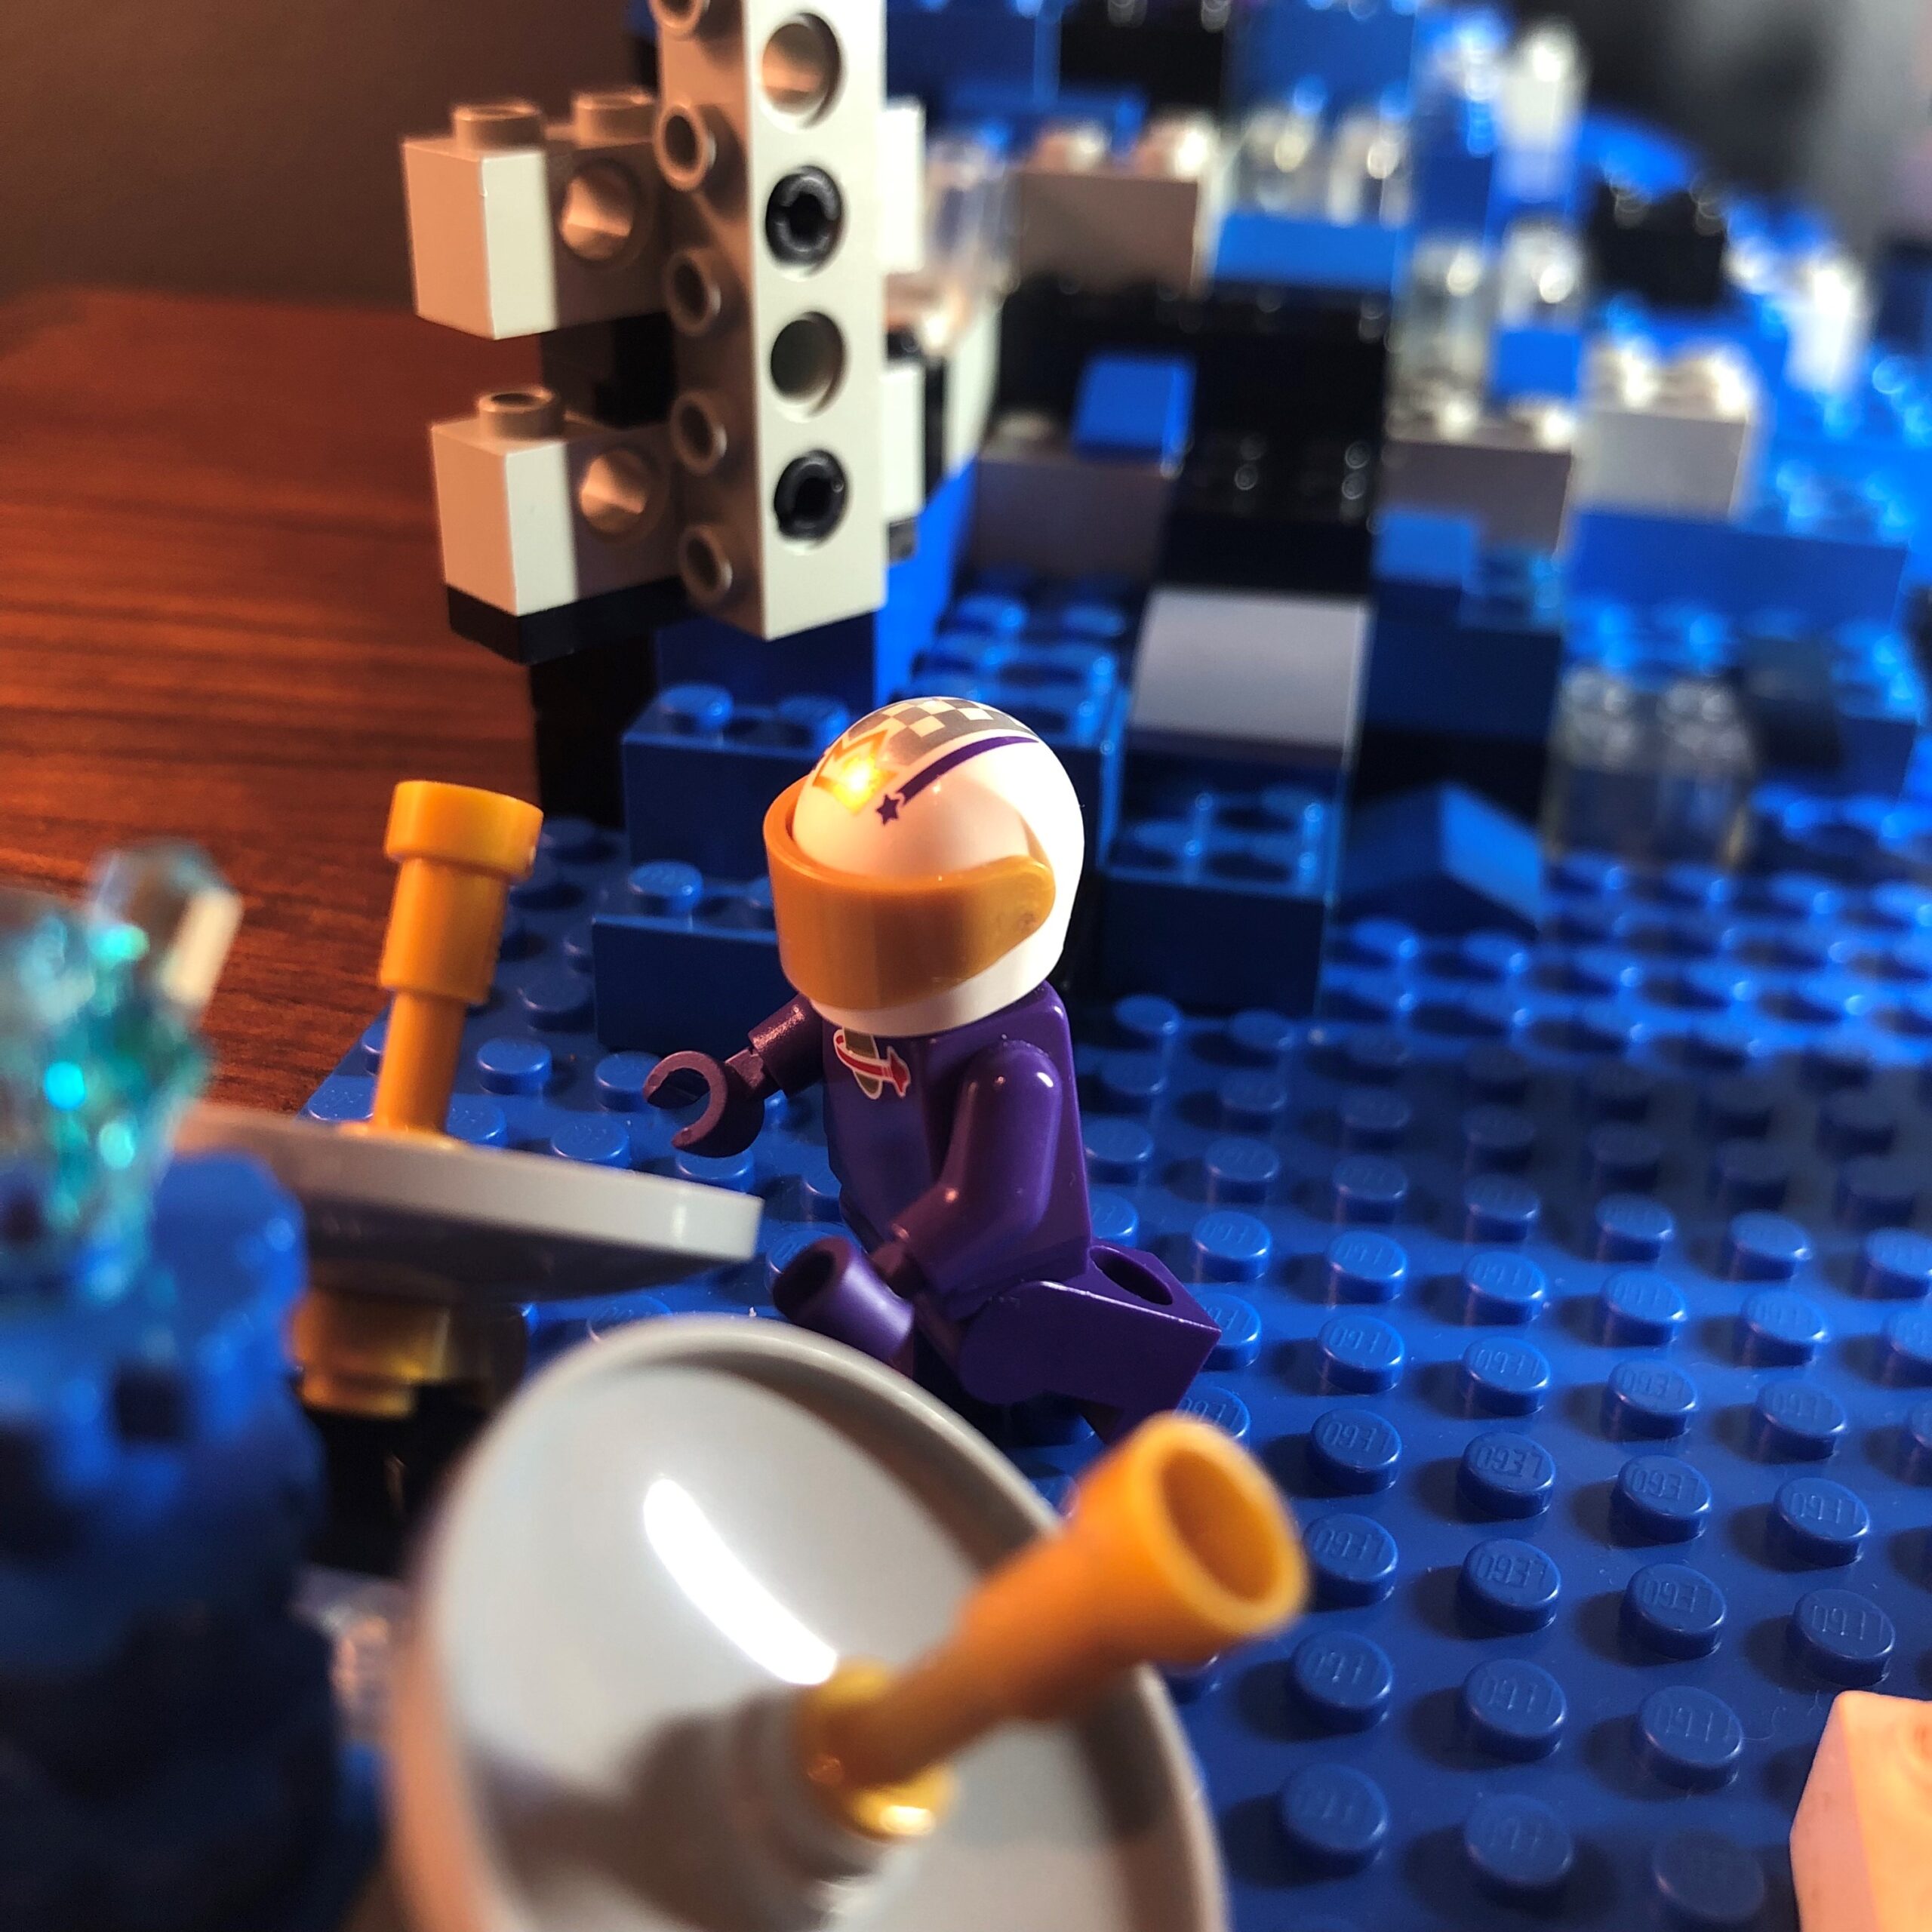
Russel’s backpack was a very fun build: it attaches to his neck in a clever way, and contains his cup, binoculars, a pan, a fork and even his trumpet! The weight of the backpack does, however, mean that he cannot stand on his own, and must be fixed onto a plate or brick for him not to topple backwards.

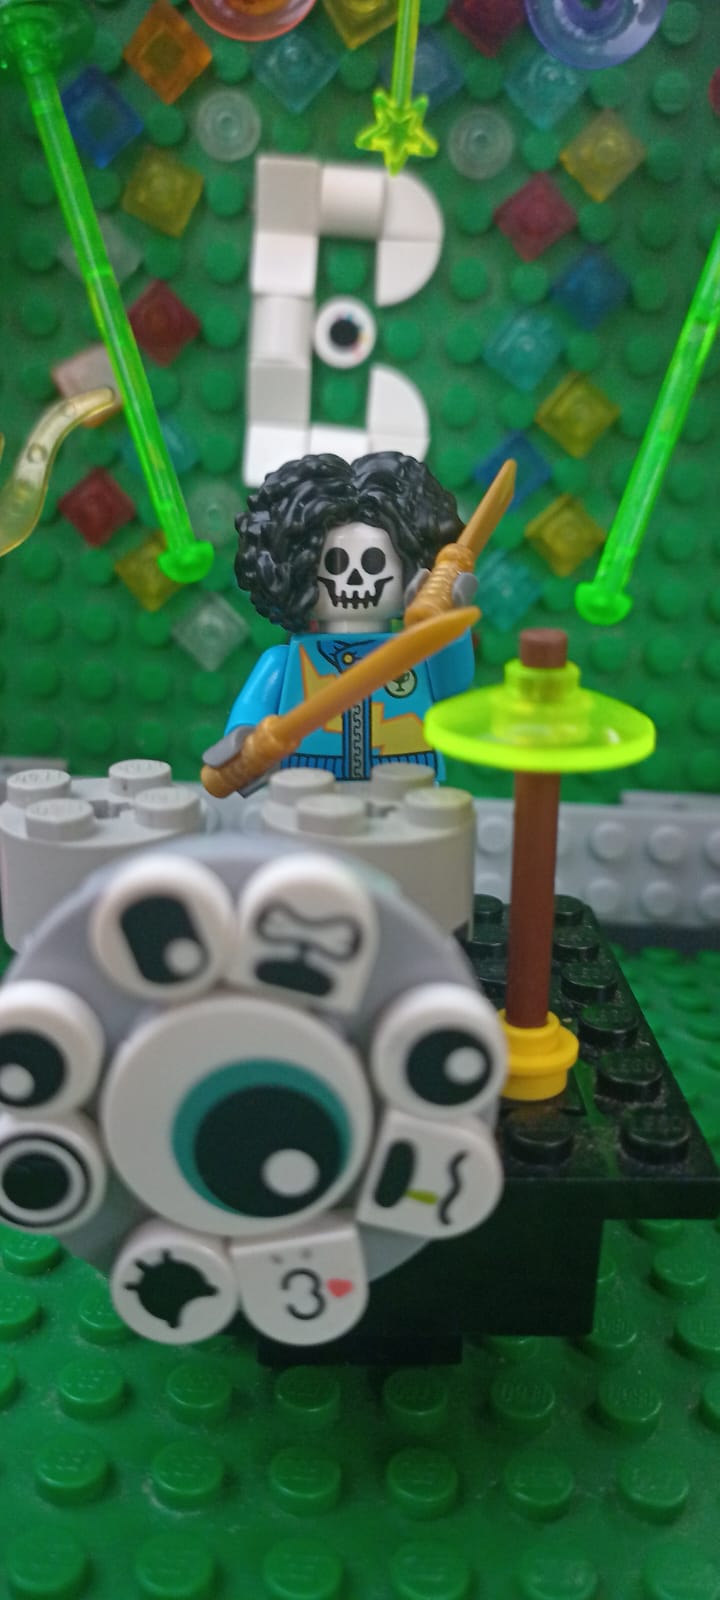
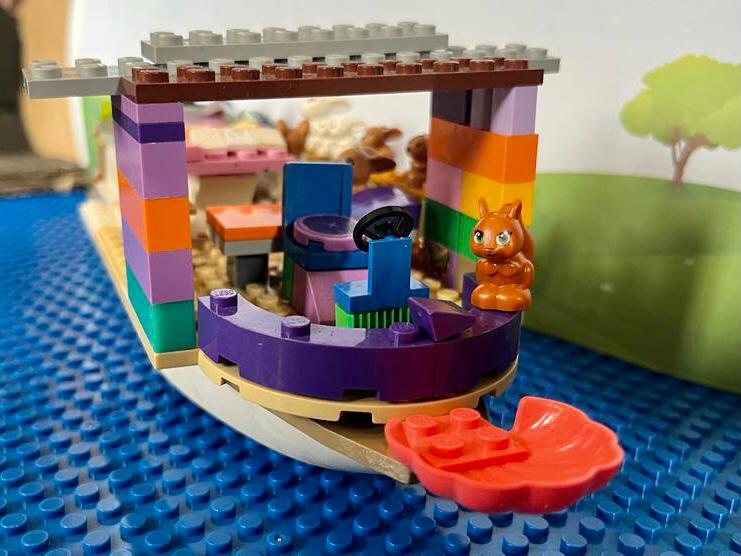
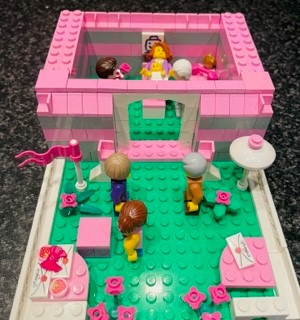
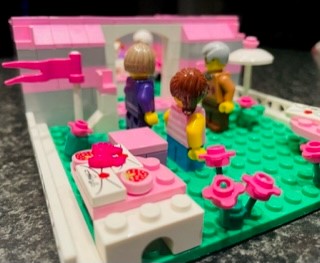
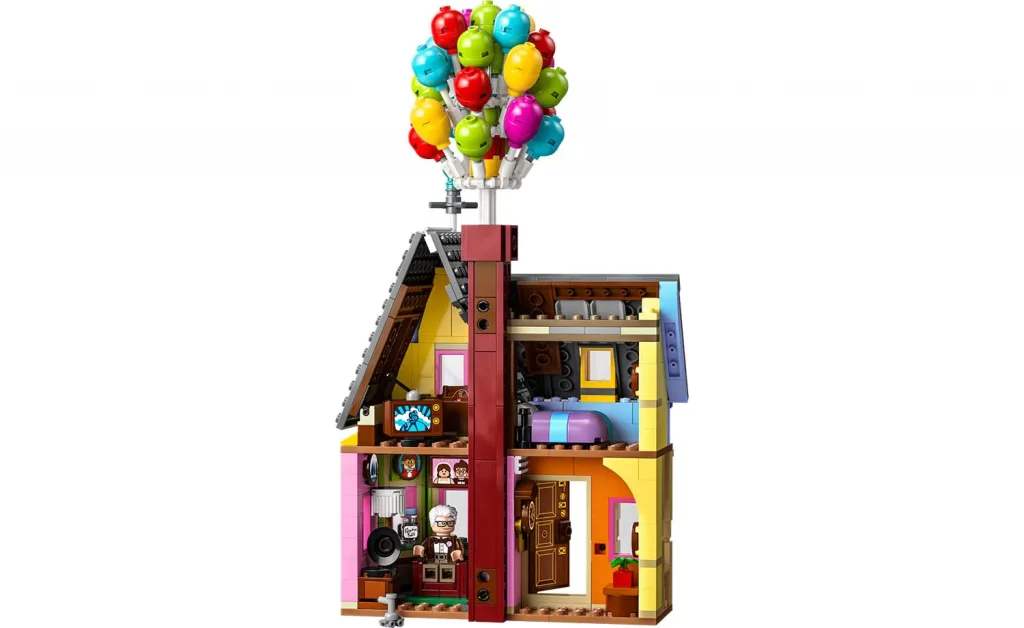
Starting with bag 1, Russel is built, and then work starts on the house itself. Lots of details from the movie are included in some very clever ways: a ribbed round brick (part no 4650644) is used as a lampshade, and a black minifig hat (part no 6349965) is used as part of the ancient record player. There are unfortunately quite a few stickers to be applied, for example the picture above the lamp, as well as the wall clock. The biggest unhappiness as far as stickers are concerned, was that both sides of the front door have a sticker. If one considers that many children will want to build this set, the use of stickers, especially on the front door, may make it difficult to get the look exactly right.

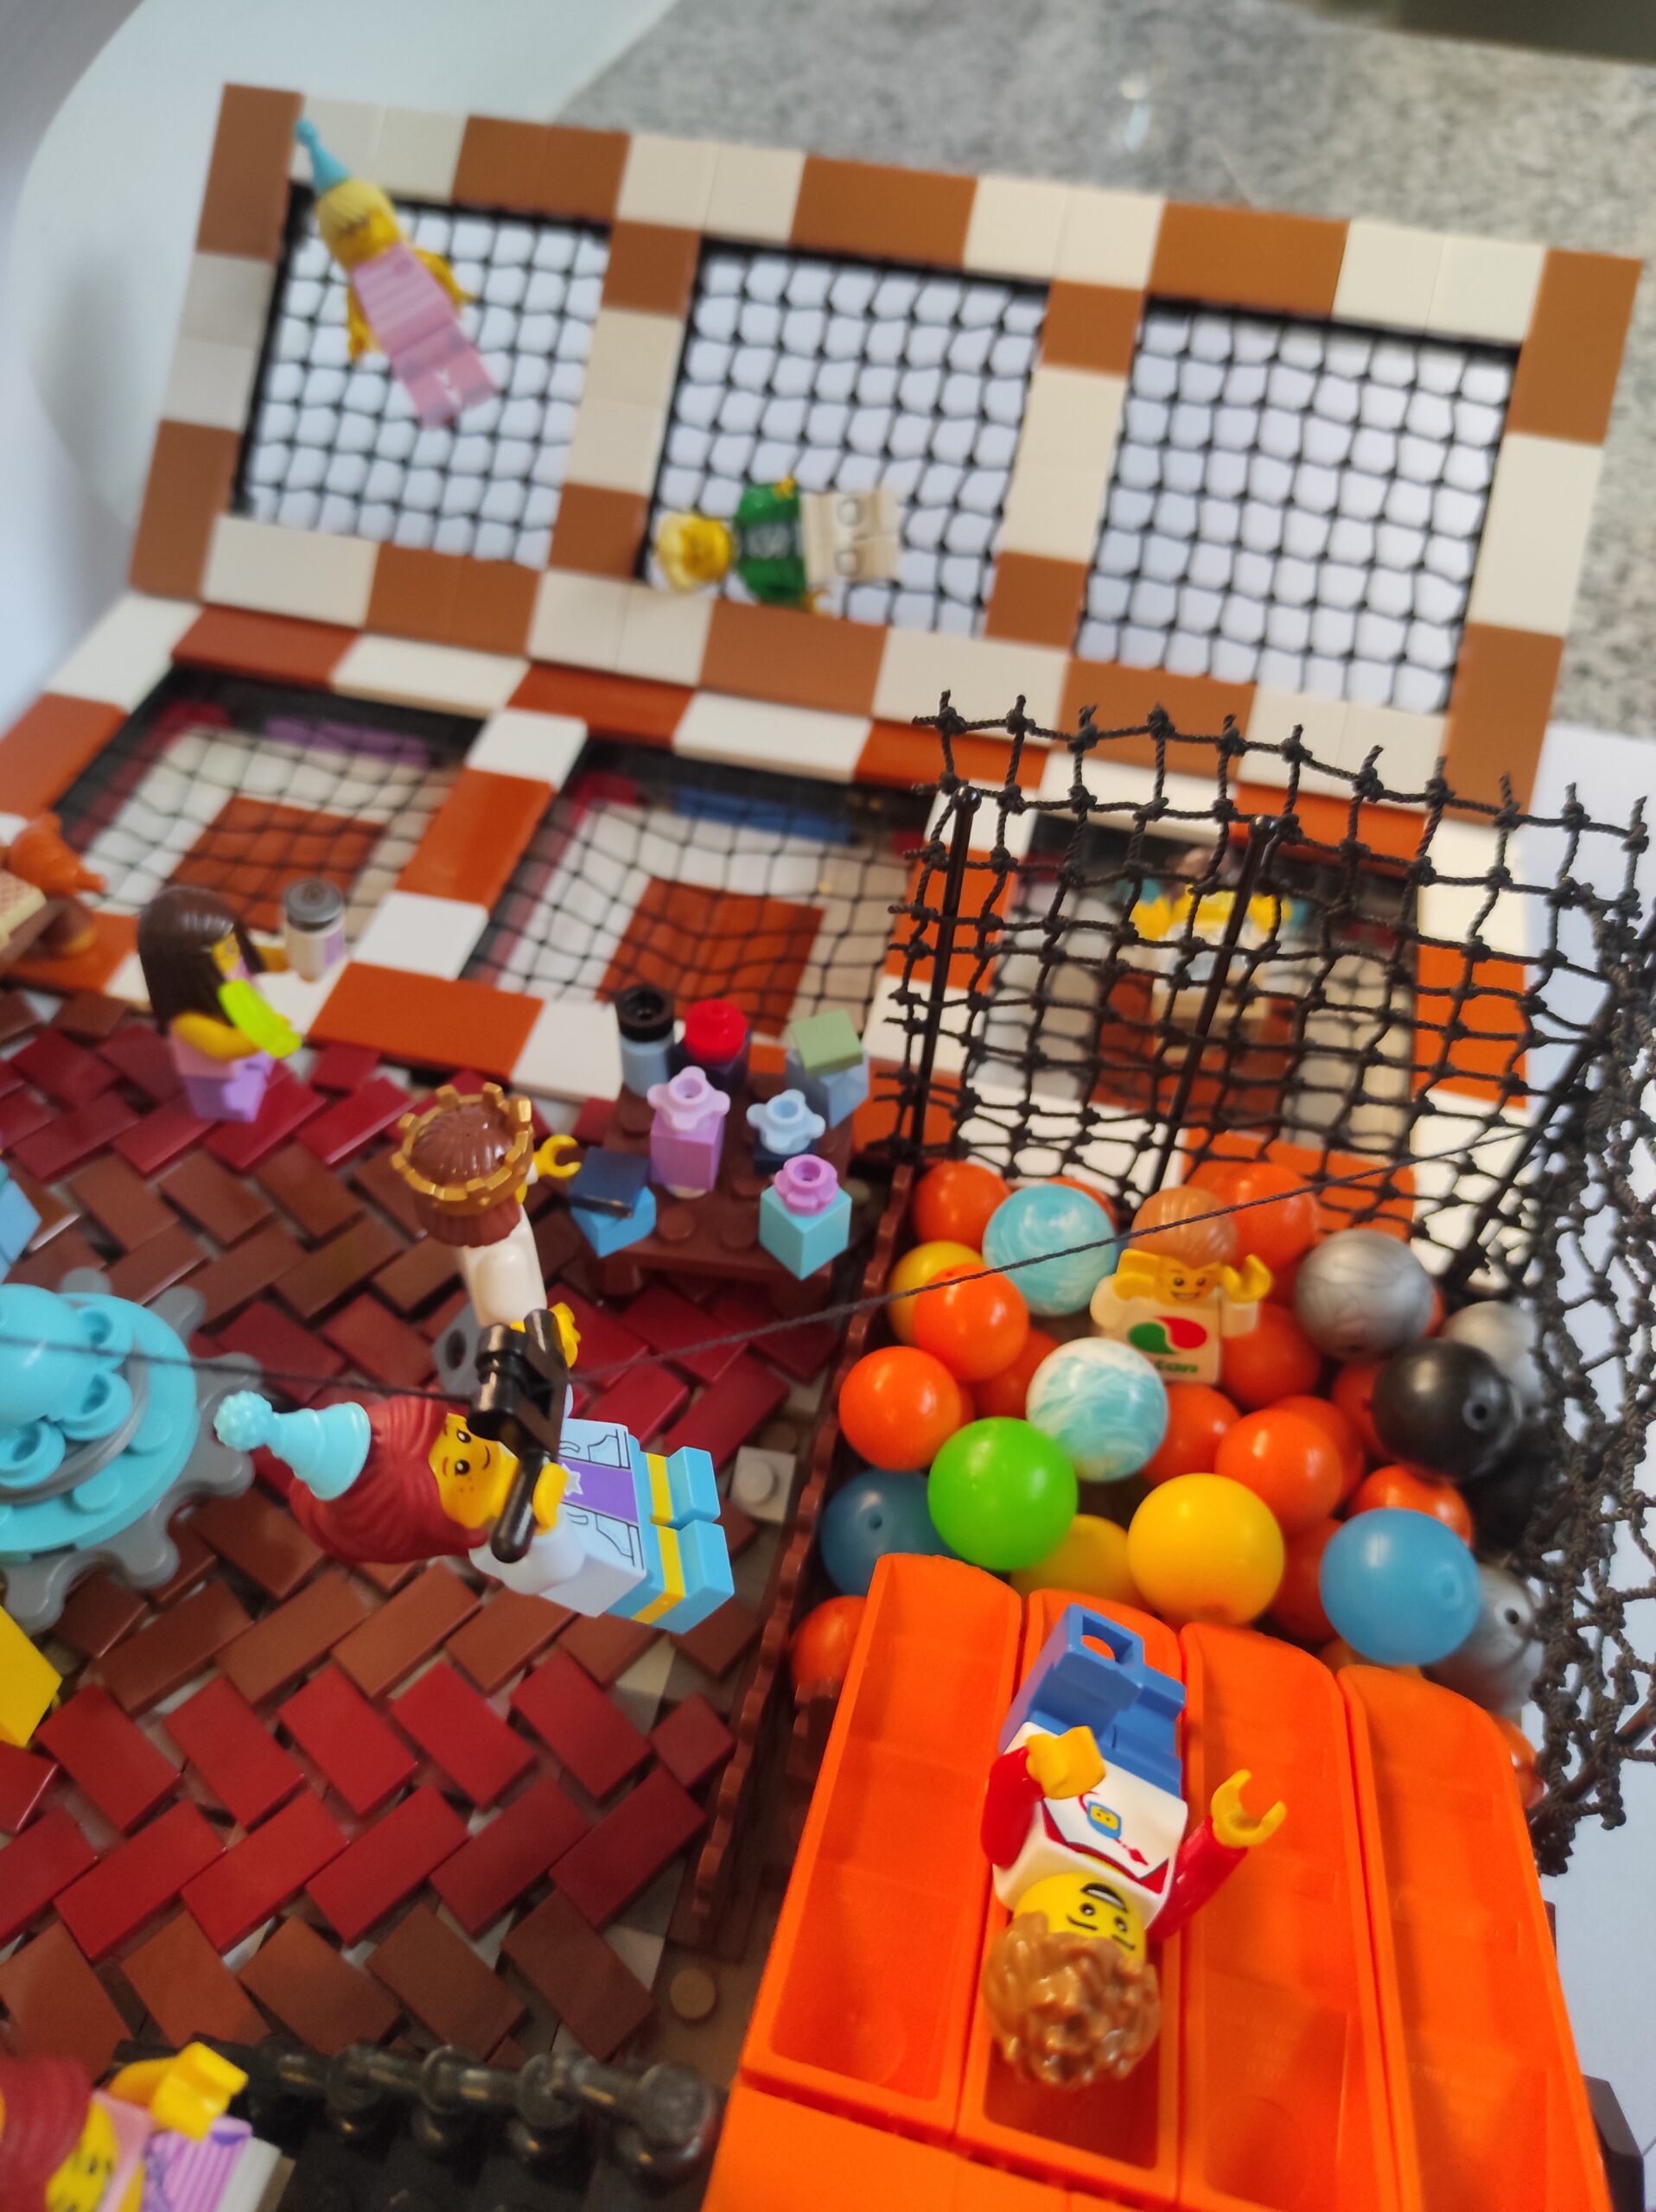
Bag 2 continues the house, and here a few SNOT-techniques are used to build up the windows and frames, and to get their angles just right. Inside the house, the details continue, with a tv set (stickered again), as well as the iconic “My adventure book”. I quite liked the modified minifig head, which is used as a transparent money jar labelled “Paradise Falls”, with even some coins in it (part no 6422742 and unique to this set). This was a great touch, but the part will of course not easily be used in MOC’s. It did, however, add to the nostalgia from the movie, as the money jar is referred to several times in the movie.

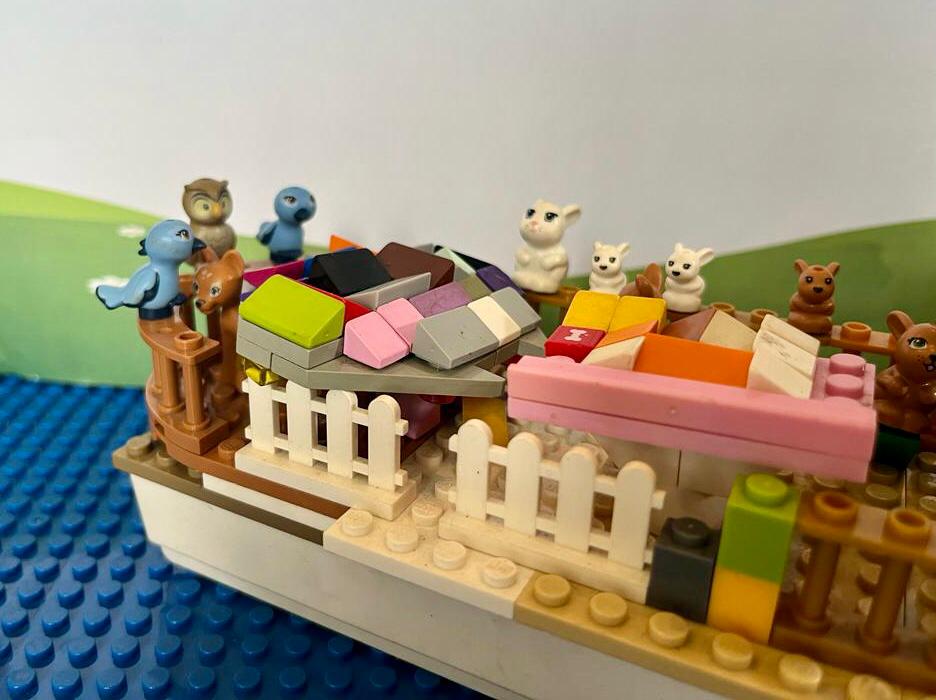
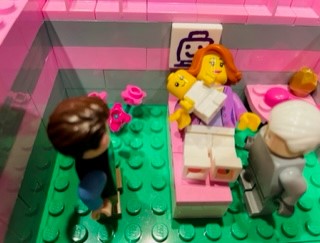
The upper level of the house and a portion of the roof are built from bag 3. The upper level contains Carl’s bedroom with a cleverly designed bed, and an attic. The TV unfortunately looks as if it has merely been stuck in the middle of the floor, without considering where it would fit best. The roof slope is obtained with the use of some hinge bricks. Unfortunately, there are no stairs linking the top and bottom floors, but given the size of the build, this is not surprising.

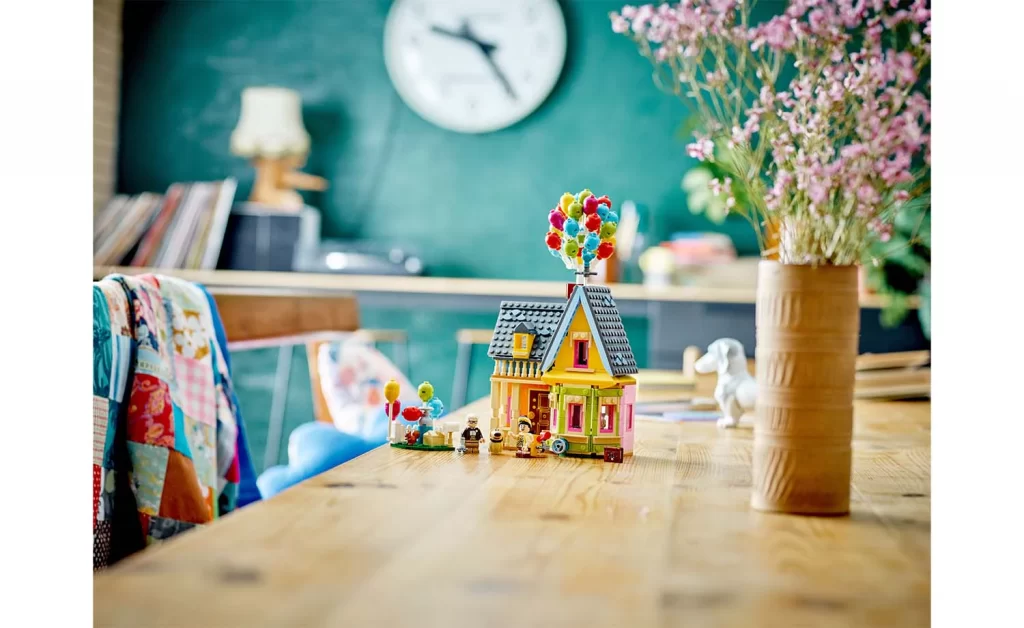
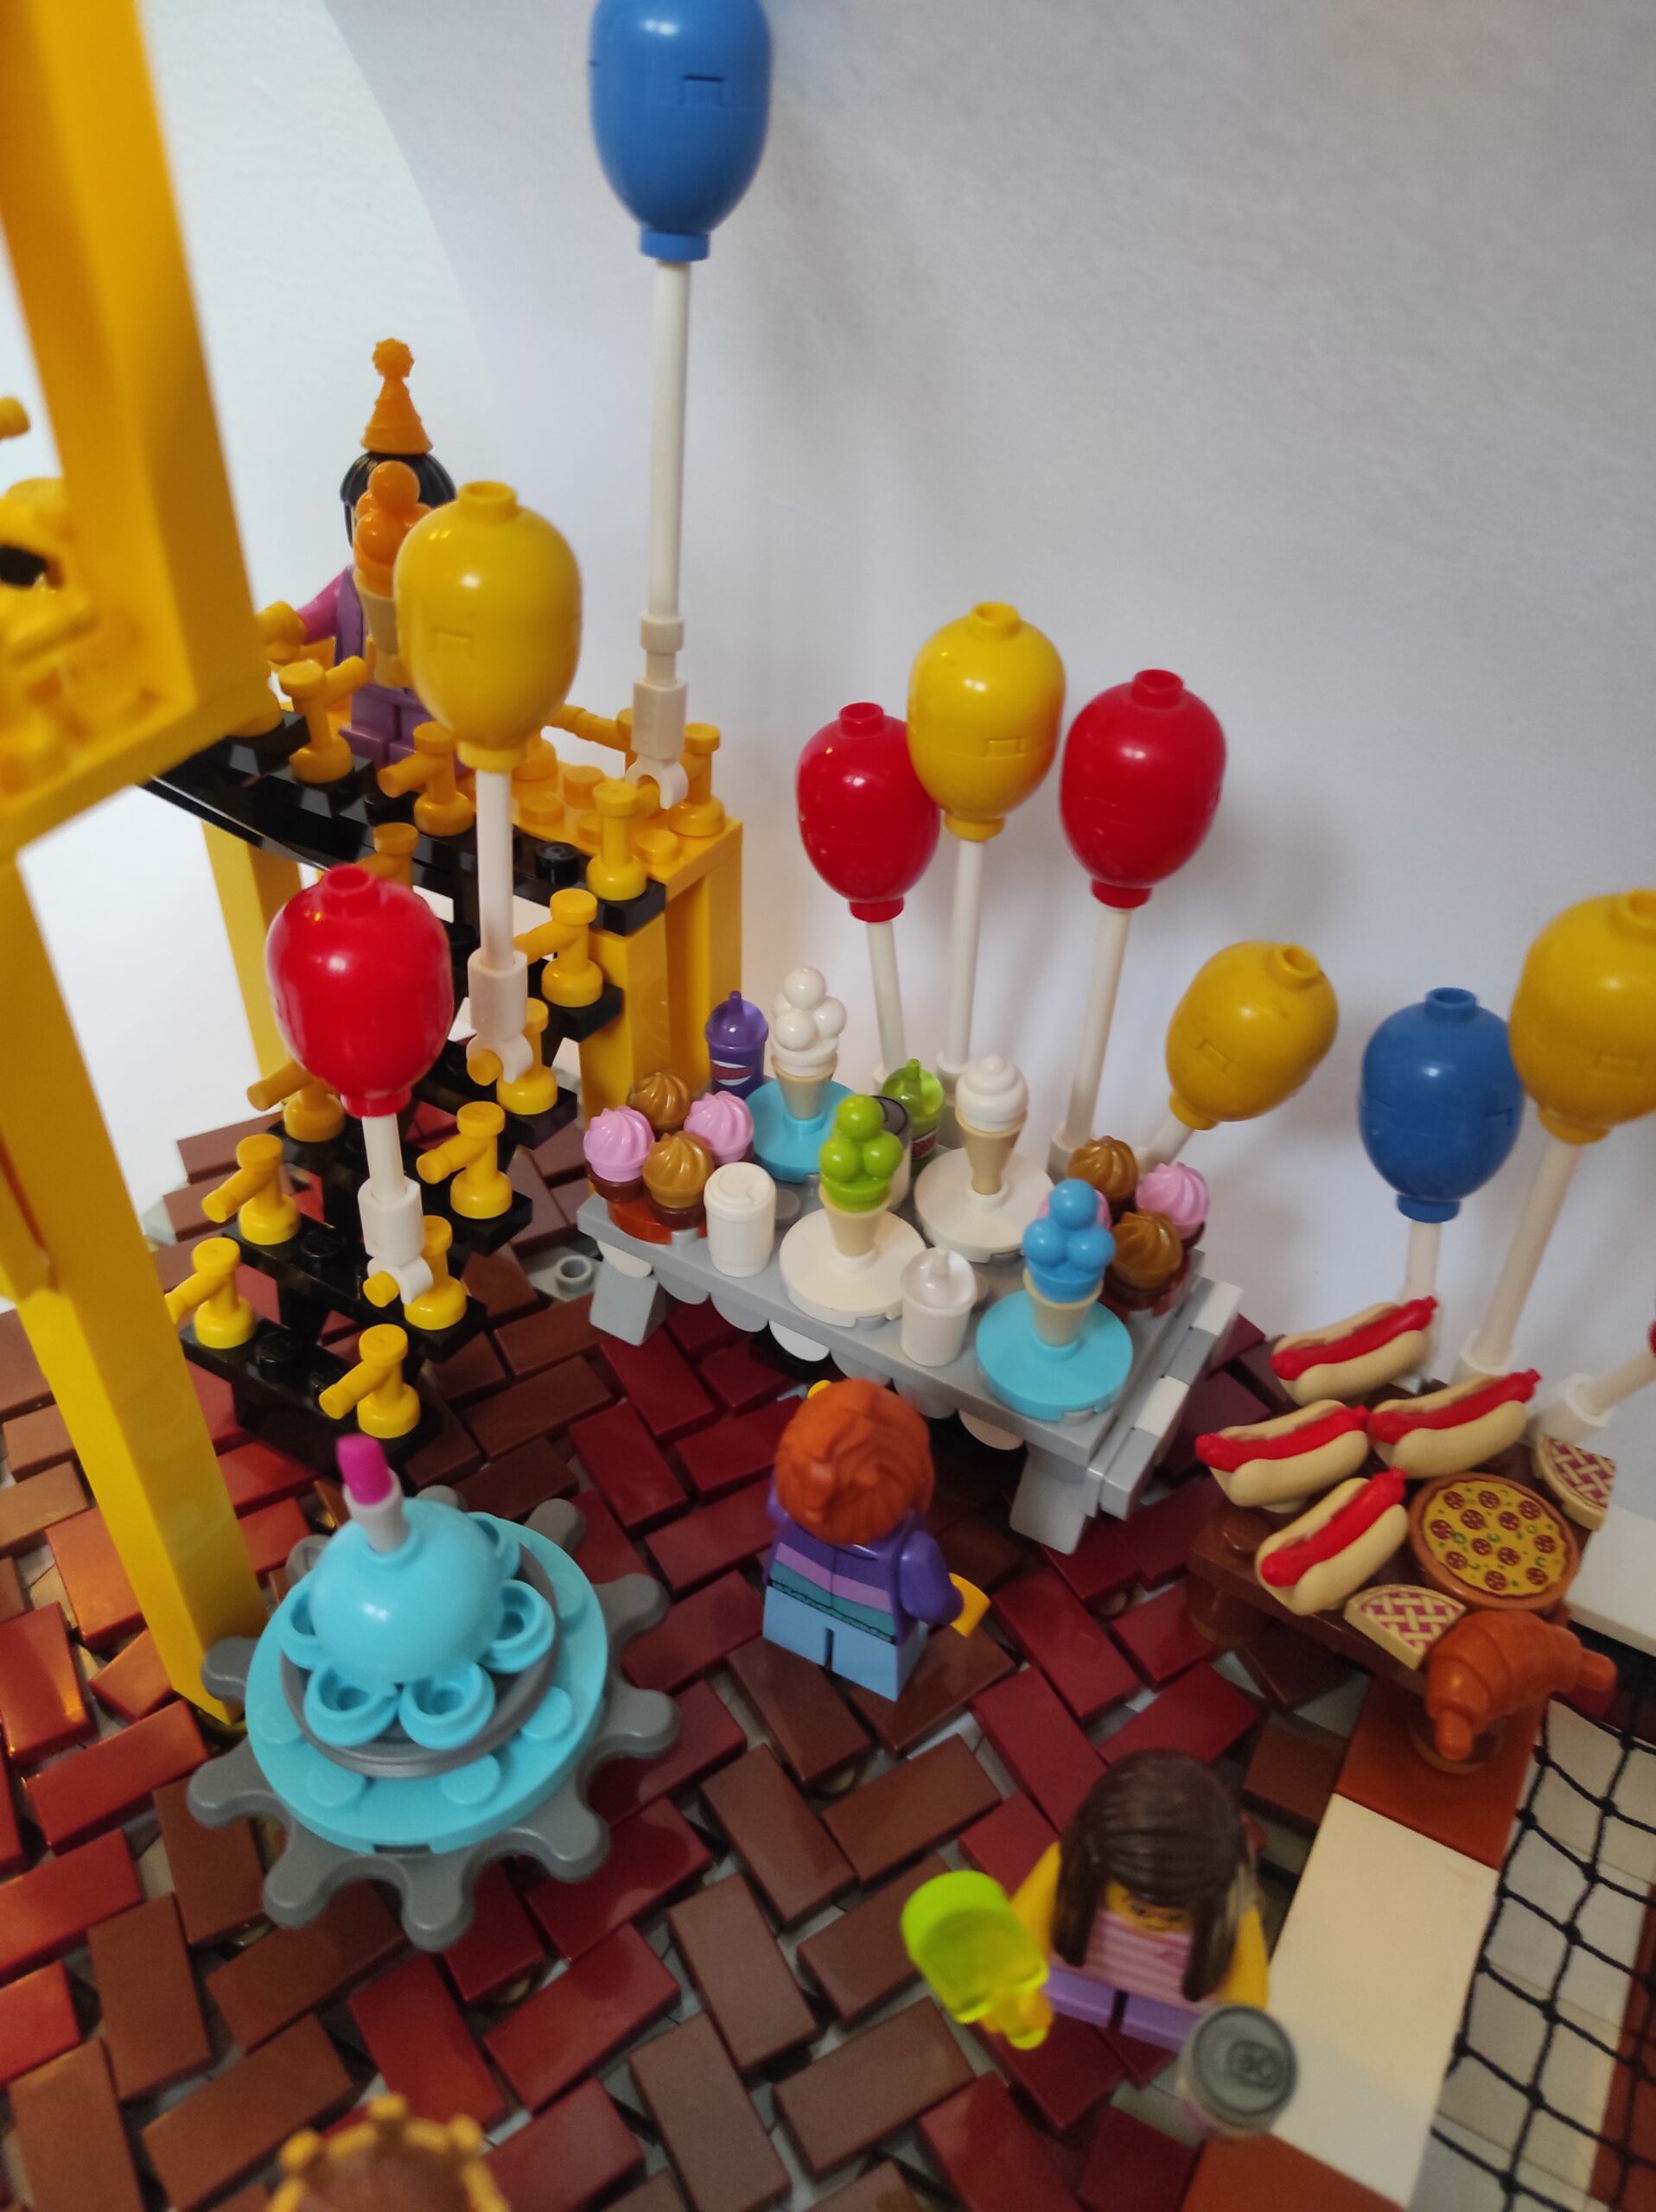
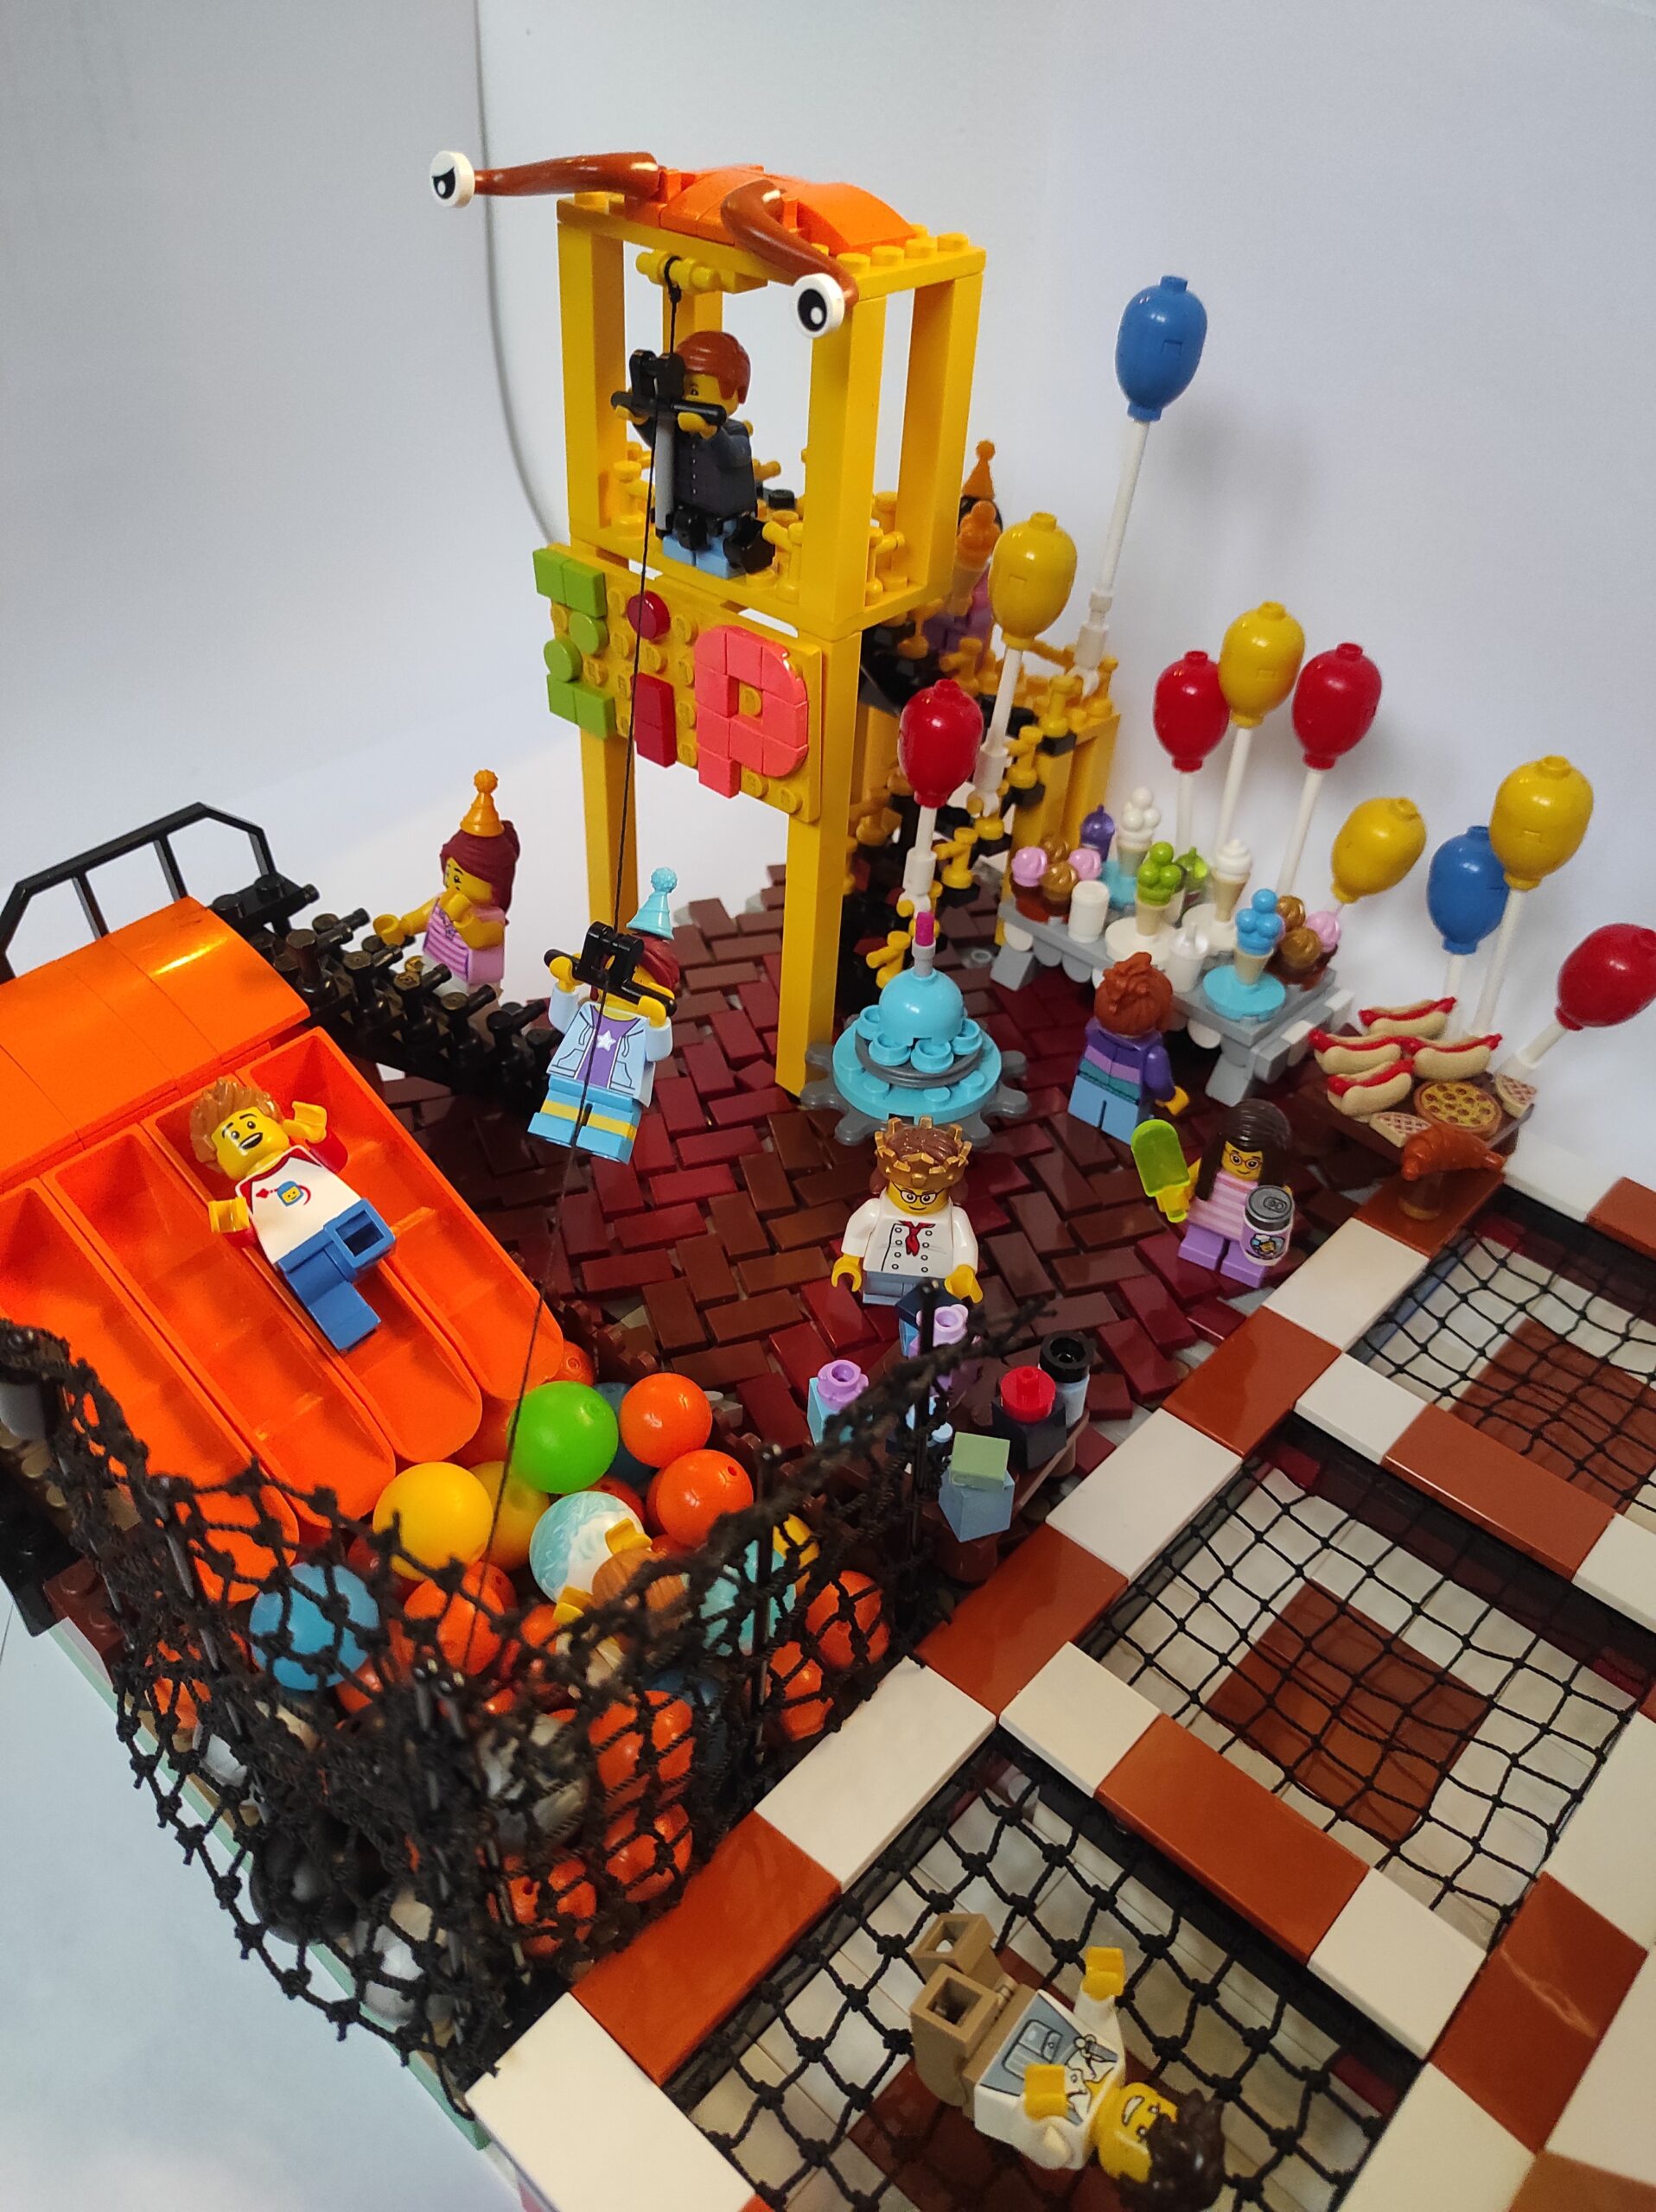
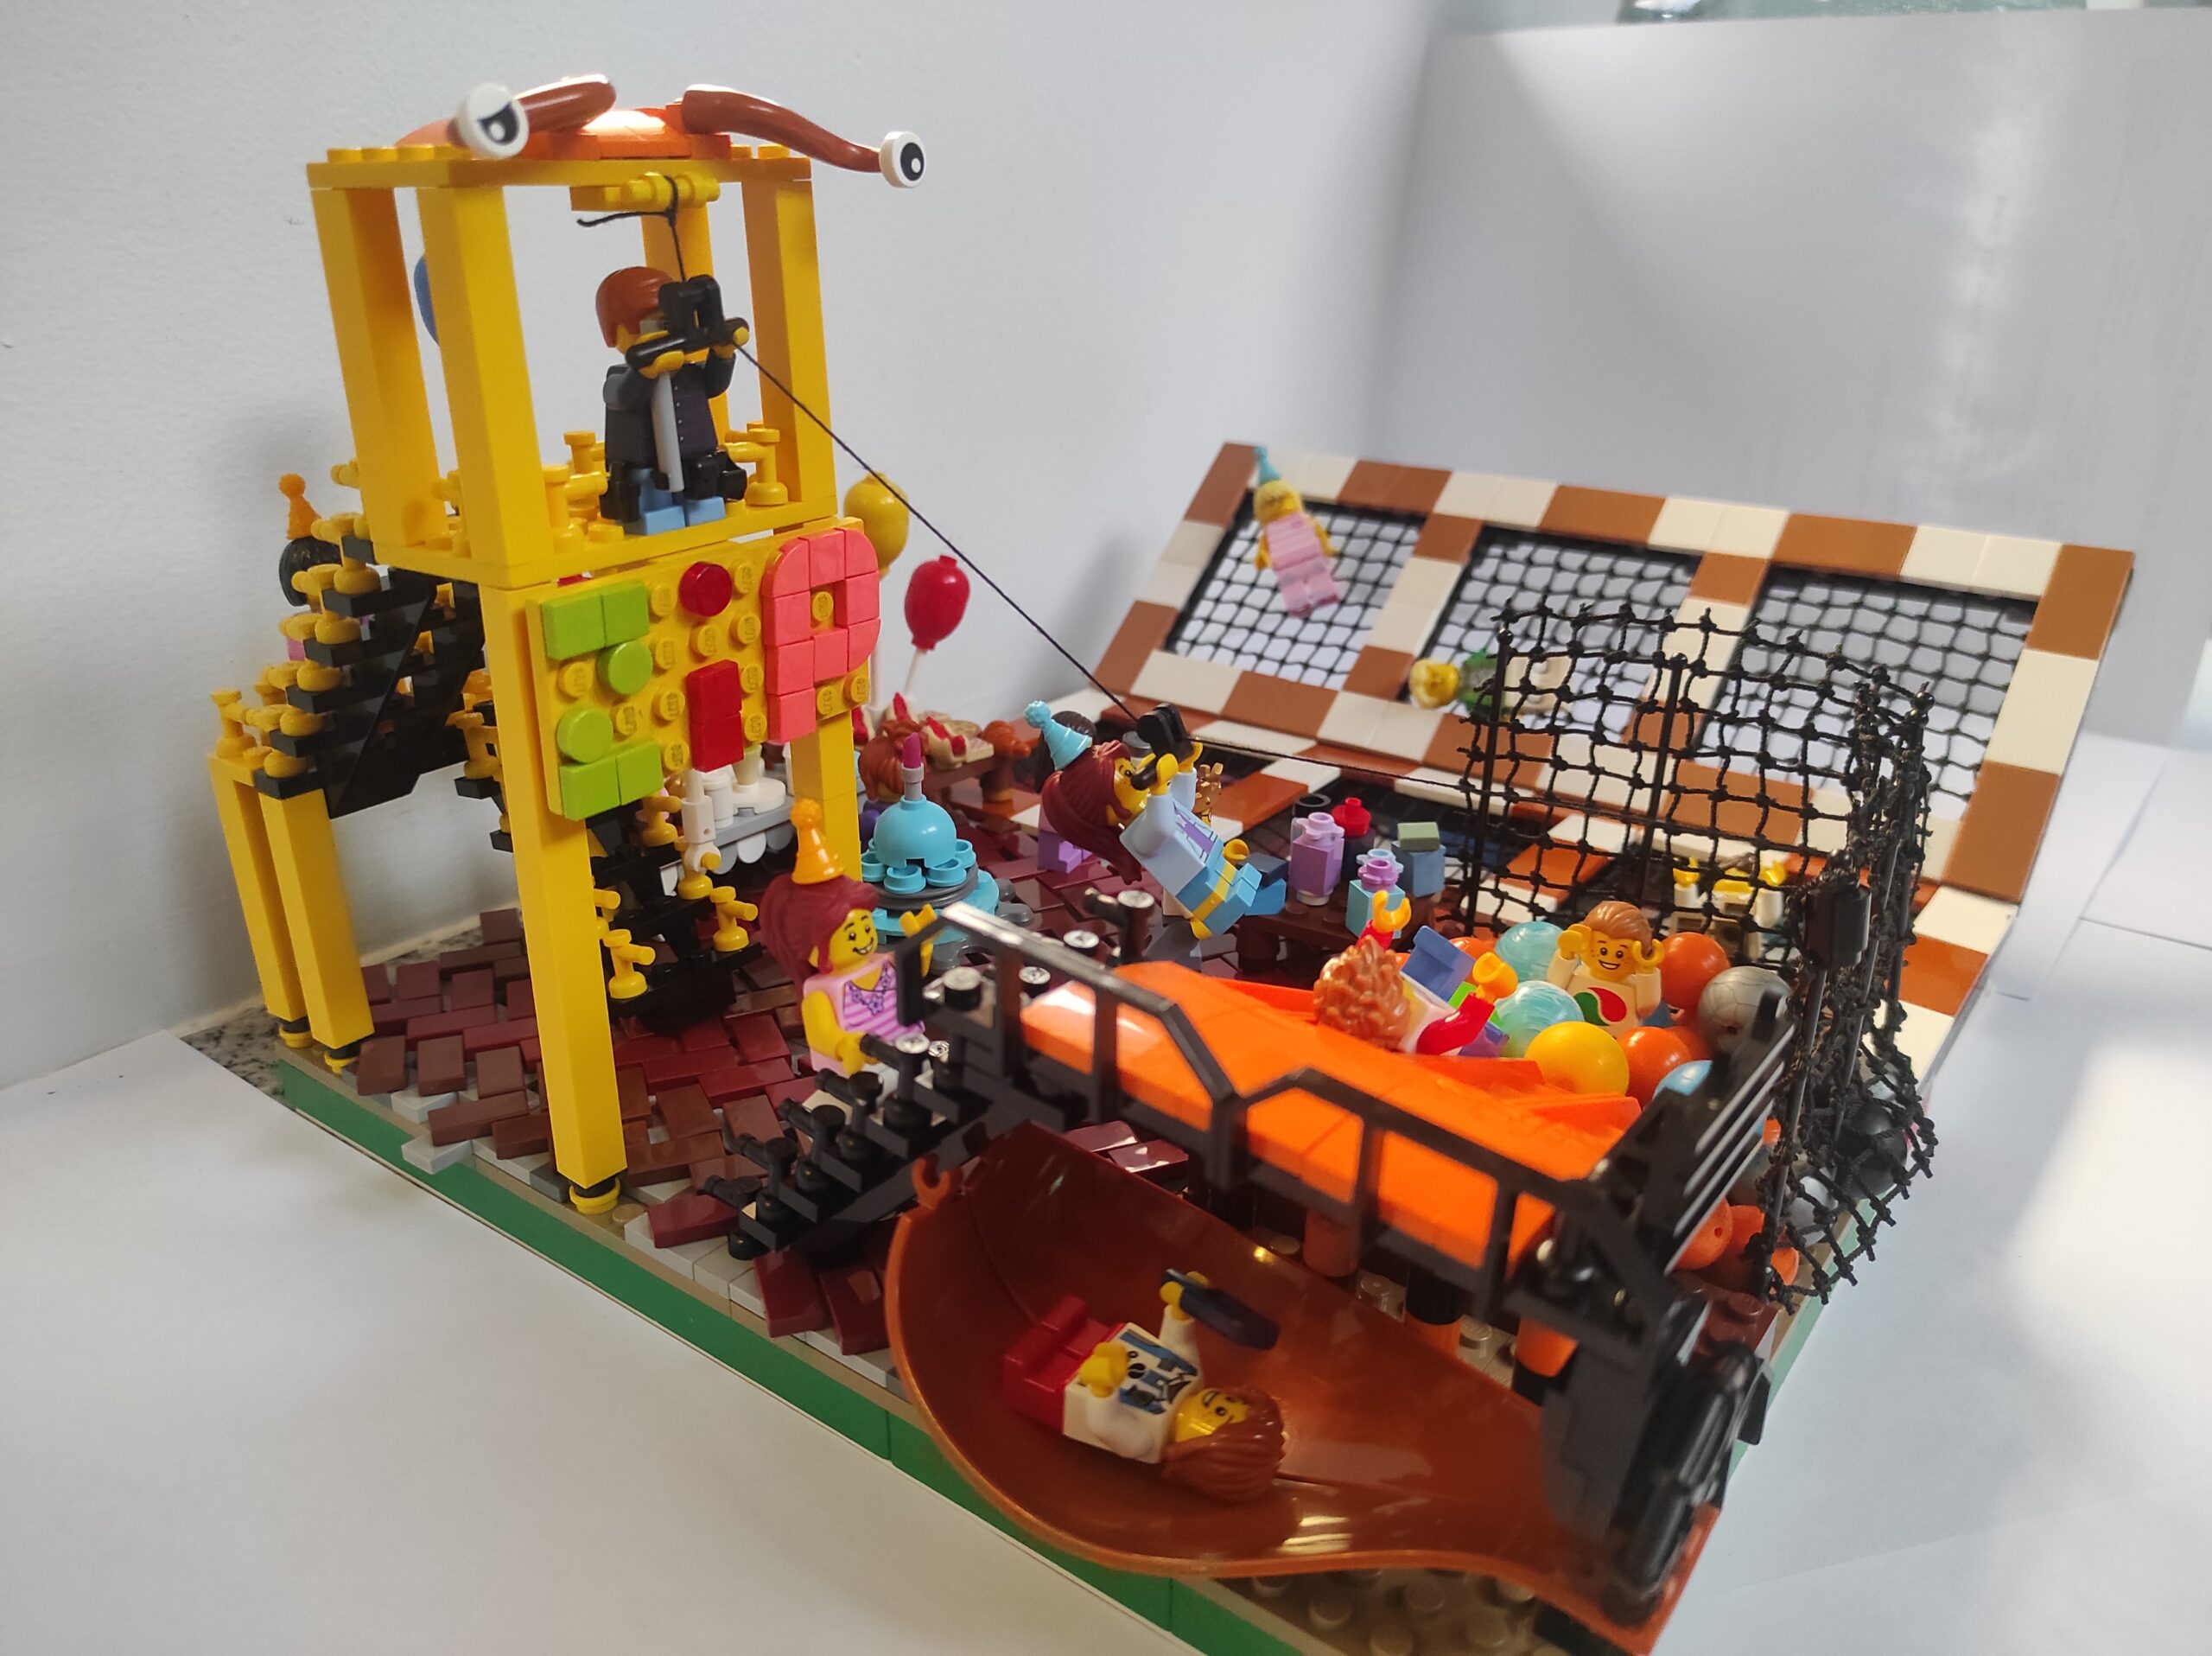
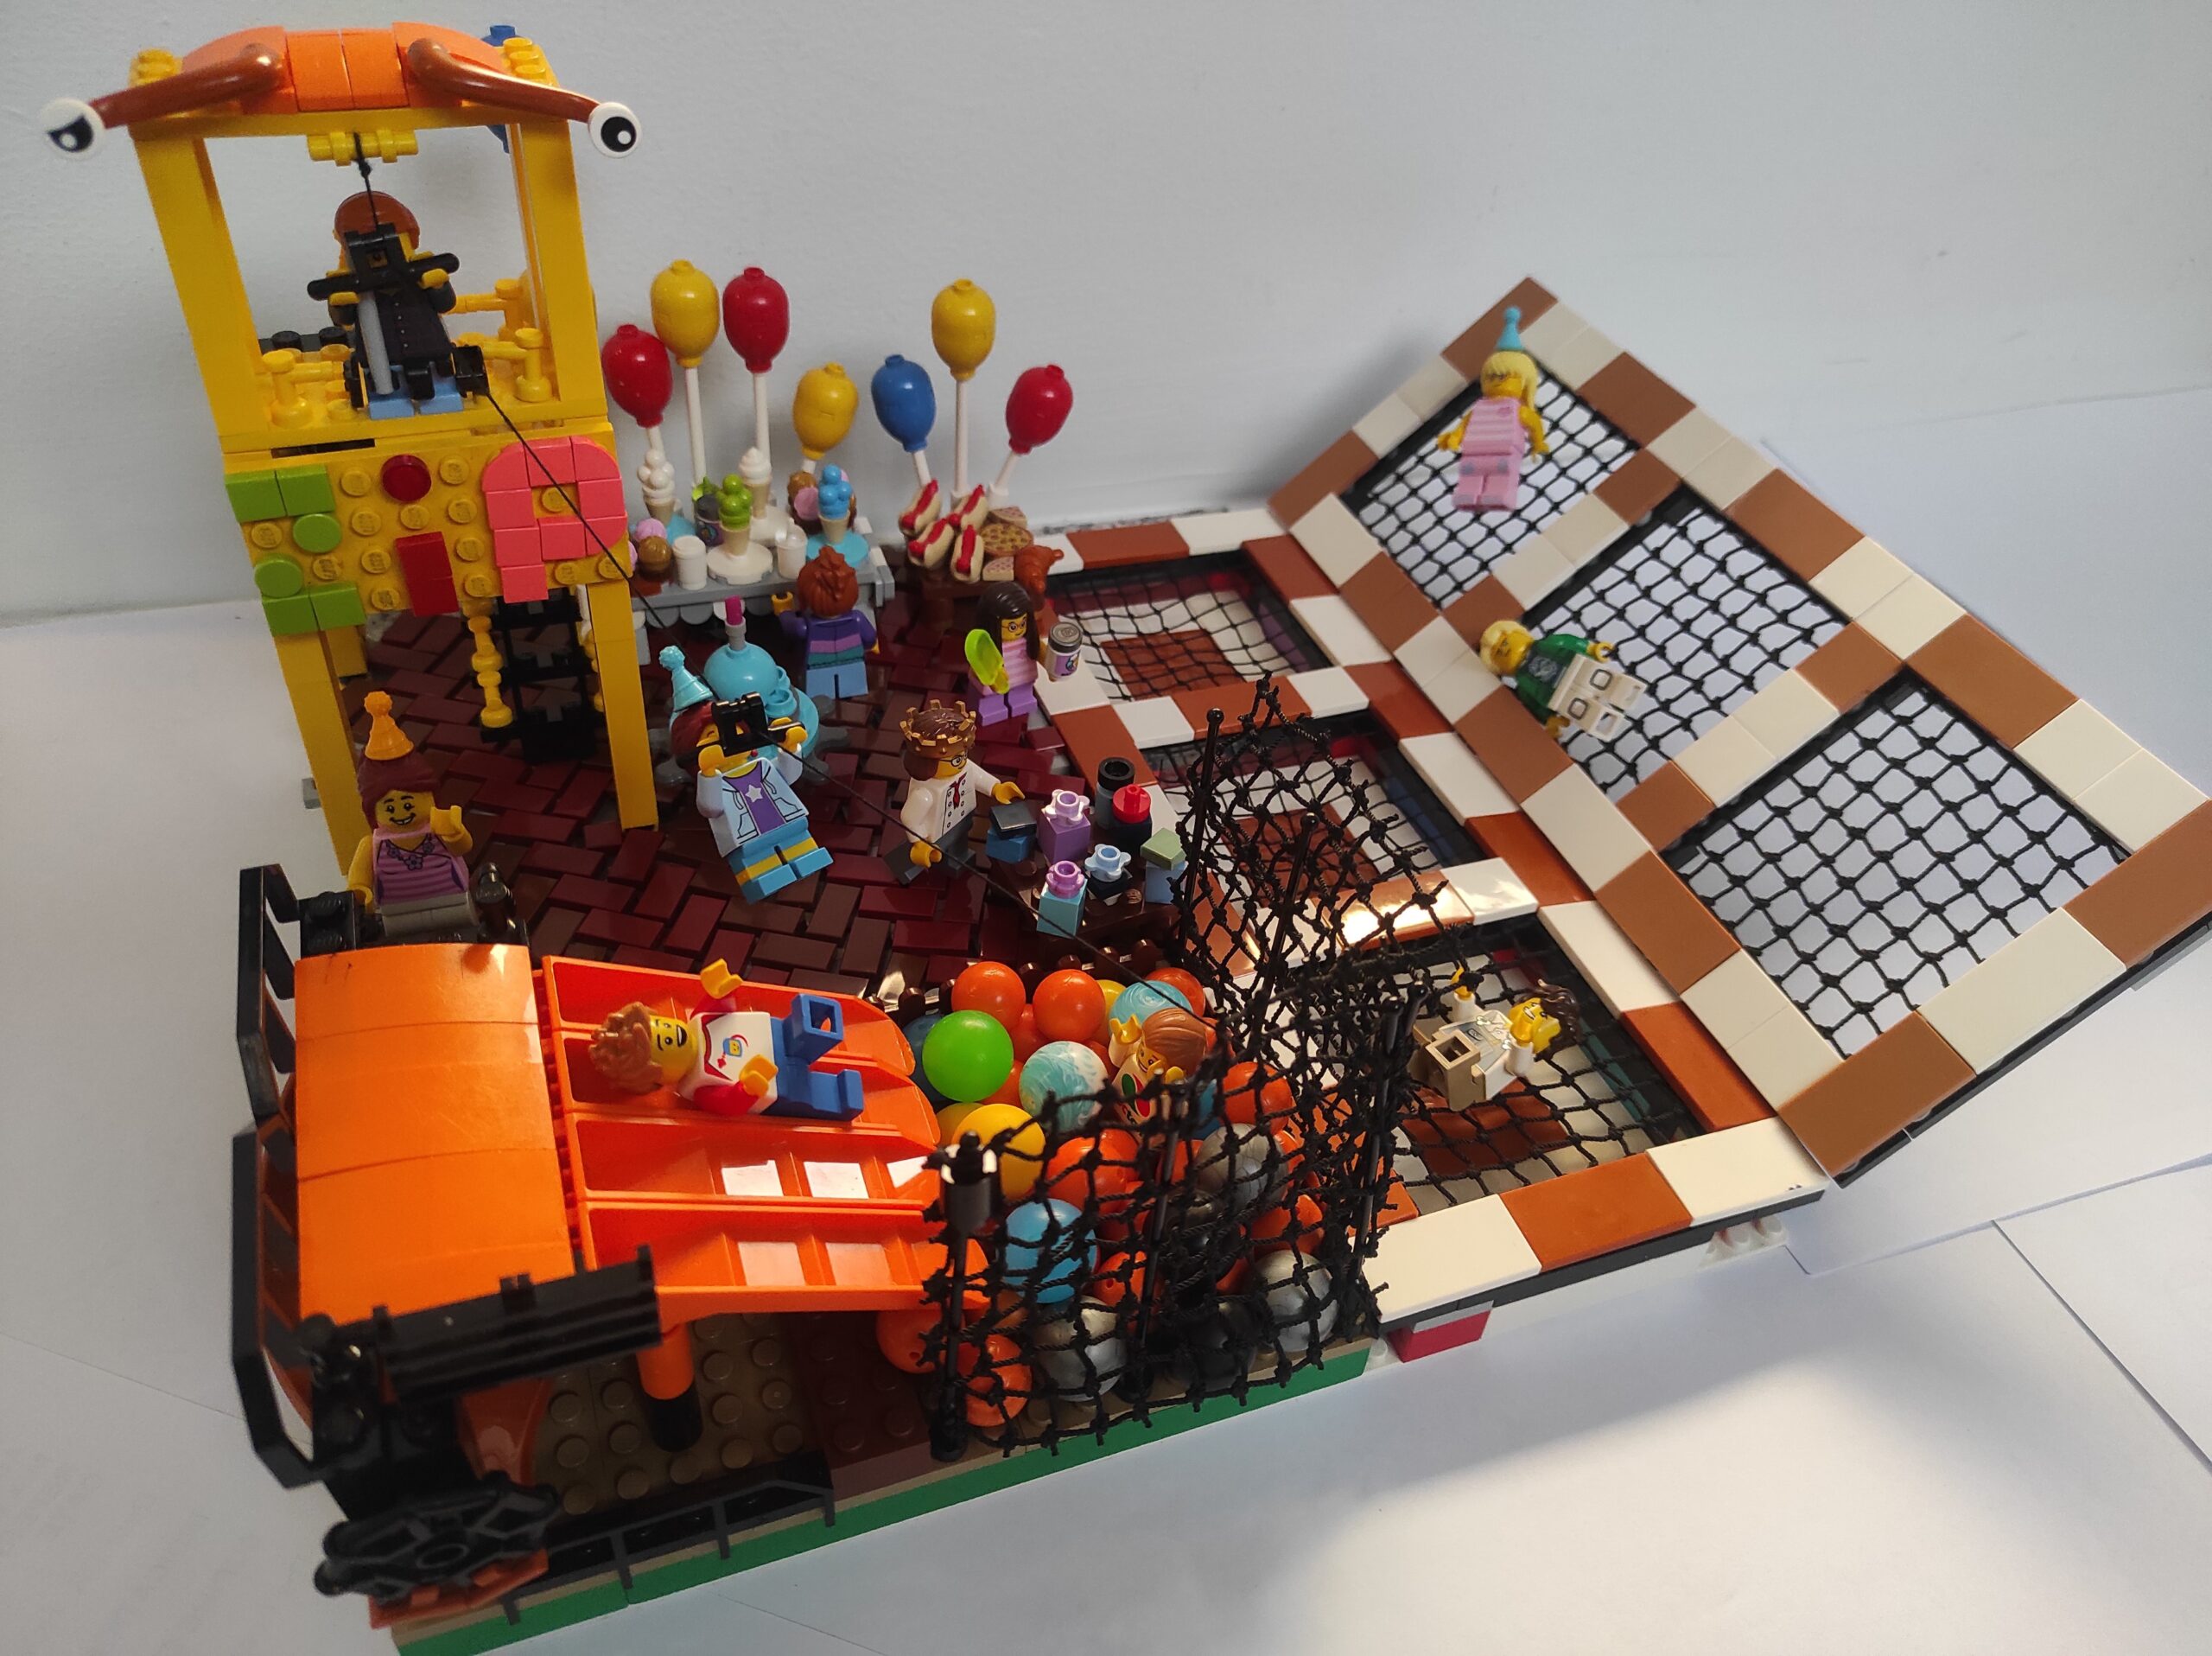
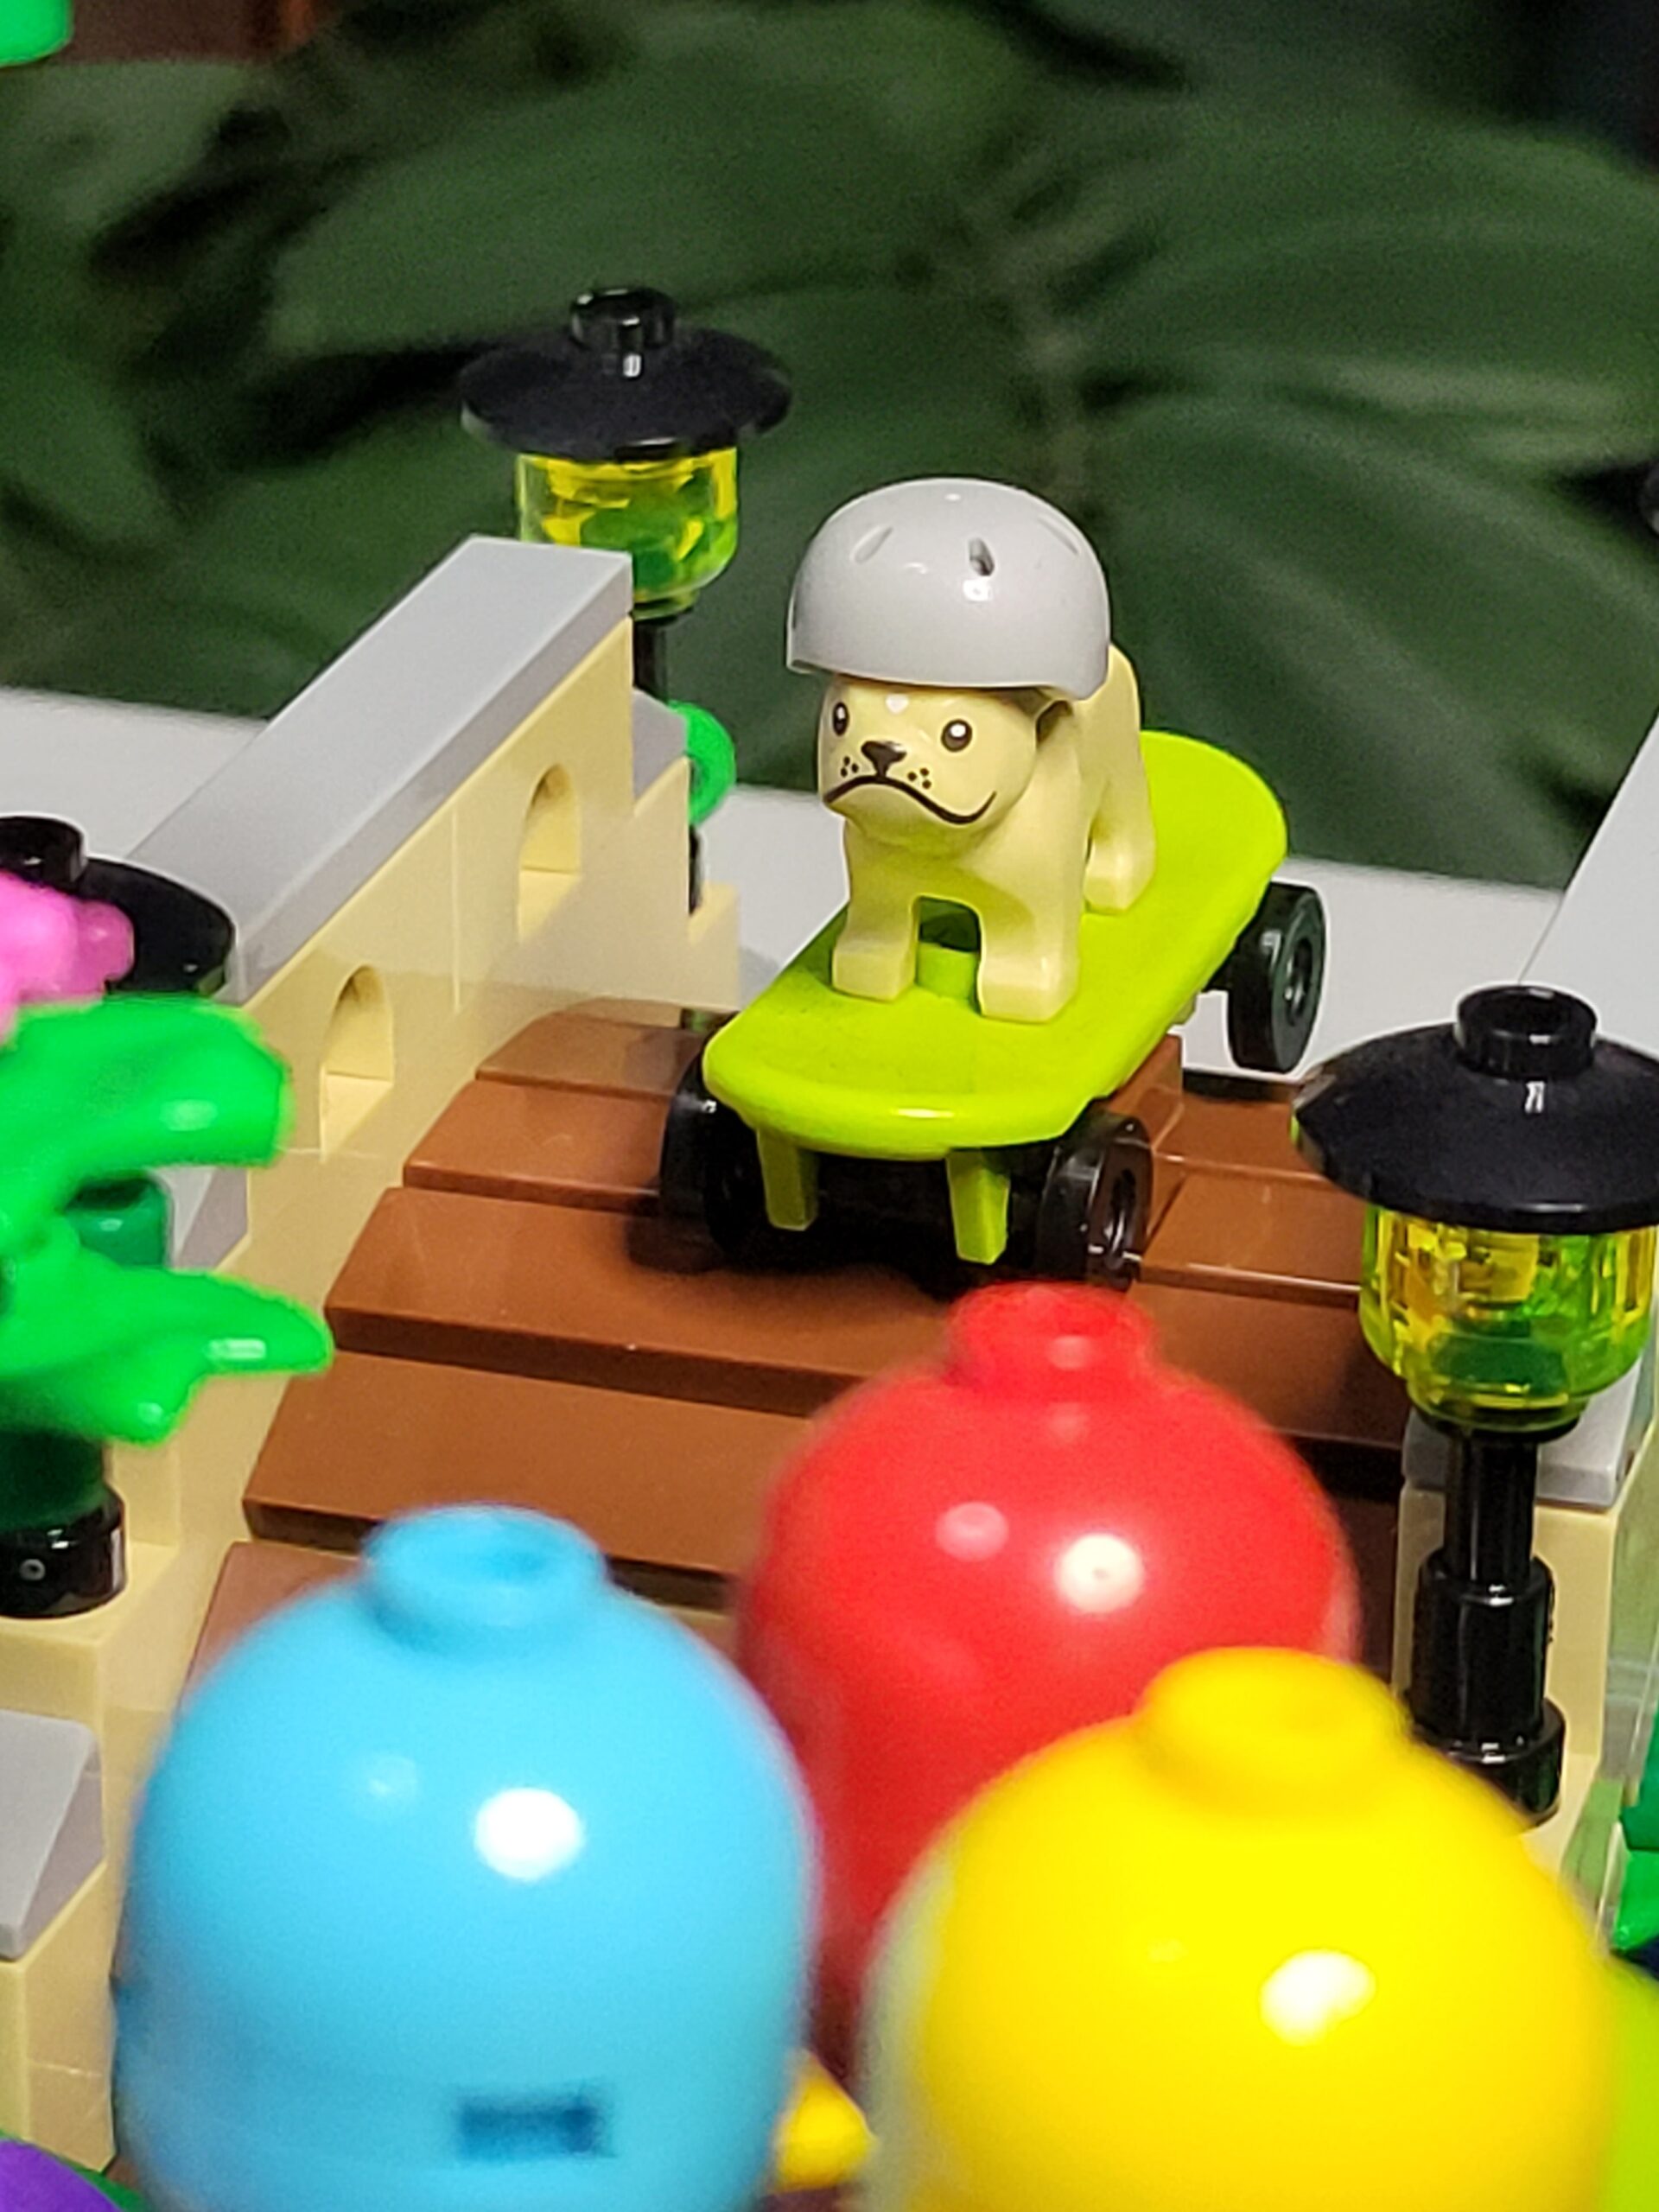
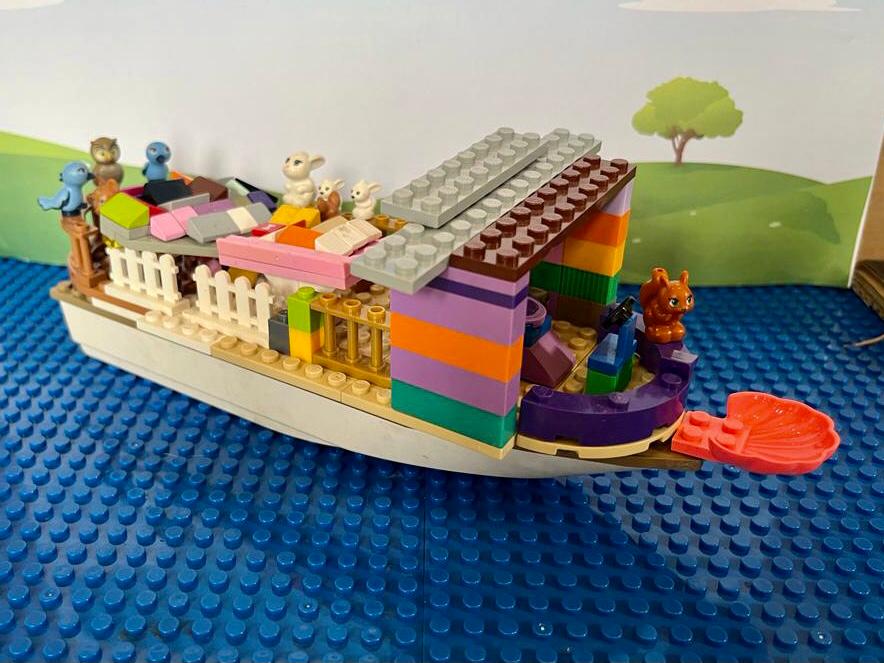
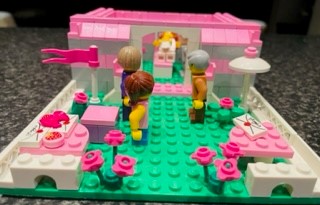
The last bag completes the roof, and then it is on to the balloons. Even though the building of the balloons is repetitive, they are cleverly spaced, so that the colours are evenly distributed. They are cleverly linked to the chimney, using an axle, and one can see how they are in the process of being released through the chimney. Lastly, there is loose 6×6 plate with bow that contains the fence and a few stray balloons, as well as a well-designed gas bottle inflating a balloon.

The build is not difficult at all, but, once finished, I was quite surprised at how small it was: the base of the house is only 18×6 studs. For its small size, though, it has an impressive amount of detail.

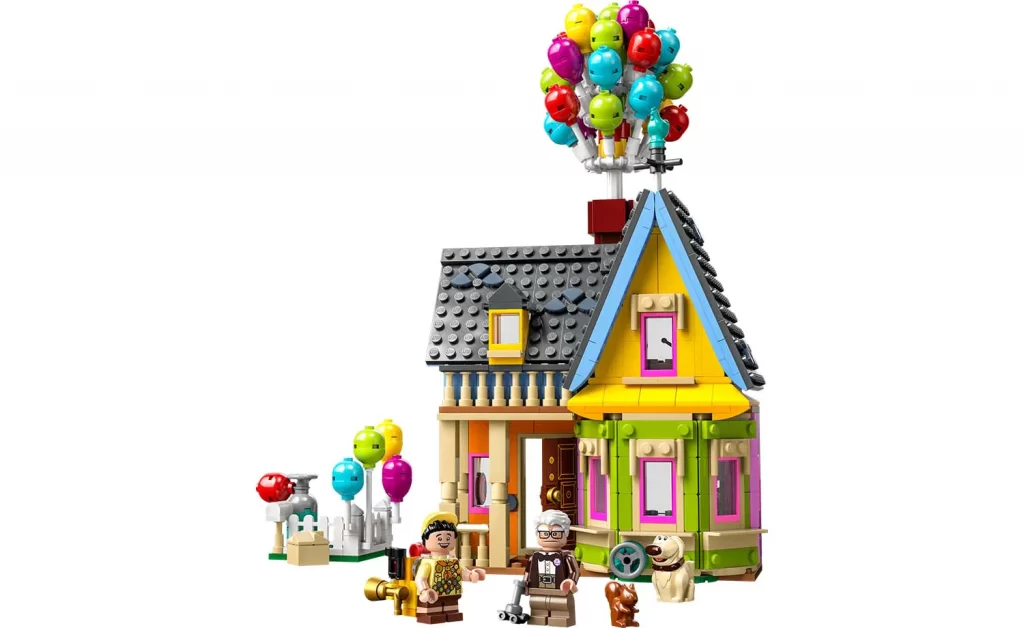
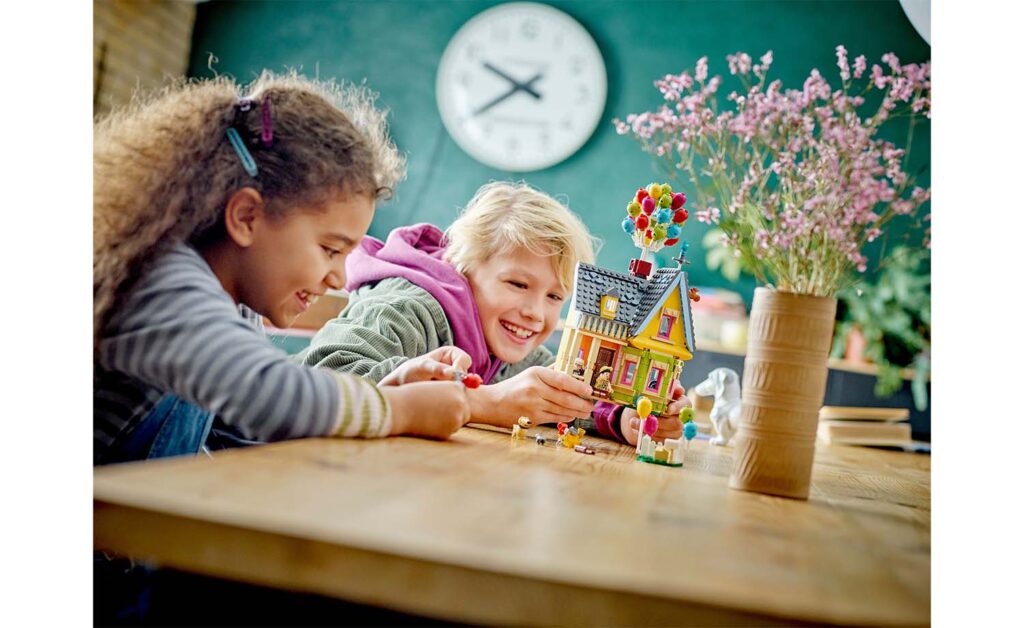
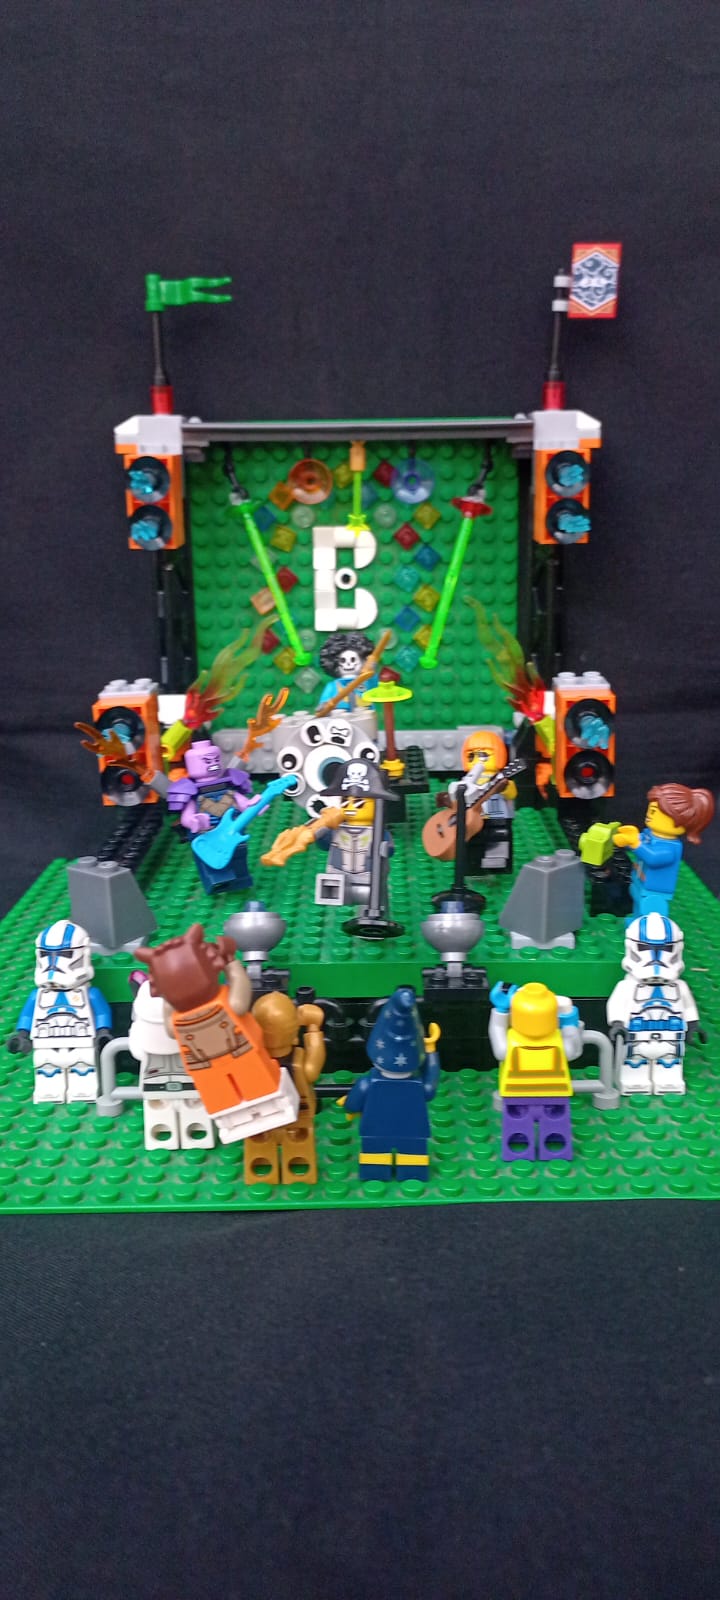
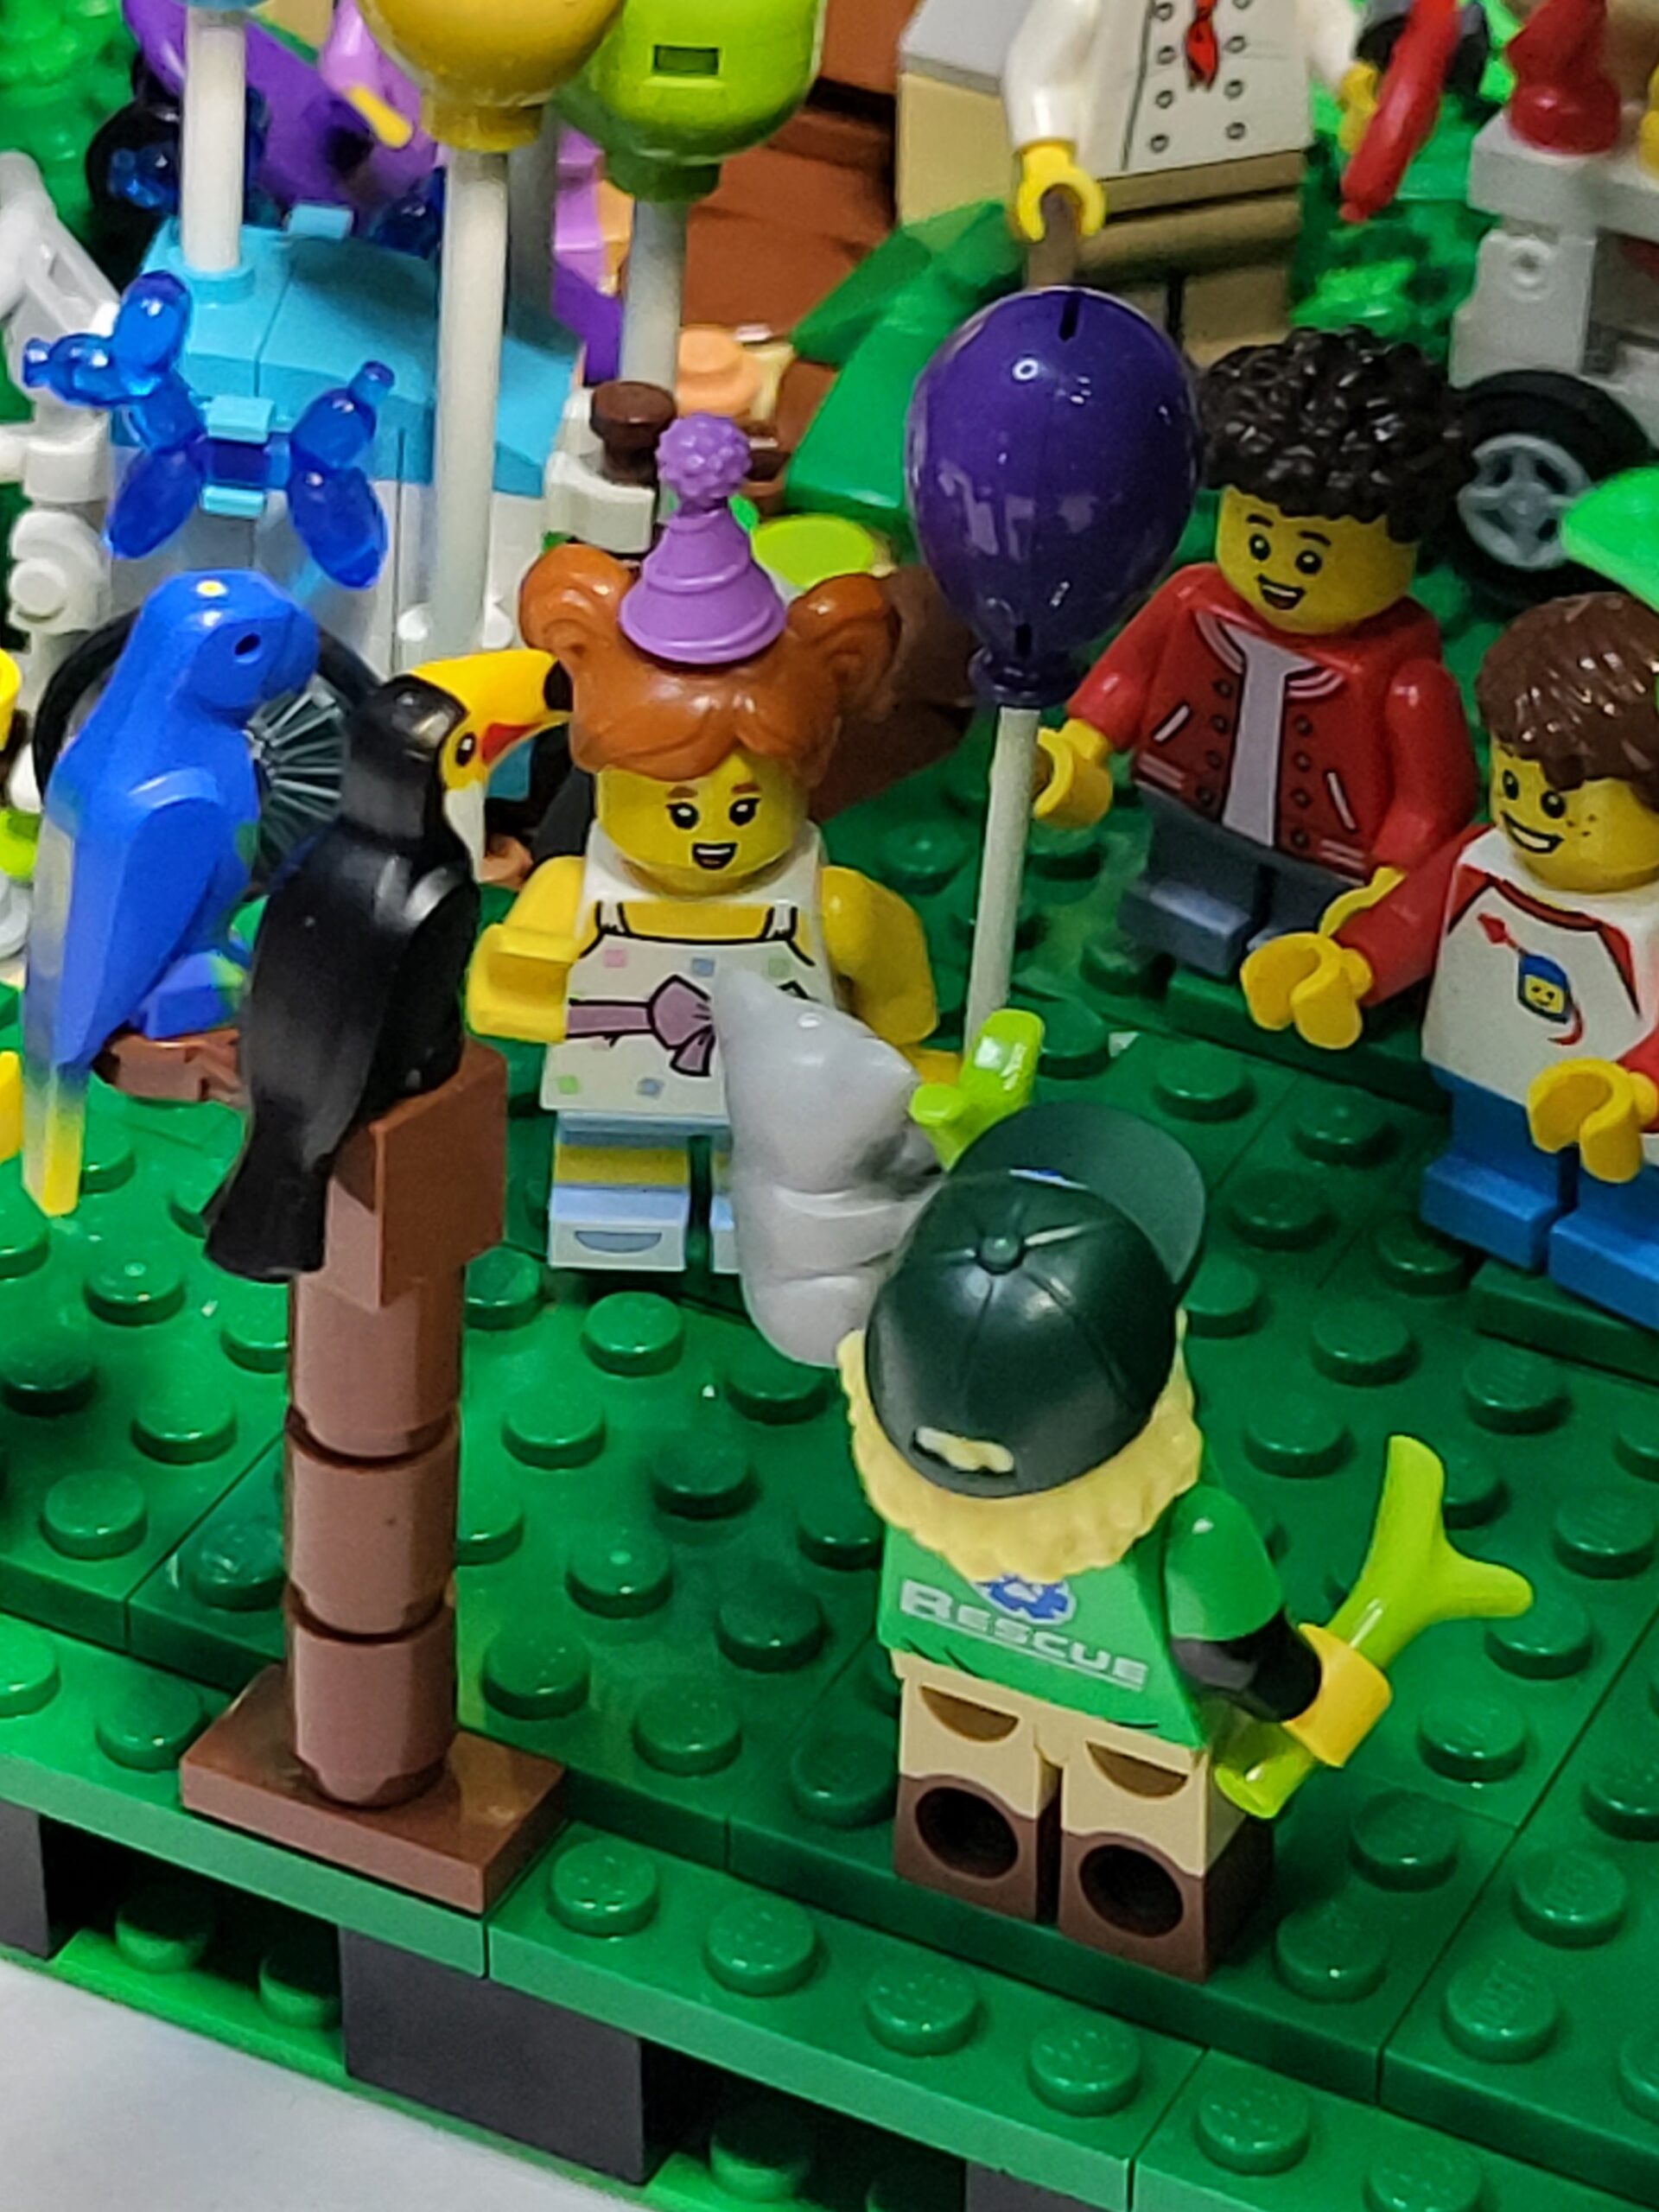
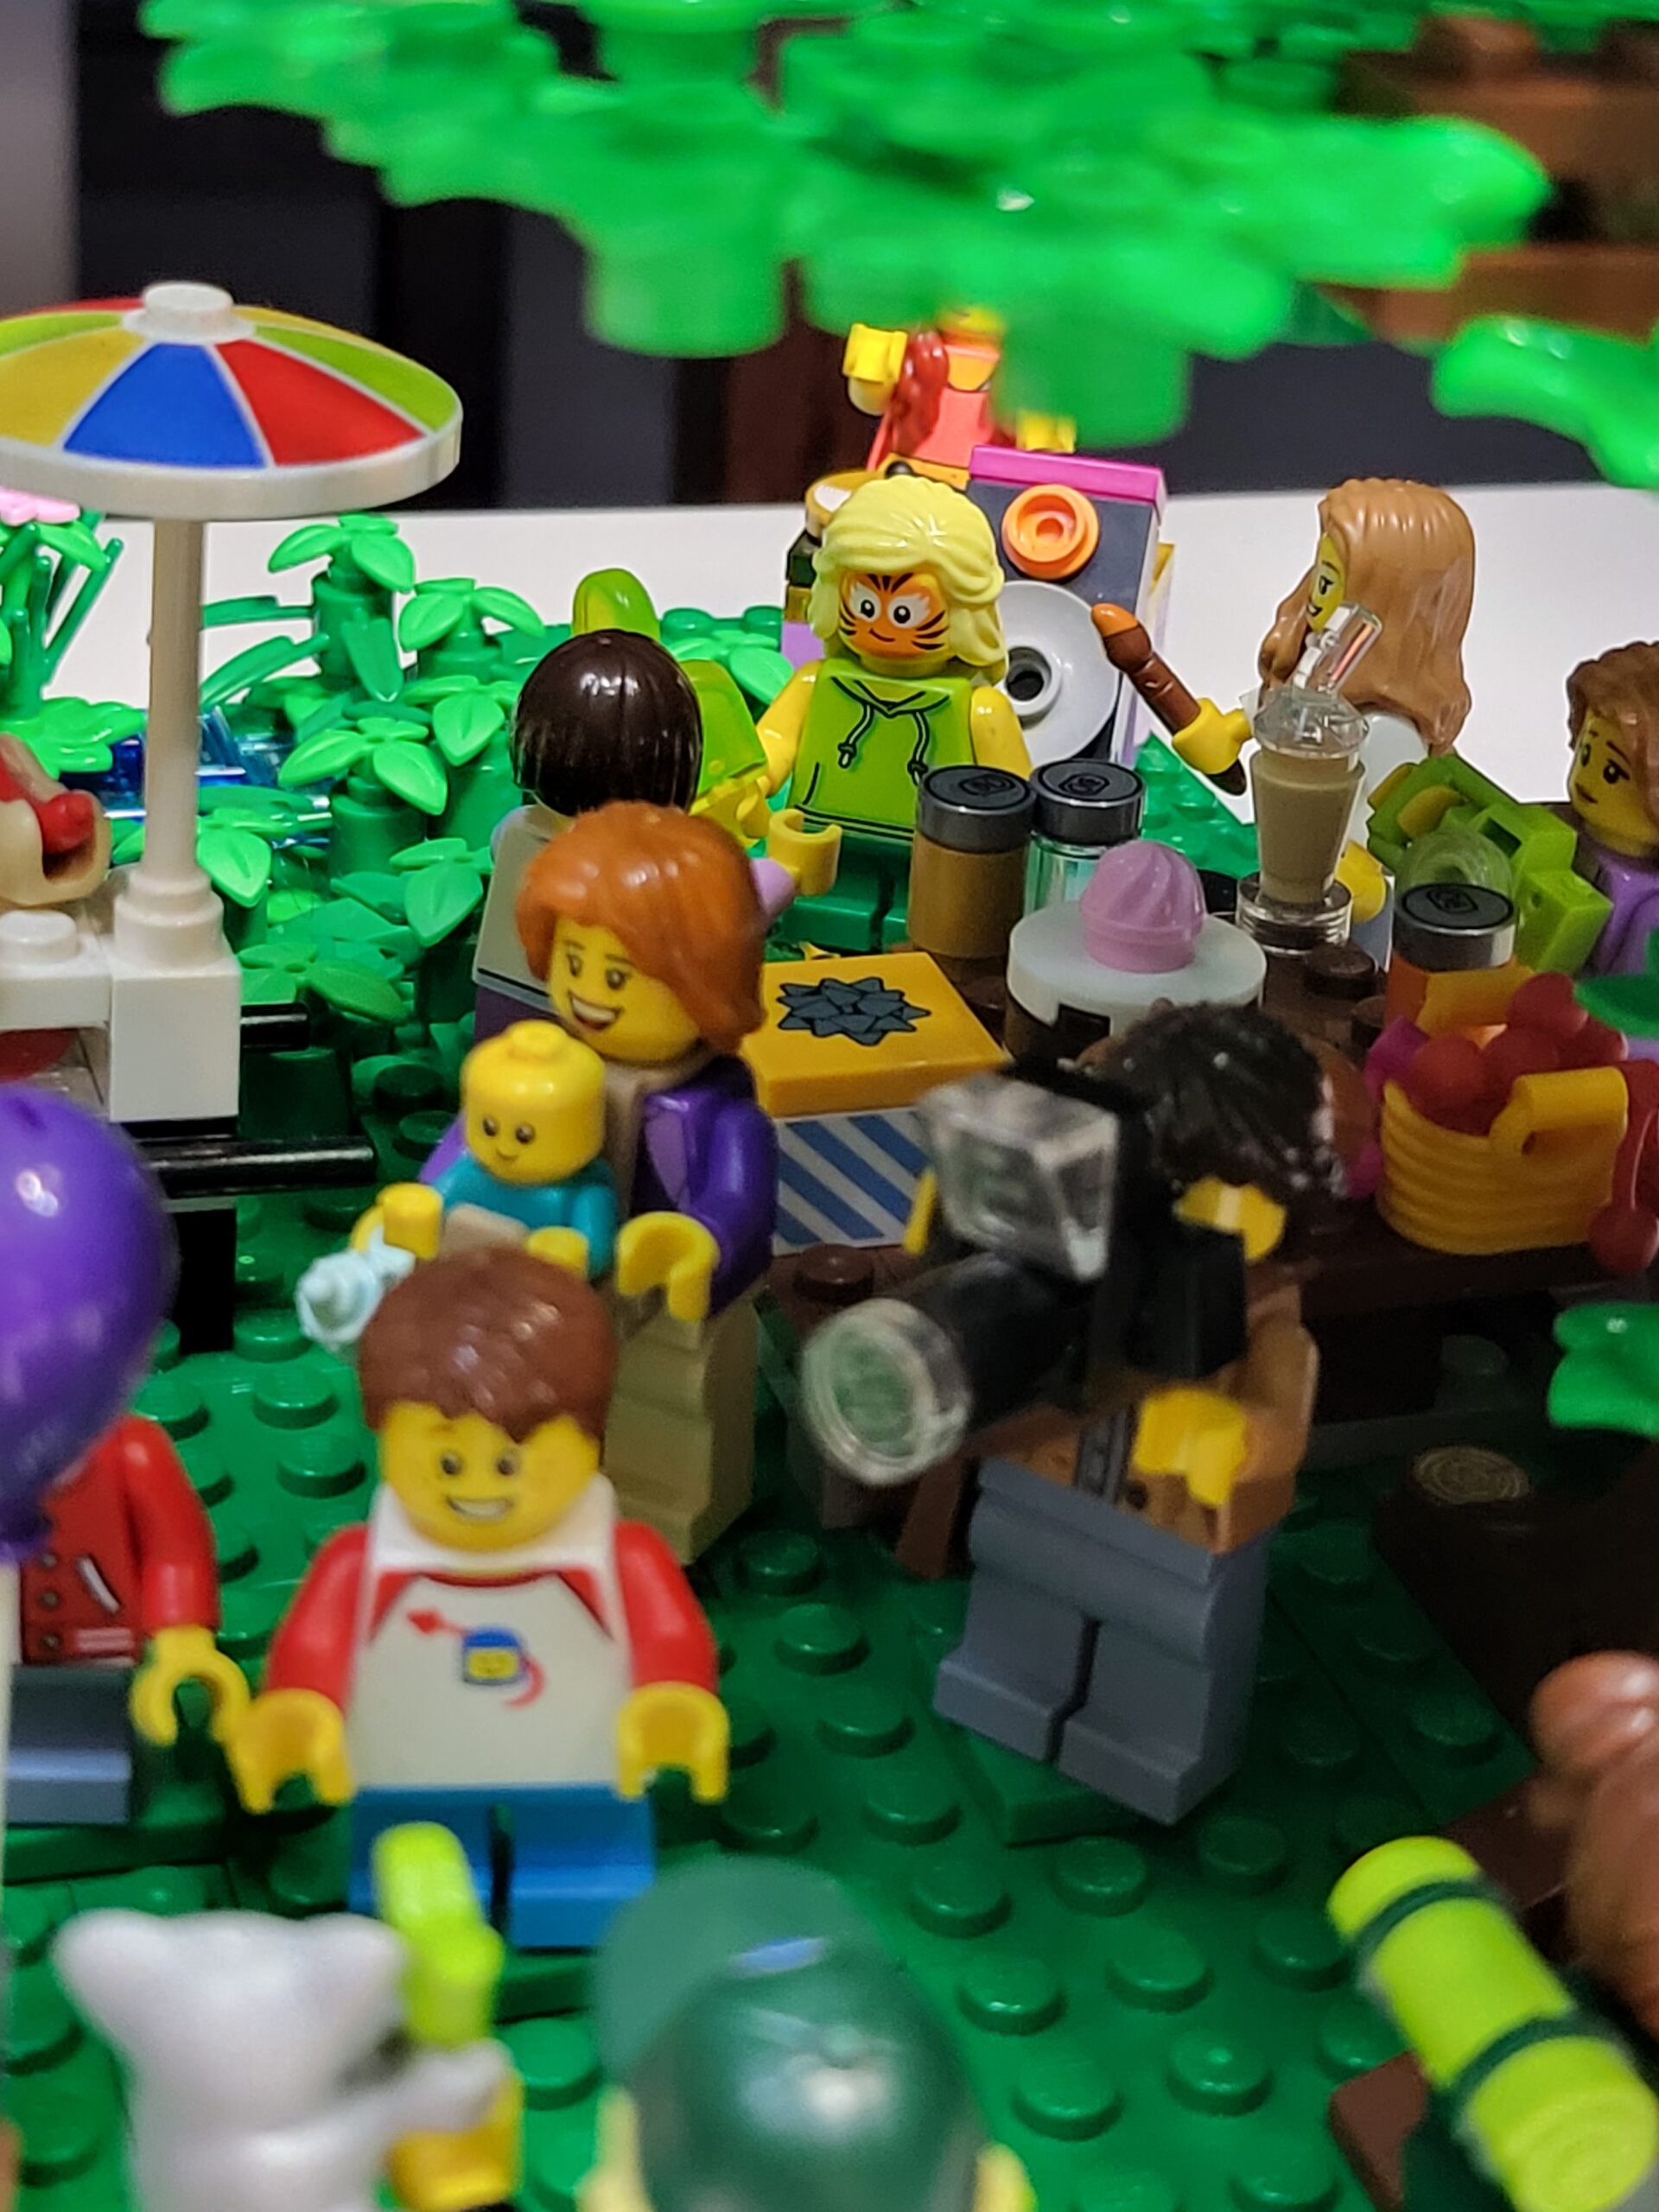
This is a lovely display piece, and with its abundant colour will immediately catch the eye. It is very playable as well, which will probably attract the kids. It fits in nicely with some of the other Disney sets, such as the Winnie the Pooh set (set no 21326) and can easily be displayed next to them.

The set retails for R999 at LCS and R969 at Kiddiwinks respectively at time of writing, but prices are set to increase on 1 September. At time of writing, LCS seems to be sold out, but Kiddiwinks shows a number in stock.

I would highly recommend buying this set – it will be nice a collaboration for parents and children to build and enjoy.

40649 Iconic Up-Scaled Minifigure Review

Review by Brett Thomas (SAFOLs Members, CapeLUG Members)

When I first saw the release pictures of this set a few months ago I know it was a must add to my collection. I am a mad minifigure collector and this fits perfectly in my collection and new size for display. It retails for R 879.00 currently exclusive to LCS stores.

The box is a flip top type like some of the Art sets and that allows for easy opening and little damage should you want to keep the box. The box contains the instruction manual, and bags numbered 1 to 5. There are no stickers, a huge plus in my view. The set contains 654 parts, with the blue dome for the cap being unique to this set. The 4 head yellow outside bow (4 x 6) pieces are only found in this set and the Pirate figure that is exclusive to the LEGO® House in Billund.

The bags are very minifig part specific. Bag 1 is for the torso and hips. Bag 2 builds both legs. Bag 3 the arms and hands. Bag 4 the head and bag 5 the peak cap.

The first 2 notable things about the figure from the pictures on the box and manual is firstly it uses the standard red and blue minifigure with the first minifig head basic smile and eye print. Secondly the cap looks a bit strange and odd shaped (more about this later). I really like the colour choice as this is the one, I associate with the “birth” of this version of the minifig in 1978.

The torso build uses a combination of slopes and a very clever middle to recreate the minifig torso shape perfectly. This clever shape is achieved by using the 1 x 2 technic brick with 2 holes raised by 2 bricks high on top of a 1 x 4 technic brick with 3 holes. The sides are attached via pins creating the slope of the torso. The torso uses 2 different size red wall elements which reduces part count and weight. Two technic cross axles are left protruding from the torso to attach the arms.

The hips are snot constructed using angle plates to attach the build and 2 more cross axles to attach the legs. The hips are mostly built “upside down and attached to a flipped torso using 1 x 2 plates with vertical tubes to join the two pieces. The legs are built next and are simply constructed mainly using bricks and tiles. The genius in my view is the clever use of two 2 x 8 plates with holes placed in the leg hollows to join them to the hips. The 1 x 2 x 1 bricks with 4 knobs as used in the Brickheadz are used to connect the bow pieces that create the curve on top of each leg.

Next are the arms and hands. The arms are great examples of LEGO® maths at work as the use of corner plates and tiles perfectly recreate the arm bend angle with no flimsiness at all. There is a technic pin used to attach the hands. Each hand consists of 10 parts and in my view does create the shape of the minifig hand reasonably well. A round brick with cross is used to attach the hand to the arm.

Bag build the head and from a design view, probably the most difficult to match the minifig head shape of all the parts. The centre is a combination of technic frames, angle plates and bricks to build up the core of the head. An interesting use of the black mudguard 2 x 4 piece to attach the big head bow pieces. A combination of slopes and bows are used to mimic the curve at the bottom of the head. The eyes and smile are printed on 1 of the yellow bow pieces. The top of the head has 2 2 x 4 plates with 2 knobs (a big jumper plate in my terms) to connect the cap.

Last is the cap, this is probably the most controversial part of this build as the shape of the peak and alignment to the top is not perfect, but in my view the finished model looks way better than the pictures and perfectly acceptable. The build of the base of the peak is another snot build, which is built like a wall and then tipped over. The arches and bows added to the top of this “wall” create the brim of the peak. The dome simply clips onto the built base.

There is a small mini build that fits inside the dome, which is a series of gears and levers, with some printed dial parts. There is a minifigure in the same attire with can be placed in the mini build to “drive” the brain of the built figure. This for me is a really cool addition to this build.

Overall, this was a build I really enjoyed with some clever techniques to create joins and shapes. The figure stands 27 cm high and is very sturdy and poseable. The legs, arms, hands, and head move in the same way as a minifigure. This is an excellent recreation at a bigger scale and a worthy addition to any minifigure collection.

This set will offer a reasonable opportunity for customisation. In doing some research this construction of the legs, arms and torso of the buildable Harry and Hermione use the same build and are the same size. Check out @pixelogre on Instagram for a recreation of the toy soldier minifigure using this set as the base, a truly excellent customisation.

Celebration Competition

Build a scene of celebration. A party, wedding, festival…Max size: 32×32 baseplate.

  • Must be your own creation. No LEGO® released sets.
  • Only ONE entry per person.
  • Categories:  
    • Brick build
    • Digital build
    • Kids 11 to 17 
    • Kids   5 to 10
  • A minimum amount of 6 entries per category required. If the minimum is not met, then the category will fall away from the competition.
  • Open to Facebook Group Members and Instagram @sa.fols followers. 
  • Please mail your entry to info@safols.co.za (max 5 images), Caption your entry and note which category it is for.
  • Closing date 31 April 2023 – 23h00.
  • This competition is only open to South African members due to logistics reasons.
  • Entries will be judged by SAFOLs Admins, and their decision is final.
  • Have Fun!!!

Brick Build Category Entries

5 -10 Years Category Entries

11 – 17 Years Category Entries

10305 Lion Knights’ Castle Review

Reviewed by Angelina Yonekura (SAFOLs Member, CapeLUG Member)

For Christmas in 1984, as a kid, I received the King’s Castle, my first ever LEGO set. With four horses and 14 minifigures the possibilities were endless but typically the red guys vs. the blue guys. 2013 was the last time a castle or kingdom theme set has been released by LEGO. The 10305 Lion Knights Castle commemorates LEGO’s 90th anniversary.  4514 pieces designed by Mike Psiaki, Milan Madge, and Ashwin Visser.

The two instruction manuals contain a history of the castle kingdom theme, visually describing the evolution and history of these sets to the current lion knights’ castle. There are 35 bags in 26 building sections, and an unnumbered 36th bag holds larger plates and thankfully no stickers. The time it took me to build was approximately 15 ½ hours although I had modified the walls to include more plants. I did not grasp the size of this set even looking at the bags until it was built and then the wow factor kicks in.

For any child or adult who loves the medieval times of knights on horses, fighting epic battles, this is the set that would impress them. This is a very large and well-rounded and equipped set. The various new pieces and techniques including angles and snot techniques truly benefit any LEGO fan.

Minifigures include Lion Knights, Forest men, a few Black Falcon knights, a wizard and peasantry. Queen Lionne with her fully decked assemble and horse is ready for battle and probably one of my favorites. She is escorted by an all-female Queen’s guard thus changing what used to be an all-male tradition.  A change between the older Lion Knights and Black Falcon’s is the leg design adding trip and chainmail improving the level of minifigure detail. One Black Falcon minifigure is reminiscent of the Monty Python and Holy Grail squire with the coconuts and had they added a coconut to his already heavy pack it would have been a great easter egg. I do wish they had used the older helmets with chin guard (3896) from the 1980 to early 1990’s for the Black Falcons. Maybe a bit of nostalgia but those were featured in in black and dark grey in earlier versions of Black Falcons.

Unique angles and section of the castle walls. It separates in two parts and needs to be as large as it is. Only issue is connection between both very large and heavy sections are just 2 modified 1×1 open clip. The issue I have found is if the alignment is not just right it won’t connect, and they easily disconnect with the slightest movement. Small modification of adding two clips would assist if it became an issue.

The waterwheel turns a gristmill with all the gears moving realistically and a sack of grain. There is even a medieval privy with a roll of toilet paper. Indoor stable at the gate, and a dungeon where the skeleton roams. There are stalls in the open section of the castle featuring food and lots of flowers and creeping ivy over an archway. The balcony by the waterwheel has an amazing sliding feature that slides in and out of a castle wall when you open it and incorporates hinges to bend when you close the castle section making a square balcony. There are so many hidden details like the birds’ nets, forest men hideout, and various side rooms and features it makes the build entertaining and fun.

The kitchen is complete with an oven and a section with various foods and containers and a flowing water feature looking like flowing water. The kid’s playroom has a yellow castle most likely a designer nod to the 1978 Classic Castle (375/6075) in yellow.

Pros: The kitchen is by far the best room in the castle. An orange/red light brick would have made an exceptional addition in the fireplace. Weapons are not lacking in this set from the armory located in the portcullis room, above the storeroom, and on the walls in the hidden Forest men room. There is enough to equip the peasantry if needed to save the castle. The angles in the castle, some connected by ball joints, and various wedge usage, create a lot of excitement with challenging and new techniques.  This set comes with a wonderful assortment of 22 minifigures (including a skeleton), a cow, lamb, bird, various frogs and two horses. Arched windows and the thatched roof are some of the most impressive techniques I have seen in regard to roof builds. Unlike the tiles on the blacksmith these give texture and variation of colors making it visibly appealing.
 
Misses: The wizard Magisto is simply welcome but completely plain with no printing unlike most of the detailed printing on the 21 other minifigures. Even in an earlier set he had a belt with a moneybag which had been a consistent feature in prior editions.  Bell tower is a big miss featuring a pear gold bell but hidden behind a small window unlike most bell towers with large arched openings. The kitchen, while my favourite room in the castle, lacks light and you do miss some of the detail as it can get very dark.
There are a lot of discussions about the ramp. It feels incomplete, and the long slopes with limited studded surfaces inhibit placing any horses or minifigures on most of it. The designers take great care to round the walls and add great window features, but this feels as if they have forgotten about this section.

Personal wishes: Honestly in a castle this huge you would think there would be a throne room but instead there is a room with a harpsichord or kids’ playroom. Personally, I modified it to have a creeping vine with SNOT bricks, but various other options would help break up the wall of the same color. Brick on brick of light blue grey intermixed with masonry bricks while welcoming for variation there are much more techniques and options out there. Would love if additional sets include more horses with various barding. Overall, this was a very welcomed for old castle fans like me.

Value for money: At R6500 it is on the higher end cost wise and cost per brick is not great for the variety of pieces, but this is balanced with the experience and nostalgia for the adult castle theme fans.

Name: Lion Knights’ Castle

Set#: 10305

Theme: LEGO Icons

Cost: Official LEGO store R6,499.00

Brick Count: 4514 pcs, 21 minifigures, 1 skeleton, 1 cow, 1 baby sheep, 2 horses

Unique pieces: Inverted 2×2 curved slopes in Reddish Brown (1750), 2×3 plate modified rock/claw fingers in nougat (27261), 10 different shield designs some classic with a few multiples of the Lion Knights shields. Cloth flags (100731, 1000728). There are some color changes, but my personal favorite is the cow (64452pb01c01),

Size: Closed 38cm high, 44cm wide

Minifigures: Release Date: August 8, 2022

40499 Santa’s Sleigh

By Rakesh Gosai (SAFOLs Brick Deputy)

Santa Claus is coming to town!

Flying in from the North Pole is the LEGO 40499 Santa’s Sleigh! I had the opportunity to get this set building Santa and his holiday ride, the perfect addition to this any Winter Village set, or any Modular City build. With only 343 pieces, the designer has designed an amazing set!

Just like Christmas morning, there’s a lot to open with this set. The box itself brings so much joy AND is a joy to look at. The scene of Santa Claus riding through the snow with the four reindeer at the front is a classic Christmas look. You can see gold detailing on the sleigh and the vast selection presents stacked up behind on the sleigh.

 Inside the box were the instructions, a sticker sheet, four bags of pieces, and four individually packaged reindeer. The individual packaging was a delight because the reindeer are safe inside the packaging and no damages could occur during shipping. The sticker sheet has 9 beautifully designed stickers which complement the build. In case you did not know, the number plate “54N74” translates to “SANTA”.

The build is quick and should take you less than an hour, and surprisingly, this Santa Claus minifigure is exclusive to the set, and has a few differences than the Santa Claus that we got from 10293 Santa’s Visit, giving you an additional reason to buy this set.

This set has a few nice details that I enjoyed, the GPS…a much-needed item in 2022, the alphanumeric number plate, an ornate SC logo on the front, and the rear compartment for the snacks, the pretzel for Santa and the carrot for the reindeer.

 I love the details of this set and the four reindeer looks so amazing; I would like to get another set to get the number of reindeer to 8.

This set is a perfect gift!

80039 Monkie Kid™ The Heavenly Realm Review

Reviewed by Richard Yang (SAFOLs Member, zaLUG Member)

When I found myself as an AFOL again in 2019, the only oriental LEGO® theme available was Ninjago, So I was pretty excited on the launched of the Monkie Kid™ theme in 2020. The first few waves of products were alright – cyberpunk style, cool mechs, highly detailed designed minifigs, and that was it. What changed my view on the theme was the launch of set 80039 The Heavenly Realm in June 2022, which gave me the same feel as the Ninjago set 70751 Temple of Airjitsu – EPIC!

The Monkie Kid™ theme was adapted from the classic Chinese fantasy novel “Journey to the West (西遊)” which is well-known to many Chinese households. The various storylines of the novel were depicted in many movies, TV series or storybooks which I thoroughly enjoyed as a child, journeying through the various adventures with the main characters.

First Impression

As the Monkie Kid™ theme are online exclusive in South Africa, I was pleasantly surprised at the size of the box (48cm x 58cm) as unboxed my delivery.

Contained in the box was instruction booklet pack separately wrapped in plastic, 17 numbered bags, and 4 of the 16×16 brick bases, in white.

The instruction pack contained 2 instruction booklets, 2 sticker sheets as well as a shiny plastic sheet of clouds.

The build

The set contained 2,433 parts, with 8 minifigs and a dog. Overall build experience was enjoyable as expected of any LEGO® set (except the application of stickers!). There are some great SNOT techniques throughout the build, I am particularly impressed on the technique used to build a section upside down on the wall of the Peach Garden!

In terms of functionality, the initial form of the build is concealed behind the clouds, and as you push the Gateway section, the clouds move aside, together with the two other scenes, to reveal the palace behind the clouds.

The set is a great display piece as a traditional oriental structure. The model measures over 37 cm high, 42 cm wide and 34 cm deep. The model can be split into 4 sections, where it tells you 3 stories as part of the 4 chapters of Heavenly Realm saga, out of the 100 chapters. But more of that in the next section.

The Story

This set is adapted from Chapter 4-7 of the novel, The Heavenly Realm Saga. The first 3 chapters before this was about the story of the birth of the Monkey King in Flower Fruit Mountain (Yes – set 80024!), followed by the protagonist causing trouble across the different realms.

Chapter 4 starts with the Monkey King being summoned by the Jade Emperor to theHeavenly Palace (靈霄殿), for all the damages he caused in the different realms. The Jade Emperor assigned him the role of the Stable Warden (弼馬溫), to keep him at bay. However, the role was mundane and boring, and he soon realizes that it was one of the lowest and insignificant rank in the realm. He deserted the position and returned to the Flower Fruit Mountain. The only presence of this chapter in the set was the Warden Monkey King minifigure with the horse image on the torso.

The Jade emperor was infuriated by the disrespect towards his order and sent soldiers to retrieve him for judgement. This was not successful as the Monkey King and his army of monkeys defeated the soldiers, thereafter, he self-proclaimed the title of 齊天大聖, which stands for Great Sage of Heaven’s Might. This title can be seen on the banner of the Warrior Monkey King minifigure in this set.

Chapter 5 The Jade emperor summoned the Monkey king once again and promoted him as the Guardian of the Peach Garden (the Peach Garden is located to the left of the final build, with a plaque of 蟠桃園 on the wall, which means Peach Garden), he also officially bestowed the title of Great Sage of Heaven’s Might upon the Monkey King to keep him happy and out of trouble.

The Monkey took the liberty of consuming the fruits in the Garden as he wishes. One day when the Fairy came to harvest the peaches for a celebration, there were almost no fruits left. She interrogated the Monkey, and in that discussion, the Monkey realized that he wasn’t invited to the celebration, he then “crashed” the party, ate all the food, and drank the wines, before the arrival of the guests, and caused a big mess. The peaches on are printed on heart shaped 1×1 tiles, which was a great addition to the set.

Whilst being extremely drunk, the Monkey King stumbled across the Palace of Taishang Laojung (This scene is to the right of the final build, with a banner of兜率宮 – which means Tusita Palace). Laojung was in the process of making pills of longevity in the furnace through Alchemy. The Monkey king opened the furnace and ate all the pills and fell asleep in the palace.  The next morning he awakened to the realisation of the big trouble he committed, he fled the palace and returned to the Flower Fruit Mountain.

The Jade Emperor, once again infuriated, sent Erlang (with his Celestial dog), Nezha and other generals together with an army of Ten thousand soldiers to seize the Monkey King for judgement.

Chapter 6/7

After being judged and sentenced to be executed, no apparatus or method could harm the Monkey King a slight bit due to his gifted abilities. Taishang Laojung then proposed to burn him to death in the furnace.

This is depicted on the dual moulded facial expression, where one was suffering (in the furnace), and the other was chewing, likely from eating the peach / food / pills.

The furnace was opened after 49 days, and the Monkey King was still alive! And he started fighting everyone and wreaking havoc in the heavenly realm. This was shown in the box art of the set where he was fighting Erlang, you can also recreate the scene with the transparent stands provided and position the fight in front of the palace.

As the Monkey King is well gifted in fighting capabilities, no one was of match to him. The Jade Emperor eventually asked requested assistance from Sakyamuni Buddha who then captured the Monkey and locked him up under a mountain.

Overall

Minifigures                                      10/10

Display value                                   9/10

Building techniques                        8/10

Value for money                              9/10

Overall product experience         9/10

This set is one of my favourite sets released in 2022. I would recommend it to anyone who loves oriental themed LEGO® sets. The build experience was great, and I specifically loved the mechanism where the clouds spreads aside.

10497 Galaxy Explorer Review

Reviewed by Alain King (SAFOLs Member, CapeLUG Member)

As a child, I remember having a few small Space sets and having an amazing time playing with them. There were always the bigger ones in the catalogue and the dream of owning them never went away. When the LEGO group announced the 10497 as tribute to what the community refers to as Classic Space, I knew that it was immediately going on my list of sets to get.

Packaging and building experience

The packaging of the box looks amazing and for those who built LEGO sets in the 80’s will bring back lots of nostalgia. For those who are concerned that they followed the old technique of no numbered bags, you can rest at ease as there are 9 numbers of bags, a large 16 x 8 tile and the instruction manuals in their protective wrap. My set also included a pamphlet about the transition to paper bags.

The first bag starts off with a Red Spaceman and a little robot. It also follows the current trend of building a technic style structure that everything will be built on. The difference that comes in here is the inclusion of some landing gear (that was not present from the original) and it gives you an idea of the scale of the ship.

Bag two starts adding on the slope that is a characteristic of this ship as well as adding the seating for the crew (all 4 of them) along with 2 steering wheels. I mean, honestly, how else are you supposed to fly a spaceship?

Bags 3 & 4 gives more shape to the ship overall, adds the first White Spaceman and is a great time to highlight the fact that the designers restricted themselves to the colours available when the original set came out (although the grey has changed during the timespan). This is one of the many titbits of information included in the instruction manual. Bag 5 adds the second Red Spaceman to the crew and finishes off the surface of the wings.  Bag 6 adds beds for the spacemen to sleep and starts building up the engine mounts.

Bag 7 adds the second White Spaceman and builds up the cockpit including all a bunch of the printed parts in this set. The LEGO group once again demonstrating that it is possible to get a set without stickers. The final set of this bag is to add on the two yellow canopies. This is great for the fans to get these in this colour as they are big and beautiful and come mixed in with the other parts so one of mine came with a big scratch down the middle of it. I don’t understand why there is no separate packaging for them or why they don’t come wrapped in a protective film like the windscreen in the new Delorean set. Thankfully the LEGO group has the best customer service in the world and a couple of days after requesting a new canopy it came carefully packaged in its own bag.

Bag 8 competes the back of the ship with the huge wing and the iconic white arrows pointing down which are done with some clear building techniques. Bag 9 finishes off the engines and the buggy to go into the back.

Overall Experience

I think that the LEGO Group has demonstrated that they know what their fans really want. This set appeals to several AFOL’s who grew up around these sets and would like to relive some aspects of their childhood. This set is a great tribute to that and very affordable in South Africa with the current recommended retail value of R1799.00. If you are interested in the space theme at all, please pick one up to encourage more in the future. And as a bonus, there are two additional sets of instructions available from the LEGO Website that allow the building of alternate models which are also tributes to past models. Personally, I have not yet built these alternates as I love having the big one on display but one day, I will get to it.

The finished Galaxy Explorer looks amazing and has some great techniques employed to get the overall shape with very minimal gaps present. There are some of the slopes on the edge of the wings which are not quite level with the surface of the wings, but I am not a skilled enough builder to do a better job than the designers of the set. It is impressively big, so I have included some photos comparing it to some other space vehicles (all latest play scale sets not UCS) in my collection. I have also heard there is a castle to go along with this tribute set, perhaps that is the next on the list of builds to complete. 

10306 ATARI 2600 Review

By Barry Kay (SAFOLs Brick Boss, CapeLUG EXCO, Batman … Ssshhhh!)

Coming home from school, doing homework (hopefully), and then heading to the living room or a friend’s house to load a cartridge and pick up that little black one button joystick to start playing your favourite pixelated game. Now we get to have those nostalgic memories come flooding back while building the LEGO® ICONS™ 10306 Atari 2600 set.

The set is designed by Chris McVeigh and contains 2,532 pieces. It is very well designed, and one would think it was the real console when looking at it from afar, with the lovely wooden look and feel to it.

The build is simpler than the NES (Nintendo Entertainment System) so one must not be scared off by the 18+ age category. It’s a smooth, relaxing build with a lot of tile work, but doesn’t feel monotonous.

The Joystick base is a solid well-built unit and looks just like the real thing.

For extra nostalgia, we get to build three game cartridges that have stickers of the originals but with LEGO® imagery. I love the way they did the spaceship on the asteroid’s cartridge in Classic Space colours to look like the Galaxy Explorer. The cartridges are designed to fit into the console as the real ones did when you wanted to play the game. We also get to build a cartridge holder for them.

Each game has a small buildable scene to go along with it, which are quite enjoyable to build.

There is also a popup room scene with a minifigure playing on his console. I found this to be a lovely little surprise feature.

The completed build makes a wonderful display piece, with its many printed parts and realistic designs from the front panel knobs to the back connection points.

The only downfall of this set is the price. At R3,699.00, most of the people I have spoken to about only have it on their wish list. Apart from that, I highly recommend this as a fun and relaxing build for those who want a little bit of 80s on display, even if you were not around to have played with the actual console.

10298 & 40517 Vespa Reviews

Review by Luke Comins (SAFOLs Members)

VESPA 125
Set Number: 10298
Pieces: 1,106
Theme: Creator Expert
LEGO Designer: Florian Müller
Release Date: 1 March 2022


Now here is something I am EXTREMELY overjoyed to get in Lego form as I have owned 2 Piaggio Vespa scooters since the mid 90’s.
Since my days in the ‘dark ages’ (a term that seems to be coined by AFOLs for when we lost the plot with regards to our childhood LEGO® and turned our attention elsewhere on whatever for however long) I have really wanted LEGO® to produce a Vespa scooter set. 20yrs later and they finally have, and I have one, well two!

Just some interesting Vespa ‘Did you Know’ to begin with…
– The name Vespa means ‘wasp’ in Italian and is derived from the vehicle’s body shape – the thicker rear part connected to the front part by a narrow waist, and the steering rod resembled antennae.
– The small wheel size was dictated by available parts after WWII. The wheels on the first Vespa’s came from Piaggio’s bomber plane factory and were originally manufactured for landing gear, hence why they only have a single arm front suspension/fork.
– The Vespa 125 (the particular model this LEGO® set is based on) was launched in 1960, and the pastel blue tone was the only colour the 125 was available in when launched.

The LEGO® designers tasked with designing this set teamed up with the Italian scooter company Piaggio and the convergence of these two culture powerhouses has resulted in a fantastic looking Vespa scooter model. A perfect way to also celebrate Vespa’s 75th anniversary!

The box, the now familiar black Creator Expert 18+ adult orientated type, works well here making the set and its colour stand out. But what matters the most is what’s INSIDE the box…

The instruction manual is packed with trivia, and an introduction to the Vespa 125. There’s plenty of classic photos of the Vespa throughout, an informative timeline and a short profile on the set’s designer, Florian Müller.

The build is split across 9 bags with a couple of steps having two bags and you can expect to take about 3 hours to complete the set.


The fitting choice of Light Royal Blue as the colour scheme will have custom builders and parts collectors in their element (pun intended) as there are over 70 types of pieces in this rare colour, including a multitude of parts that appear in bright light blue for the very first time.
Building with so many of these Light Royal Blue elements was a delight as it’s not a LEGO® colour that’s usually found in such abundance, and the relative rarity (thus far) does make it quite a novel experience.

Unlike a lot of the four-wheeled vehicles in the Creator Expert theme, the first stage uses very little if any Technic elements to make up the frame, relying instead on a variety of System parts. It’s a really enjoyable start and it’s always a pleasure to watch a model of this size begin to take shape using nothing but regular bricks and pieces.
Vespas have a signature shape defined by soft curves, something that certainly isn’t easy to translate into LEGO®. There is a very impressive level of skill employed here by the designer to get the shape of the Vespa. In order to get its flowing curves, there are plenty of bow elements used but these only go so far as to craft the wasp-like body. The back section of the Vespa, along with the area where you’ll find the seats, are both connected to the frame via a series of hinged plates. This helps to angle them.
One part I really like about the frame of the set is the footwells where the black anti-slip strips protrude from the floor where the rider puts their feet when moving. Once the frame is complete much of the other details are built independently and added to it. These include the large curved pods which frame the rear wheel. 
The removable right side engine cover/panel is a nice feature and when removed shows the entire detailed engine. A nice printed Technic disk is used for the flywheel and four plain disks are used for the cylinder block. Underneath the engine is the kickstarter that hinges up and down. Further underneath you will also find the working kickstand. The stand is hinged so can be retracted, but then of course it does not balance without the stand down. It has rubber dampers on either side of the stand to give it some grip when displayed.

The most exciting new parts for me are the wheels and tyres, both a first for LEGO®. The rims are dual-moulded light grey and white. When the tyre is attached the joint is seamless so it looks like they are white-walled, something rather in vogue on automobiles in the early to mid 1900s and appeared on various early Vespa models and customised Vespas since.

The Vespa’s licence plate at the back has the words Roma (Rome, where the Vespa was launched) and the date 23 April 1946, the date Piaggio filed the patent for the Vespa.

To give the set a little more character, it features a few added accessories. One of the most unique is a spare wheel. Not something you’d expect such a small mode of transportation to have. The Vespa slotted them in various different places but the early models featured them on the back of the steering column, nestled in the same space as the rider’s knees. The LEGO version doesn’t actually include a tyre, in fact, it’s a little smaller than the actual wheels used in the set.

The basket/crate is simplistic and it secures nicely to a rear carrier which would have been more epic in chrome parts. The yellow flower bouquet is a cool contrast to the pale blue of the majority of the build and the use of the broken eggshell element looks cool. The bouquet is attached inside the basket so you can secure it and change the angle.

The traditional open face helmet that comes with this set is a little odd. While I appreciate the sentiment (and the extra parts), the design doesn’t have the sophistication that the rest of the model has, and those goggles just look lame, to be honest. The helmet and goggles are somewhat out of place, and while they do fit the theme, the scooter would be just fine without it. There’s also no ideal place to rest or hang the helmet from.

For fans of SNOT (studs not on top) building techniques, this is a dream set, as there is serious lack of studs showing and, other than one or two here or there, the only area that has a few together is the centre mat in the footwell. The effect of this makes it look like a non-Lego Vespa model in a big way and adds to the iconic curves of the scooter.
I however don’t like to see the few exposed plate bottoms under the neck of the scooter as against the mostly SNOT backdrop it does look quite odd.

The 10-sticker sheet, hmmm… I do wish we had got one or two printed elements with the Vespa or Piaggio branding on them but instead all the branding is in sticker form. There are some pesky stickers that cover entire parts. If I had to find another downside to this model, other than that seat and helmet, when observed closely you may notice some variation in the colour of the light royal blue pieces. It’s not too bad but some elements, such as 1×2 plates, seem more ‘yellowy’, and some of the curved pieces, such as those on the front wheel cover, are slightly lighter. However when displayed and viewed from a distance the final model looks great.

Unlike other vehicles in the Creator Expert theme, the scale of the Vespa is vastly different. It’s not the most complex but much bigger in terms of its scale, measuring at a nice 35cm long and 22cm tall.
Comparing the 10298 Vespa 125 to its closest counterpart, the 10269 Harley-Davidson Fat Boy, the Vespa has slightly more pieces and is ever so slightly bigger.

To conclude, the attention to detail is very impressive, the design techniques are enjoyable to construct, the colour scheme gives the whole set a very unique feel, both to build with and to look at. It’s not the most complex of builds in the Creator Expert vehicle line, but it’s very entertaining to put together.
Vespa enthusiasts (like me!) will absolutely love this set, and will no doubt be impressed with how authentic the end result actually is, while it’s also a rather quirky entry in the Creator Expert theme to tempt even those with little interest in the scooter itself.

Prior to getting this set I read a few online reviews with all the accompanying comments and found there was a common thread saying that many found this set to be flimsy in various ways however when I completed the build I didn’t find that to be the situation at all.

Having said all that, LEGO® went bossies and not only treated us with one Vespa scooter but TWO! I can’t recall another time when two LEGO® models of the same item have been launched on the same day.
So, here’s a short review on the smaller, more modern version in striking red…

VESPA
Set Number: 40517
Pieces: 117
Theme: Creator
Release Date: 1 March 2022


This set comes in a small tab-sealed box. The front and back are pretty similar with a central image of the Vespa seen from either side.
Inside the box are two unnumbered parts bags, a 40-page instruction booklet, and a small sticker sheet.

For a small set, there are some interesting pieces to be had. Lots of red and feels perfect for this later model Vespa. The rounded corner slopes in red are new for this set, as is the red modified brick with Technic connection. It also includes a couple of the new 1×5 plates in black.
The build for this set is quick and easy, taking advantage of some SNOT (studs not on top) connections to create a nicely rounded body accomplishing the overall look and shape of the Vespa rather well.
One of the most interesting techniques on this set is the use of a Technic axle to connect the front and back of the model. It is very efficient and adds a lot of strength.

A few stickers provide the front Vespa badge, some minor detailing for the engine side cover/panel and a 1946 number plate, a nice nod to the year the Vespa was first manufactured.
Due to its compact size (just 9cm tall, 12cm long and 6cm wide), the model does have a few design flaws (twin front suspensions/forks on vespa? Noooo…) but it’s unmistakably a Vespa. It still shows just what can be achieved with only a handful of bricks.
The wheels look smaller and wider than they should and the front fender is a bit too wide due to this.
The steering column is fixed and cannot move, and because of that and the wide tyres, it can balance on its wheels without the need for a stand.

It’s perfect for those who have an affection for the Vespa scooter but without the room or the budget for the larger one.
It obviously doesn’t have the same wow-factor as the larger version, but it is nevertheless a very decent model.

It will take around 15-30 minutes to complete.

BETTA GETTA VESPA!