10292 The Friends Apartment Review

Review by Cerry-Lee Chelin and Troy Chelin (SAFOLs Members, jhbLUG Members)

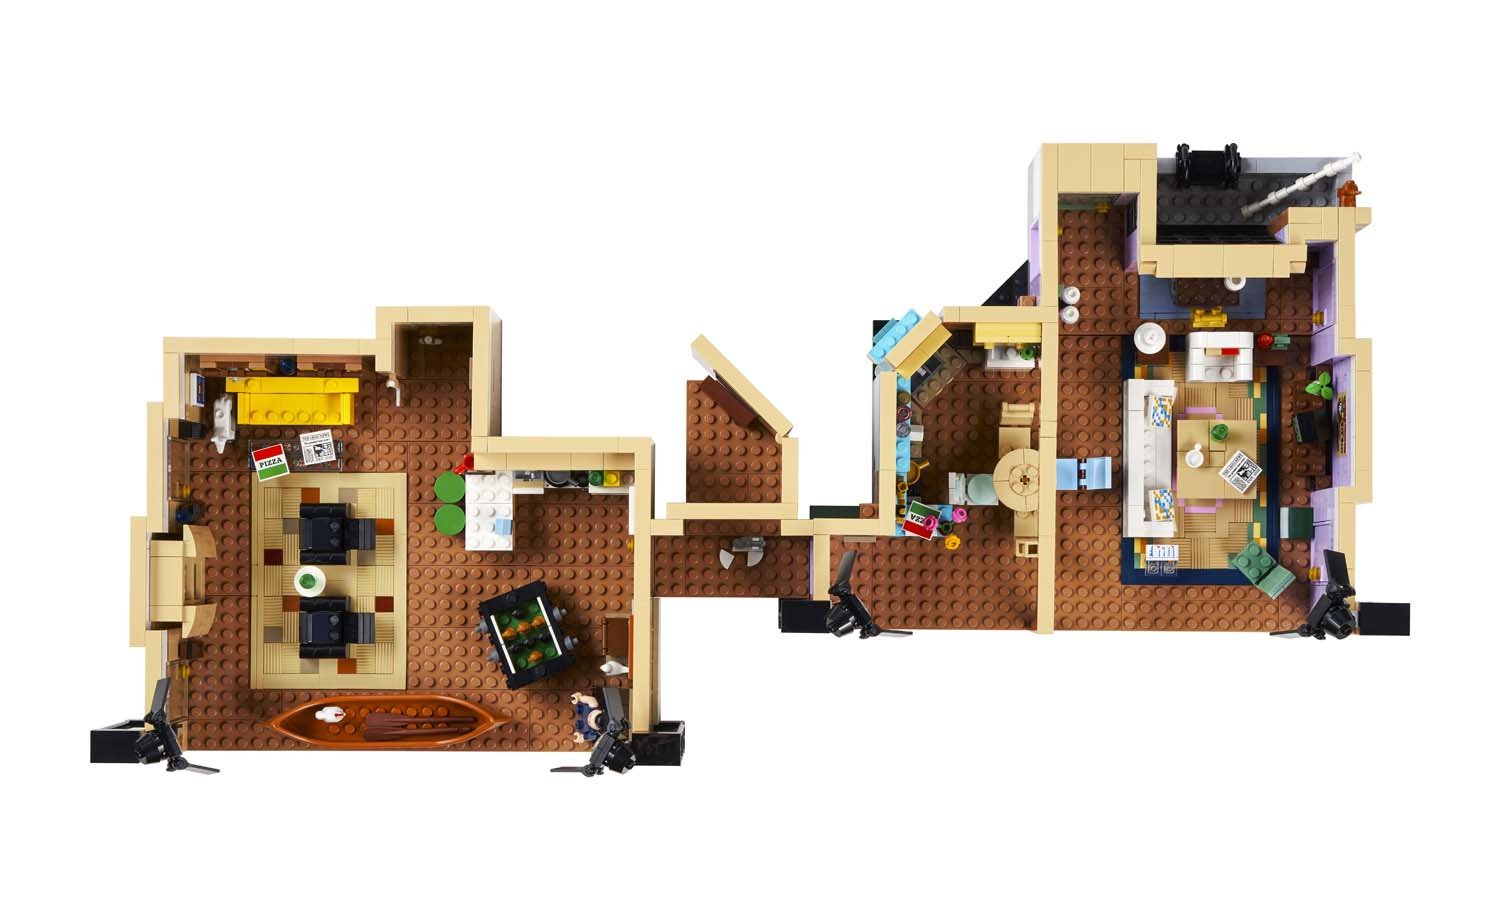
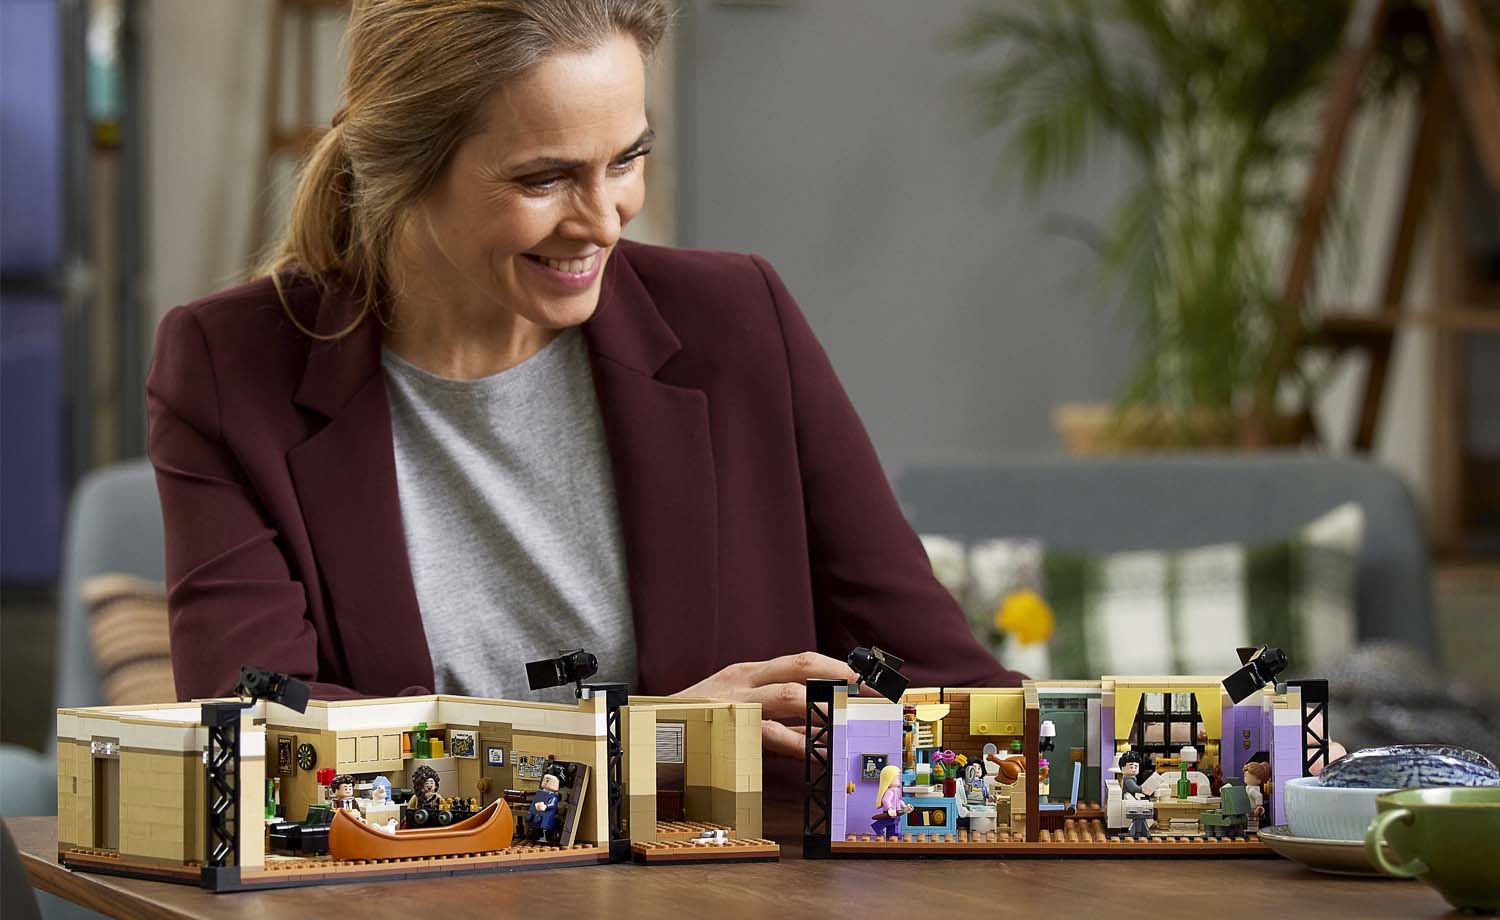
Set number 10292 The Friends Apartment is an adults set that was made off the back of the very popular 21319 Central Perk set that featured the cast of friends in the Central Perk coffee shop which they spent time at throughout the TV Series. This set features Joey and Chandler’s apartment as well as Monica and Rachel’s apartment separated by the hall way which can be placed in-between the two apartments or separate it is your choice.

Box Art and instructions

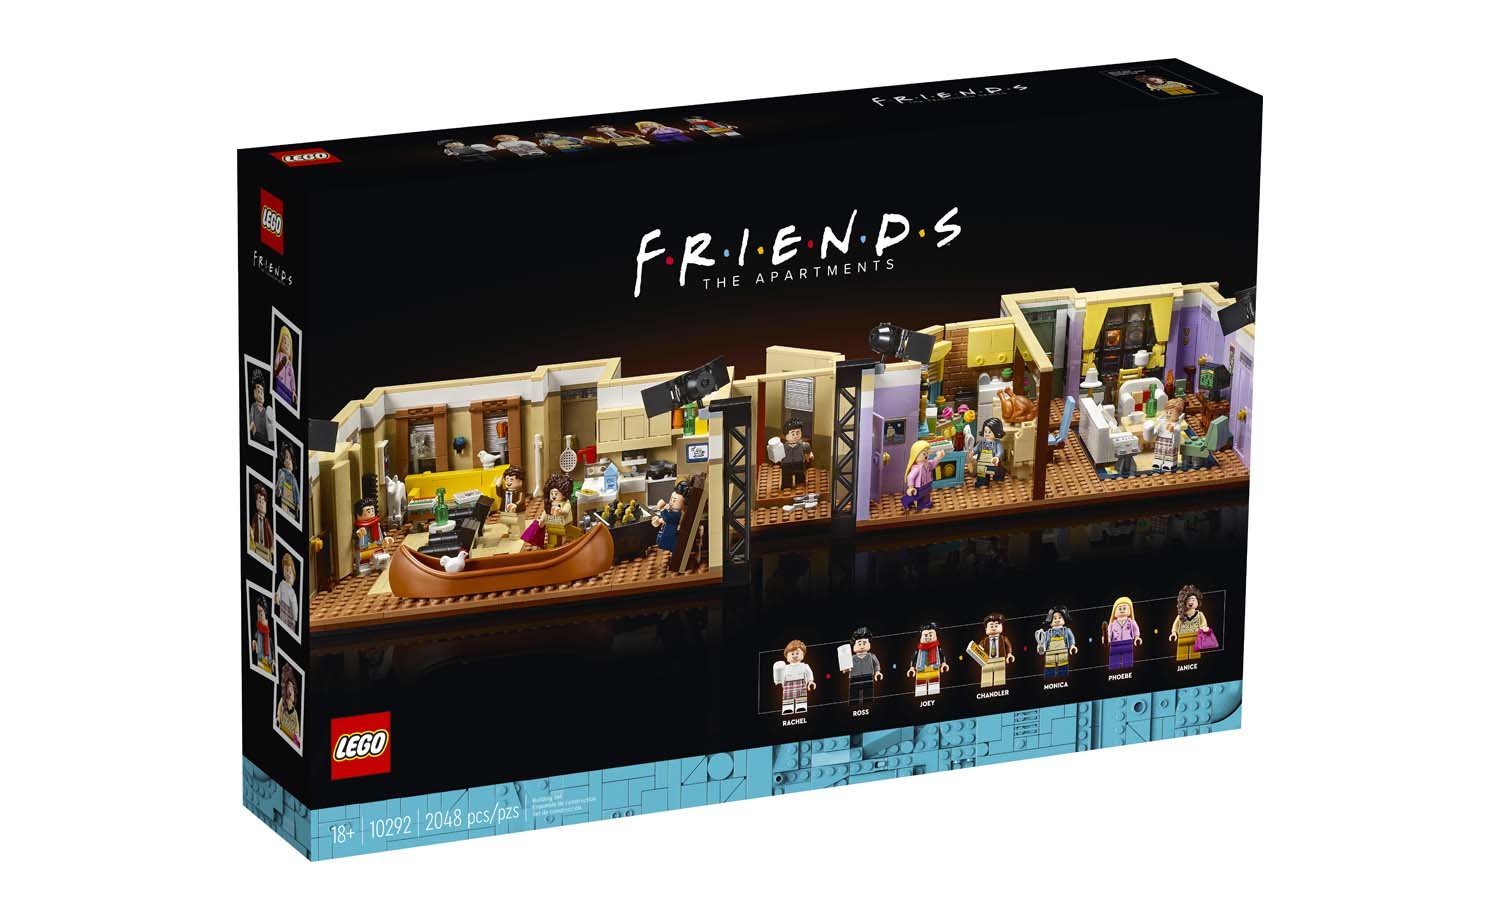
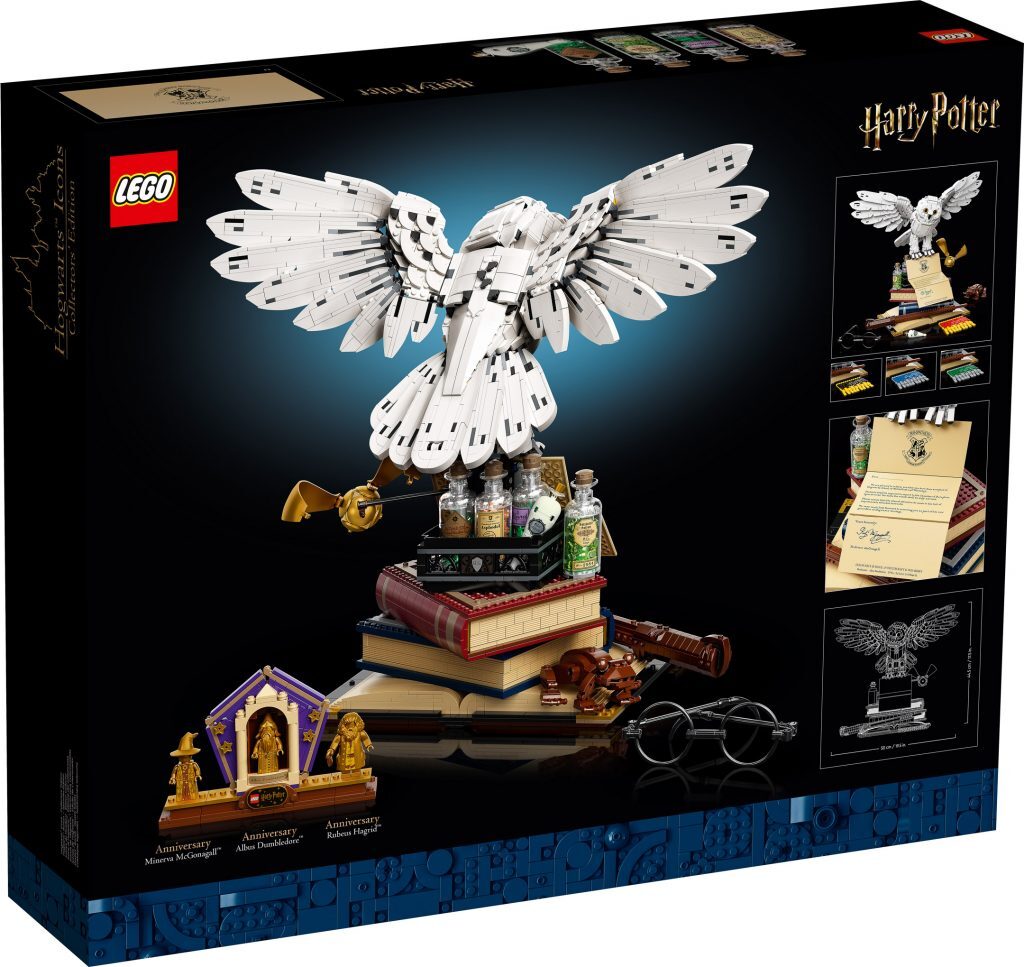
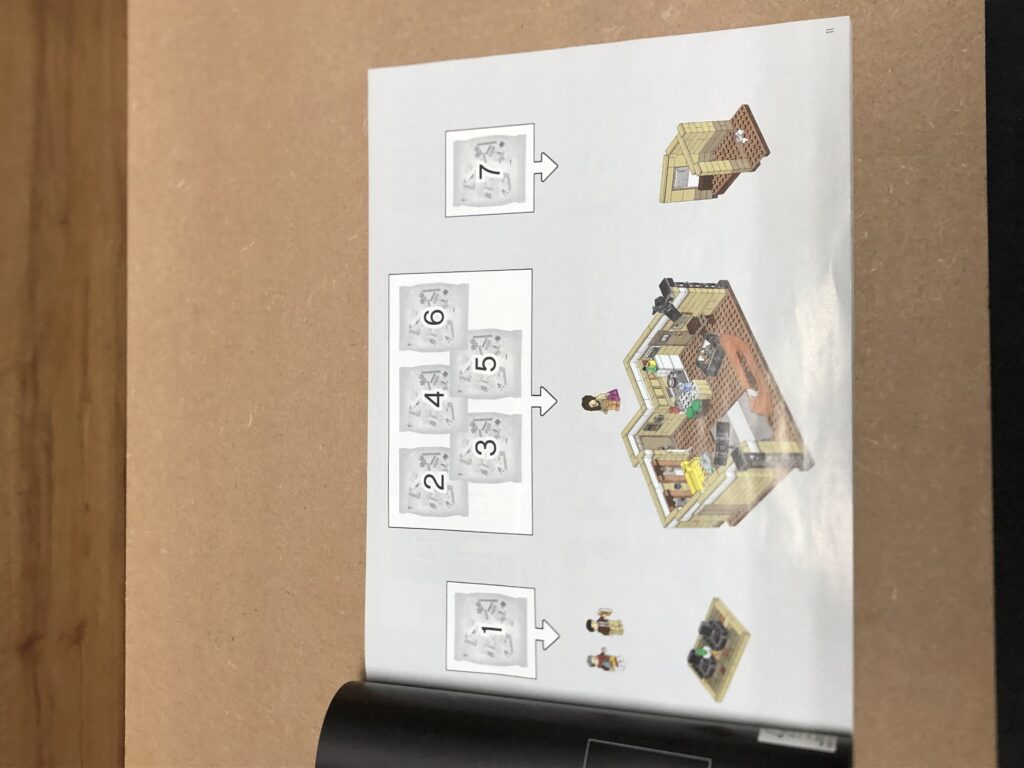
The box features the Friend’s iconic logo with the picture of the two LEGO® apartments on a black background, it features the characters on the bottom right corner with a blue LEGO® pieces band at the bottom stating the set name and piece count of 2048. Brickset has the piece count of 2047, but you are welcome to count for yourself. To be honest I don’t know why LEGO® chose all the 18+ Adult sets with the black background because on store shelves it does not really pop out at you and I find it very odd, adults do enjoy bright colours and fresh backgrounds I just find the adult box art unappealing and rather boring, even the instruction manual cover is black, luckily the instructions are in a lighter background so you can actually see what piece goes where. Talking of the instructions you get a heavy book with 291 pages, with some lovely pictures and notes from the designer and an overview of all the characters featured in the set. The set comes with 15 bags and a sticker sheet with 17 stickers to apply.

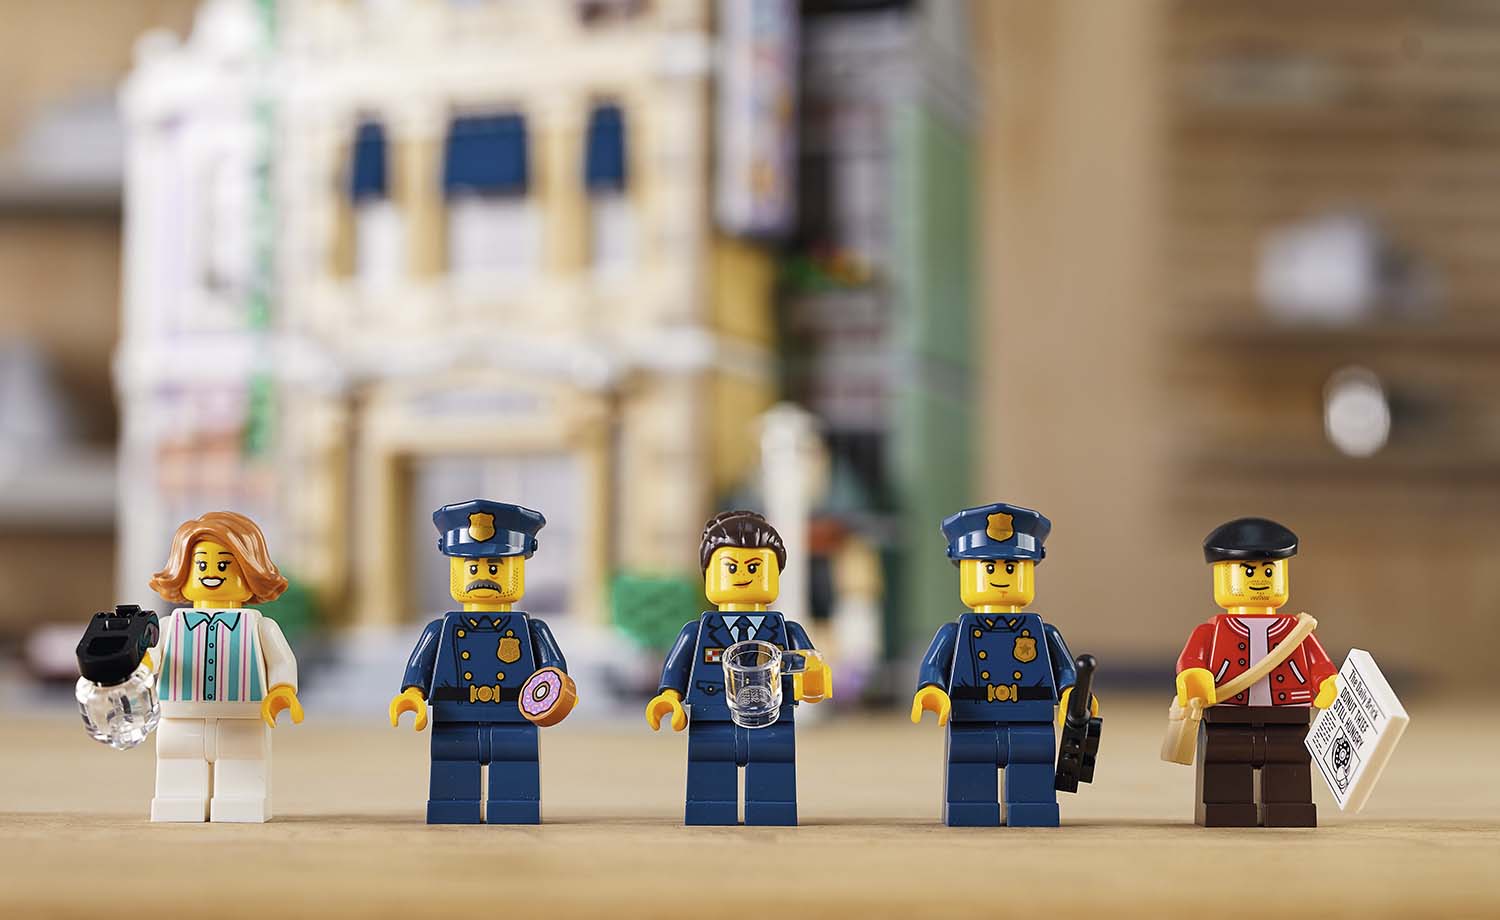
The all-important Mini figures

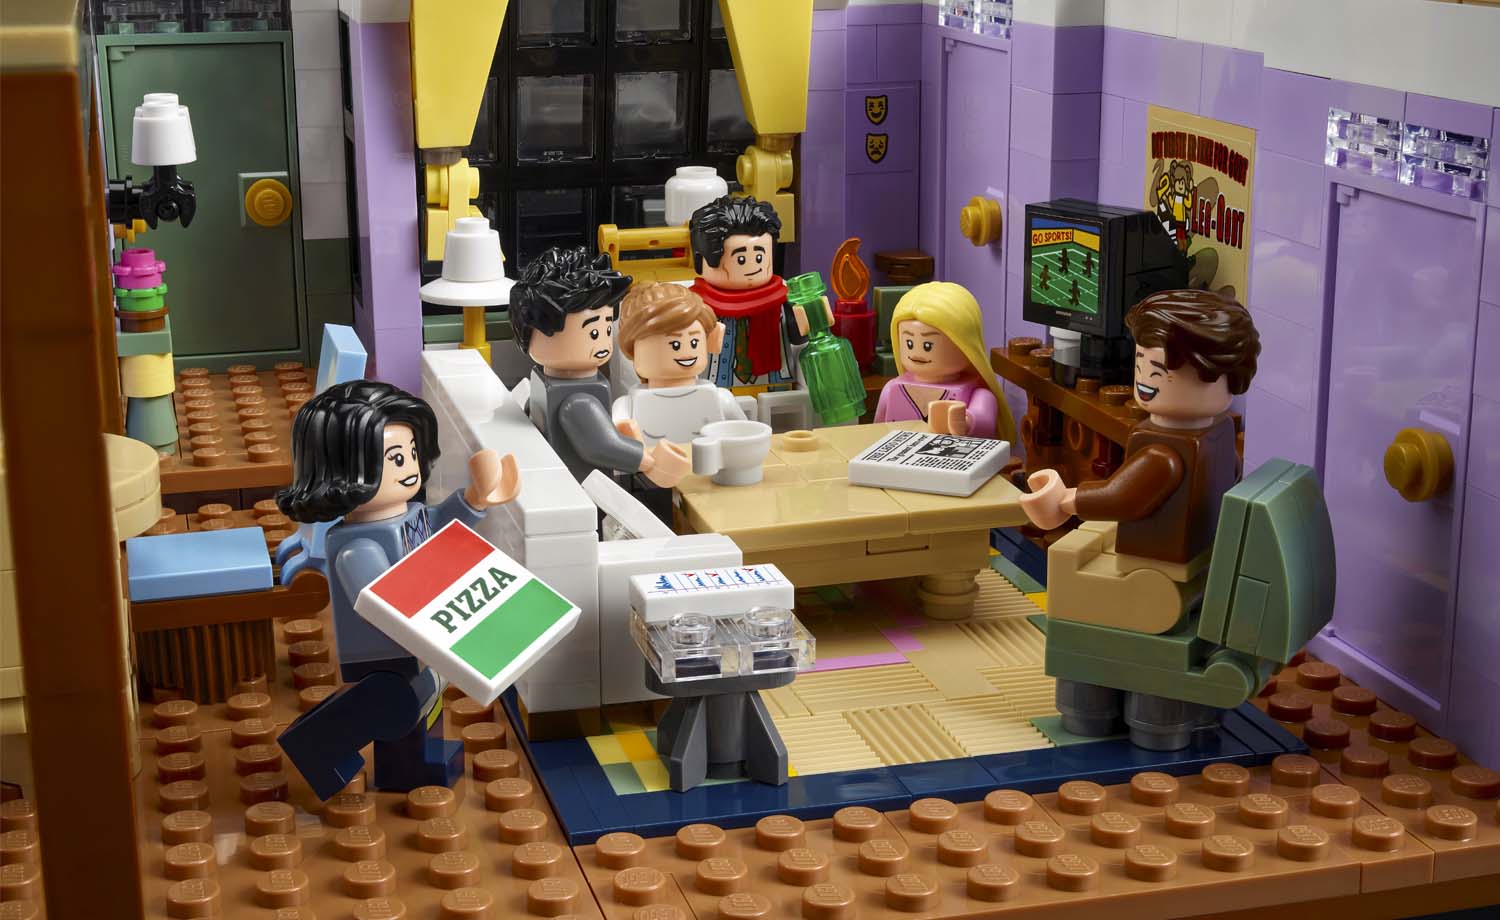
Rachel: This mini figure has matured from the last figure we received in the Central Perk set, she has a beautiful long ponytail and only Rachel’s character can pull off a printed cropped turtleneck, plaid kilt and knee length socks which makes her look fashionable.

Ross: This mini figure is based on the season 5, episode 11, and ‘The one with all the Resolutions” where he shows off his leather pants. Friend’s fans will know how that turns out. He has a long sleeved grey collared shirt; the hair is a perfect resemblance to Ross.

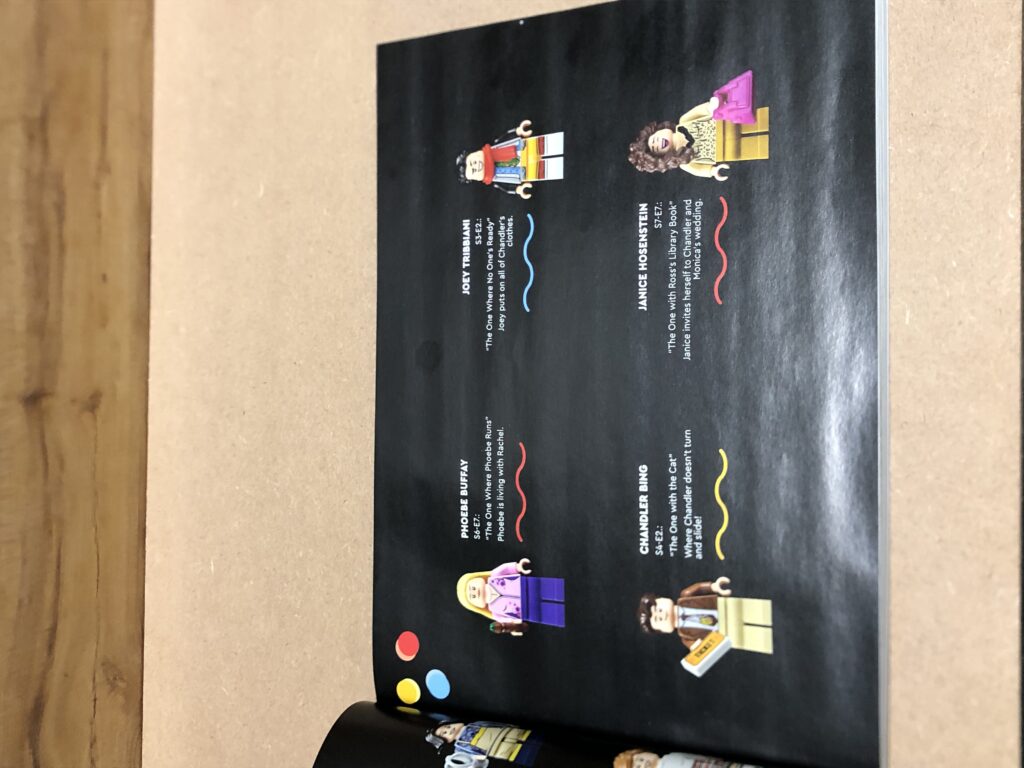
Joey: This is Cerry’s favourite mini figure because as soon as you see his torso you know the episode. “The one where no one’s Ready” Chandler and Joey have a fight over the couch and it escalates to where Joey does not have any clean underwear to wear with his tuxedo and to get back at Chandler he wears all of his cloths. (This was a two part episode and a must watch for non Friends fans) The legs are nicely printed and he has a scarf to represent the amount of cloths he has on.

Chandler: His character in the series has never had the best dress sense so it is great that the LEGO® designers have created his torso with a brown jacket and a very ugly tie from his collection. Nice hair piece which looks like a harry potter hair piece re coloured to brown. Chandlers alternative face print of him laughing is a nice addition.

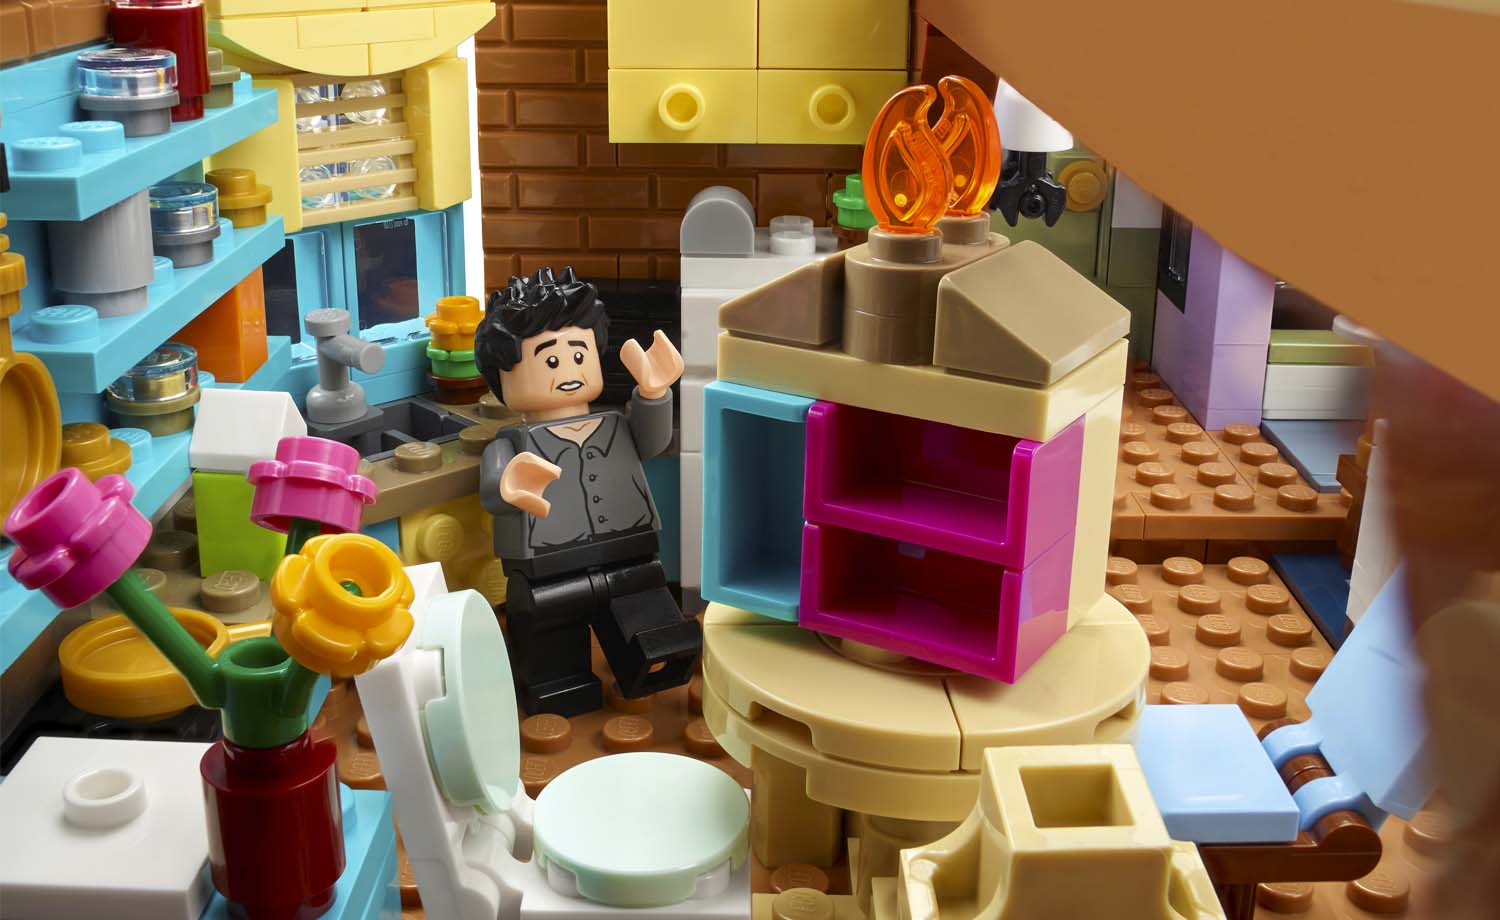
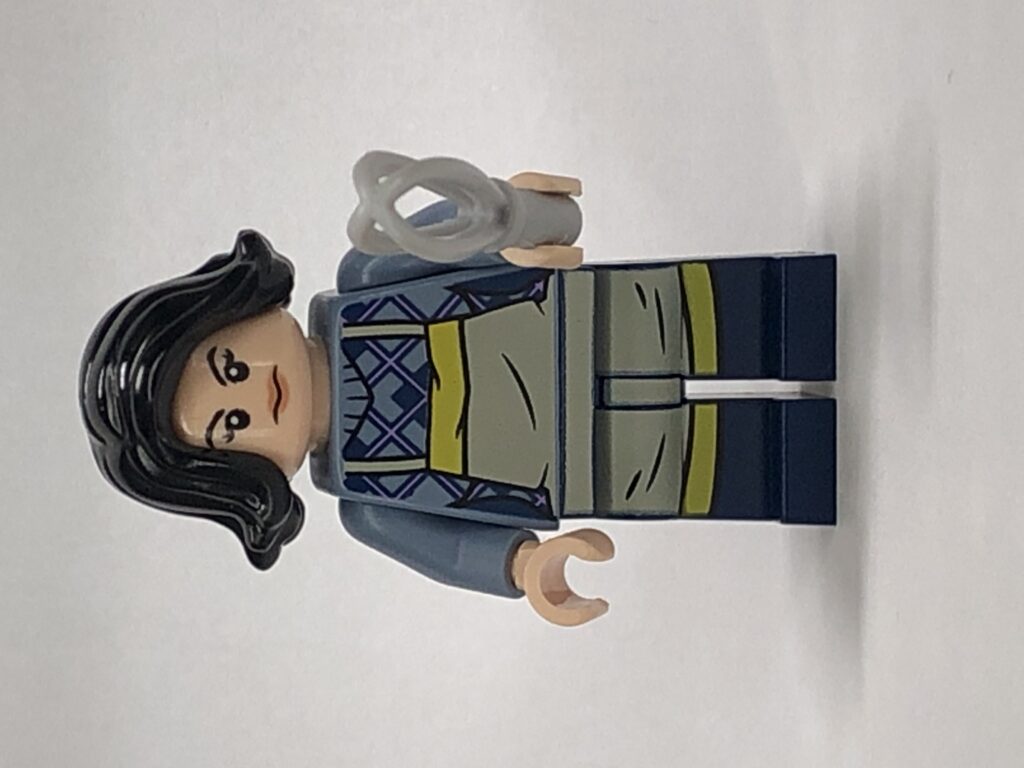
Monica: Her hair piece has changed to a nicely moulded longer style; her mini figure is based off the episode “The one with all the Candy” where she makes candy for the neighbours to get to know them better and it all goes wrong. Her legs are beautifully printed to match her torso and are well matched to the episode.

Phoebe: She has a really nice flowing moulded hair piece with a nice pink cardigan torso with purple flowers, and plain purple pants, on the torso’s neckline you can make out a necklace printed in silver, we both find this character rather bland has she has such a spontaneous personality in the series and wears lovely different outfits throughout the. We would have liked to see her in a printed floral dress piece to match her personality on screen.

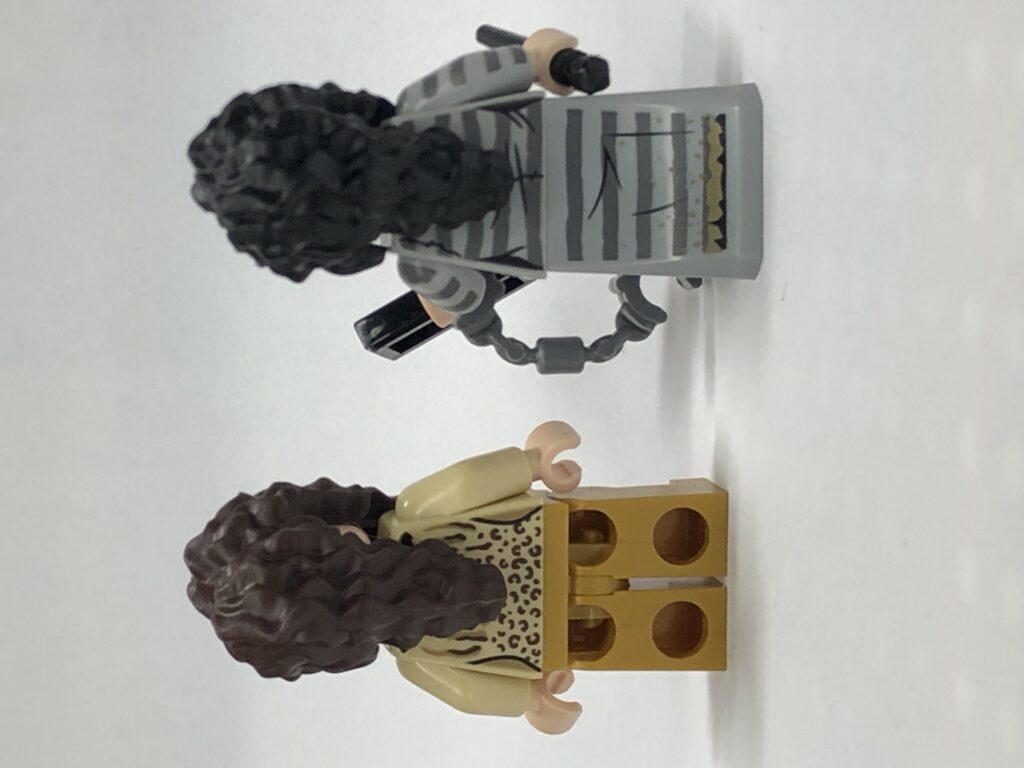
Janice: Central Perk we got Gunther and now we get another memorable figure in Janice, the torso is classic Janice style, leopard print top with plain legs and with the printed laughing face print you can almost hear her iconic laugh. Her hair piece has been adapted from a harry potter mini figure Bellatrix Lestrange but in dark brown.
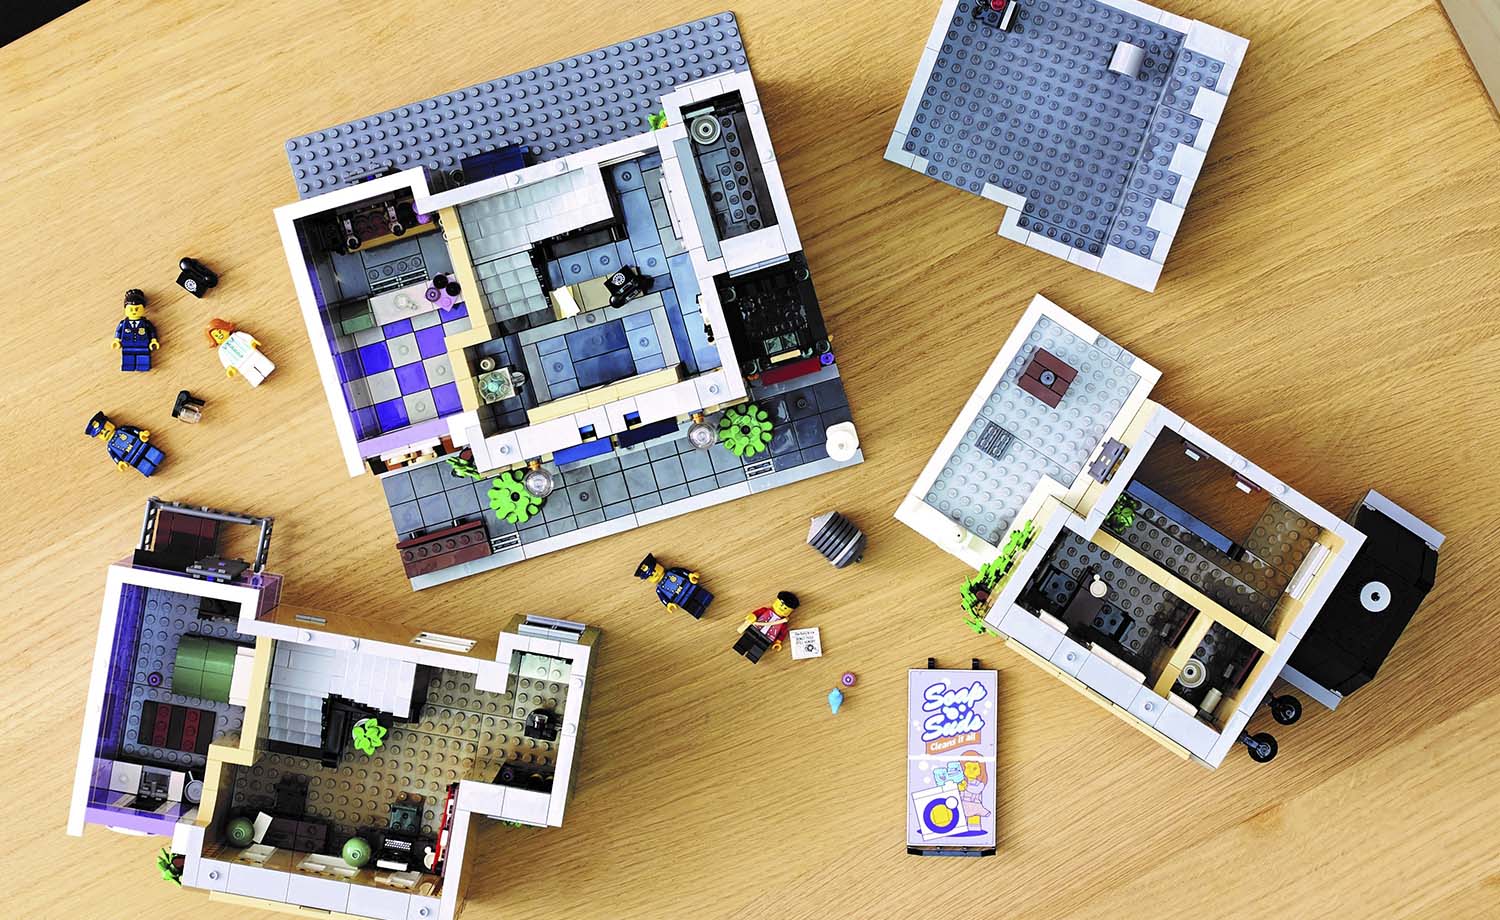
The Build

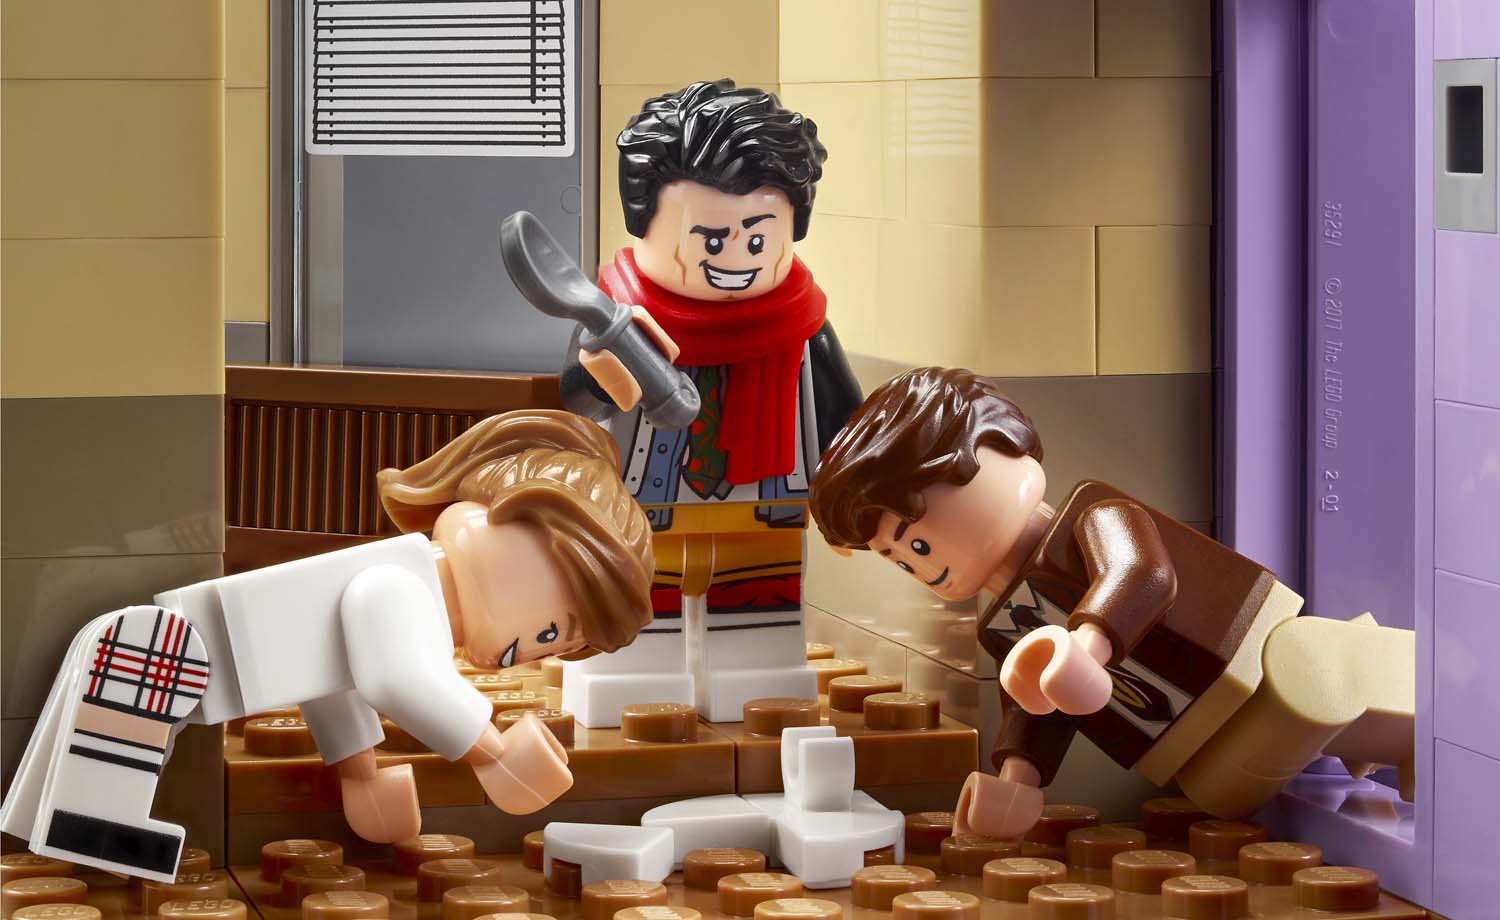
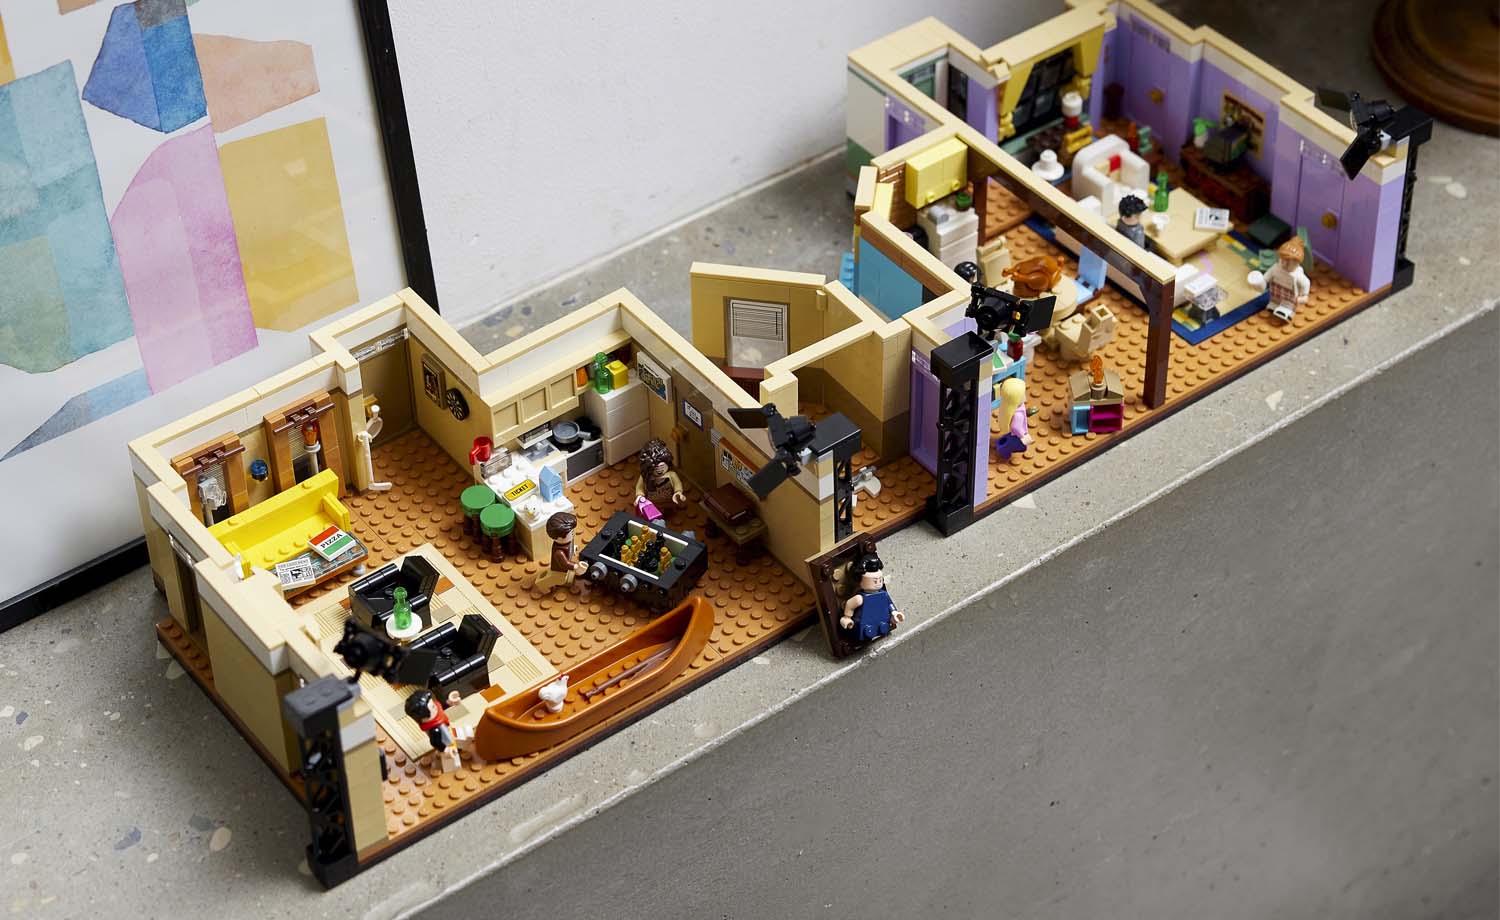
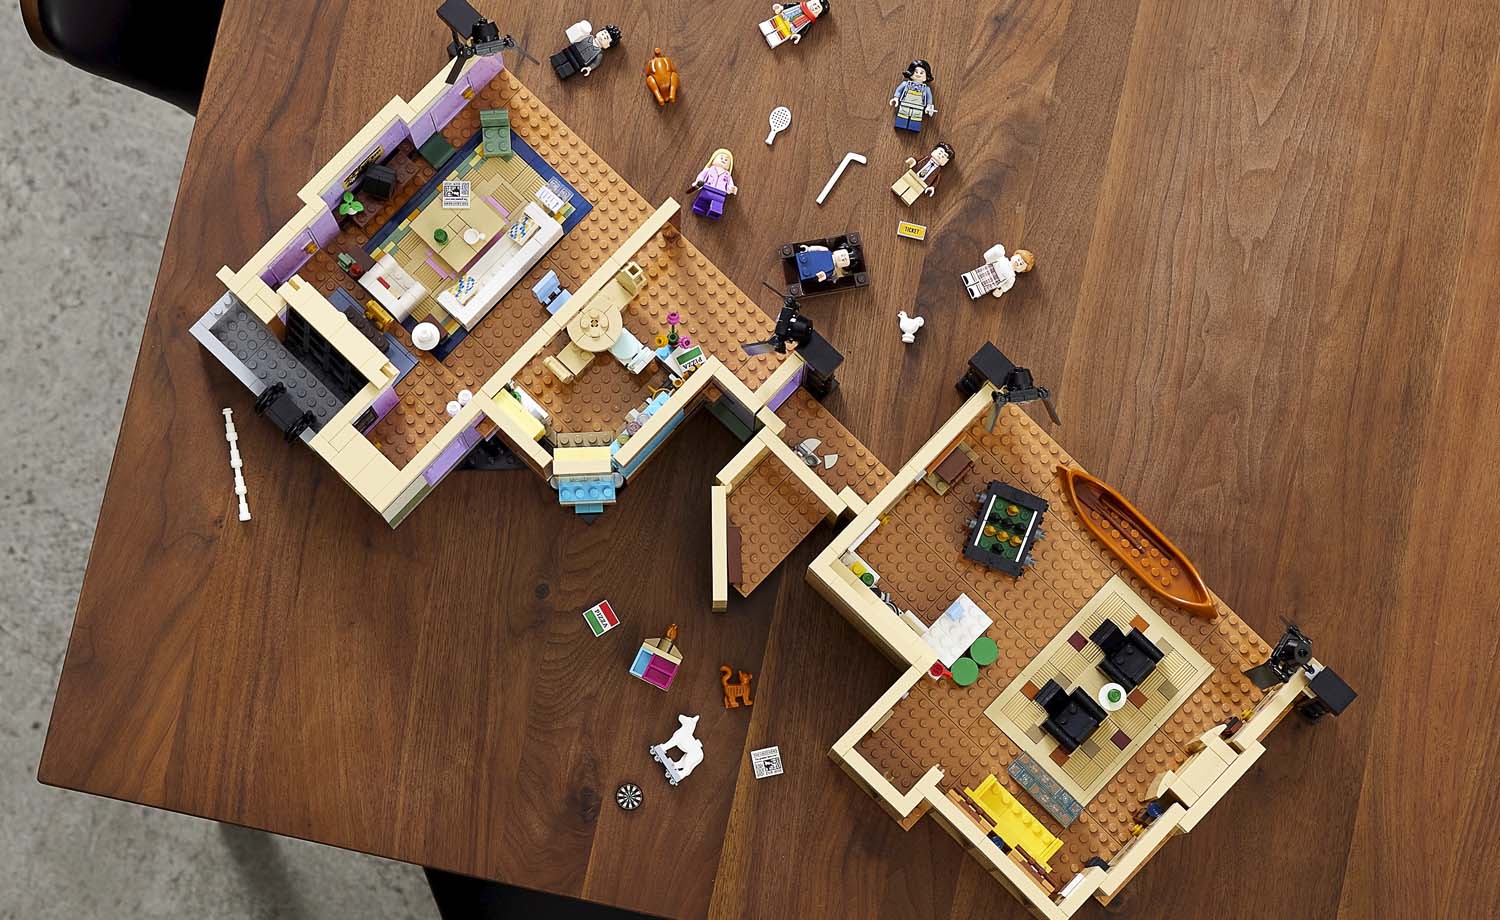
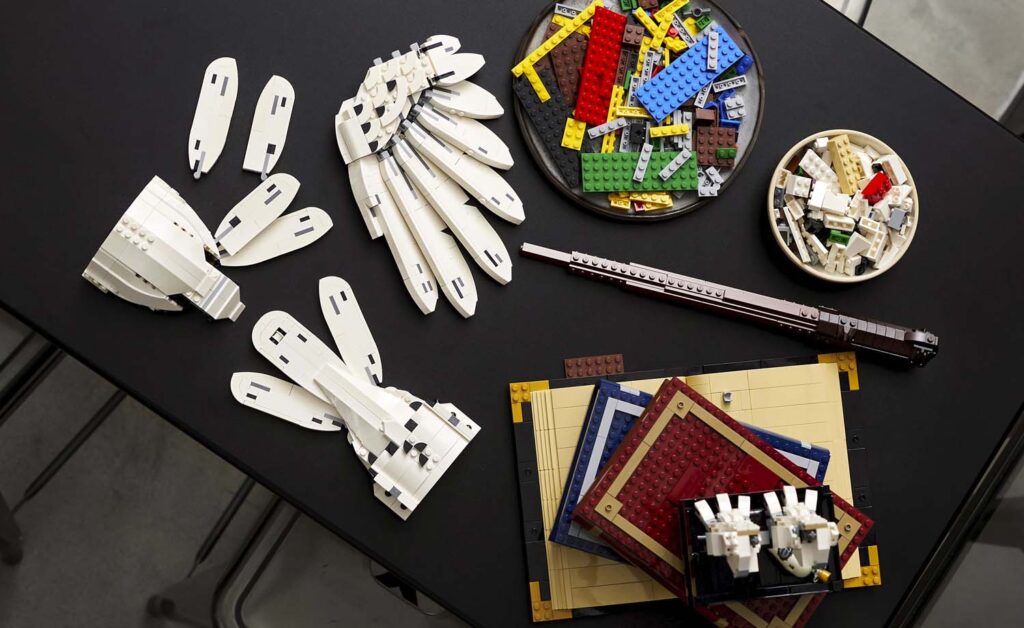
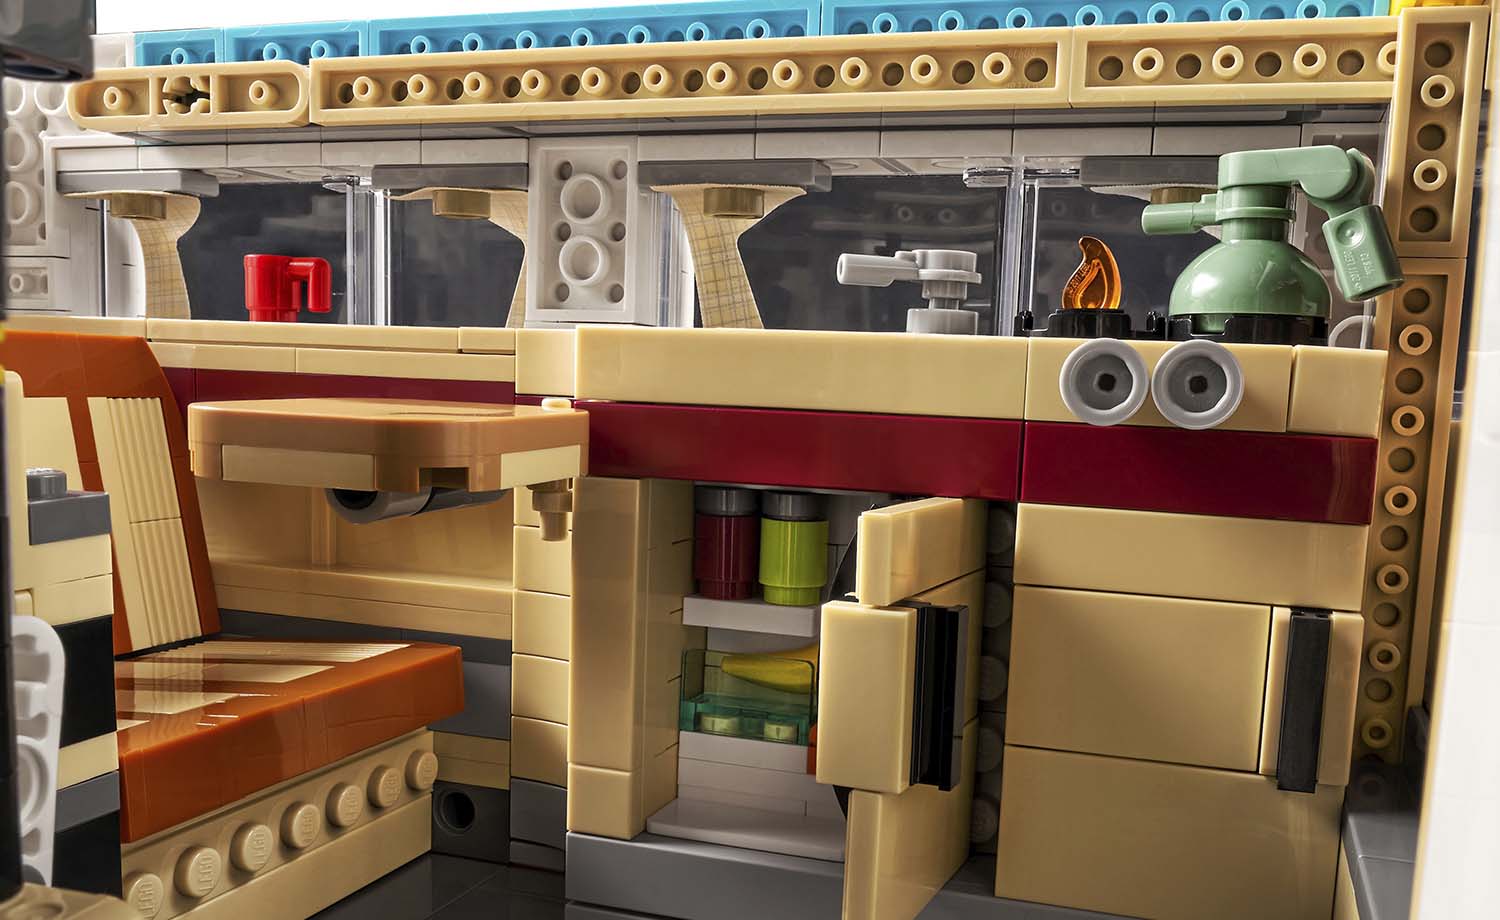
Very enjoyable build and had a similar building experience to the Central Perk set. The same building techniques are used for the mats and furniture, not surprising as the fan designer had input in the building of this set. The best parts where all the Easter eggs that came out of every bag. When the hall way was finished it reviled the episode where Ross, Rachel and Joey eat the pie off the floor. Finding the Kayak, Duck and Chicken were an absolute treat.
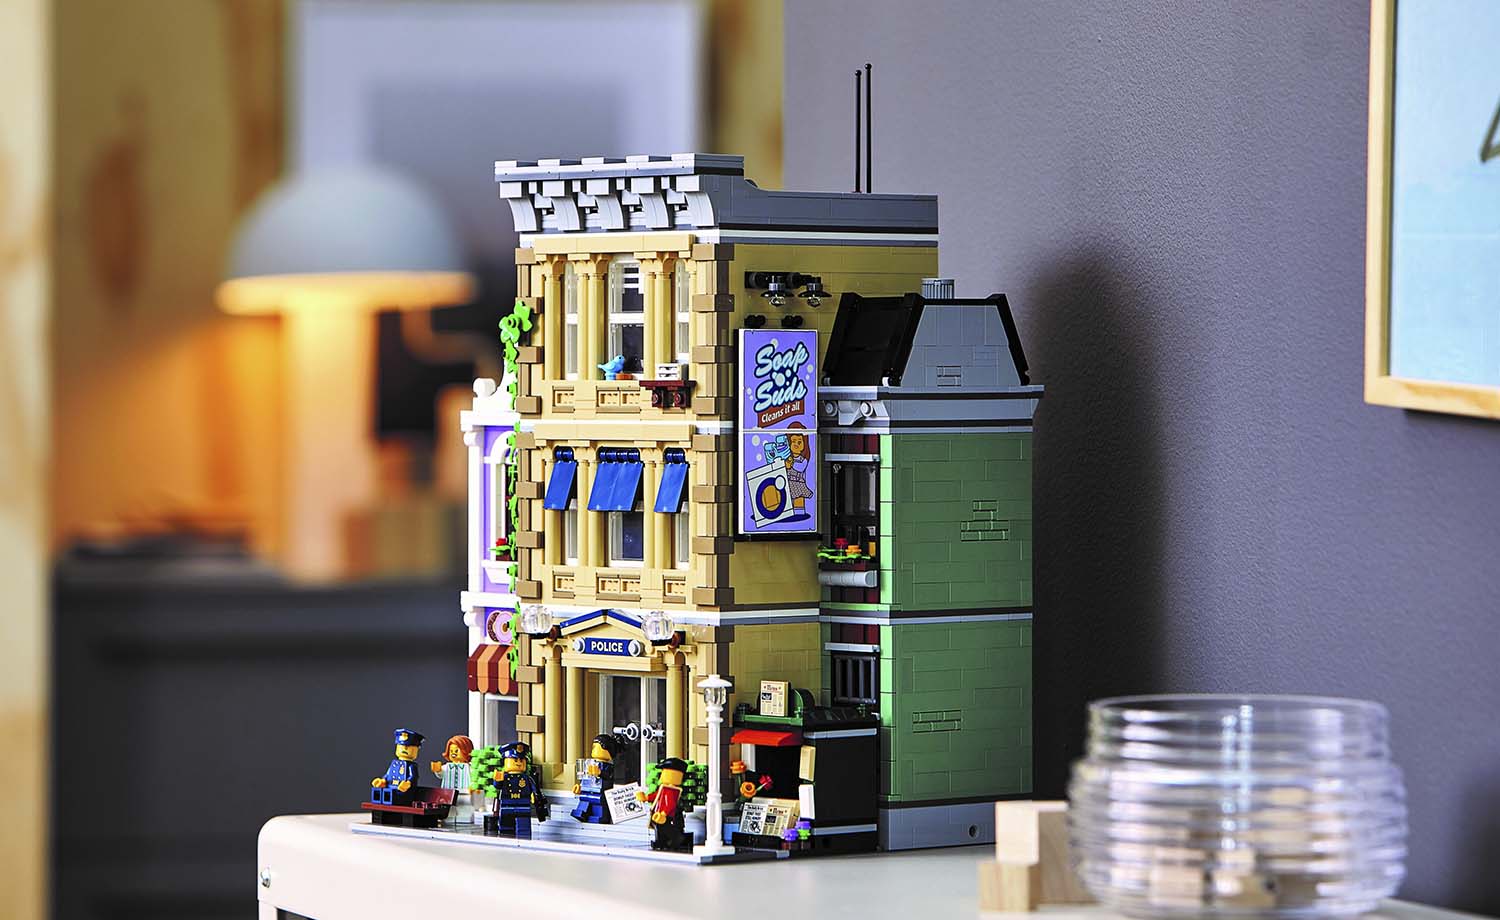
Final thoughts

A must for Friend’s fans but even if you are not a Friend’s fan the details in the two apartments and the pieces would sway you to buy this set. Lovely use of colours and the addition of the lighting give the feel of a studio set, which you can remove if you want to display this set without them. This set takes up a lot of space so make sure you have enough room to display it. However the apartments can be separated and you could display the Central Perk and Apartments underneath each other in a display case.

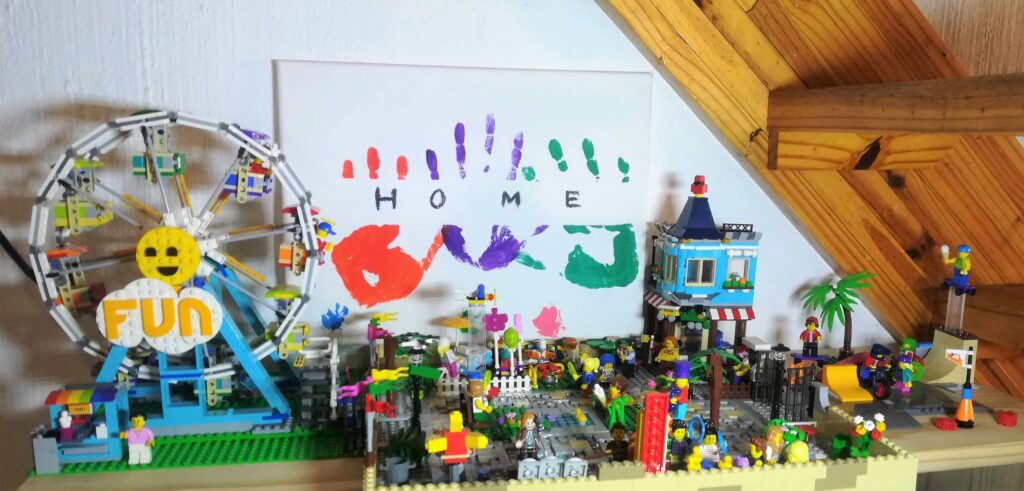
Here is an alternative build https://rebrickable.com/mocs/MOC-90906/beewiks/10292-friends-the-apartments-in-photo-frame/#details

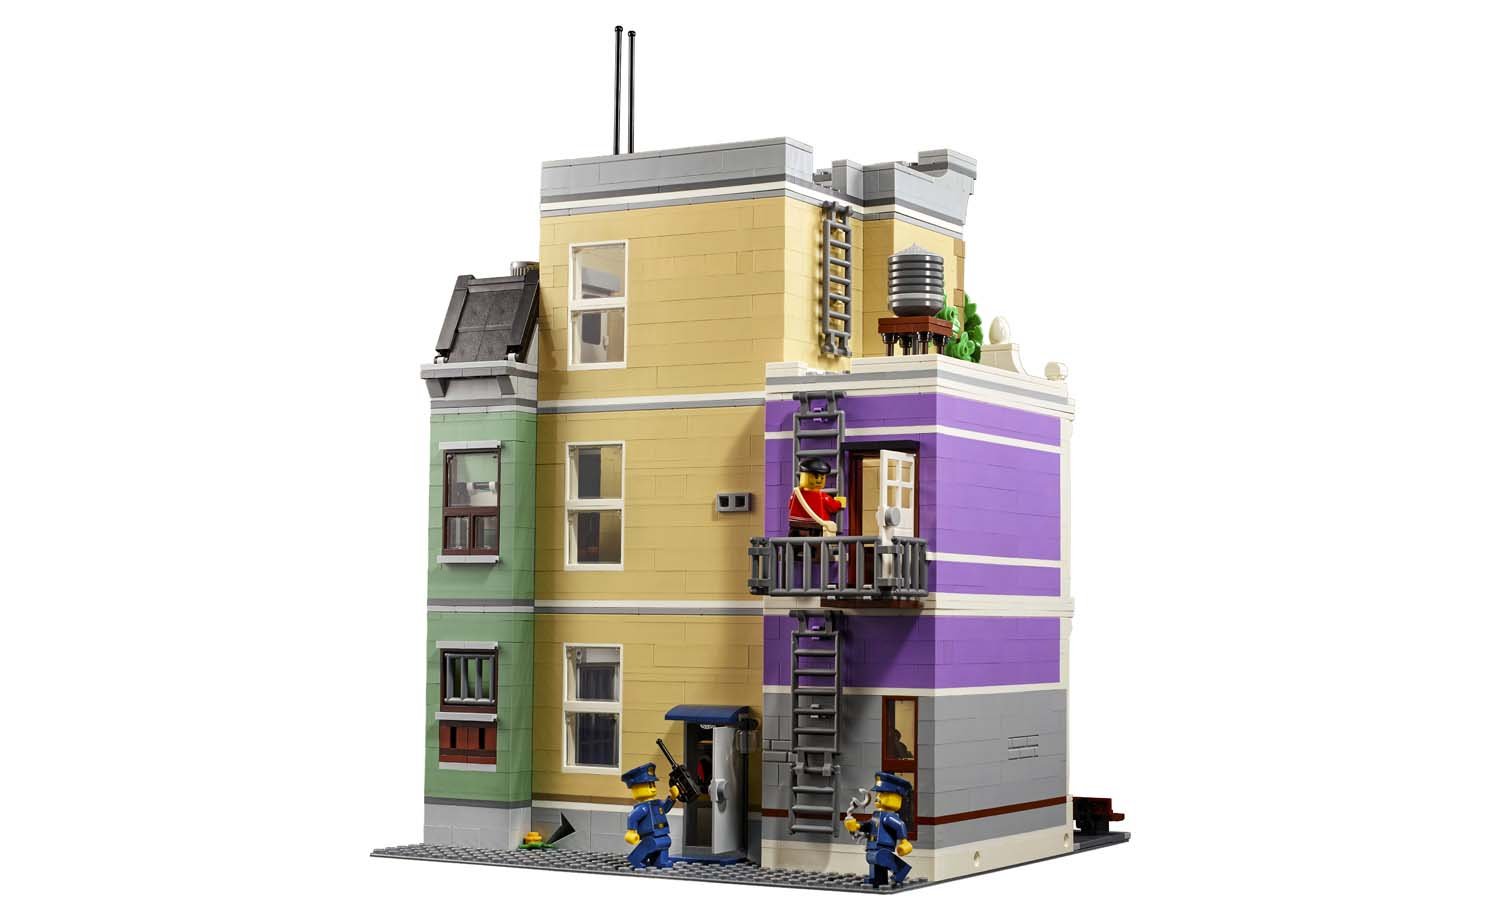
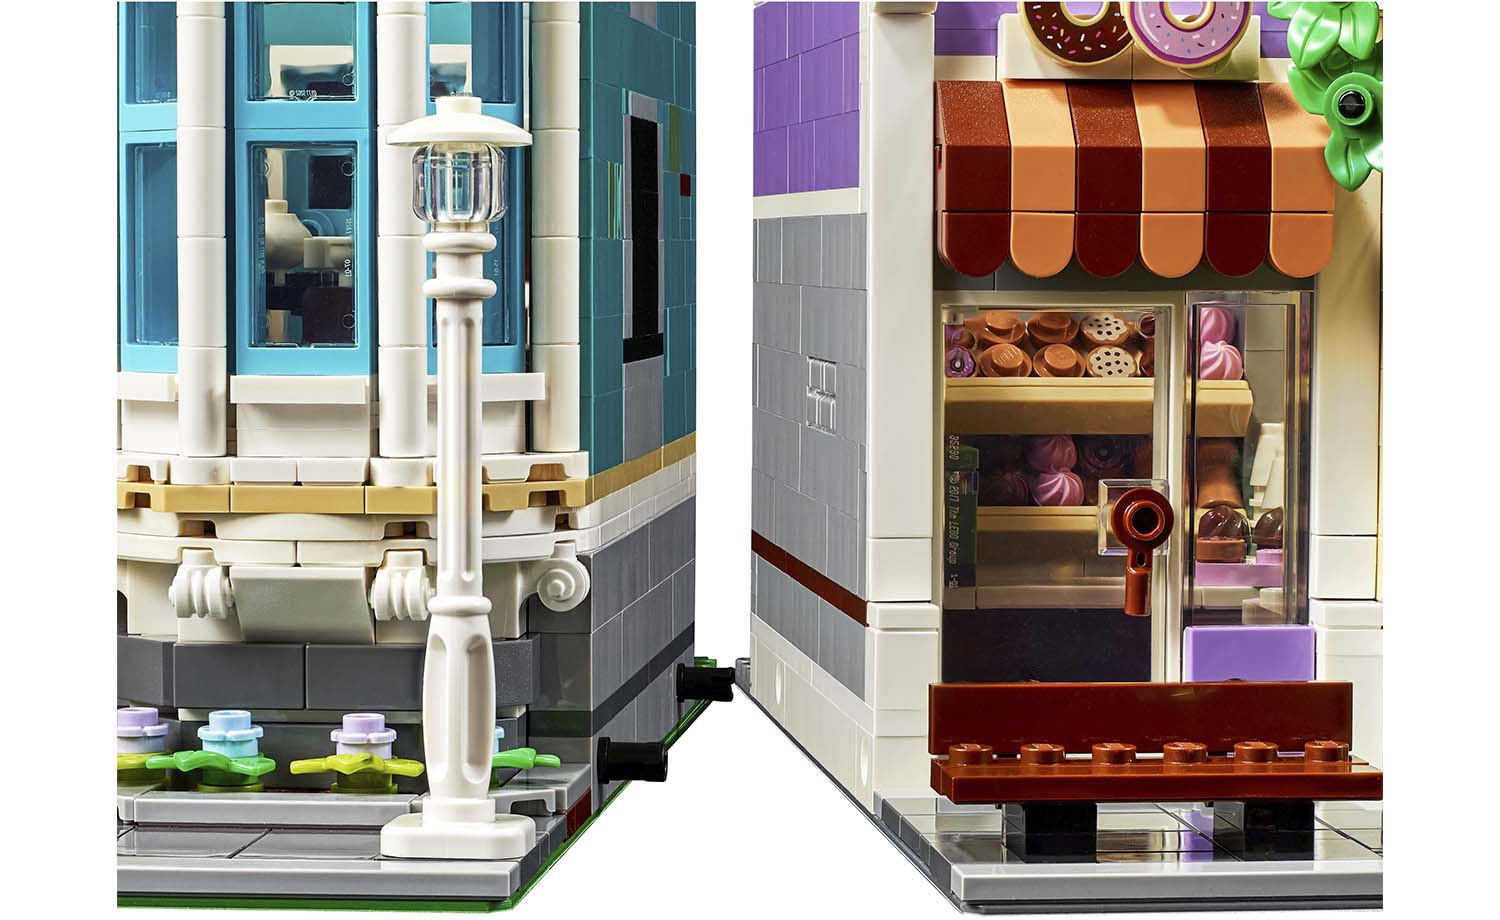
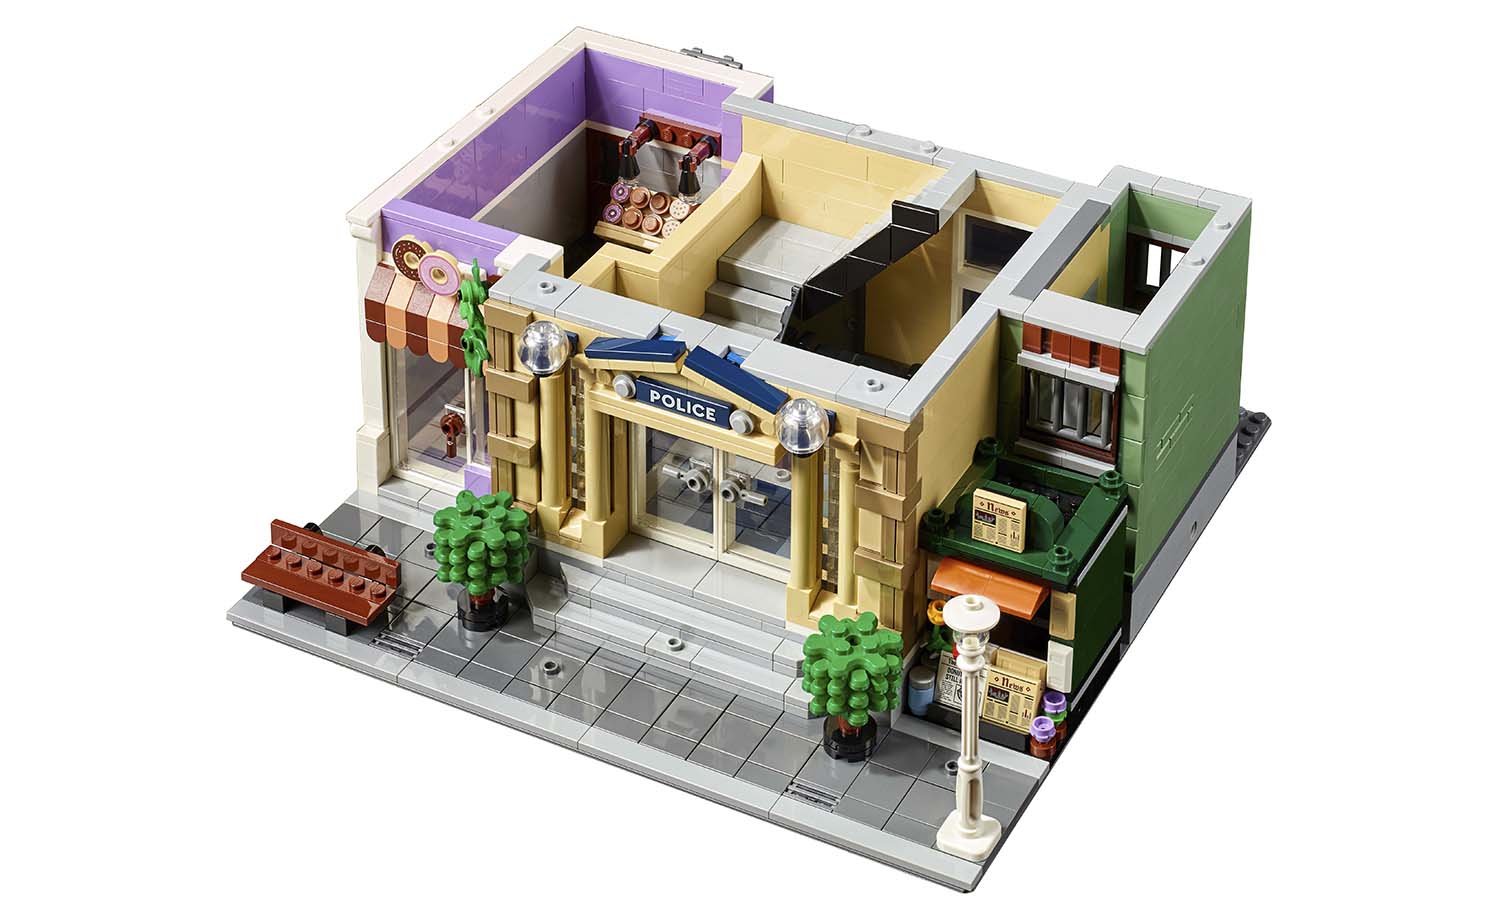
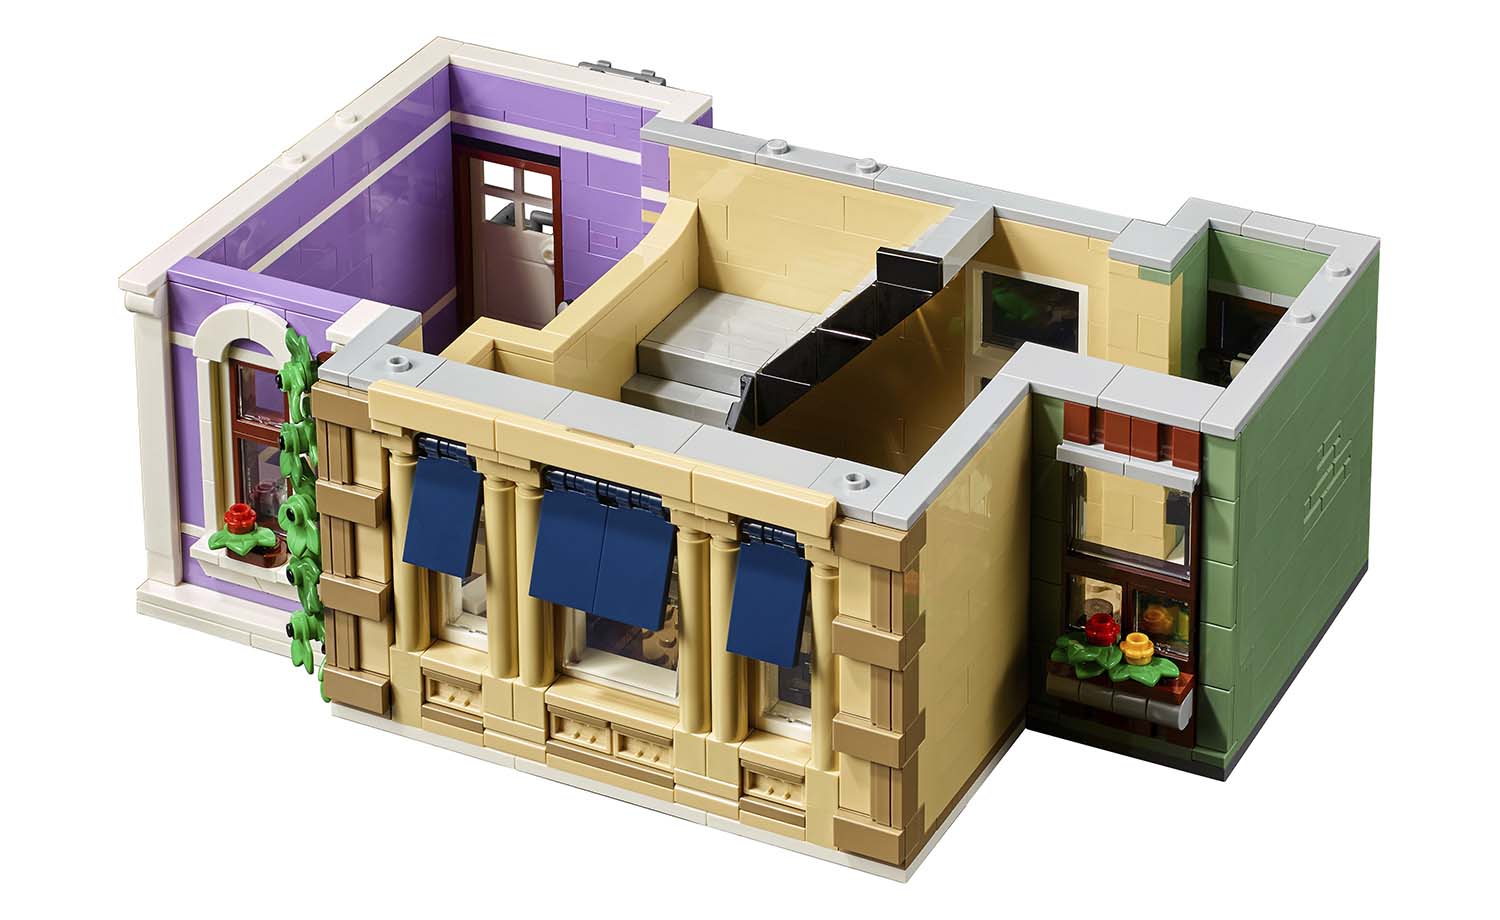
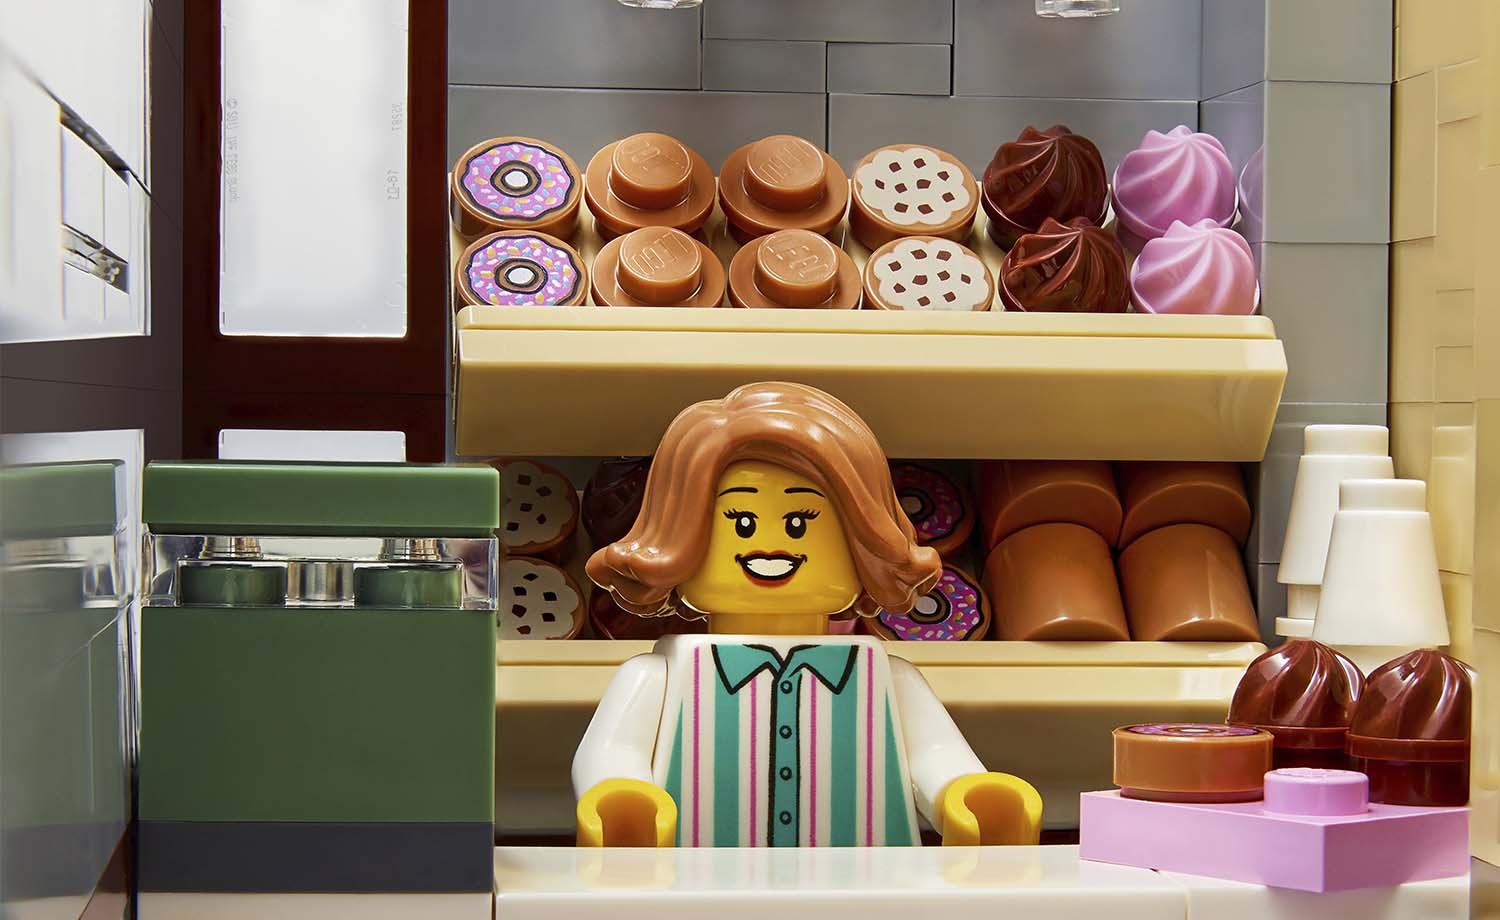
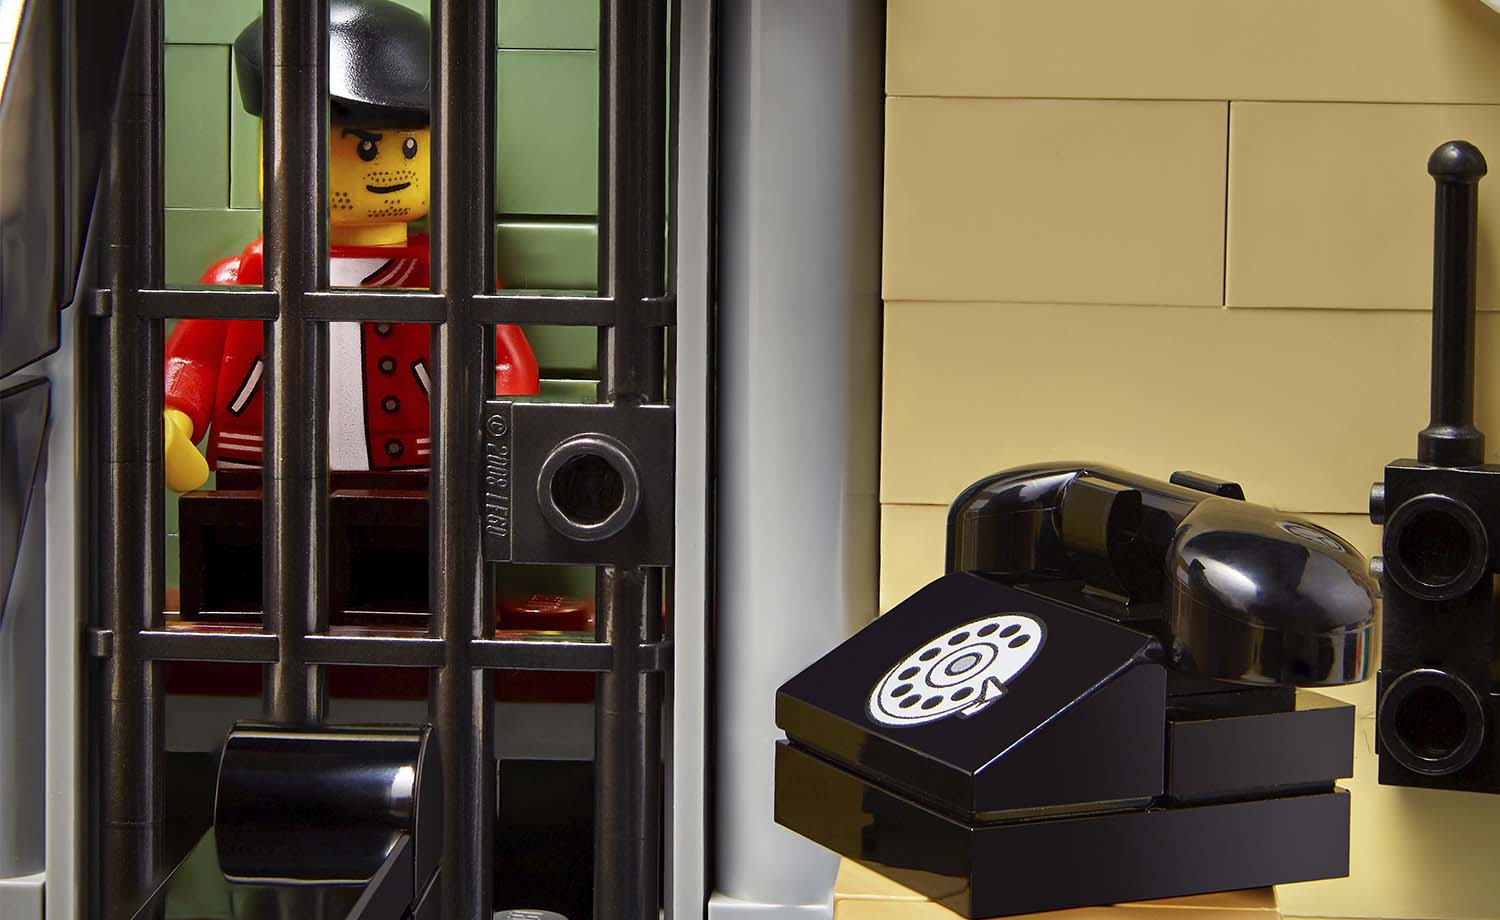
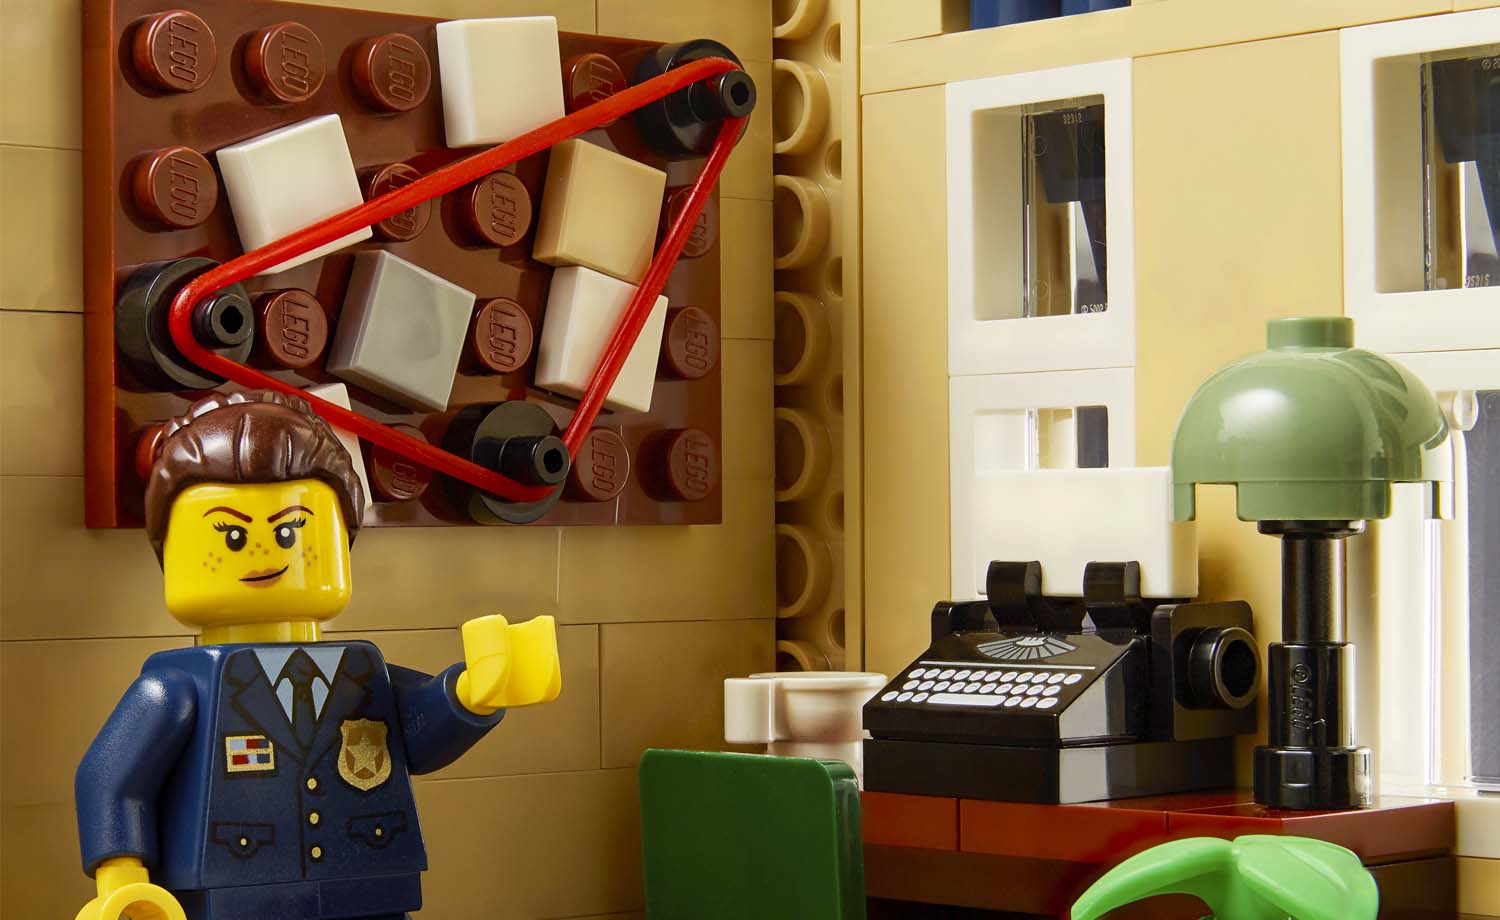
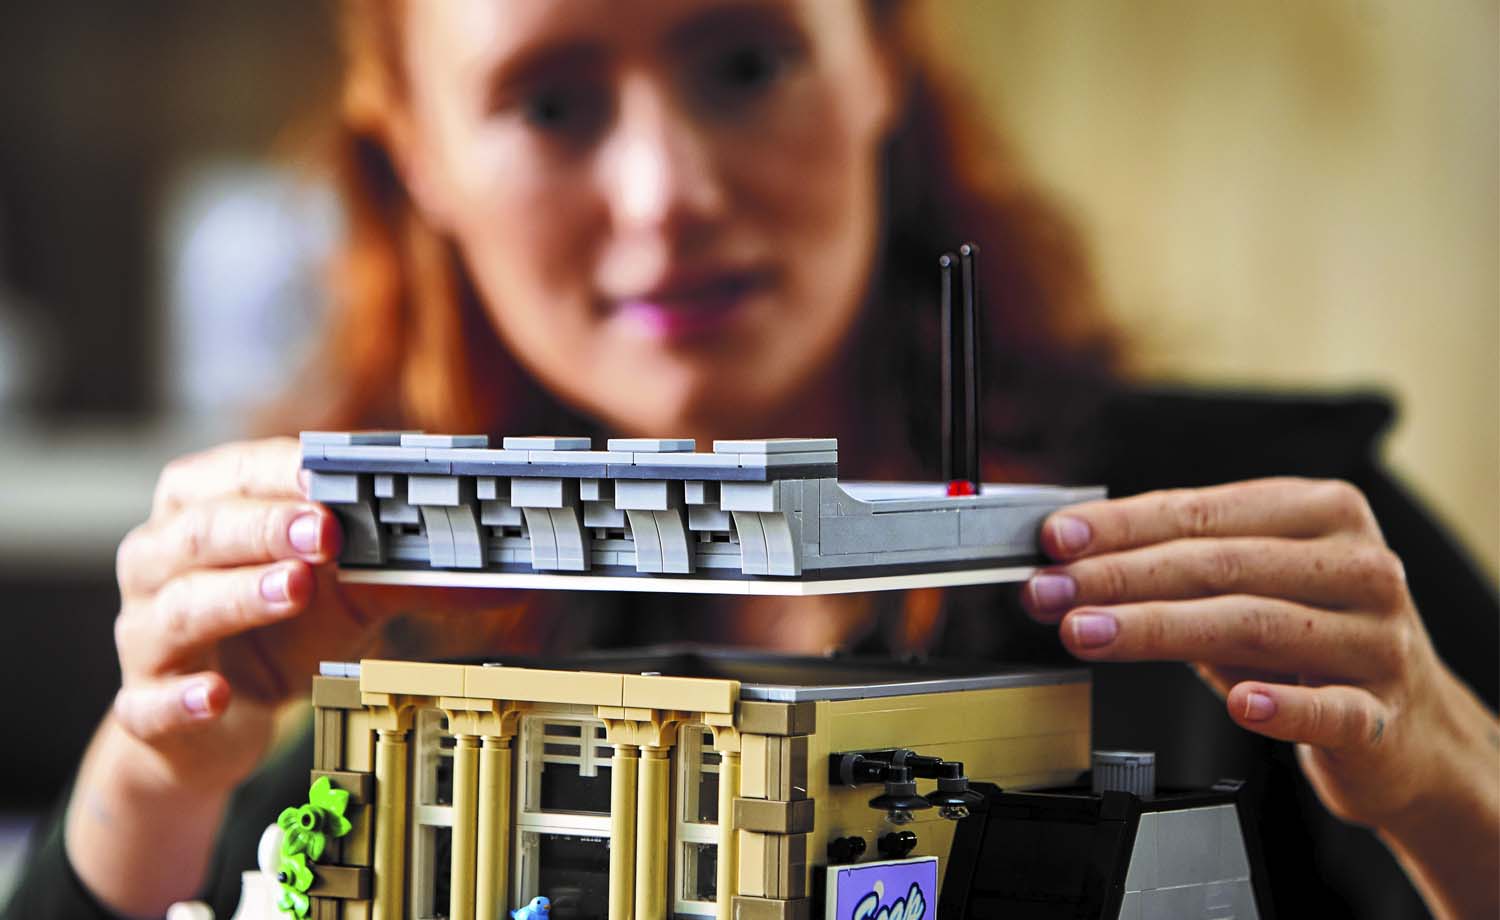
Press Release images:

76391 – Harry Potter™ Hogwarts™ Icons – Collector’s Edition Review

By Andi Glogauer (SAFOLs Member)

Firstly, a disclaimer – I am fully certifiably Harry Potter obsessed.  So, if a Harry Potter Lego set comes out, I am likely to buy it, not because it is Lego, but because it is Harry Potter.

The only non-Harry Potter set that I own is the flowers set.

Secondly, I am not an advanced builder, and I struggle with perceptual issues, so I get help from my son if I need it.

Thirdly, I like cute and shiny things, and the fact that this set comes with potion bottles, gold minifigures, a golden snitch and a chocolate frog meant that I was sold from the outset.

Unboxing the huge box revealed 22 bags; an instruction book (which has lovely information at the end of each section, as well as information about the designers) and a small sticker sheet. (Yay! Fewer stickers meant printed bricks.)

The first part of the build was the wand, and I couldn’t figure out whether the core was there for stability or a representation of the actual core of the wand (phoenix feather). Needless to say, it did both jobs well because you can swish and flick the wand without any issues. It does not actually work – although that is quite fortunate since my son tried to do a spell on me to keep me quiet…

Harry Potter’s glasses are lovely and have round pieces that I have not seen before (one of the things that we love when building Lego is finding pieces that are new to us) and can actually be worn if you want to.  My only issue with the glasses is that they have no specific placement on the complete set.  I have put them on top of the scarf.

The base formed by a pile of books is incredible and creates a stand and support for the huge Hedwig.  I was fascinated by the engineering/technical side of the insides of the books, but I did need some help with some of them. The instructions were not always that clear to me, and I missed some steps without realising until a bit later – that was easily fixable, and I eventually got into a rhythm of how the build works.

It is not obvious that the bottom book is Tom Riddle’s diary if you don’t know any better, and I would have loved the designers to have added an ink splash or some writing on the book. The design of the open pages is wonderful and gives a very nice finish. I especially liked sliding the pieces into place rather than the usual pressing down of studs. The attention to detail on the books – particularly the spines and the angles that the books are placed is great. It looks so impressive that I think that the set would be ideally displayed where you can view it from all angles. You definitely miss out on seeing details if you place it against a wall or shelf.

And then we get to the great mystery… the box on top of the books.  It is an ornate, black box with the initials “H.G.” printed on one of the bricks. Who is H.G.? We had a lot of discussions about this. It seems to be Hermione Granger’s, but then why would Harry have Hermione’s potions? We wondered if they had made a mistake, and it should have been H.P. More about spelling mistakes later.

Building a giant owl – a feat of design and engineering. 

It’s a big owl, and although building some parts of Hedwig are monotonous and repetitive, it is incredible to see the owl take shape. The separator tool came into use a lot here as I sometimes struggled to see exactly where I was in terms of the placement of pieces. Once again, there were a few pieces that I had never seen before. 

For anything that needed two elements built, it was a joint effort between my son and I. We built the elements simultaneously or he sorted pieces while I built. Each feather on the wings and the tail is attached by either a ball or a hinge joint which make it possible to adjust their angles. The attention to detail with black and grey highlights gives her a beautiful and realistic effect.

The exciting parts – shiny and colourful – the potion bottles look incredible and are very satisfying to build.
The bottle tops look like realistic stoppers.  All the bottles can fit into the potion box. The labels for each bottle have meanings related to previous Lego sets, as well as classic Harry Potter references. As a bonus, the Felix Felicis vial glows in the dark.

The scarf is customisable to your choice of house.  It seems quite a simple element compared to the rest of the build.  I chose to use the colours of my house, Hufflepuff, but then wondered if it was true to the set because this is, obviously, Harry’s belongings, and then logic would say that the scarf should be in Gryffindor colours.  I have also heard people complain that the colours for the scarf are too bright and not true to the colours of the Hogwarts houses.

The golden snitch is also a quick, but very clever, build and is attached to the base with a technic piece so that it “floats” next to the books and potions.

The last element is the acceptance letter which is hinged to look like it has been folded and unfolded and is placed in Hedwig’s claws.

There is room to add your own name on the acceptance letter – again, this is Harry’s set, and I’m not sure that I will write my name on it.  Also, this is an adult set, and I don’t know how many adults want to write their name on a Lego set in permanent marker.  There’s a lot of upset amongst Harry Potter fans (and Latin purists I guess) about a spelling mistake on the crest on the letter – “titillandos” instead of “titillandus”.

Overall, I think that the finished set is really stunning and makes a great feature piece for any Harry Potter (or Lego) fan. It towers over Hedwig 75979 and is definitely a conversation piece and a beautiful addition to my collection.  I highly recommend it.

31119 Creator 3-in-1 Ferris Wheel Review

Reviewed by Riëtte Badenhorst (SAFOLs Member) and her son Gabriel

Pieces 1002, Age 9+, Released June 2021, Price R 1599.99

This build was done by Gabriel, almost-12 year’s old, and these are his views on how he liked this set.

Why did you decide to build the Ferris wheel build first?

I liked to build the Ferris wheel first because it’s the biggest build of the three.

What did you like most about the build?

I liked that I was able to motorise it with the LEGO® Technic parts.

I liked that it is interactive, and we can put people into the carts, and they have different colours that makes it fun.

It was easy enough to build and didn’t take too long.

The colourful style is very eye catching and we can put it with our Fun Town at home.

What changes did you make to the build?

The set is on 2 16×16 baseplates but we put those on a full baseplate to be more stable and so we could add other things like the ticket counter on it.

If Mom gets another set of this, which of the other two options would you build?

Definitely the bumper cars.

76182 Batman™ Cowl Review

By Allan Taylor (SAFOLs Member, CapeLUG Member)

Weighing in at 410 shiny black parts, split between three bags of bricky fun, set number 76182 Batman™ Cowl is yet another sterling product from the LEGO® Group.  This set is an amazing build of the headgear famously worn by none other than Batman himself!

Right from the get-go the packaging and even the manual is set to impress with its delightful and informative preamble on the opening pages to its stylish typesetting for the instructions themselves on beautiful glossy black paper.  This set sports an 18+ age recommendation and is clearly designed to appeal to an older audience.

So… let’s get to the actual build, shall we?

As with many of these busts, the fact that the base is designed to be hollower raising it by one plate height via strategically placed studs near the corners, makes this base tricky to build on because it isn’t stable unless you are working on a perfectly flat surface.  As I was building this set in our bedroom so I could also spend some time with my missus I did NOT have a perfectly flat surface to work on and frequently during the build the support struts would need reattaching to the base which would also require a bit of rebuilding as bits had popped off when I absentmindedly applied pressure.

If you’ve built any of these amazing busts before, you will be familiar with the start of the build as it follows roughly the same formula as previous sets. Establishing the base and support during the early steps so that it can all be incorporated deep within the final build, adding the essential structural integrity with tasteful engineering which is well obscured from view once the final product is on display.

The base design does differentiate itself slightly from previous Marvel and Star Wars busts by adding a few aesthetic elements more fitting with the Batman milieu in the form of some Trans-Black cheese slopes and some of the newer triangular corner tiles (and I REALLY hope these become more prevalent in future sets as they are invaluable to any MOC builder’s arsenal).

Another departure from the norm is the use of trans black 1x2x6 bricks to form the outer layer of the central pillar.  This trans black “smoky glass” is a theme that is evident throughout the entire build, but it just works, and I think Batman himself would approve of such well implemented design aesthetics.

As you progress through the build, raising the now well-known and cleverly design central cavity, one also notices that there are elements added at this initial stage which will nicely round out the completed design by elegantly complimenting the various sub builds which comprise the actual shaping of the bust, such as the black curved and angled plates layered near the bottom.  This results in a slightly less “vanilla” design to the support structure whilst still maintaining the necessary sturdy but hollow outcome.  This is a staple of these builds as it brings down the total part count (ie the cost to you, the end user) as well as the overall weight of the model once complete, which is great because even as is these things can get pretty hefty.

Once the second bag of bits has been built and incorporated the model really starts taking shape and looking every bit as iconic as one would imagine.  The sub builds for the top, back and sides of the cowl are brilliantly designed and are both authentically gorgeous looking as well as extremely structurally sound.  They attach flawlessly with not much overlap and no finishing pieces added after the fact to blend them, this could not have been an easy task given the complexity of the source design.  The ears, historically tricky to pull off properly without looking comically out of scale, are PERFECT on this representation.

The third bag is almost exclusively parts required for the front of the cowl.  Here again we see the recuring theme of trans black, ingeniously used to represent form without attempting to recreate that iconic square jaw and chin in actual “flesh”.  This is smart for two reasons, primarily, as (in my humble opinion) when LEGO® has attempted organic, and specifically human, form for faces it has largely failed.  More relevant to the display factor though, is that it creates the impression that this cowl is not currently being worn but is ostensibly under lock and key in whichever dark recess the Batcave is currently occupying.  In simpler terms, it just looks so freakin’ cool man!

The shaping of the nose, eyes and eyebrows is achieved through a brilliant combination of angled pieces and cleverly concealed hinge elements.  The final satisfying step is snapping the singular printed tile piece to the base, letting all your jealous friends know that this is indeed… BATMAN!  The end result is breath-taking, resulting in a display piece any fan of The Bat can certainly be proud to have as part of their collection.

LEGO® has once again delivered an outstanding rendition of a much beloved character, continuing its streak of successful throwbacks to the genius of Tim Burton in the mid 80’s.  Also, unlike expensive behemoths such as the 1989 Batmobile and Batwing, the price point on this set makes it extremely appealing and justifiable as a display piece. My final thoughts on this set would be almost totally positive despite some small niggles regarding the base design as I mentioned before.  Zero stickers, one printed tile piece and non-excessive use of new elements makes this another set which could be quite easily sourced and built if one had the patience and so desired, which is always a plus in my book.  Also, if you ever had the heart to dismantle it, it would make for an excellent parts donor set (even for a NON-BATMAN related to build!).

40516 Everyone Is Awesome Review

By Luke Comins (SAFOLs Member)

This delightful waterfall of colour began with the LEGO® Company’s design vice president, Matthew Ashton, initially creating this awesome set for his own desk at LEGO®’s head office in Billund.

Visitors to LEGO®’s offices noticed and commented on it to the point where he was prompted to make it an official set.

Other than one LEGO® Architecture set, 21045 Trafalgar Square, which includes a tiny 1×1 printed rainbow flag placed on the inside of the National Gallery, LEGO® has never represented the LGBTQIA+ community in sets. Until now, well the 1 June 2021 release date to coincide with LGBTQIA+ Pride Month, this is the first LEGO® set dedicated to the LGBTQIA+ community in the company’s 72-year history.

One wouldn’t really get the main purpose of this set unless you are familiar with Gilbert Baker’s 1978 six coloured rainbow ‘pride’ flag. Red, orange, yellow, green, dark blue, and purple. Three further colours (pale blue, white, and pink) representing the transgender pride flag, and another two (black and brown) representing the diversity of races, ethnicities, and backgrounds within the LGBTQIA+ community are also included. All 11 colour stripes together are known as the ‘Progress’ flag.

The set number is 40516 and the set name is inspired by ‘Everything Is Awesome’, a song from the LEGO® Movie released in 2014. The song was performed by Tegan & Sara, both of whom are openly gay and vocal supporters of LGBTQ+ rights.

One wouldn’t know any of this though as LGBTQ+ (did I miss any?) is not mentioned anywhere in the accompanying instructions booklet.

The box design, being predominantly black works well as this is technically an 18+ set. The exception to LEGO® ®’s age rating system seems to be sets that are regarded as ‘collectors’ items and these adult-targeted sets, which the Everyone is Awesome set seems to share branding with are routinely rated 18+. A LEGO® spokesperson said “this set is intended to be a display model rather than a play set and was designed with our adult fans in mind. That’s why we have suggested the age-grade and used the packaging designed for our adults’ products.” I’m curious to know how many under 18’s felt/feel led to buy this set.

There are 346 pieces and the set includes 11 minifigures matching the 11 colours mentioned above.

All those alphabet letters aside, and I’m certain that this set is sure to have made the LGBTQIA+ folks ecstatic but, for plain old me I just saw 11 totally featureless MONOCHROME minifigures!

But let me first mention the display stand…

The stand, a superb way to display the monochrome minifigures, looks like a waterfall of colour paint flowing down and painting these minifigures. The top curves are really nice and give reference to a rainbow without it looking too much like one.

Other than the studs for the minifigures to be attached to, the build is entirely studless which will please SNOT (Studs Not On Top) fans. Construction is rather straightforward and most of the build can be accomplished without actually referring to the instructions and despite being rather simple, it’s extremely impactful and the perfect platform for a bunch of colourful monochrome minifigures. Only takes about 15 minutes to put together.

Yes, back to the minifigures! They are the absolute highlight of the set and, although this set is primarily designed to be displayed as depicted on the box and as instructed in the booklet, you can by virtue of them being minifigures display them in all sorts of different positions and poses. You can also choose where you want them to be using the studded 1×2 plates in a different arrangement and then rearrange the smooth tiles around them.

Being ‘monofigs’ all 11 are an excellent expansion to minifigure accessories even if you’re a veteran ‘monofig’ minifigure collector. Some of us (me included) haven’t got too much of a ‘monofig’ collection so this is a sure and cheaper way to boost the collection. These single colour minifigures are highly collectible but the task isn’t easy as not all the elements are available in every colour. The minifigures available in this set really push that especially as they also include hair elements. Most of these are not available in the colours featured here. The Bright Blue ‘Johnny Bravo’ hairpiece is also brand new. Some of the display stand parts also appear for the first time in Dark Purple, Dark Pink and Bright Green.

Whether you are a member of the LGBTQIA+ community or not, there is much to love about this clean, colourful… awesome display piece.

It’s the first LEGO® set to contain multiple ‘monofigs’ and a fantastic way to display the almighty LEGO® minifigure in all ‘it’s’ colour and glory and to help get a jump start on your ‘monofig’ collection.

Oh yes, it’s a splendid set to photograph!

10278 Police Station Review

By Rakesh Gosai (SAFOLs Brick Deputy)

This year’s long-awaited LEGO® Modular Building is the Police Station. Designed by Chris McVeigh. With styling cues from the 1950’s era, this building would fit perfectly in any LEGO® Modular scene. As predicted, this year, the LEGO® Creator Advanced Series has changed styling to fit in line with the 18+ Range and has the “Modular Buildings Collection” name on it. As with all sets of this size, the instruction manual is sealed in its own bag. A favourite in these sets are all printed tiles and no sticker sheet.

Chris McVeigh has been designing LEGO® models long before he started working for LEGO®. Please have a look at his website for the unofficial models he has made : https://chrismcveigh.com/cm/welcome.html I started following his work when I was looking for some inspiration for the interior of the earlier LEGO® Modular Buildings, as these were bare inside. Chris has also designed a few popular sets, namely the LEGO® Brick Sketches series, LEGO® Botanical Collection 10289 Bird of Paradise, and the LEGO® Winter Village Collection 10275 Elf Club House to name a few.

This set has 14 numbered bags with a 32×32 baseplate. This set has 2,923 pieces in it with a few new printed pieces, rare colours, and a few new pieces. One of my favourite printed pieces from this set is the daily brick newspaper with the headline “Donut Thief Still Hungry”. Depending on your building speed, this build should take a few hours. As you build, the three structures takes shape quickly with the donut shop on the left, the news stand on the right and the police station in the centre. Two of the printed pieces form a billboard for “Soap ‘n Suds”, the laundromat from the Brick Bank Modular Building.

The stairs in this build are amazing. Be sure to keep an eye out for this when you are building. The other items that really make an impact are the two desks which have a typewriter and a rotary telephone. Chris McVeigh has a lot more of these designs on his personal website. The donut shop is two stories high with a few hidden gems on the second floor. The bed is able to lift up, revealing an opening to steal donuts from the shop. Sneaky hey!

I do not know how important this detail is but there are two toilets in this building. One in the jail cell and the other in the police station. You would also notice that inside the jail cell, the bed is able to lift up, revealing an opening to a tunnel with a spoon, apparently used for digging. There is also a tunnel at the base of the building which adds an exciting element to the build.

I would rate this build 9/10. The Minifigures selection are good, build has many hidden gems and overall, a beautifully designed building. 


10279 Volkswagen T2 Camper Van Review

By Marick Hornsveld (SAFOLs Member, Founding member of CapeLUG. Loves Creator vehicles, Harry Potter, and Ninjago dragons. )

Creator fans rejoice, another Volkswagen icon has just been released – the T2 Camper Van. Available in South Africa from the beginning of August 2021, it joins the LEGO Volkswagen line-up which includes the 2008 Beetle, 2016 classic Beetle, and most notably, the 2011 T1 Camper Van – a fan favourite which was available for almost 10 years.

With Creator sets, especially the Creator Expert or 18+ line, becoming ever-more detailed and impressive, I had high expectations of this set, and it certainly didn’t disappoint.

The box is enormous and is filled about ¾ of the way. Pieces come in the usual numbered, plastic packets. The instructions and stickers are shipped in a plastic sleeve. The instructions feature some history of the T2 and photos of the designer, Sven Franic, who based the model on his own T2.

The build offers a master-class in SNOT-techniques (studs not on top), and the direction in which sub-assemblies are placed and attached is sometimes quite surprising. The body mainly uses tiles (flat and sloped) attached to SNOT plates, rather than bricks.

The size of the model quickly becomes evident – it measures 42 studs in length, 20 studs in height, and 18 studs in width, and is therefore considerably larger than its predecessor, the T1 Camper Van.

The build starts with the chassis, and once that’s together the frame starts to take shape. The focus then turns to the interior where delightful details are added, including a fridge, sand-green kettle, and folding bench/ bed. Exterior details continue to be added, and eventually the front interior, and nose area is completed. The build up to this point has been very enjoyable, and I’m sad to see that I am nearing the end. Then comes the pop-up roof…

The next 47 pages are dedicated to the construction of the pop-up roof. The mechanism is built mainly with Technic pieces. It is tedious and non-Technic builders will more than likely not enjoy this part of the build. The pop-up roof is completely over-engineered and the amount of parts it takes up does not nearly warrant the resultant operation, which is disappointing at best. I am quite certain that a similar operation could have been achieved with far fewer parts. The inclusion of so many Technic parts to create such a small part of the model is rather perplexing. The piece count could have much rather been used to add details to the dash, such as instruments (represented with only a sticker), more interior details, and better interior finishing, such as on the inside of the doors, and the boot area.

In stark contrast to this, the sliding door is executed brilliantly, and with very few parts. Its movement captures the closing motion of the real VW van perfectly, and it’s the one feature I believe truly makes this model. The two front doors close satisfyingly well – the joints and transitions of the model overall is exceptional with almost no gaps visible.

During the build, a few areas feel quite flimsy, especially because of the pop-up roof which essentially floats on top of the model. Most, but not all, of these flimsy areas are strengthened. Two notable areas that could have been strengthened further is the panel above the left rear wheel – pressing too hard here pops the interior SNOT panel right off and fixing it requires some disassembly. The front-bumper also falls off at the slightest touch. The use of stickers are also disappointing, especially because the colour-matching of the stickers are poor. These are minor gripes, however, and don’t detract from the overall great impression the model gives.

The set also features steering which is connected to the interior steering wheel, and to the front spare tire – a really fun feature.  

The colour combination of white and medium azure is very attractive. The tan and dark orange upholstery is equally attractive, and really gives it that era-specific feel. The chrome hubs with VW-logo adds that special touch. A sticker sheet is also included that allows the builder to customize their bus with flowers and lettering – flower power!

The added surfboard gives it that California feel, and the two folding chairs add another fun detail.

Considering its size and the level of exterior detail, the set feels like good value for money. It is a beautiful display set and offers a great building experience. Younger AFOLS will definitely remember someone who drove a ‘ou, blou Kombi’, while the older generation may even reminisce about driving one of these beauties.

I highly recommend adding this set to your Creator or Volkswagen collection.

75317 The Mandalorian and the Child Brickheadz Review

By Rakesh Gosai (SAFOLs Brick Deputy)

The Mandalorian was released in 2019 and my two favourite characters are in this set. The Mandalorian and The Child aka Grogu aka Baby Yoda.

Din Djarin, aka “the Mandalorian” or “Mando,” was a Mandalorian who worked as a famous bounty hunter during the New Republic Era. With his Mandalorian armour, IB-94 blaster pistol, Amban sniper rifle, and distinctive beskar helmet.

Beskar, also known as Mandalorian iron, was an alloy used in Mandalorian armour, notable for its high tolerance to extreme forms of damage. The metal was durable enough to withstand a direct blaster shot and could repel light-sabre strikes.

Like previous LEGO BrickHeadz sets that have included multiple characters, the parts for each character are packaged in their own numbered bags — in this case, two sets of bags to separate the parts for The Child [Labelled 1] and The Mandalorian [Labelled 2].

Upon opening the bags, I really enjoyed the few printed parts. I was amazed what detail they brought to the build.

The Child sits inside the hover-pram, featuring an enormous head with big ears and two tiny arms which rest on the sides of the hover-pram. The hover-pram has been simplified in relation to the series, keeping to the usual BrickHeadz scale, The scaling between these two characters is not correct as The Child is too large, although that does not matter because BrickHeadz scaling is rarely consistent.

The Mandalorian’s armour appears immediately recognisable here, taking inspiration from his early appearances during the series. His chest and shoulder armour is reddish brown, complementing the tan and dark tan attire underneath.

The Mandalorian and The Child is certainly among my favourite BrickHeadz models because I love these characters! The Mandalorian appears rugged, featuring an impressive helmet and armour components.

My favourite must be The Child, the hover-pram distinguishes this model from the other BrickHeadz models. The designer has done an excellent rendition, this is the way he designed it!

76394 Fawkes, Dumbledore’s Phoenix Review

Reviewed by Riëtte Badenhorst (SAFOLs Member)

Set number 76394
Theme Harry Potter
Pieces 597
Age 10+
Released June 2021
Cost (Lego SA) R 829.99

Disclaimer: I’m not used to building sets with a lot of Technic™ pieces and some of the gear placements I found a bit tricky but my son built the Hedwig set on his own at age 10 and this set has the same difficulty level, so that could just be me!

Build Process

The set comes with 4 bags and the instruction booklet.

Bag 1 contains mostly the base and the central pedestal structure around which the bird is built. First up is old Dumbledore and his Fawkes of course who would patiently keep an eye on the build.

This part of the build was straight forward but the turning mechanism used in the wings’ motion proved a bit of a challenge to me with the gears and such to get them aligned and in place. I would not rush this build as I did at times and then had to reverse some steps when I realized things weren’t lining up correctly, but was still easy to follow if that should happen.

The Fawkes plate is printed and not a sticker. (sigh of relief)

The rest of the build focuses on the phoenix itself. The wing structure is quite intricate, and looking closely, it seemed odd how it was designed that way. When you look at the build as a whole, it is really beautiful and truly makes the mechanics work.

Here is what it looked like from the top after bag 3.

Once the build was complete, these were the spare pieces left over. Subject to change of course.

Pros:

I liked the challenge of building something different from modular buildings and at the lower price point it was a financially forgiving alternative.

The displayability (that is a word now) of the piece is great, especially to pair it with Hedwig. I’m not a collector/builder of Harry Potter sets in general but these two can be displayed without being too heavily “HP” themed.

It’s a beautiful set with bright colours that will surely be an eye-catcher when displayed.

The wing-motion works very well but I would treat it carefully so you don’t have pieces flying off.

Cons:

As mentioned I struggled a bit now and again to keep gears and other technic pieces in place.

A strange thing that happened a few times was that pieces would dislodge themselves from elsewhere as I tried to put sections in place. It was as if some parts’ ‘click’ didn’t ‘grip’. The wing pieces that connected to Technic™ parts also had to be treated with patience at times.

Under Pros I noted that the set is bright. It is VERY bright which might not be everyone’s cup of tea. I might have preferred a slightly deeper red and orange.

Final Thought

I’m very happy with my Fawkes. I had a company registered as Red Phoenix as I identify personally with the phoenix because of my life story. Getting it was an absolute no-brainer. I truly hope Lego will make more sets like these to display together.

10266 Apollo 11 Lunar Lander Review

Reviewed by Malcolm Keevy (SAFOLs Member, CapeLUG Member)

LEGO® has made several memorable real life space sets over the years, but the first one I ever bought was the IDEAS® Saturn V set, which was a combination of such an iconic machine and an amazing LEGO® set. Then the Apollo 11 Lunar Lander (10266), in addition to the obvious link, has that same status – an instantly recognizable and historically significant vehicle.

That comes through from the start with the instructions, as although it is a CREATOR® set, the instruction manual looks more like the IDEAS® range, with a few pages of history and images from the Apollo missions.

The Build

The first bag is the base. It is not a particularly exciting build, with a single crater in the middle. The purpose of the circles becomes apparent later. The one lovely detail is the light grey layer underneath that are the footprints.

The lander has a difficult octagonal shape to achieve which requires some interesting building techniques, using ball and sockets to join the intermediate sections, and then once it is all finished off you still have the details of the tanks tucked into the base. Once it is one the base it is already a cool model.

The module is built in a few different directions and has some cool techniques. It almost starts with the panel stickers and builds out from there, as the internal space it tight and cramped to fit the two Minifigures in, which made it difficult to fit my big fingers in but reflects the actual size.

Final Thoughts

This is a great model. It was an enjoyable build and overall makes a great display piece. It does have quite a few stickers, but at the finished product is superb. For fans of the other space sets it is a must-have addition to the Saturn V and space station.