10298 & 40517 Vespa Reviews

Review by Luke Comins (SAFOLs Members)

VESPA 125
Set Number: 10298
Pieces: 1,106
Theme: Creator Expert
LEGO Designer: Florian Müller
Release Date: 1 March 2022


Now here is something I am EXTREMELY overjoyed to get in Lego form as I have owned 2 Piaggio Vespa scooters since the mid 90’s.
Since my days in the ‘dark ages’ (a term that seems to be coined by AFOLs for when we lost the plot with regards to our childhood LEGO® and turned our attention elsewhere on whatever for however long) I have really wanted LEGO® to produce a Vespa scooter set. 20yrs later and they finally have, and I have one, well two!

Just some interesting Vespa ‘Did you Know’ to begin with…
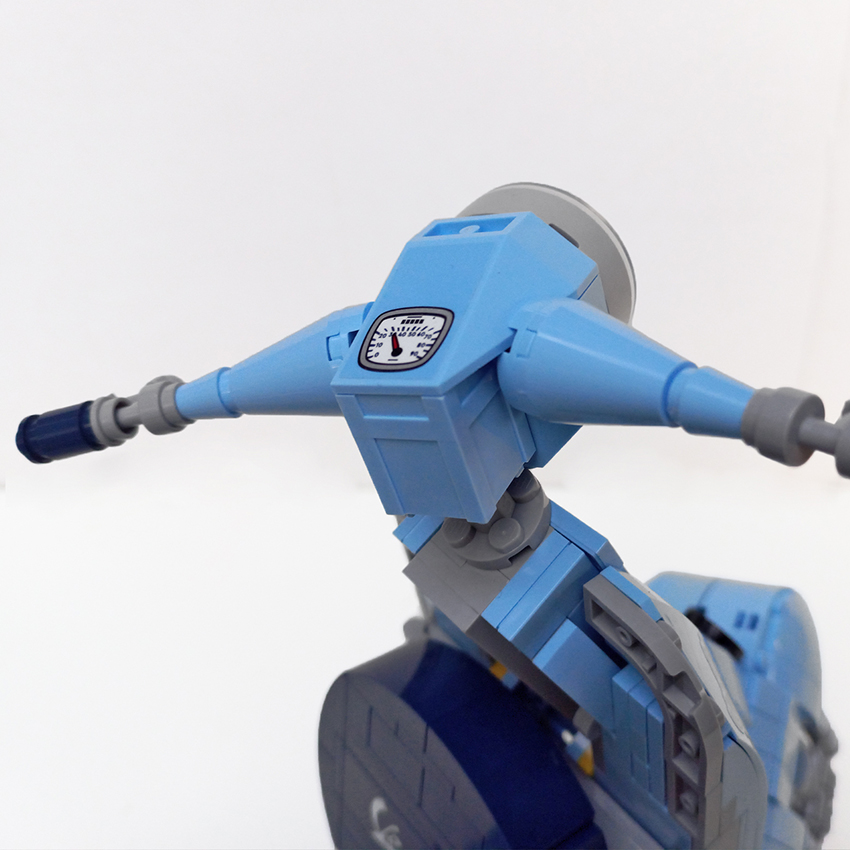
– The name Vespa means ‘wasp’ in Italian and is derived from the vehicle’s body shape – the thicker rear part connected to the front part by a narrow waist, and the steering rod resembled antennae.
– The small wheel size was dictated by available parts after WWII. The wheels on the first Vespa’s came from Piaggio’s bomber plane factory and were originally manufactured for landing gear, hence why they only have a single arm front suspension/fork.
– The Vespa 125 (the particular model this LEGO® set is based on) was launched in 1960, and the pastel blue tone was the only colour the 125 was available in when launched.

The LEGO® designers tasked with designing this set teamed up with the Italian scooter company Piaggio and the convergence of these two culture powerhouses has resulted in a fantastic looking Vespa scooter model. A perfect way to also celebrate Vespa’s 75th anniversary!

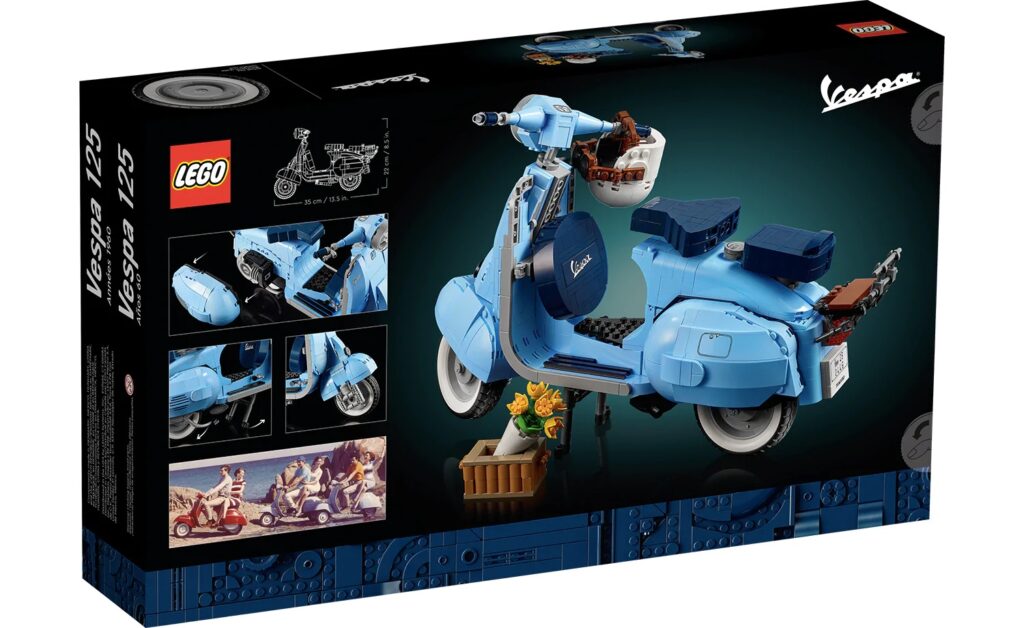
The box, the now familiar black Creator Expert 18+ adult orientated type, works well here making the set and its colour stand out. But what matters the most is what’s INSIDE the box…

The instruction manual is packed with trivia, and an introduction to the Vespa 125. There’s plenty of classic photos of the Vespa throughout, an informative timeline and a short profile on the set’s designer, Florian Müller.

The build is split across 9 bags with a couple of steps having two bags and you can expect to take about 3 hours to complete the set.


The fitting choice of Light Royal Blue as the colour scheme will have custom builders and parts collectors in their element (pun intended) as there are over 70 types of pieces in this rare colour, including a multitude of parts that appear in bright light blue for the very first time.
Building with so many of these Light Royal Blue elements was a delight as it’s not a LEGO® colour that’s usually found in such abundance, and the relative rarity (thus far) does make it quite a novel experience.

Unlike a lot of the four-wheeled vehicles in the Creator Expert theme, the first stage uses very little if any Technic elements to make up the frame, relying instead on a variety of System parts. It’s a really enjoyable start and it’s always a pleasure to watch a model of this size begin to take shape using nothing but regular bricks and pieces.
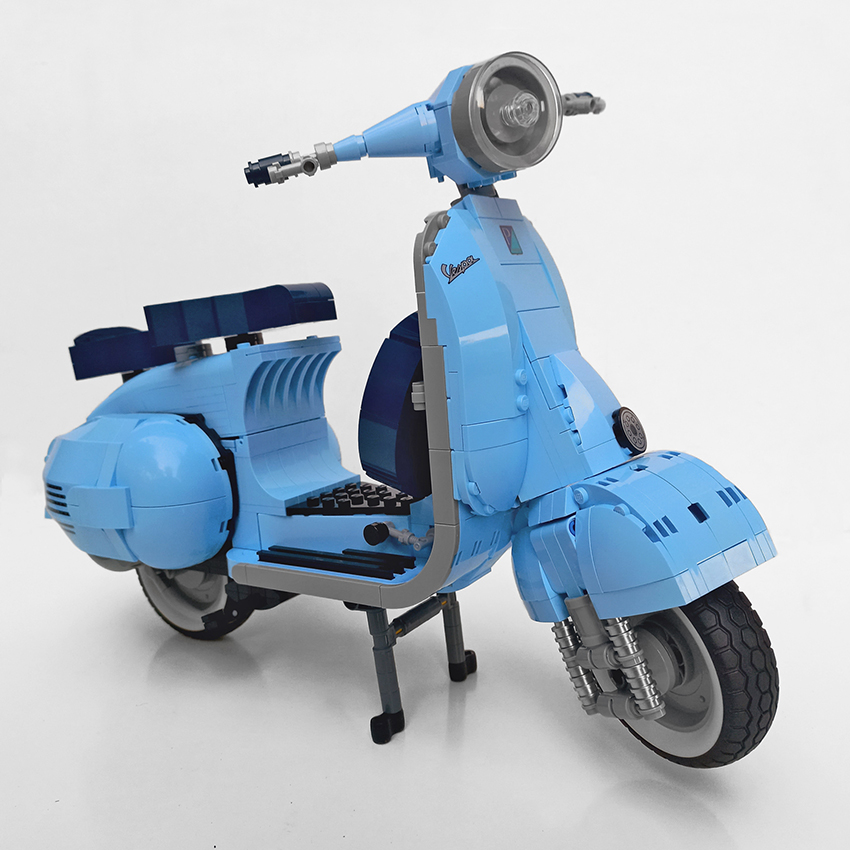
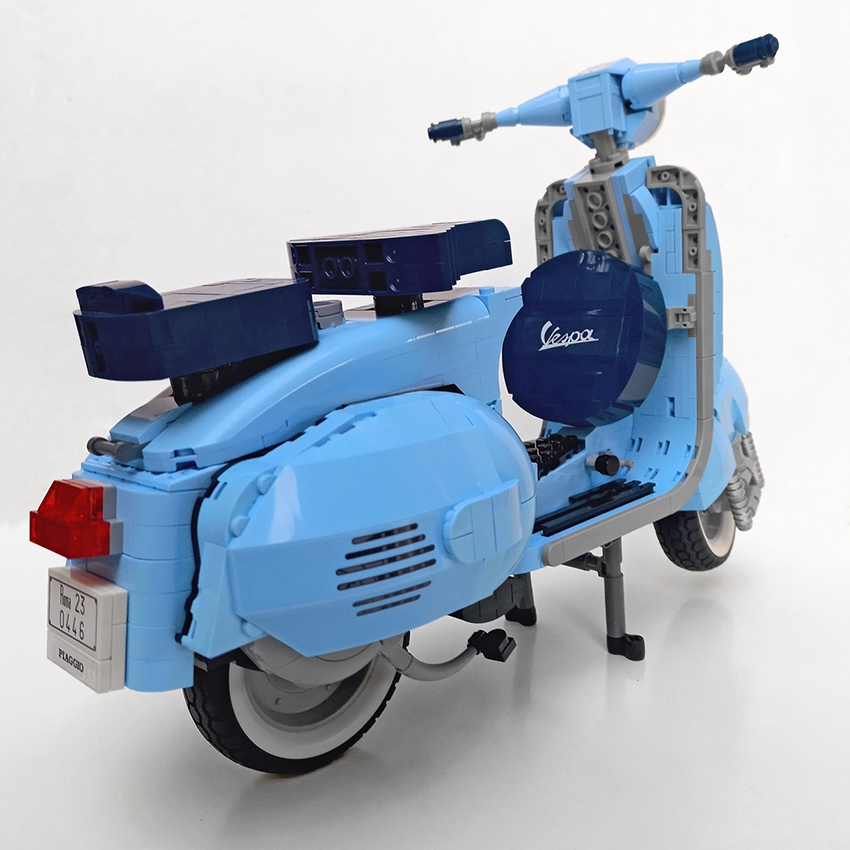
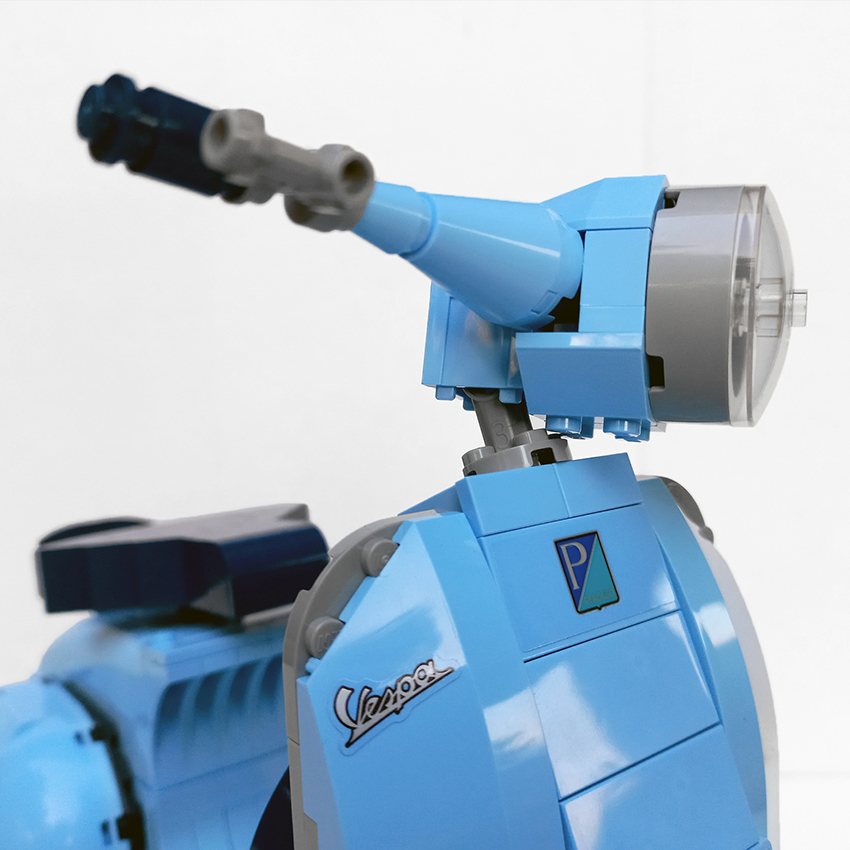
Vespas have a signature shape defined by soft curves, something that certainly isn’t easy to translate into LEGO®. There is a very impressive level of skill employed here by the designer to get the shape of the Vespa. In order to get its flowing curves, there are plenty of bow elements used but these only go so far as to craft the wasp-like body. The back section of the Vespa, along with the area where you’ll find the seats, are both connected to the frame via a series of hinged plates. This helps to angle them.
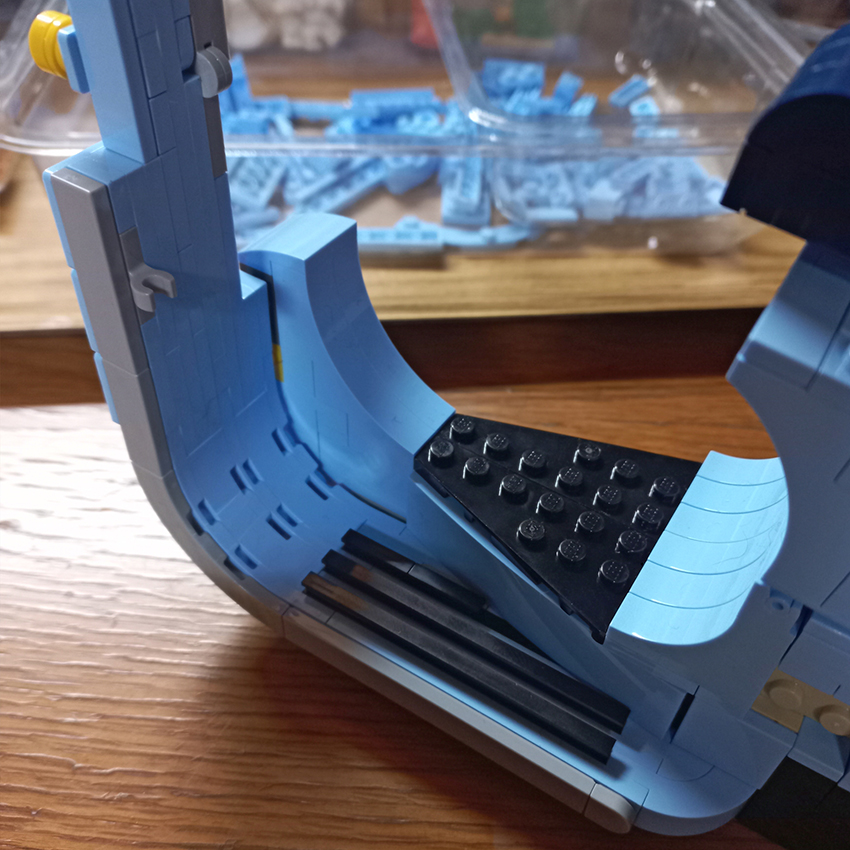
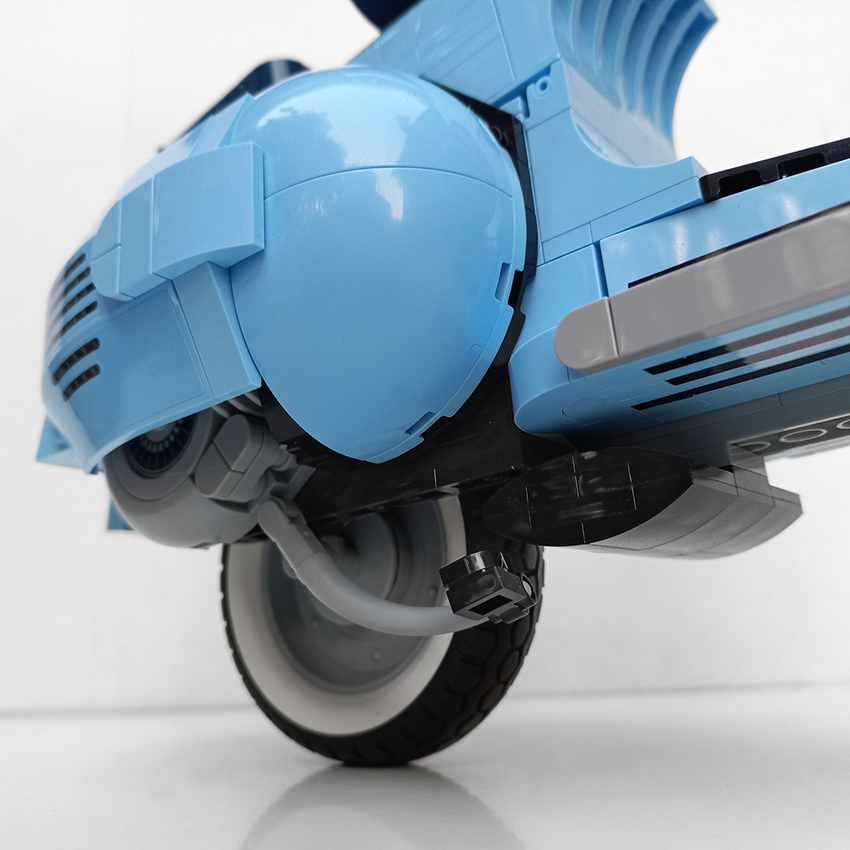
One part I really like about the frame of the set is the footwells where the black anti-slip strips protrude from the floor where the rider puts their feet when moving. Once the frame is complete much of the other details are built independently and added to it. These include the large curved pods which frame the rear wheel. 
The removable right side engine cover/panel is a nice feature and when removed shows the entire detailed engine. A nice printed Technic disk is used for the flywheel and four plain disks are used for the cylinder block. Underneath the engine is the kickstarter that hinges up and down. Further underneath you will also find the working kickstand. The stand is hinged so can be retracted, but then of course it does not balance without the stand down. It has rubber dampers on either side of the stand to give it some grip when displayed.

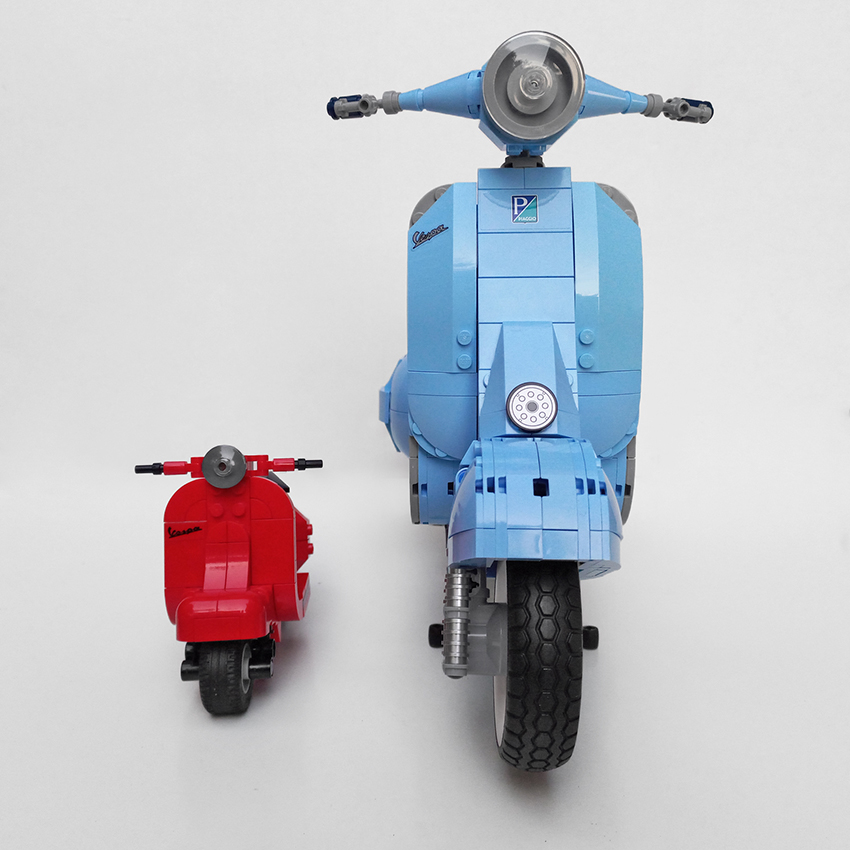
The most exciting new parts for me are the wheels and tyres, both a first for LEGO®. The rims are dual-moulded light grey and white. When the tyre is attached the joint is seamless so it looks like they are white-walled, something rather in vogue on automobiles in the early to mid 1900s and appeared on various early Vespa models and customised Vespas since.

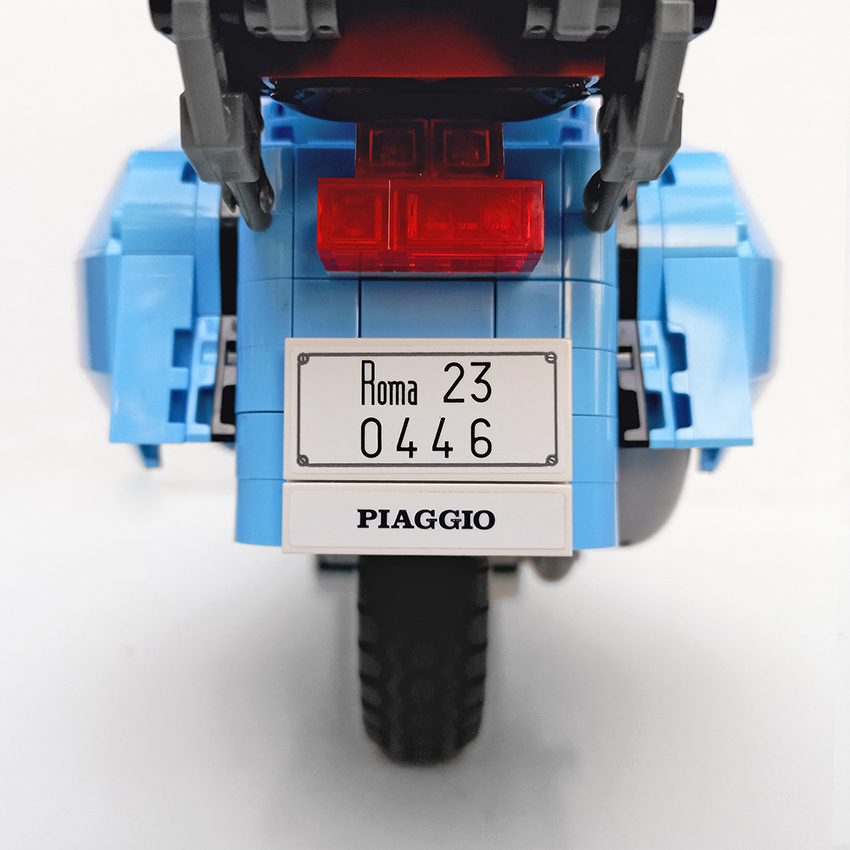
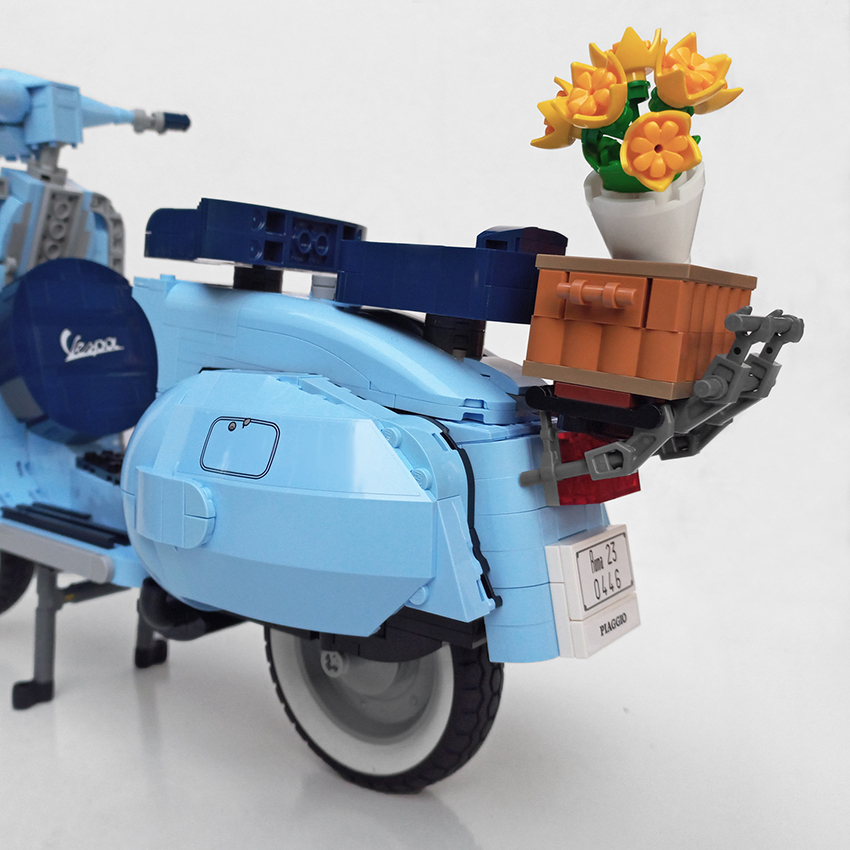
The Vespa’s licence plate at the back has the words Roma (Rome, where the Vespa was launched) and the date 23 April 1946, the date Piaggio filed the patent for the Vespa.

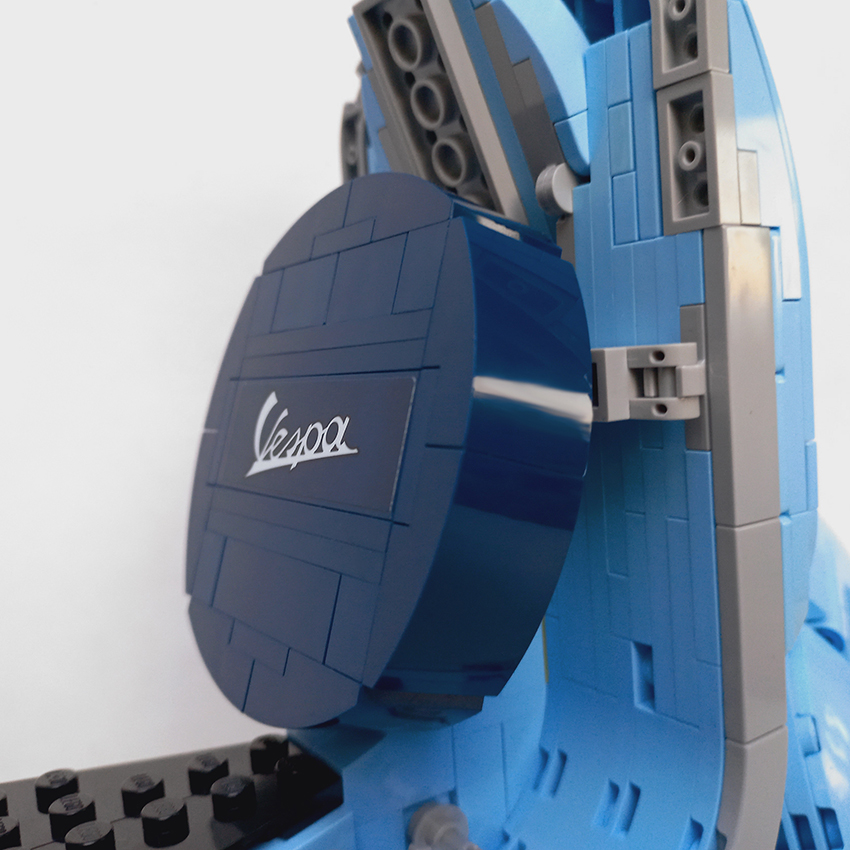
To give the set a little more character, it features a few added accessories. One of the most unique is a spare wheel. Not something you’d expect such a small mode of transportation to have. The Vespa slotted them in various different places but the early models featured them on the back of the steering column, nestled in the same space as the rider’s knees. The LEGO version doesn’t actually include a tyre, in fact, it’s a little smaller than the actual wheels used in the set.

The basket/crate is simplistic and it secures nicely to a rear carrier which would have been more epic in chrome parts. The yellow flower bouquet is a cool contrast to the pale blue of the majority of the build and the use of the broken eggshell element looks cool. The bouquet is attached inside the basket so you can secure it and change the angle.

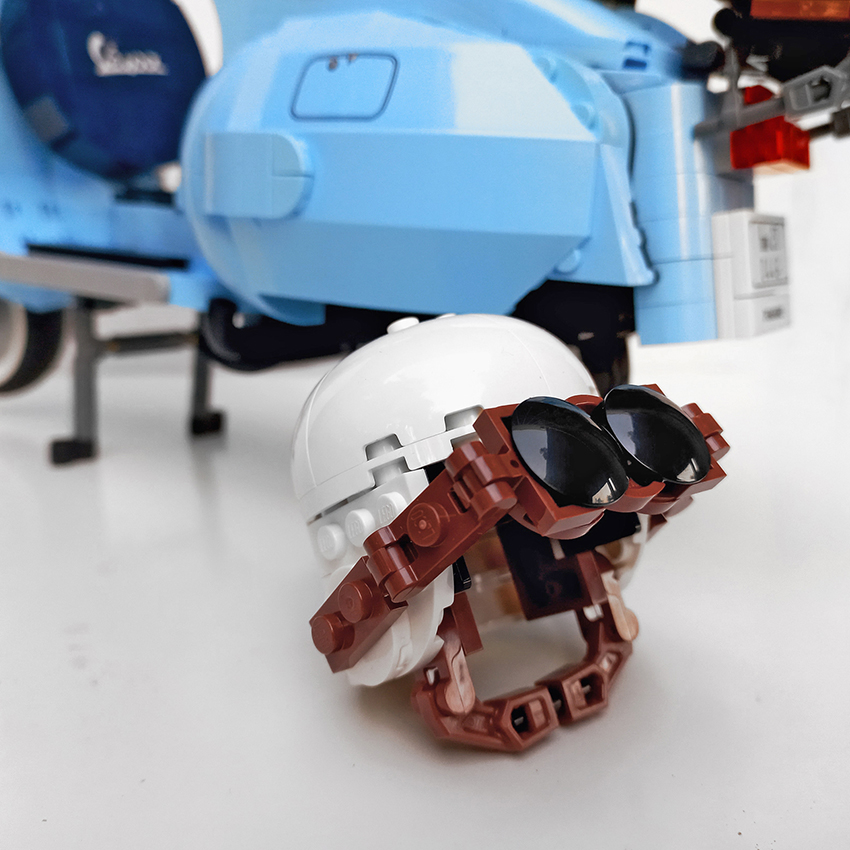
The traditional open face helmet that comes with this set is a little odd. While I appreciate the sentiment (and the extra parts), the design doesn’t have the sophistication that the rest of the model has, and those goggles just look lame, to be honest. The helmet and goggles are somewhat out of place, and while they do fit the theme, the scooter would be just fine without it. There’s also no ideal place to rest or hang the helmet from.

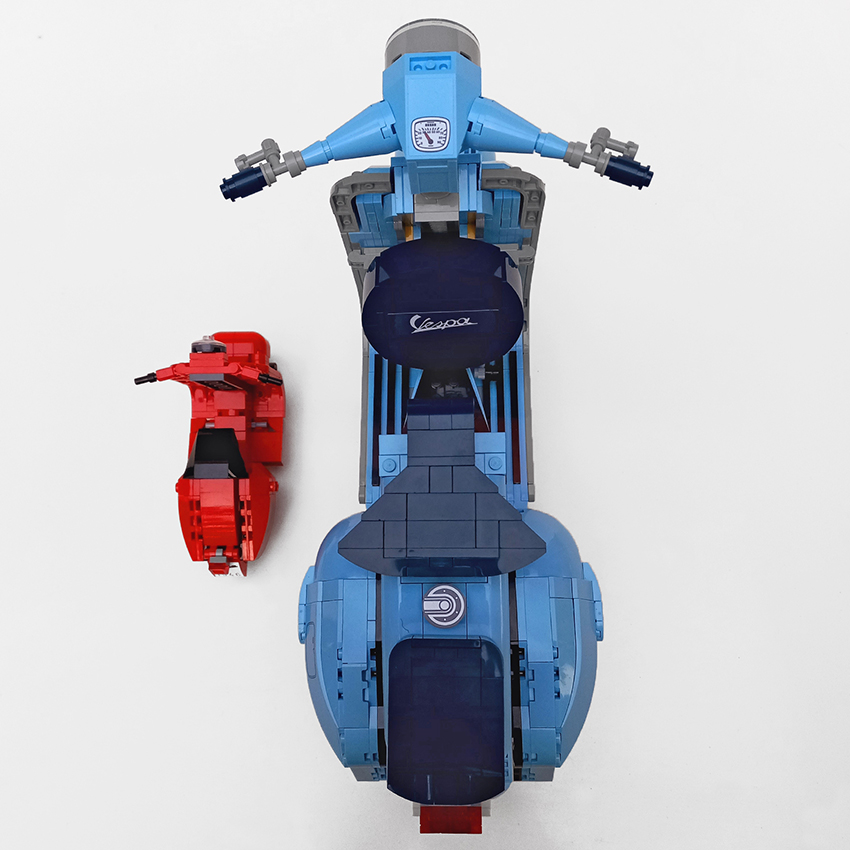
For fans of SNOT (studs not on top) building techniques, this is a dream set, as there is serious lack of studs showing and, other than one or two here or there, the only area that has a few together is the centre mat in the footwell. The effect of this makes it look like a non-Lego Vespa model in a big way and adds to the iconic curves of the scooter.
I however don’t like to see the few exposed plate bottoms under the neck of the scooter as against the mostly SNOT backdrop it does look quite odd.

The 10-sticker sheet, hmmm… I do wish we had got one or two printed elements with the Vespa or Piaggio branding on them but instead all the branding is in sticker form. There are some pesky stickers that cover entire parts. If I had to find another downside to this model, other than that seat and helmet, when observed closely you may notice some variation in the colour of the light royal blue pieces. It’s not too bad but some elements, such as 1×2 plates, seem more ‘yellowy’, and some of the curved pieces, such as those on the front wheel cover, are slightly lighter. However when displayed and viewed from a distance the final model looks great.

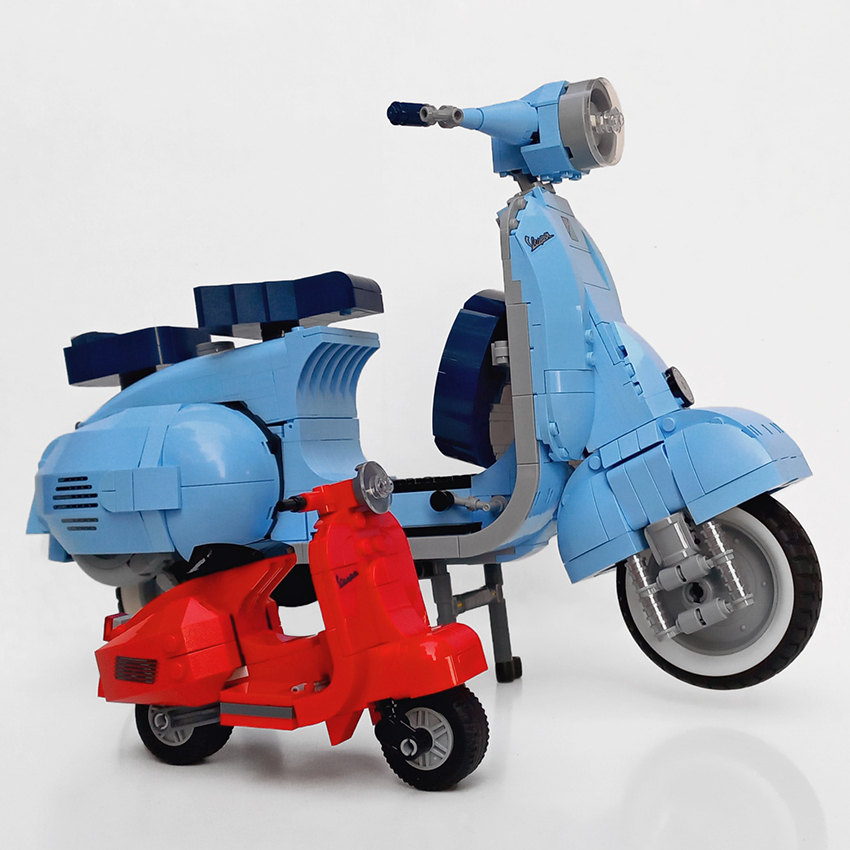
Unlike other vehicles in the Creator Expert theme, the scale of the Vespa is vastly different. It’s not the most complex but much bigger in terms of its scale, measuring at a nice 35cm long and 22cm tall.
Comparing the 10298 Vespa 125 to its closest counterpart, the 10269 Harley-Davidson Fat Boy, the Vespa has slightly more pieces and is ever so slightly bigger.

To conclude, the attention to detail is very impressive, the design techniques are enjoyable to construct, the colour scheme gives the whole set a very unique feel, both to build with and to look at. It’s not the most complex of builds in the Creator Expert vehicle line, but it’s very entertaining to put together.
Vespa enthusiasts (like me!) will absolutely love this set, and will no doubt be impressed with how authentic the end result actually is, while it’s also a rather quirky entry in the Creator Expert theme to tempt even those with little interest in the scooter itself.

Prior to getting this set I read a few online reviews with all the accompanying comments and found there was a common thread saying that many found this set to be flimsy in various ways however when I completed the build I didn’t find that to be the situation at all.

Having said all that, LEGO® went bossies and not only treated us with one Vespa scooter but TWO! I can’t recall another time when two LEGO® models of the same item have been launched on the same day.
So, here’s a short review 
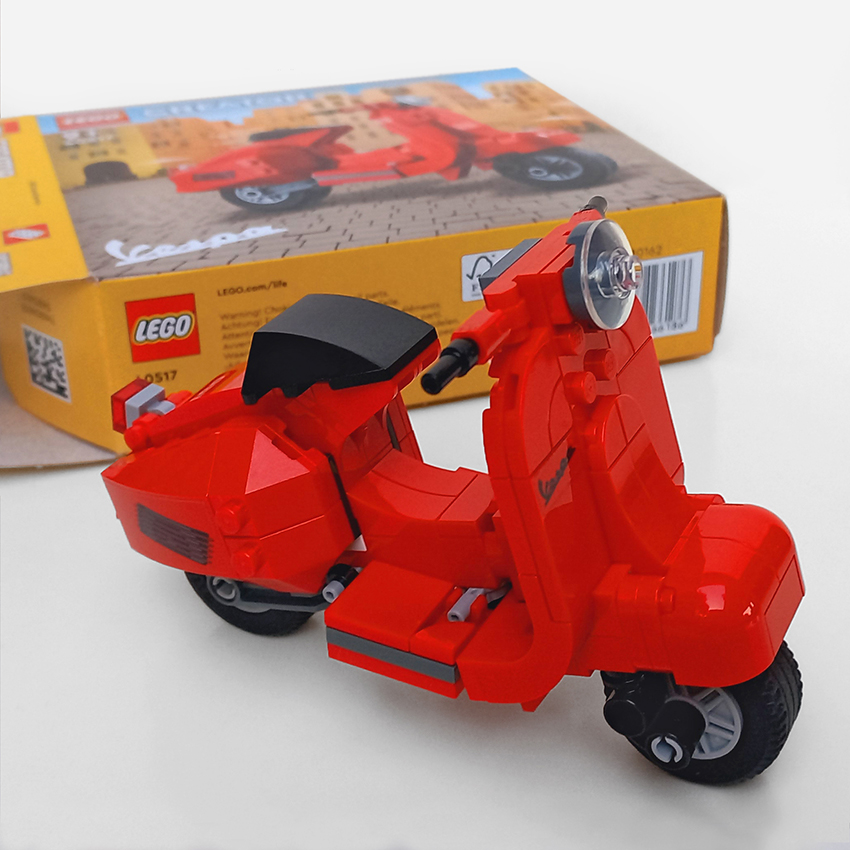
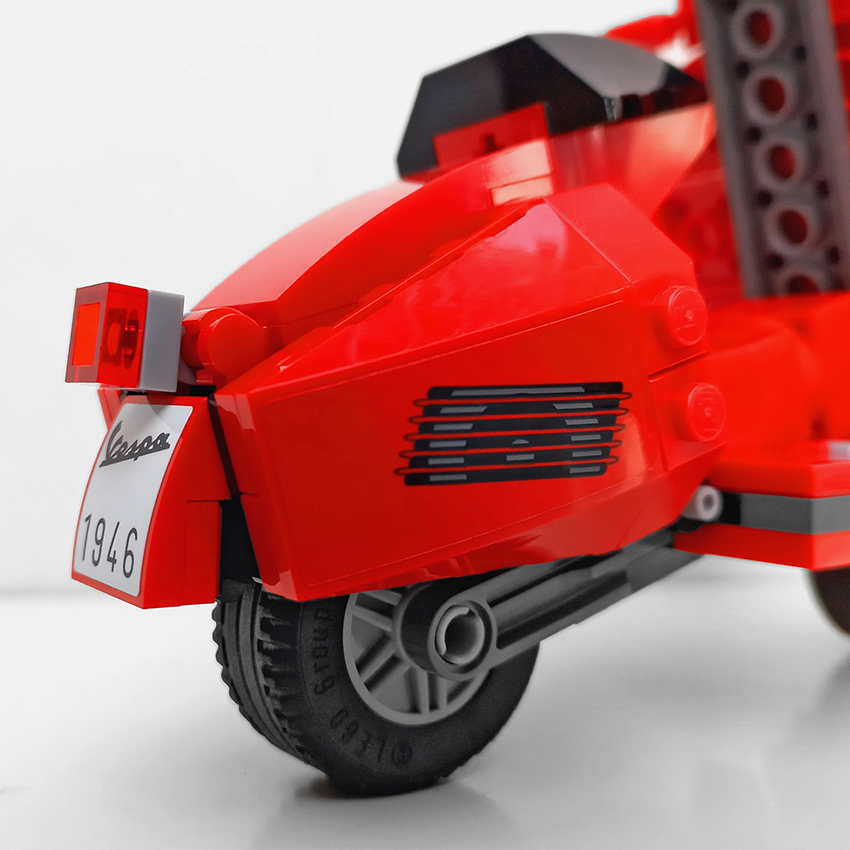
on the smaller, more modern version in striking red…
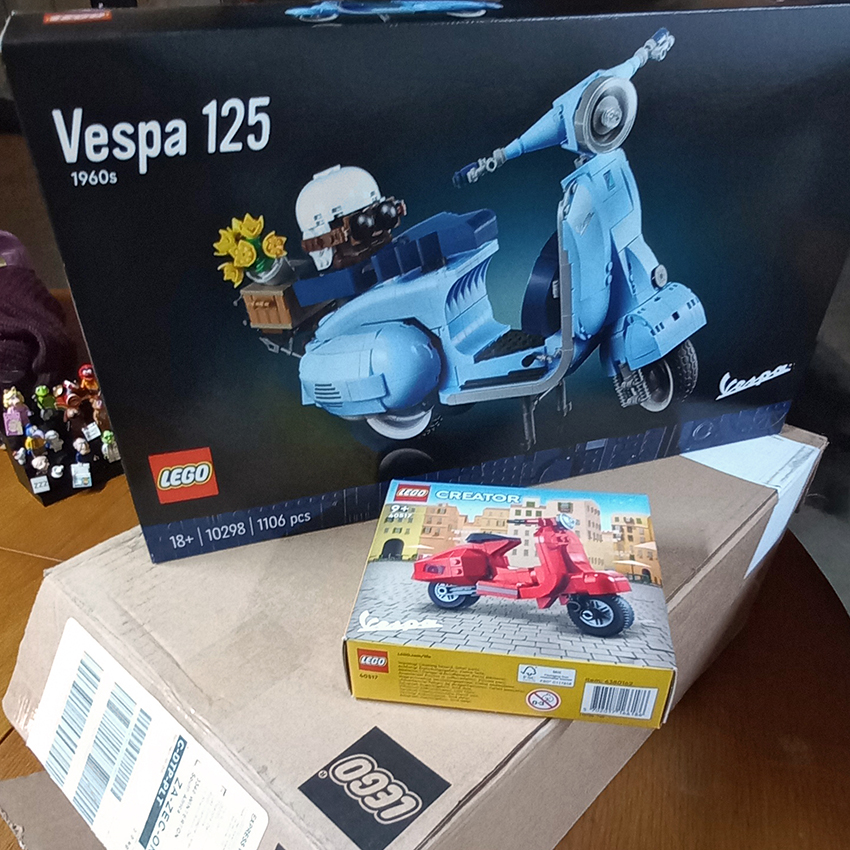
VESPA
Set Number: 40517
Pieces: 117
Theme: Creator
Release Date: 1 March 2022


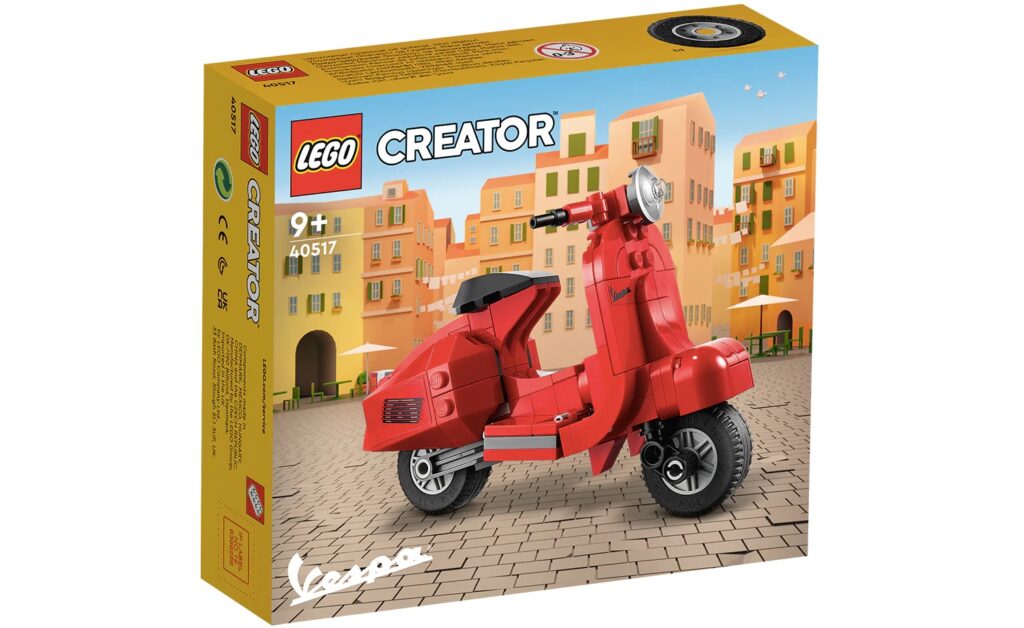
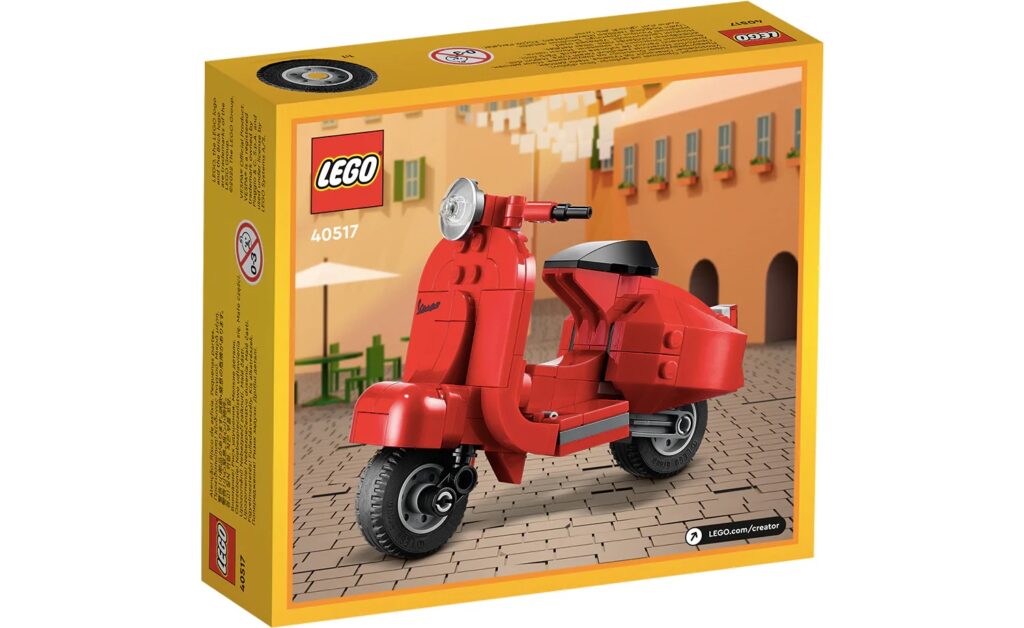
This set comes in a small tab-sealed box. The front and back are pretty similar with a central image of the Vespa seen from either side.
Inside the box are two unnumbered parts bags, a 40-page instruction booklet, and a small sticker sheet.

For a small set, there are some interesting pieces to be had. Lots of red and feels perfect for this later model Vespa. The rounded corner slopes in red are new for this set, as is the red modified brick with Technic connection. It also includes a couple of the new 1×5 plates in black.
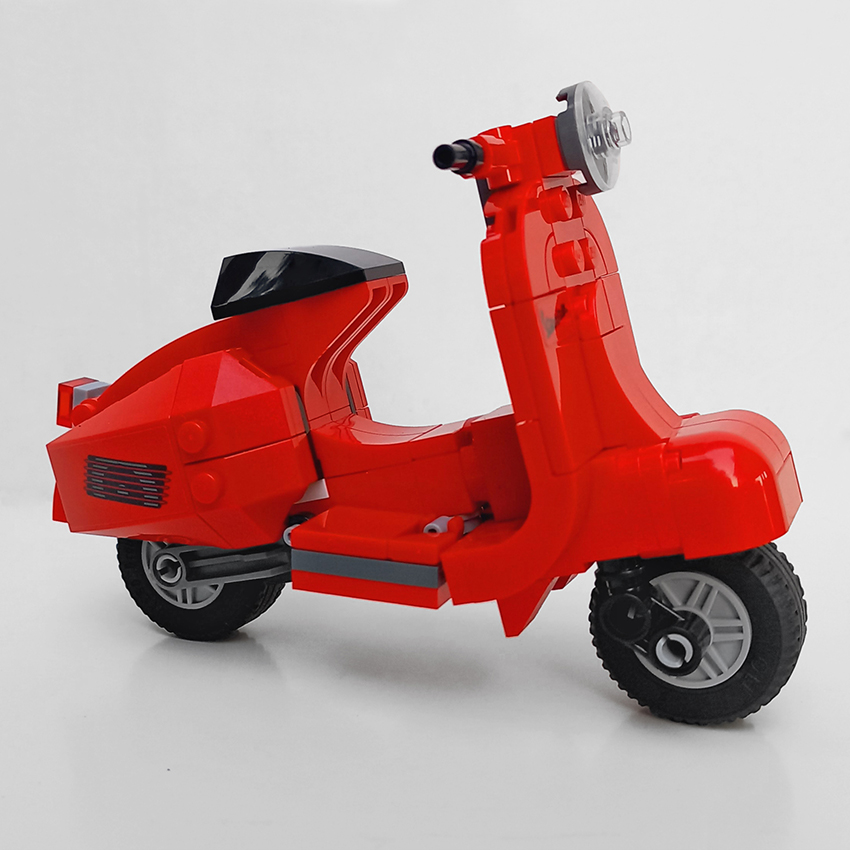
The build for this set is quick and easy, taking advantage of some SNOT (studs not on top) connections to create a nicely rounded body accomplishing the overall look and shape of the Vespa rather well.
One of the most interesting techniques on this set is the use of a Technic axle to connect the front and back of the model. It is very efficient and adds a lot of strength.

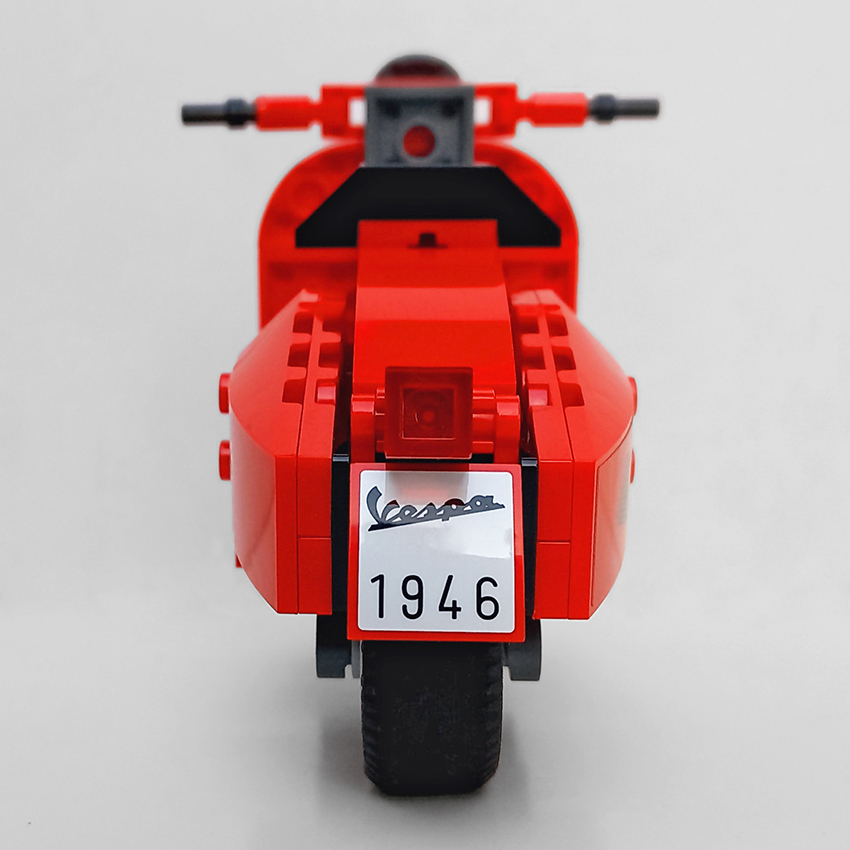
A few stickers provide the front Vespa badge, some minor detailing for the engine side cover/panel and a 1946 number plate, a nice nod to the year the Vespa was first manufactured.
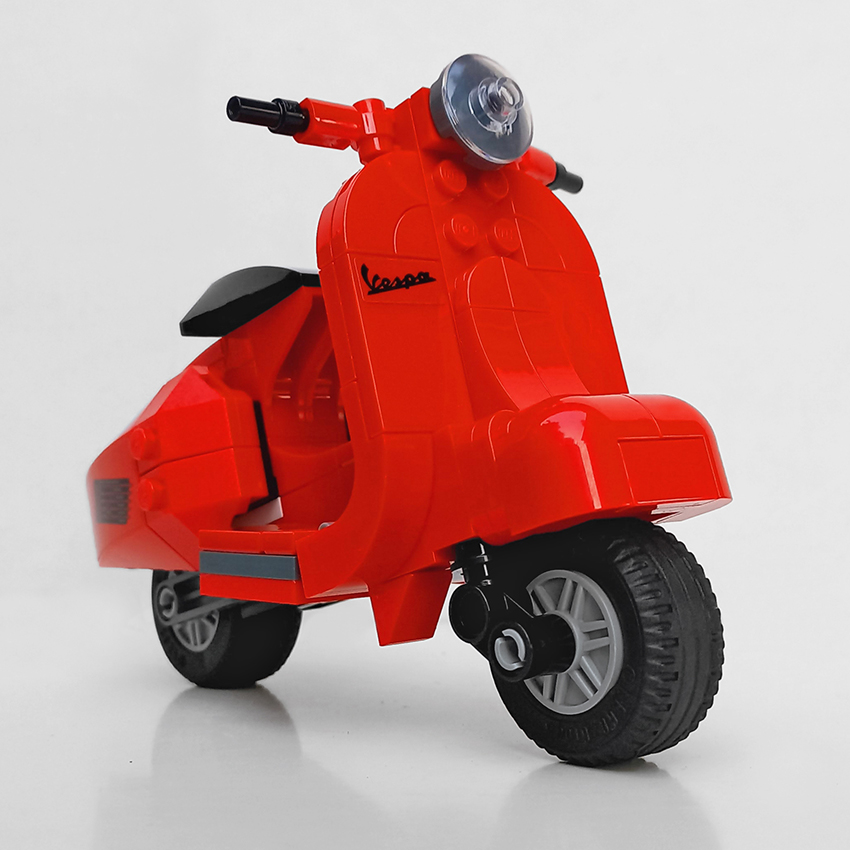
Due to its compact size (just 9cm tall, 12cm long and 6cm wide), the model does have a few design flaws (twin front suspensions/forks on vespa? Noooo…) but it’s unmistakably a Vespa. It still shows just what can be achieved with only a handful of bricks.
The wheels look smaller and wider than they should and the front fender is a bit too wide due to this.
The steering column is fixed and cannot move, and because of that and the wide tyres, it can balance on its wheels without the need for a stand.

It’s perfect for those who have an affection for the Vespa scooter but without the room or the budget for the larger one.
It obviously doesn’t have the same wow-factor as the larger version, but it is nevertheless a very decent model.

It will take around 15-30 minutes to complete.

BETTA GETTA VESPA!


10297 LEGO® Boutique Hotel Review

By Rakesh Gosai (SAFOLs Brick Deputy)

One of the most anticipated LEGO® sets for me released this year, the LEGO® Boutique Hotel 10297. This is the 17th LEGO® Modular building that LEGO® has made. The LEGO® Boutique Hotel was designed to celebrate the 15th Anniversary of this well-loved Creator Expert Theme.

The set consists of 3066 pieces and is already available from your favourite LEGO® store in South Africa. Get your bags packed and get checked in to this beautiful rendition of this hotel!

This hotel is unlike anything LEGO® has done on a Modular Building and its fitting for the 15th Anniversary set to be something special. The instruction manual has a fitting introduction to the Boutique Hotel and the Modular Building theme. The designer is Anderson Ward Grubb, and he has cleverly hidden references to the previous Modular Buildings. I enjoyed that because it helped me appreciate the current and previous renditions in this series.

The amount of minifigures in this set is 7, which is above the average amount of minifigures that were included previously. More minifigures just increase the playability of this set.

The minifigures are:

  1. An accountant
  2. A backpacker
  3. An older lady
  4. The art gallery curator
  5. A barista
  6. A male bellhop
  7. A female bellhop

Included with the above minifigures are two mini builds i.e. A coffee cart and a luggage trolley.

The build is an amazing experience and continuously engages you as you build the various sections. The variety in the build kept me engaged with the furniture on the inside, the variety of colours used in this set, the staircases, and the beautiful architectural details on the exterior of the hotel. Each bag feels like you are building something different.

Sand Green is a favourite colour of mines, this is used at the top section of the hotel. I enjoyed the clever use of the black snakes on the roof, keep an eye out for that! One of the stand-out features of the build is the way the building is angled and gives the set a unique feel.

Keep an eye out for the beautifully designed staircases in this build, there are many as this set is three stories high. The art gallery is an amazing addition, it does feel very small, but the details squeezed into this section are really fun. The painting inside looks like a character from the theme called “Galidor”, an unknown theme to me. Included in the gallery is a LEGO® sculpture, I have not seen this featured in any other sets.

The palm tree at the outside bar is another amazing detail, something new and bright unlike the ones I am used to seeing in older sets. The staircase at the rooftop bar has a notice board which has plenty of references to the previous modular buildings, a very clever way to include this in such a small board.

The hotel itself features two rooms, one large suite and a smaller room. My daughter always asks me where the toilets are in these sets, and this set has only one in the large suite! Poor minifigures that use the smaller room! In the large suite, a nice feature was the chocolate on the bed and bottle of wine. This suite has a black and white television with an actress from The Palace Cinema.

The Boutique Hotel makes is an amazing build with beautiful colours and beautiful design. From start to finish, I was engaged. Once the build is completed, you can’t help but admire it from all angles. This was a perfect set for me and rated 10/10!

31205 Jim Lee Batman™ Collection Review

Reviewed by Gary James (SAFOLs Member)

The Jim Lee Batman collection Lego Art set was release in March 2022. The set consists of 4167 pieces, the bulk of which is made up of the coloured 1×1 round tiles. That being said, as with all Lego Art sets, not all of these will be used. The set allows the builder to choose one of three portraits: Batman, Joker or Harley-Quinn. The artwork itself is based off the drawings of legendary DC artist and current publisher and Chief Creative Officer Jim Lee, coloured by Alex Sinclair.

The set consists of the default 9 16×16 black panels that are assembled into a 3×3 grid and locked into place by a border made of black bricks and making your final portrait 40cmx40cm. The image is created by using 16 different coloured 1×1 round tiles. The set also comes with a large black brick separator for removing multiple tiles at a time and a smaller separator for removing specific tiles for those inevitable moments when you mix up your colours and place a piece in the wrong location.

The instruction manual does a good job of breaking down what could be a very intimidating, complex build into small manageable steps. You start with building the all-important colour key that assigns each of the 16 colours a number. A good idea is to decant the different colours into their own container and arrange them in numeric order to minimise your time searching for the correct colour.

Next you need to decide which of the 3 portraits you want to build and find the appropriate starting point in the instruction manual and start building. The build itself is very much like painting by numbers and can be very monotonous at times. This is not necessarily a bad thing as sometimes after a long day you just want to relax, building some LEGO® that does not need a lot of concentration. The experience is added to by downloading and listening to the unique soundtrack for this LEGO® Art set, which is an interview featuring both LEGO® designers and DC artists, the link for which can be found in the instruction manual.

I loved watching the image develop as you add each completed tile to form a row, and then adding each row to form the completed image. Of the three picture options from the single set my favourite is The Batman™, that is in no way influenced by me being a huge Batman™ fan 😉

In addition to the three options out of the box, there are two further image options available. Using two sets you can build an image of Batman™ and Catwoman with the Gotham City skyline in the background. Combining three sets you can build a large profile image of The Batman™

On the downside, due to the number of pieces and possibly the IP involved these sets are not cheap and go for round R2000 each. This means that to build all 5 possible images at once you would have to purchase 8 of these sets; 1 each for the default options, 2 for the Batman™/Catwoman portrait and a further 3 for the large Batman™ portrait, and since you will never use all the pieces for any particular image it does mean that you will end up with a huge excess of coloured tiles. This however is not necessarily a bad thing, especially if you fancy yourself a little creative. There is plenty of software on the internet that will produce a pixilated version of any image, giving you the opportunity to make your own art piece with the left-over pieces.

Overall, I am a fan of the LEGO® Art series having collected the previous Star Wars Art sets, but the Jim Lee Batman™ collection is definitely my favourite. With a build time of 2.5 to 4 hours per image, depending on how quickly you can find and place tiles. I find building these sets very relaxing and is a great way to spend the evening and when you are finished you have a new piece of art to hang on your wall.

71741 NINJAGO® City Gardens Review

Reviewed by Xavier Cordeiro (SAFOLs Member)

The NINJAGO® City Gardens is the third in the NINJAGO® City Series, and its 5709 pieces make it the largest NINJAGO® set to-date, all while celebrating 10 years of the NINJAGO® theme. It’s an enormous build, so without further delay I’m going to jump right in.

Inside the main box is a smaller white box, a 32×32 baseplate, a bag of special elements, and the three Instruction manuals. I forget the exact number of bags, but it’s around 60.

The city is built on 4 levels, with much of it in a modular style, although as the levels go higher, the build comes in larger separable parts. Naturally I’ll start with the base. Light Bluish Grey plates form the majority of the ground floor, while the rest is covered in water. A small Island behind the city adds colour and life. As with the previous two sets, different coloured plates laid under hundreds of 1×2 Trans-Light Blue tiles creates a sense of depth in the water, a brilliant technique that elevates the visual experience of the entire set. The first half of an enormous tree dominates the first level. Without its other half it looks somewhat strange, but it does support the second level. Foliage scattered about also serves to break up the monotony, while the supporting beam comes together satisfyingly for a neon look.

A small basement with a few rare items lies under the first building, Ronin’s shop. Dark Brown and Sand Green combine for an antique feel, which is complemented by clever builds like a scale and a bookcase. A nice technique, repeated for all four buildings on the first level, uses hinges to create one diagonal wall. I like how one side looks out onto the water, making it far more accessible. Across from Ronin’s shop is a small restaurant, perhaps a Ramen shop. This building uses a brighter combination of white and Reddish Brown and features a small balcony facing frontward. The two parts of the newer Book piece are used brilliantly as an awning and a counter. Overall, it’s a small but delightful shop. The room of a NINJAGO® fan sits atop the Ramen shop. This is arguably my favourite build, with a colourful Cole and Kai themed bed along with what appears to be a few micro-scale NINJAGO® sets. I really like the windowsills and curtains for this segment, which work well with the tan colour scheme. 1×3 jumper plates make a lovely traditional awning to complete the building, and a few flower boxes bring some more nature into the build. The building on top of Ronin’s shop is divided into two parts. The larger is a sort of balcony, its walls decorated by paintings or pictures of NINJAGO®. Some teacups and a teapot are nice additions. The rest is separated by a door, and a large round window uses what I assume is an old Bionicle piece. Another great awning design is used, this time serving to cover the shop beneath.

Now, the base for the second floor is built. It’s basic, with some adverts and two intricate builds decorating the railing. A model of Jay’s Desert Storm is integrated into the base and hangs down into the NINJAGO® fan’s room. The next build is another favourite, the Ice cream shop. I believe it’s based on a Classic theme. The interior is simple, yet cheerful, with a few sundae glasses, cones, etc. A rounded window looks out onto the exterior walkway, and the design above takes the cake for the best awning in the set. Several cleaver pieces in Black give a fantastic, tiled effect. There’s a staircase rising to the third level, and a small walkway with some nice details. Next is Chen’s Noodle House, which featured in season 4 of the show. One table is situated inside, with one or two additional details. The kitchen compartment sits by the main window, and swings open for easier access. As always, the exterior is very detailed, and a Minifig is used for the sign. The awning is also a contender for best, this time using sausages with clips on them. Overall, I like the detail, but the colours on this building are my least favourite of the entire set. The upper section of the tree is now finished on level two, its details far larger and more natural than on its base.

The NINJAGO® museum demands most of the space on the third level, dividing into a gift shop, and the actual museum. The museum itself is fairly similar to the one in the show, with a portrait of Master Yang, a painting of Kai and Nya’s parents, a model of the Destiny’s Bounty, and much more. The centre wall can be easily removed. The exterior detail almost outdoes the interior. The different signs look nice, and the teal windows work well with the bright orange. Around the back, a railed walkway runs from the door of the museum to a small passage between the Museum and an apartment belonging to an artist, which is among my favourite builds. The combination of several shades of green makes it light and pleasant to look at. SNOT techniques build up the front and back walls, which are decorated with plants on either side. A tiny bed and TV occupy half the room, while the other half hosts an easel, upon which a portrait of the City is being painted. Another door opens onto a balcony that cleverly uses angled bar pieces to create a textured railing. So far this might be my favourite level.

The centre of the fourth and final level completes the Museum, with a rounded skylight. A bright, cheery cherry blossom arcs over it, adding to the ‘Gardens’ theme. On the left is a sort of sanctuary, built in lavender. I’m sure there’s a better term for it, but either way it’s lovely. I’ve spoken a lot about how good the colours throughout each build are and this is no different, with a refreshing mix of Reddish Brown and Lavender. Treasure chest lids make a traditional-looking roof that gradually slants inward. The final part of the city is an arcade for the Ninja along with a tower that serves as a secret control tower. The arcade is simple enough, with an armchair, a TV, a hatstand, and, fittingly, an arcade game. The arcade game is actually interactive, with a 1×2 tile that can be pushed upward as you press on the joystick. The design for it blew my mind. BrickHeadz glasses pieces work as rails, and a bright Koi fish build decorates the outside. There’s also a golden telescope stationed just outside the arcade. The tower above houses some spare posters, and Jay’s Ninja costume, a welcome inclusion. Above it is a small command centre with a central console. It’s not super easy to access, but accessibility is sacrificed for stability. Otherwise, it’s just a high-tech tower that increases the rather impressive height of the set.

The last, and final part of the set is a small island that connects to the left side. Upon it is a small temple. A minifig is used for the drastically downscaled Titanium Ninja statue. For those who don’t know, in season three, Zane, the Titanium or White Ninja, seemingly died while saving the city and this monument was erected in his honour. Overall, it supports the theme of nature with more water and foliage.

I’ll speak briefly about the nineteen Minifigs, making it simple by dividing them into those I really like and the others I don’t find particularly noteworthy. The five Ninja along with young Lloyd are great. Clutch Powers, Misako, Ronin, The Mechanic, Hai, Kaito, and Tito are some of the better minifigs. The Legacy version of Master Wu is also great. My favourite of the whole set is probably Christina, the NINJAGO® Superfan with a Green Ninja jersey. Mei, Cece and Eileen are still nice minifigs, although I’m not a particular fan. Some clever part uses make up one final character called Scoop, a cleaning robot.

Earlier, I mentioned my concern at the lack of ‘Gardens’ but having built it, foliage and plant-life scattered throughout really brings the set to life, while signs, pipes and ads mean almost no space is unused. It’s an extremely enjoyable build, the final product a bustling, colourful city. I’ve had it for over a month, and it still appeals just as much as when I first built it. In terms of build experience, few sets rival it in my opinion. I believe the build alone is worth paying for. So many ingenious techniques are scattered throughout every build. You simply can’t go wrong with it. I like rating the different aspects of a set, and I think the following scores are fair:

Build: 10/10

Minifigs: 9/10

Packaging: 10/10

Playability: 9/10

Value: 10/10

All-round it’s a lively and pleasant display. I’d say one of the few drawbacks is that the compact spaces can make it difficult to access and position Minifigures if desired, but at the same time, having most buildings closed means dusting this set is much easier than you might imagine. You don’t have to like NINJAGO® to enjoy the set, you don’t even really have to like LEGO®. It’s a truly awesome set and is certainly the highlight of my collection.

Official Images

80108 Iconic Lunar New Year Traditions Review

Review by Brett Thomas (SAFOLs Members, CapeLUG Members)

I would like to start with why I wanted this set (which I was lucky enough to receive as a birthday present). I am a huge fan and collector of the Lego minifigure. I am always looking for unique figures and creative ways to display these. I have built some of my own habitats for my minifigures and so this set immediately caught my eye as it ticks all the above boxes. It contains 12 minifigures and 6 mini built habitats as well as a central core to join the mini builds

The box is aligned to those in this theme and the front has a large picture of the final build as well as a picture of each minifigure. The rear of the box shows an alternate completed build structure as well as some enlarged pictures of the mini builds.

Inside the box are 7 bags (1 for each mini build and the central core) 6 instruction booklets and 2 sticker sheets. The instruction booklets are separated so that different family members can build these at the same time. The central core build is included in book 1 with the first scene.

Each scene depicts an activity related to the Chinese New Year, I will describe each one and the minifigures in each below.

The central core uses technic parts to connect to all 6 scenes. It has a printed round top with New year Mandrin printing and some stickered tiles representing each scene (These are hidden in the final build.) The rear of each scene has 2 technic axle connectors to join to the core, only 1 is used to join and the other gives some stability when lifting the final build. Each scene is built on a 9×9 base with 3 rounded corners. Each scene has a sticker in Mandarin that relates to the scene.

The 6 different scenes are spring cleaning, food shopping, making good luck decorations, staying up to ring in the new year. Visiting grandparents and the god of prosperity.

Spring Cleaning

In this scene there are 2 minifigures dusting and cleaning the windows of an apartment. It is a full scene with some washing an aircon and a white bird. I like the feather duster build using coloured flower parts and the squeegee using T-bar. Both minifigure are dressed in orange overalls and the torso is a new print

Food Shopping

This shows a Chinese street vendor and his stall. He is selling food and toys on sticks. The toys are depicted by micro statuettes in 4 different colours. The roof of the stall uses ingot pieces, which is a cool way to depict tiles. We also get a new colour ingot in sand blue. The vendors torso has a printed belt and “moon bag” which is new in this set

Making Good Luck Decorations

This scene has an adult and a child making decorations. This scene is packed with details, a mandarin tree holding the final decorations (depicted with a red 1×2 printed tile) a parcel on the doorstep (which per Jay’s brick blog review has the IATA code BLL on it, which is for Billund airport. Some Lego perhaps?) and a small table with a red stickered parcel. The young gild has a quilted jacket torso which is also a new print. The door is surrounded by 3 printed red 1×3 and 4 tiles.

Staying Up To Ring In The New Year

This scene shows a family of 3 watching television just before the new year. There is a stickered digital clock showing the time as 23:59. This scene has a couch, the television (Stickered) a small table and a really cool small aquarium. The father is holding a printed orange/mandarin round tile which is also new.

Visiting Grandparents

This scene shows a child and 2 grandparents they all have the same red printed tile from the making decorations scene. This scene is also packed with details, a picture depicting a tiger (sticker) to align with the year of the tiger, a vase with pink flowers, a bookshelf with 3 books (creative use of the sand blue ingot here also) and a few presents among which is a Lego bag (sticker). The grandparents are sitting on 2 chair parts and there is a lilac carpet. The grandfather has a neat torso with a printed scarf

The God of Prosperity

The final scene depicts Choy San, the God OF Prosperity. The figure has a new torso print and uses a sloped skirt piece to depict a robe. This is also a new print in this set. The head has a wink and a smile. The scene shows gold ingots and “yuanbao” (ancient Chinses ingots resembling a boat with a lump in the middle) These are done using a gold hotdog bun with a gold stud, there is also a large red pot. There is a printed lamp showing a tiger and a printed 2×4 red tile as decoration.

Alternative display

There are some exposed studs on the top of the walls of each scene which allows you to stack these in a pyramid format with 3 on the bottom, 2 on the next level and 1 on the top. The benefit of this is allowing all 6 scenes to be viewed without moving the display. I found this stacking methos to be flimsy and not stable. If you chose to use this, you would need to build some kind of support behind the display

Overall

 This set is only found at LCS stores and retails for R 1 299.00, it consists of 1066 pieces and includes 12 minifigures. There is a lot of detail crammed into each scene and a few techniques you could use in other builds. The builds could be done by the whole family together. There is a good quantity and variety of minifigures which could also be used in other Lego displays. This will make a interesting display piece. I would recommend this set.

71387 Adventures with Luigi Review

Reviewed by Chris McGee (SAFOLs Member, jhbLUG Member)

Introduction:

So it has been a while since my review of the Mario Starter Course set and a lot has happened, both in the theme and at LEGO® but seeing the Luigi starter course being released, I put it on the to-do list from a review perspective. Although I was positive about the Mario starter course, I was concerned about the longevity of the theme and the play system but with the introduction of the Luigi figure, it shows that the theme has had some legs on it. Also as a side note, I haven’t covered the mobile application in this review, but you can refer to the review of the Mario starter pack if you would like some insights.

The Figure:

In my opinion, the Mario figure was one of the most creative technology items LEGO® has produced in recent history. With the likes of the augmented reality themes coming and going without much staying power, for LEGO® to bring out a new starter set, embracing the old technology as well as bringing in some new co-operative features shows a lot of positives towards the initial Mario starter set.

The Luigi figure itself is very similar to Mario, having the same shape and ability to use the power up packs (suits and the cap), although also being slightly taller and the features elongated to give the impression that he is slenderer than Mario as reflected in the games. One disappointment I had was that the printed “L” on the cap was printed slightly off center, and hopefully is an isolated incident.

The functionality and usage of the figure remains the same as the Mario and updates come through the mobile application which will allows for the same functionality across both Luigi and Mario. One of the great aspects though is that the voice as well as the recorded lines are different to Mario giving you a semi-authentic play experience.

Best feature that has come with the Luigi introduction would have to be the new co-op feature. Essentially, you can use both Luigi and Mario in unison and actually play a 2-player game mode (Note: Mario figure not included in this set). The 2 figures can be paired using the Bluetooth functionality and now you can build a larger course or have multiple routes and play alongside your friend. A bonus to this is that Mario and Luigi also have talking points such as saying “Hi” to each other.

The Builds and Course:

So I noticed when building the set, that a large portion of builds were made to be more geared towards the course building system versus focusing on small modules, rather than the original Mario starter set which did try and guide the course a bit more.

The set also comes with extra plates for joining the different platforms and does allow for more intuitive creativity in the play and course building. It does also come with the starting pipe as well as the end flag which seem to be almost identical to the original starter set which I feel should be the case given this is also meant to be a starter course, and the inclusion of a single question mark block is a handy addition.

The core play function in the set comes from the inclusion of 3 characters and a rotatable see-saw build which is quite interesting.

The use of the “splat” gear modified plates which come in the separate platforms allows you to spin your Luigi (or Mario) to earn coins, but then also connect to and spin the rotating see-saw. You can also use the figure on the see-saw itself and earn coins by bouncing from either side. However, this was clearly built to be done in a co-op mode with 2 of the figures playing in tandem effectively teetering from side to side on the see-saw, or one figure spinning the platform and another figure busy on the see-saw. Playing in co-op with this build was a lot of fun trying to maximise the coin collecting.

The Characters:

Alongside Luigi, the set includes a Pink Yoshi, as well as 2 enemies to battle, being a Bone Gumba (in a walking pose) and Boom Boom, one of the many koopalings.

I am appreciative of the inclusion of the Pink Yoshi here as the original starter set did lack some additional aspects to the interactions available. It is a solid build although pretty much the same as the Green Yoshi which has been available from the first wave of sets. The printing of the eyes could have been more opaque though. The Boom Boom is a welcome inclusion and is a well thought out build giving the right shaping of the head and fists as well as nicely articulable arms using the mini-ball joints. The Bone Gumba is also very welcome since we did see more (and probably too many) regular Gumbas in previous sets.

I have heard of people who don’t enjoy the brick-built characters and would have preferred new moulds, and it is the same debate which happens with the different dinosaurs that LEGO® release. I can see that side of the argument, but for me, these brick-built versions really do give a great aesthetic to the course building system, and I do think that the designers have done a good job with them.

The Verdict:

This is a better value starter set with some extra interaction, an additional character when compared with the original with an additional 50 pieces and 280 pieces in total versus 230 pieces. The cost of the set is clearly down to the Luigi figure as the technology factor influences. However, as I said in the prior review, the technology really is great and worth the price of admission in the set.

But I am not sure if getting this set alongside the original version (if you have it) would be needed. If you are like me and need the Luigi to be alongside Mario and enjoy the new co-op features then the set more than attends to your needs and ticked all of my personal boxes (with some annoyances on production quality as mentioned through the review) But if you are happy with Mario or are not a fan of the course building system of play or fairly simplistic builds, it may be just more of the same…

Official Images:

21329 Fender Stratocaster Review

Review by Luke Comins (SAFOLs Members)

Released October 1 2021, this set includes 1,074 pieces.

The Gig
Just about all sets released under the LEGO® Ideas banner come from fan designers uploading their creations and getting 10,000 votes. In recent years, contests have offered a unique way to gather fan-created content. After a few smaller projects have been transformed into GWPs (gifts with purchase), this set is the first to be released after being featured in a LEGO® Ideas Contest. Back in 2020 LEGO® Ideas ran the ‘Music to Our Ears’ contest. This contest required fans to create a music-themed build. Fans could vote for their favourites as well as the possibility of one of the finalists becoming a future LEGO® set. One such entry was the legendary Fender Stratocaster project designed by Slovakian fan designer Tomáš Letenay. It did not win one of the contest’s top prizes however was chosen to become the 37th LEGO® Ideas set.

The Fender Stratocaster was created back in 1952 and became an instant classic, everybody needed a ‘Strat’. Known for its distinctive shape, double cutaway, extended horn and contoured back, the timeless design has led to nearly 60 years of market dominance for the Stratocaster – and that’s exactly the kind of legacy that makes it a perfect fit for the LEGO® Group, particularly the +18 Adult theme.

The Good, the Bad and the Build
The set consists of a guitar, foldable display stand, amplifier and foot pedal which comes in twelve numbered bags.
The first eight numbered bags contain the parts for the guitar, and the rest are for the amplifier.

The instructions booklet also includes some neat extra content including the history of the Stratocaster and the fan designer behind the set’s original concept.


You start by constructing the neck and fretboard of the instrument. There are 6 strings included in the build that aren’t normally offered in such a long length and they each have a coloured stud attached to them. Once correctly placed in position, these are then removed. This visual marker is a simple yet helpful way to ensure the strings are placed in the right formation. Once they are, you are required to twist them counterclockwise in order to tighten them. The unique fretboard tiles are really cool and make it possible for MOC builders to now create some other brand guitars. The 1×1 corner tiles supplied for 4 different picks are also a nice touch.

The headstock looks somewhat close to the real thing, but the connector piece makes it look a bit crappy and the tuning keys and bridge in silver would have been a real bonus. The printed Fender logo could also have been a fraction smaller just so it doesn’t freak out my semi-OCD mind.

The guitar can be built in red or black and I chose the red version to build first as that is what is shown as the main image on the box, and I personally find the red ‘Strat’ more iconic.

The body of the guitar uses various sideways building techniques using slopes to recreate the curves. The top curves are unfortunately not as smooth as have been achieved on the bottom of the guitar shape. The result is that swapping between the two colour ways isn’t all that simple. You can’t just cleanly detach the black body and attach a red sub-assembly as the official images suggest; thanks to the way the strings are integrated into the bottom of the pick guard and the body, you’ll have to pry apart chunks of the guitar if you fancy a change.
The volume and tone knobs could have been detailed whether printed or with stickers. LEGO® have printed tons of random 1×1 round tiles…
Oh yes, the stickers… there are a few nice ones to apply, one for the back of the guitar and three for the amp.

One of my favourite parts of the Fender build is the unique textile strap (same as used for minifigure capes etc). On a real instrument, the strap is an important tool to help with playing it.
The version here has been given a LEGO® twist, with brick stud patterns interwoven with the Fender logo, a nice print!

As much as the focus of the set is the guitar, the accompanying ’65 Princeton Reverb amplifier is just as important and in fact, is even more interesting to build.
The amp pulls a similar trick to the LEGO® 71374 Nintendo Entertainment System’s console in how it’s designed first and foremost to be dynamic for the builder, rather than solely to be admired on display. The various components of the motherboard and fuses that form the inner workings of the amp have all been worked into the build, even if some of those pieces aren’t connected in a traditional manner. This includes the speaker dish being held in place by the edge of studs and various different coloured 1×1 tiles wedged sideways between studs. The results are pretty cool and can be easily viewed or accessed once the set is built as the back and top covers can be removed.

Just as you would a real guitar, the LEGO® Stratocaster can be connected to the amp via a uniquely long piece of tubing. Another is used to connect the foot pedal to the back of the amp. Even the pieces used to achieve this are interesting, with ‘lipstick’ elements used to create connector pins. These elements are also used inside some of the fuse tubes inside the speaker.

The guitar measures in at a reasonable 36cm tall and 11cm wide and comes in surprisingly close to the initial design concept, both in scale and design.

This build brilliantly captures the iconic shape, proportions, and details of the Fender Stratocaster, across both the guitar and amp.

It does seem a little smaller than expected but I think that adds to the charm as well as making it a lot easier to display. Interestingly, the amp seems to be the overall bigger hit in the set.
There is not really any playability in the set so best to stick to your air guitar or a real one for that.

Oh yes, LEGO® throw in a nice big LEGO® Fender sticker as an added bonus!

This set took 4hrs build time including making the black version of the body to swap if I feel like it one day…

(Photos Credit: Vizcom)

70004 Chima Wakz’ Pack Tracker

Review by James Burnett (SAFOLs Members, CapeLUG Members)

The Chima theme is centred on the fictional world of Chima, a place inhabited by warring tribes of anthropomorphic animals. There are 12 main tribes living in the various parts of Chima. These are Bear, Beaver, Crawler (sub-divided into Bat, Scorpion, and Spider), Crocodile, Eagle, Fire (sub-divided into Phoenix, and Tiger), Gorilla, Ice Hunter (sub-divided into Ice-Bear, Mammoth, Saber-Tooth Tiger, and Vulture), Lion, Raven, Rhino, and Wolf Tribes.

The Wolf tribe is a nomadic tribe and have no need for large cities. They have a permanent base in the Timber Woods called Wolf Camp, but they prefer to roam the land. They have no royal family or formal leadership structure as it has little need for a leader because they form a close pack that all think alike. They do choose one wolf (the Alpha) to handle interaction and negotiations with other tribes. The Wolf tribe loves destructive. The Wolves revere a great “Mother Wolf” whose “Mother Tooth” was left to them to provide light in darkness and thus is treated as a holy. The tribe consist of 5 members:

  • Worriz (the Alpha male of the tribe)
  • Wakz (elder of the tribe).
  • Wilhurt (a soldier and the Alpha’s second in command)
  • Windra (a female member of the tribe.
  • Winzar (a soldier of the tribe)

All Wolf tribe vehicles feature a full wolf-head build into a truck in gray, black and dark red. Vehicle features include a head, jaw, white teeth, fangs, large wheels and flaming exhausts.

The Build

The main build consists only of the Wolf tribe vehicle called a Pack Tracker and it uses mainly black, dark red, DBG and LBG. It is built to resemble a wolf. The drivers cabin is shaped like the head of a wolf with eyebrows and everything. The bottom jaw of the snout is hinged and can be opened or closed, depending on the pose you could like to have.

The back of the vehicle resembles a stand truck flatbed and this is where the primary weapon is located which is one of the newer projectile launchers (cannon). The projectile has a good range and does shoot out with a decent force, so avoid shooting yourself in the eyes as it will hurt (don’t ask how I know J ).

The tail is a chain with two claws attached to it, and is a secondary weapon. It can be rolled in using technic gears thereby capturing enemies and bringing them on board the vehicle. The large open snout, large black wheels and dark red exhausts (with flames) gives the vehicle an a very aggressive look, which fits in perfectly with the nature of the Wolf tribe.

The Minifigure

The set comes with 3 minifigures. The first is Wakz, one of the pack Elders. His legs are DBG with white claws and he is wearing dark red pants. Patches of fur can be seen sticking out of his pants. On the front of his torso is a dark azure circle (representing CHI) with dark red armour, silver markings, and a fur animal pelt print. The same detail is on the back of his torso. A flat silver armour piece fits on the torso.

His head is double-sided with one side being stern, and the other appearing as if he is snarling. A wolf head-piece goes over the standard minifigure head in order to enhance the look of a wold. The headpiece is DBG with LBG accents which helps to create the look of an older wolf (seeing as he is an Elder).

The second minifigure is Winzar (a soldier of the tribe). His legs are LGB with white claw. He is wearing a dark red loincloth and has a fur tail lucky charm dangling from his belt.

On the front of his torso is a dark azure circle (representing CHI), surrounded by DBG chest hair. The rest of his fur is LBG with muscle printing. The back of the torso is mostly LBG with a few strips of BDG fur. I am slightly disappointed how plain his back print is, but luckily you would display him from the front.

His head is double-sided with very detailed red scars over his left eye with is closed. I am not sure if he lost the eye in a previous battle or if it is only swollen shut. His wolf head-piece has stubble and the same red scars as on the head. Over all the printing detail creates an angry and ferocious looking wolf soldier.

The third minifigure is Equila (the Tournament Announcer of the Eagle tribe). His legs are white with yellow talons. He is wearing a dark blue belt and pearl gold belt as well as pearl hold knee covers. 

On the front of his torso is a blue circle (representing CHI), with an absolutely stunning pearl gold armour plate pattern. The rest of the torso is bright light blue with muscle printing. The back of the torso has the same beautiful armour plate printing. A pearl gold armour piece fits on the torso with a trans-light blue round tile represents the CHI on the front. White wings can be attached to the back.

He has a double-sided head with one side having very cool orange goggles. An eagle head-piece goes over the standard minifigure head in order to enhance the look of an eagle. The headpiece is mostly white with some medium blue feather.

Conclusion

While the vehicle is a fun build that does a great job representing a wolf, the true value of the set lies in the detailed minifigures which is a pure joy to display and look at on a daily basis.

70003 Chima Iris’ Eagle Interceptor

Review by James Burnett (SAFOLs Members, CapeLUG Members)

The Chima theme is centred on the fictional world of Chima, a place inhabited by warring tribes of anthropomorphic animals. There are 12 main tribes living in the various parts of Chima. These are Bear, Beaver, Crawler (sub-divided into Bat, Scorpion, and Spider), Crocodile, Eagle, Fire (sub-divided into Phoenix, and Tiger), Gorilla, Ice Hunter (sub-divided into Ice-Bear, Mammoth, Saber-Tooth Tiger, and Vulture), Lion, Raven, Rhino, and Wolf Tribes.

The Eagle tribe is the most analytical of all the tribes. They live in the Eagle Spire which is a tall spire/pillar of rock jutting into the air with numerous buildings and towers near the top. The Eagle Spire has no windows, doors, or streets because Eagles can fly, making it obsolete.

Even though the tribe has a royal family, the tribe is ruled by a Ruling Council of Elders. The tribe consist of 5 members:

  • Ewald (head of the Ruling Council)
  • Eris (Princess of the Eagle Tribe)
  • Equila (the tournament announcer)
  • Eglor (the inventor of the tribe)
  • Ewar (a soldier)

The tribe’s vehicles generally resemble white bird-heads with yellow beaks. The body will normally be different shades of blue and azure with white accents. Talons are also a common feature, either coloured pearl gold or black.

The Build

You first build the small glider of the Raven tribe. It consists of only 29 parts. Although it does somewhat resemble a raven, mainly due to the black colour, it is a very plain build and does not use any new or interesting techniques. Luckily it is only a support build and the main focus should be on the larger Eagle tribe vehicle.

Next you build the much larger vehicle of the Eagle tribe after which the set is named. The designers did an excellent job in making the vehicle resemble an eagle. The wings, tail, legs (with talons) and head articulate, making it easy to place the vehicle in different positions. The colours of blue, dark blue, and dark azure (with accents of white and yellow) creates an appealing aesthetic. The vehicle has numerous weapons, while the talons can also serve as a weapon to grab and hold enemies. The head of the vehicle can also detach and be a small recognisance vehicle with its own wings and weapons.

The Minifigures

The set comes with 3 minifigures. The first is Eris, the Princess of the Eagle tribe. As with all Chima figures, a lot of detail has gone into the printing detail. Her legs are white with yellow talons printed on them (showing the attention to detail as it links to the yellow used in the talons of the vehicle), as well as pearl gold printing on the legs and hips.  

On the front of her torso is a blue circle (representing CHI), with a pearl gold armour printing. Lego does seem to have fallen into the trap in the fantasy realm where all female warriors have a lot of exposed flesh (compared to male warriors that are fully covered and protected by armour). This does however not take anything away from the quality of this minifigure. The back of the torso is the same armour print.

A pearl gold armour piece fits on the torso. I really appreciate the fact that even though the armour covers half of the torso, it did not limit the printing of the torso which allows you to display the minifigure with or without the armour. A trans-light blue round tile represents the CHI on the front. White wings can be attached to the back. As with all Chima minifigures, the head is double-sided with one side being calm, and the other appearing friendly. An eagle head-piece goes over the standard minifigure head in order to enhance the look of an eagle. The headpiece is mostly white is a beautiful pearl gold print that reminds me of a tiara (seeing as she is a princess).

The second minifigure is Razar (prince of the Raven tribe). His legs have dark bluish grey (DBG) talons printed on them with a red belt and silver buckles.

On the front of his torso is a blue circle (representing CHI), some DBG belts and dark purple feather prints. The back of the torso also has the DBG bels and dark purple feather. He lost his left hand which has been replaced with a flat silver hook.

A flat silver armour piece fits on the torso. A trans-light blue round tile represents the CHI on the front. Black wings can be attached to the back. The head is double-sided with red and silver printing. A raven head-piece goes over the standard minifigure head and has the same red and silver to match the head.

The third minifigure is Rizzo who is half raven and half cyborg. He has one flat silver pirate peg leg and one standard leg. Interestingly it is one of the few Chima legs with no printing on them. I don’t know what the reasoning was behind this/

His torso is almost identical to Razar, except he has a DBG belt printed onto his torso, while Razar has a red belt printing onto his hips. Rizzo also has both his dark purple hands.

A flat silver armour piece fits on the torso. A trans-light blue round tile represents the CHI on the front. Black wings can be attached to the back. The head is double-sided. Rizzo also lost his left eye so that has been replaced with a metal eye patch. A raven head-piece goes over the standard minifigure head which has a beautiful metal plate on the left side of his face.

Conclusion

While the glider of the Raven tribe is functional, the vehicle of the Eagle tribe is a fun and interesting build. The minifigures are also done really well, with enough variation between the two Raven tribe members to not appear monotonous. A definite must for any Chima fan.

70000 Chima Razcal’s Glider Review

By James Burnett (SAFOLs Member, CapeLUG Member)

In 2018 I came across a raven/crow minifigure that I had no idea what theme it belonged too. However, the printing detail was done so exceptionally well that I immediately did my homework to find out which theme it belonged too. And so I discovered the amazing (although short lived) theme of Legends of Chima.

The theme is centred on the fictional world of Chima, a place inhabited by warring tribes of anthropomorphic animals. There are 12 main tribes living in the various parts of Chima. These are Bear, Beaver, Crawler (sub-divided into Bat, Scorpion, and Spider), Crocodile, Eagle, Fire (sub-divided into Phoenix, and Tiger), Gorilla, Ice Hunter (sub-divided into Ice-Bear, Mammoth, Saber-Tooth Tiger, and Vulture), Lion, Raven, Rhino, and Wolf Tribes.

The most powerful natural resource on the world of Chima is Chi. It gives life and energy to much of the world and it contains the raw power of nature, compressed into an orb. Chi flows in the form of magical water into a sacred pool and combines with the minerals in the pool to form glowing, blue Chi orbs. Chi is then channelled into weapons, equipment, vehicle, and more. Most inhabitants of Chima wear a special harness that is designed for holding orbs of Chi and absorbing its power. When the Chi is placed into the harness, it releases a surge of energy into the wearer that increases strength, speed, stamina, as well as enhancing instincts and natural senses.

Figure 1: The tribes of Chima

The Raven tribe is the sneakiest tribe in Chima. They reside in the Raven’s Junkyard (a city in the desert). They are professional thieves with a strong attraction to shiny objects. Their vehicles are often gliders coloured black, dark red, and purple. The tribe consists of 4 members:

  1. Rawzom (King of the Ravens)
  2. Razar (Prince of the Ravens)
  3. Razcal (the tribe’s accountant)
  4. Rizzo (cyborg-like leader of some packs within the tribe.

The Build

The build consists of a small glider. Like most of the vehicles in the Chima world, the glider is built to resemble the specific tribe, is this case a raven.  For a small build of only 99 pieces, the designers did a good job representing a raven. The wings and claws can articulate making the glider easy to pose in various attack modes. The colours of black, dark red and purple give the vehicle an overall ominous look and feel, while adding a touch of humour in the form of a bone as the control stick. The glider has 1 main weapon which is flick operated in the centre of the chest.

The Minifigure

The set comes with only 1 minifigure which is Razcal. The printing detail is exceptional from the claws on his feet to piercings on his eyebrows. His legs have dark bluish grey (DBG) claws printed on them, as well as some gold, purple, and DBG details above there. His hips have gold detailing in the center and a bit of DBG around the gold.

On the front of his torso is a dark azure circle (representing CHI), some gold above it and around it, and a lot of DBG and purple detail. The back of the torso has printed DBG pockets with gold on them, and some purple feathers printed all around the back.

A flat silver armour piece fits on the torso. A trans-light blue round tile represents the CHI on the front. Black wings can be attached to the back. As with all Chima minifigures, the head is double-sided which one side being calm, and the other appearing agitated. A raven head-piece goes over the standard minifigure head in order to enhance the look of a raven.

Conclusion

For the size and number of parts, it is a fun and interesting build. It is a good introduction to the world of Chima.