By Allan Taylor (SAFOLs Member, CapeLUG Member)
DAY 1
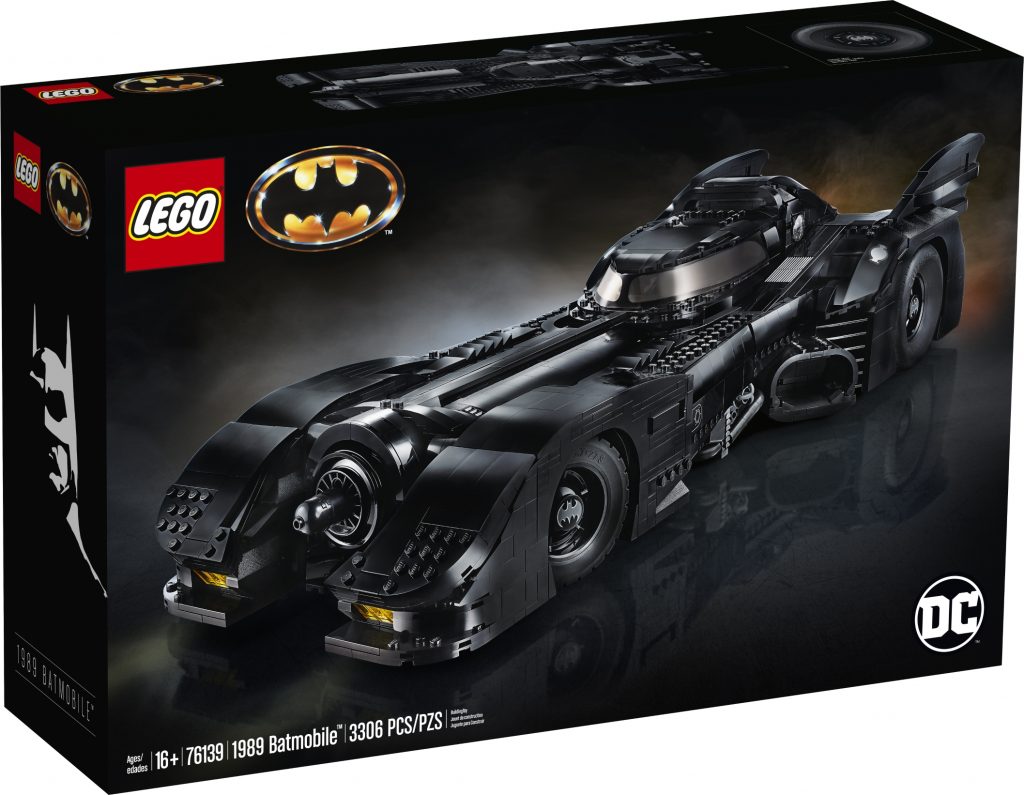
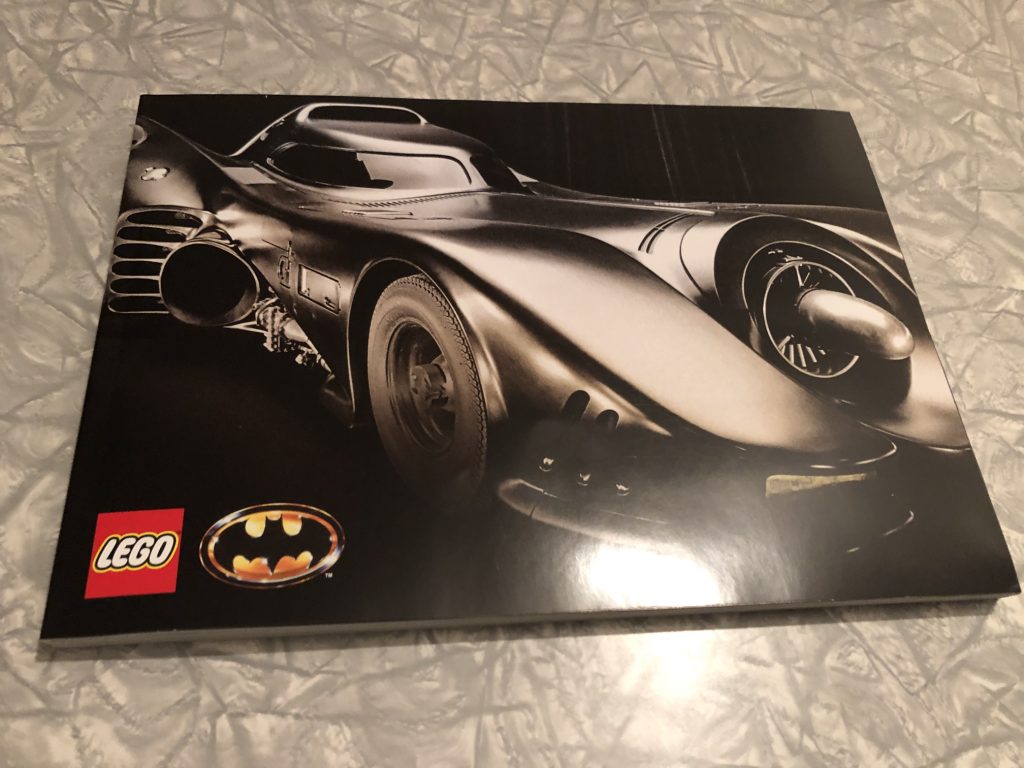
Black… All important builds start with a bag of black bits. And music! Edgy, scary music that would make a parent, or studio executive, nervous. And thus… with Danny Elfman’s brilliant score for the original 1989 Tim Burton classic setting the correct, sombre tone, I reach for my knife and open the huge box of shiny new LEGO® that has been haunting my dreams this past month. Welcome to my review of LEGO® set #76139!
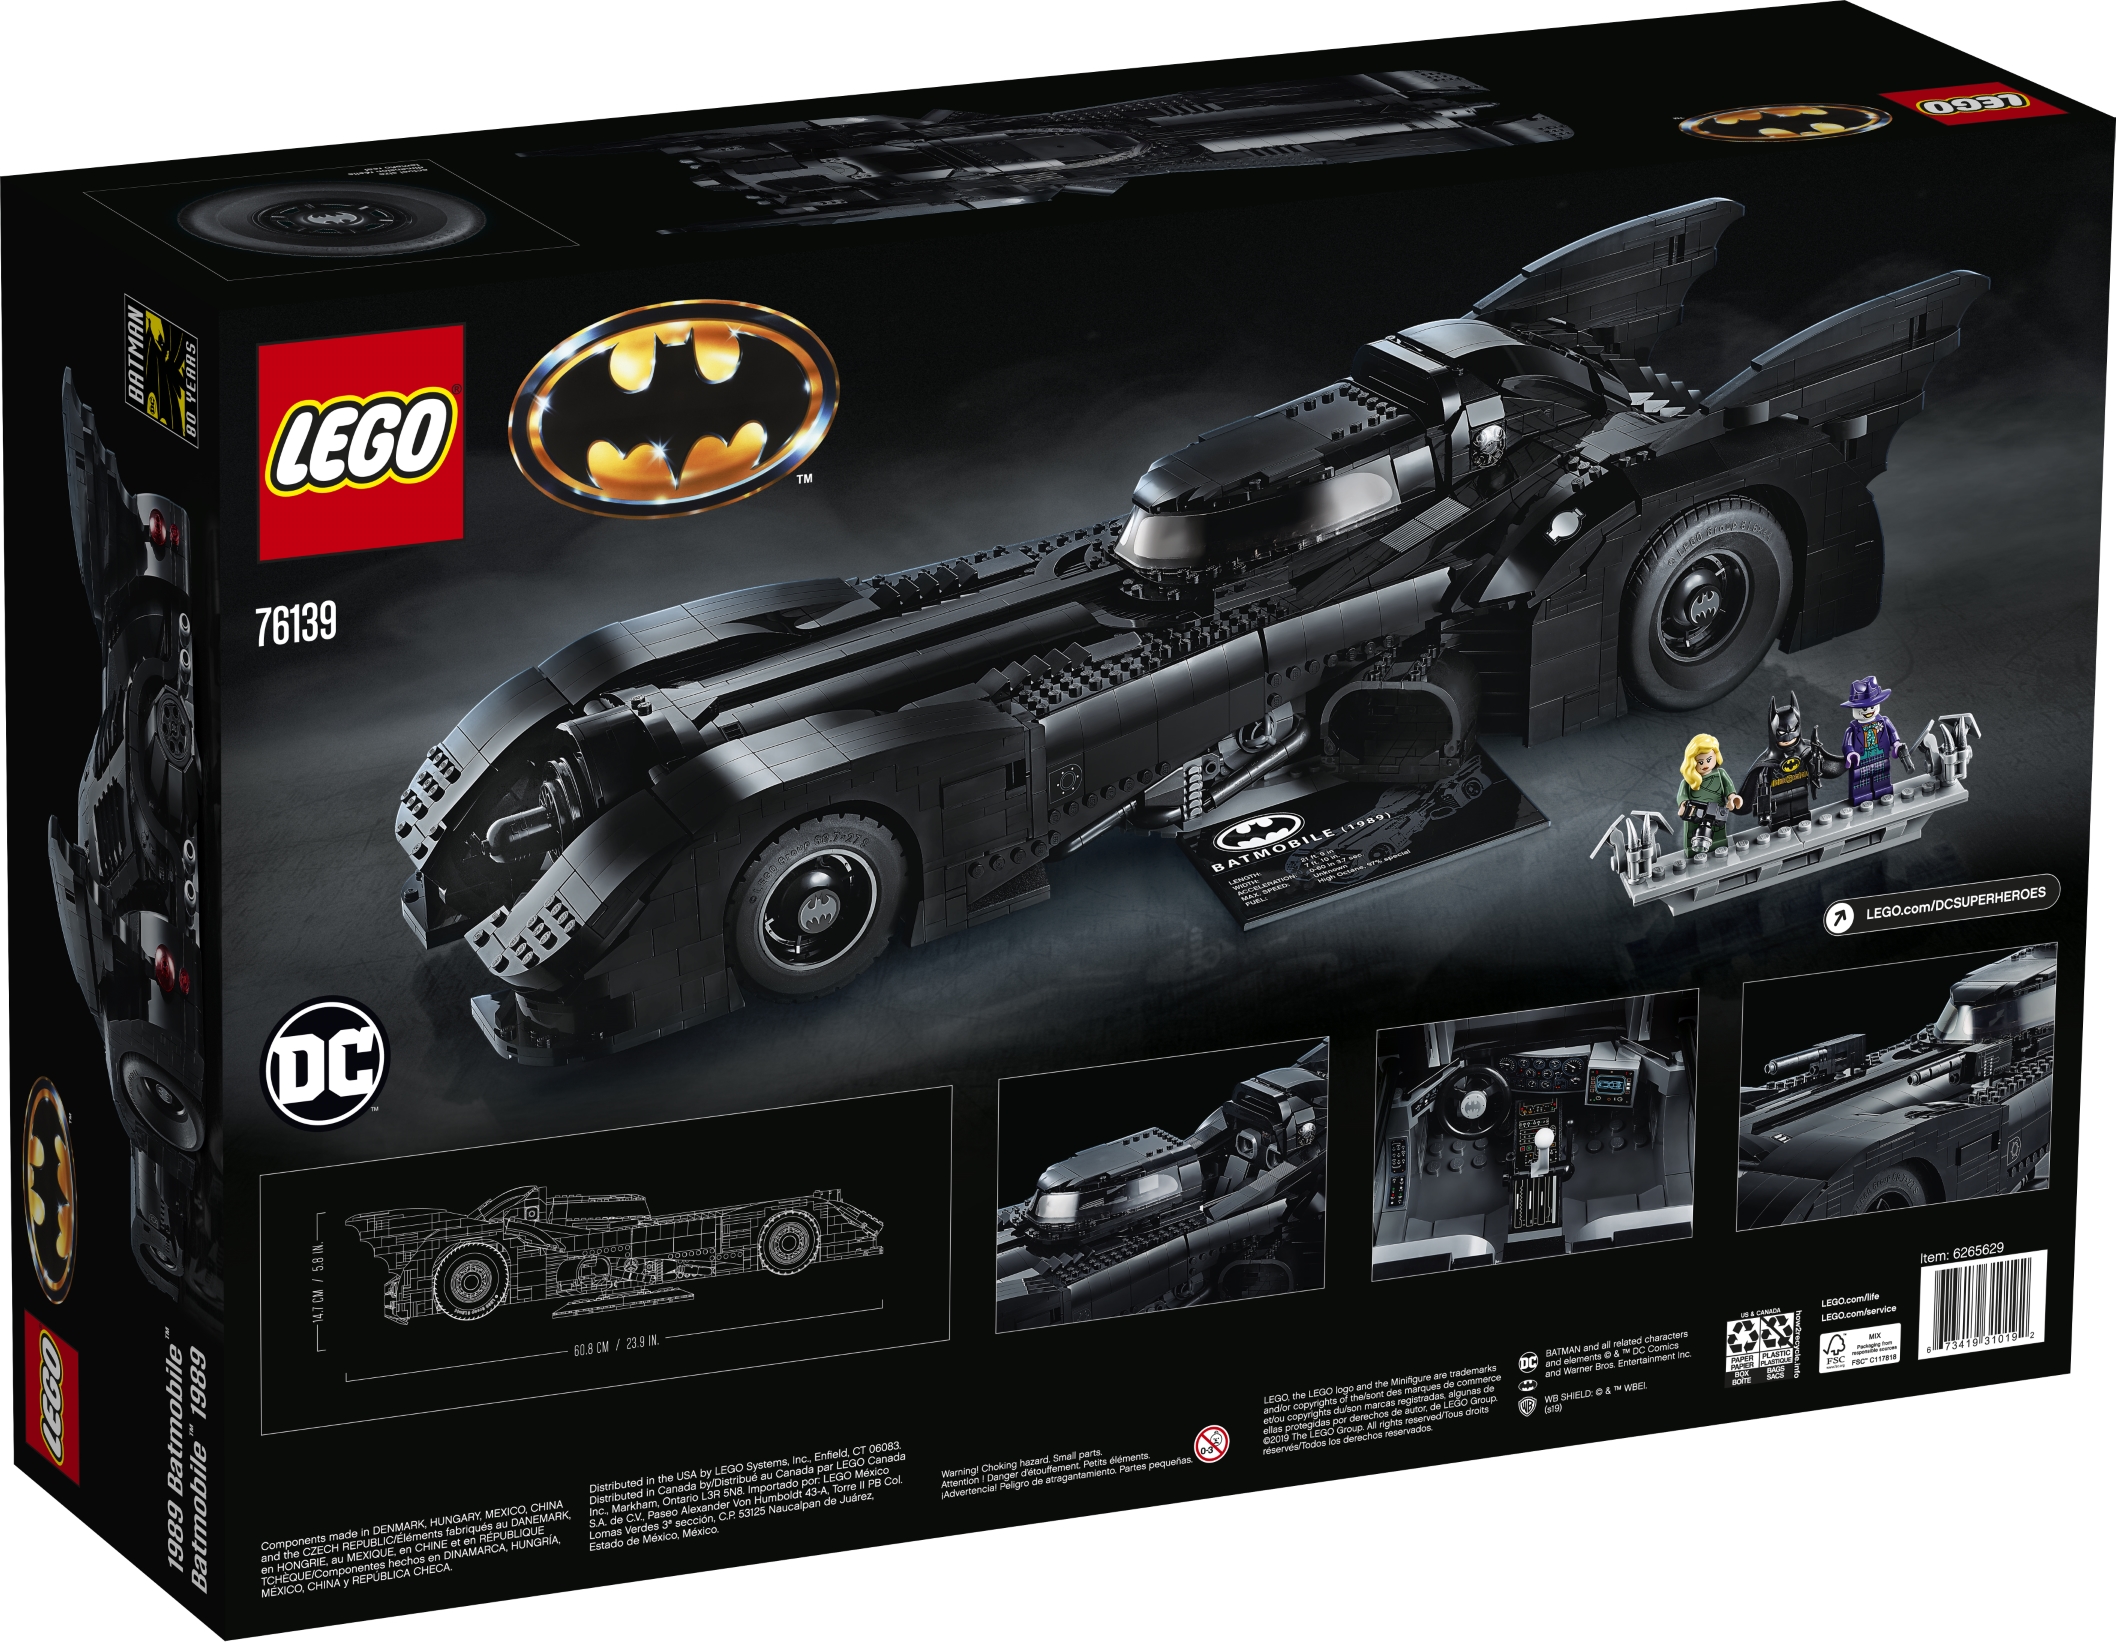
The box art for this set is just next level superb, and that’s saying something given that LEGO® has historically produced some pretty epic pack shots and box art. A matte black finish is embossed with glossy images of what many consider to be THE quintessential Batmobile. Also included are images and a logo indicating that this set is to celebrate both the 30th anniversary of Tim Burton’s rendition of Bob Kane’s creation and 80 years since Mr Kane first released images of the Dark Knight.
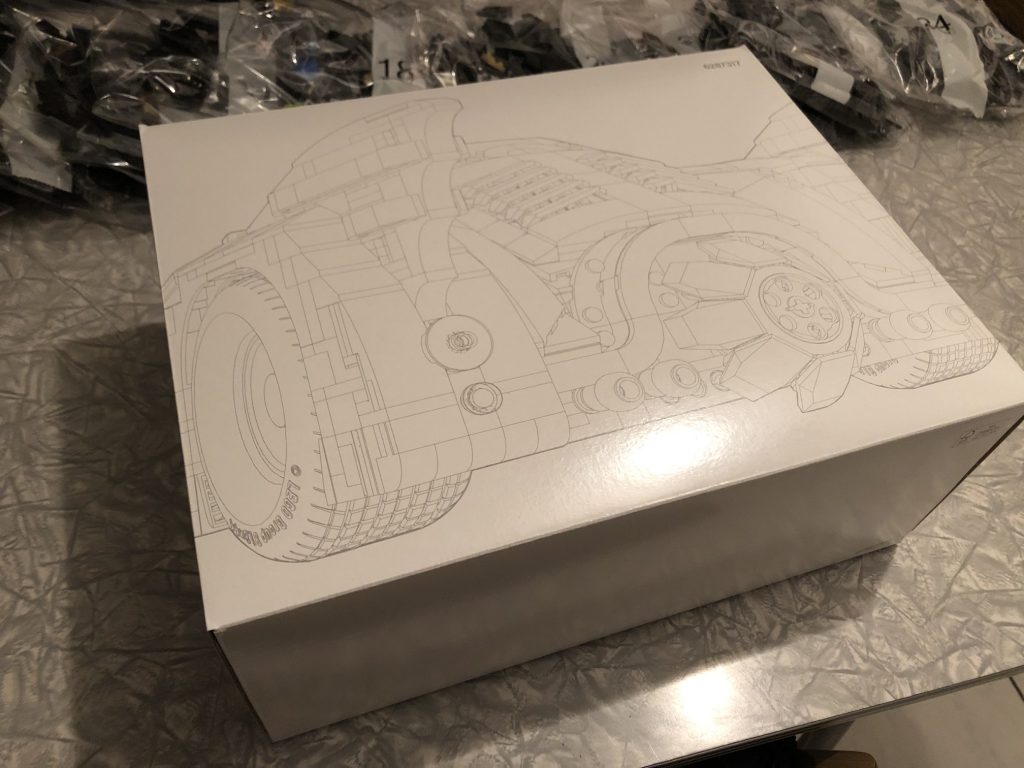
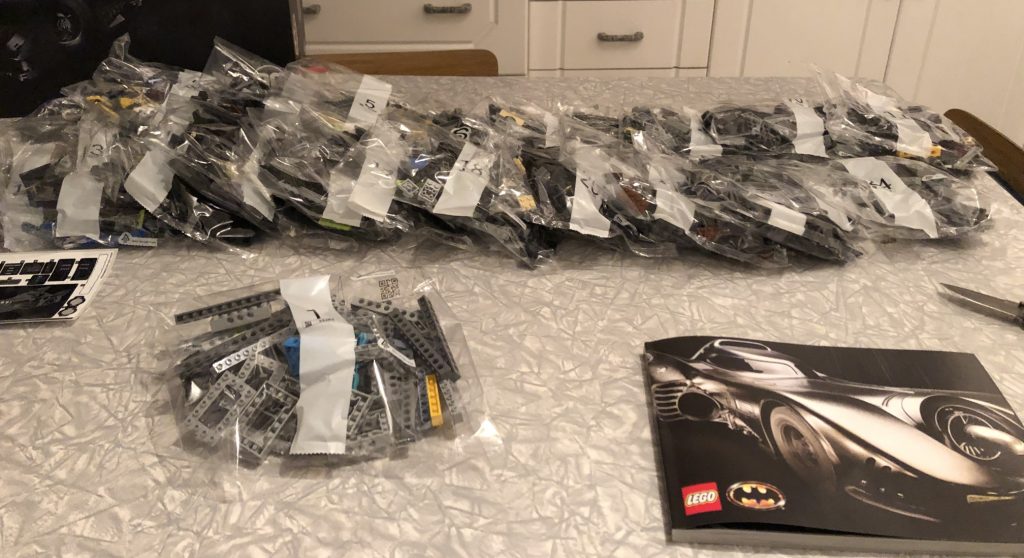
One of the first pleasant surprises is that there is nice art in the form of a schematic style rendering of the Batmobile on the (usually plain) white box containing roughly half the parts. I am always grateful for these boxes as not only do they add support for the bigger boxes but they also help to keep manuals and sticker sheets from being misshapen or deformed open opening. I am pleased as punch that mine are in perfect nick!
Unnumbered bags include the rims and windshield (is this the most expensive piece I now own??).
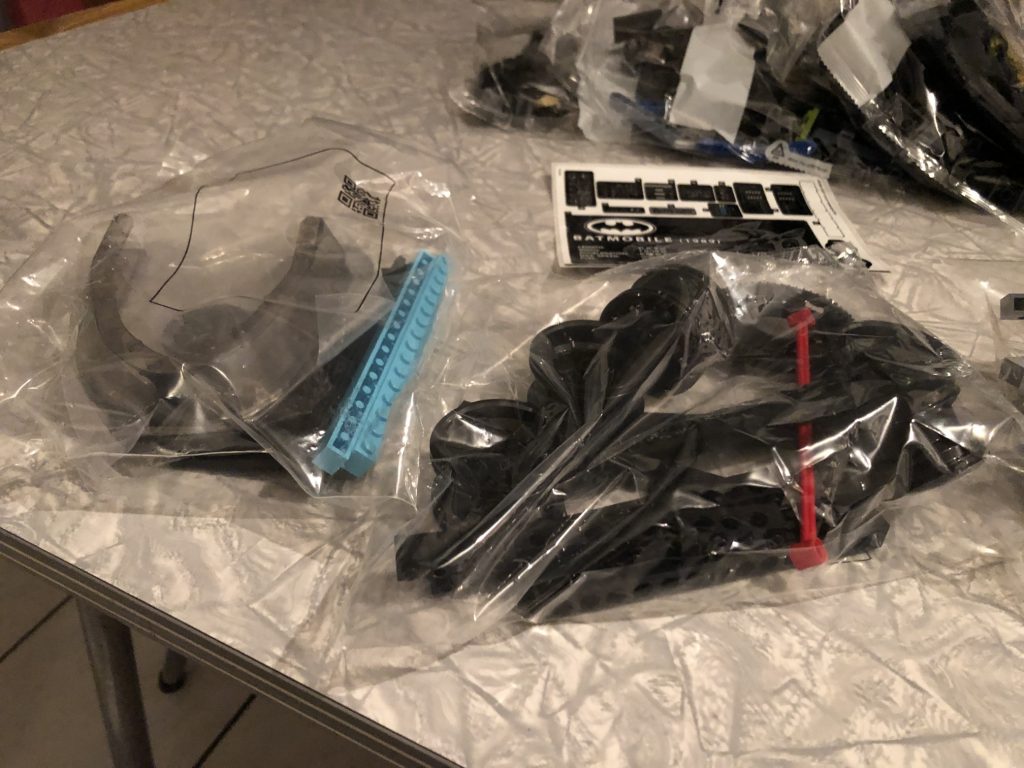
The first bag is a hefty one to get us started.
The manual is super swish! Exactly what I would expect from a UCS build and it has info about the actual Batmobile as well as the creation of this particular LEGO® design.
Perusing the preamble it seems Burton himself had some final say in design choices with the work being submitted directly to him from the LEGO® design team.
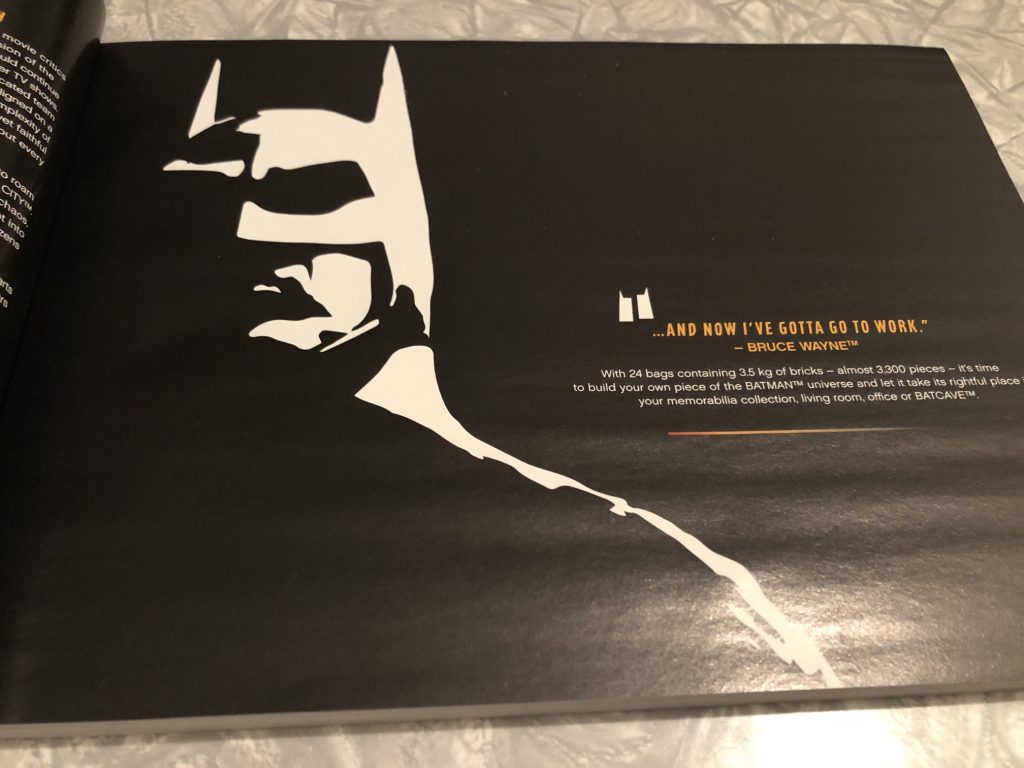
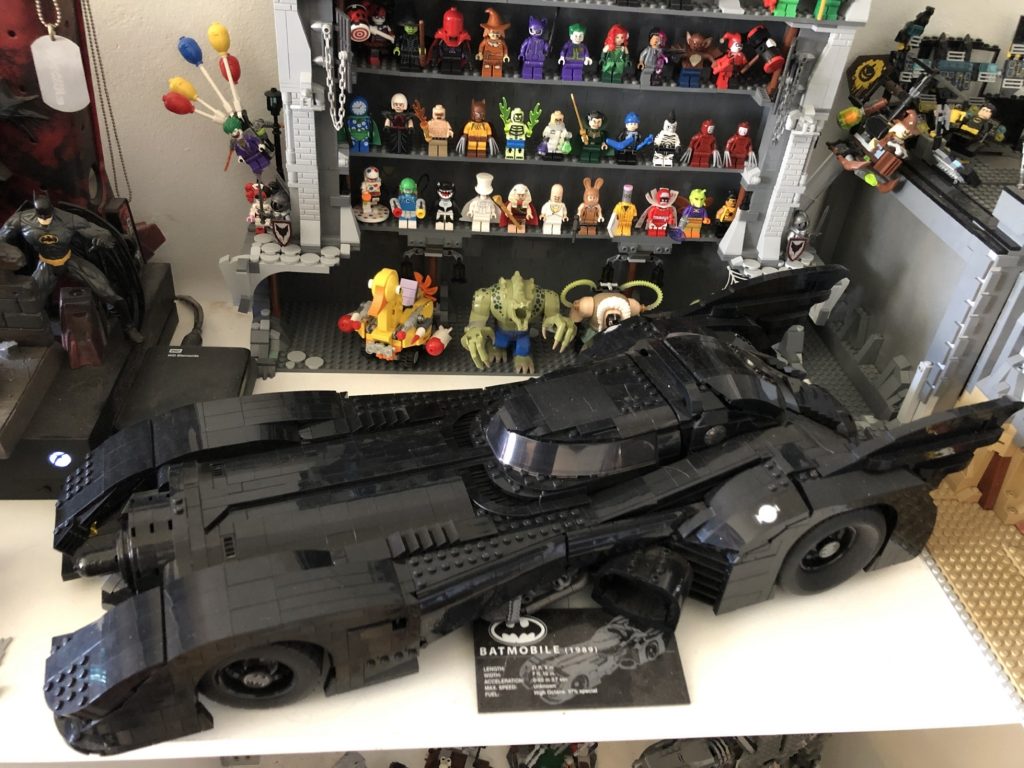
The notes in the manual indicate that this build has over 3300 parts and weighs in at around 3.5kg. This is going to be EPIC!
Danny Elfman’s score for the original movie jamming, snoozing cat and a much bigger kitchen table secured! I’m finally ready to start.
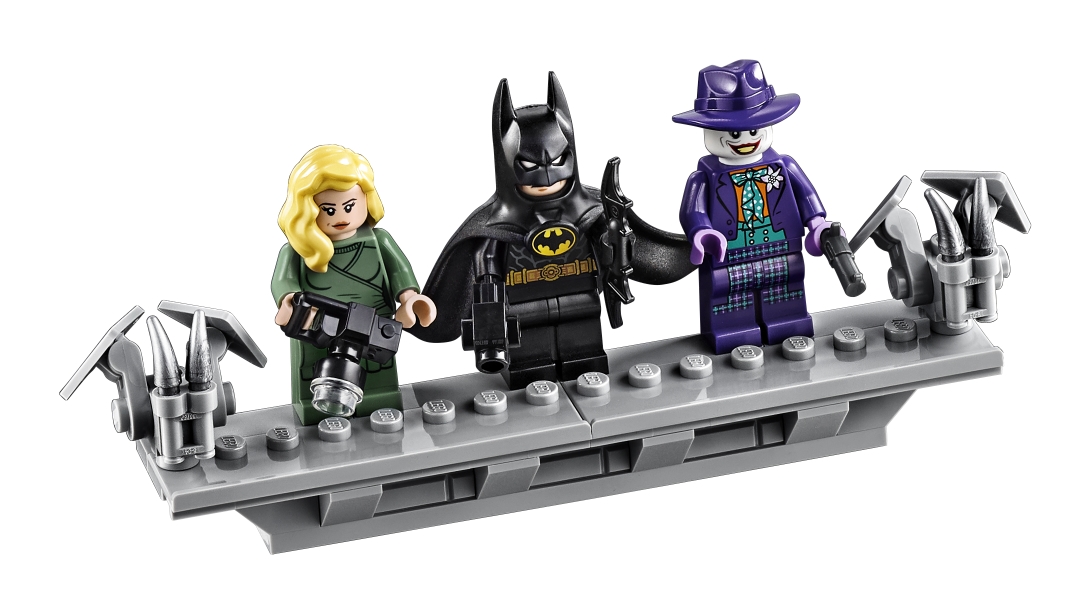
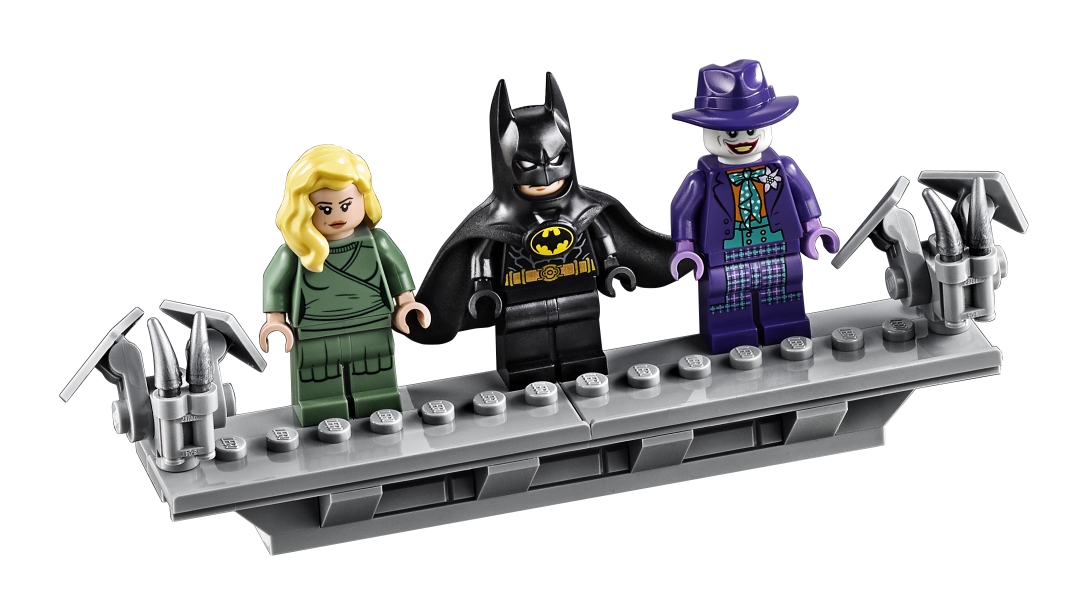
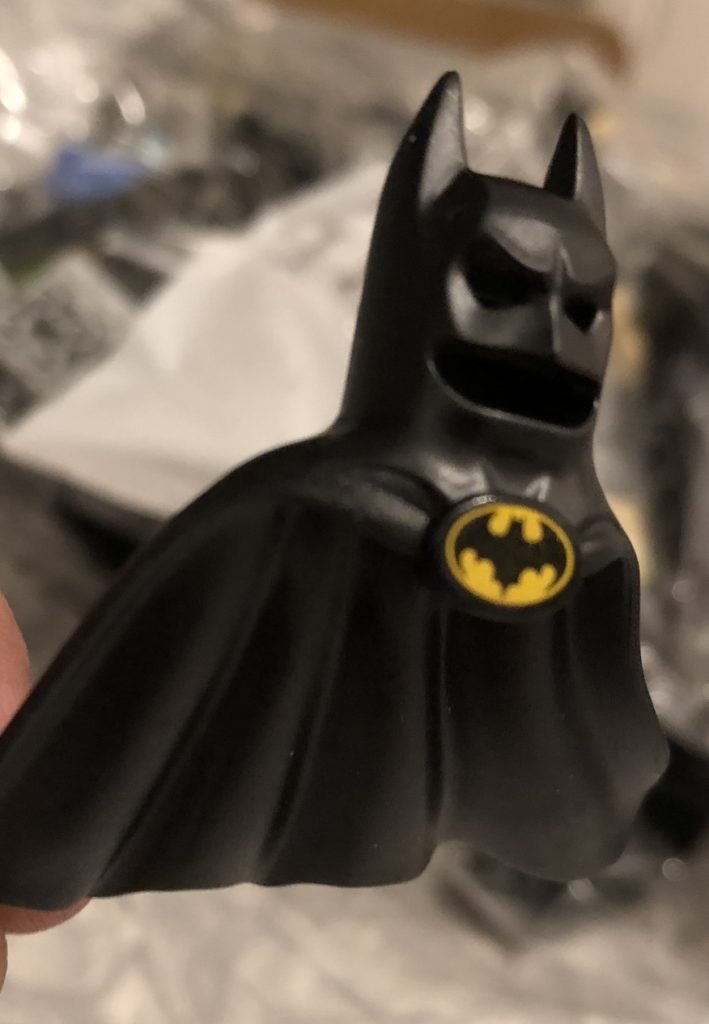
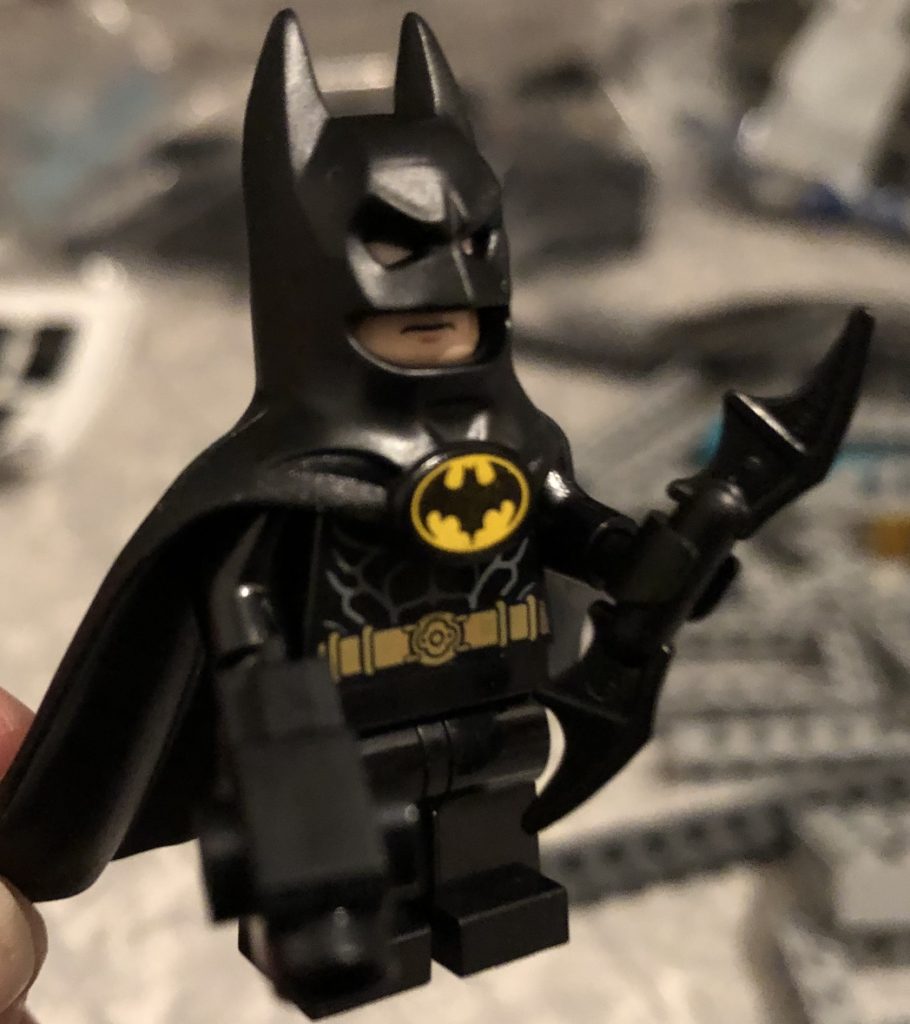
The Batman minifig included with this set is simply mind-blowing! The new cowl element is first to be found as I snuffle through the pile like a hog hunting truffles! It does NOT disappoint! (THAT is now the most expensive piece I own!).

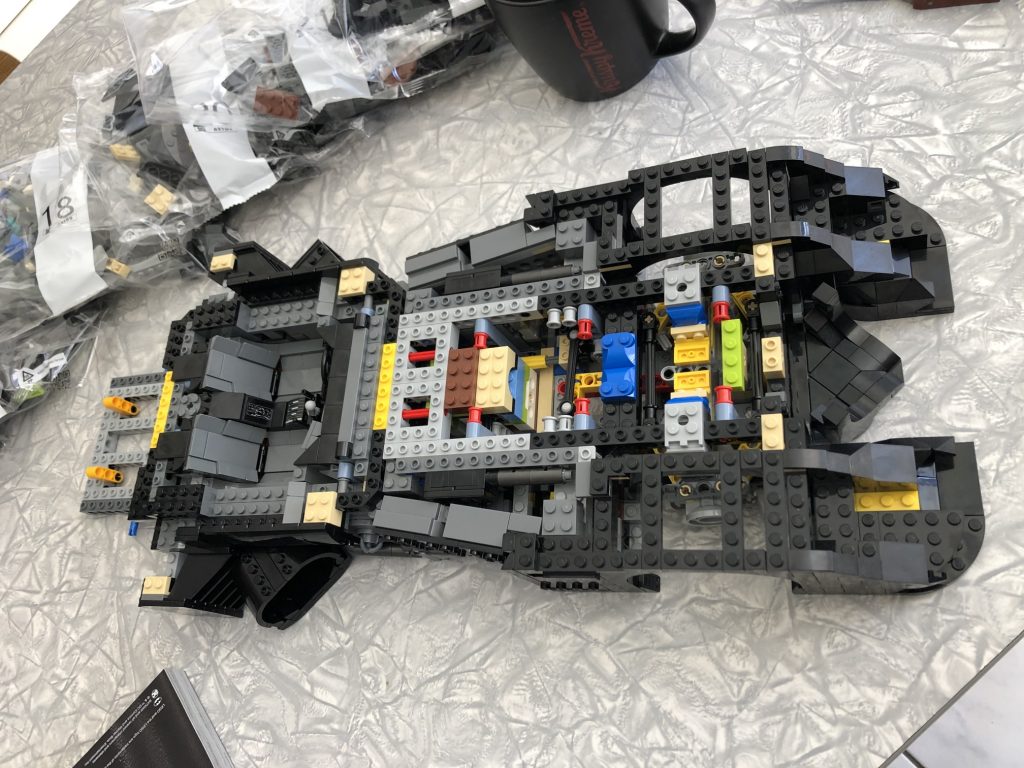
I can already tell that there will be a LOT of Technic support structure here, as with previous UCS vehicles, and this makes sense given the weight which will need to be supported by the final build.
SO many pins… my fingers begin to cramp.
Already this thing is almost longer than the manual and I’m still adding to the length with every step!!
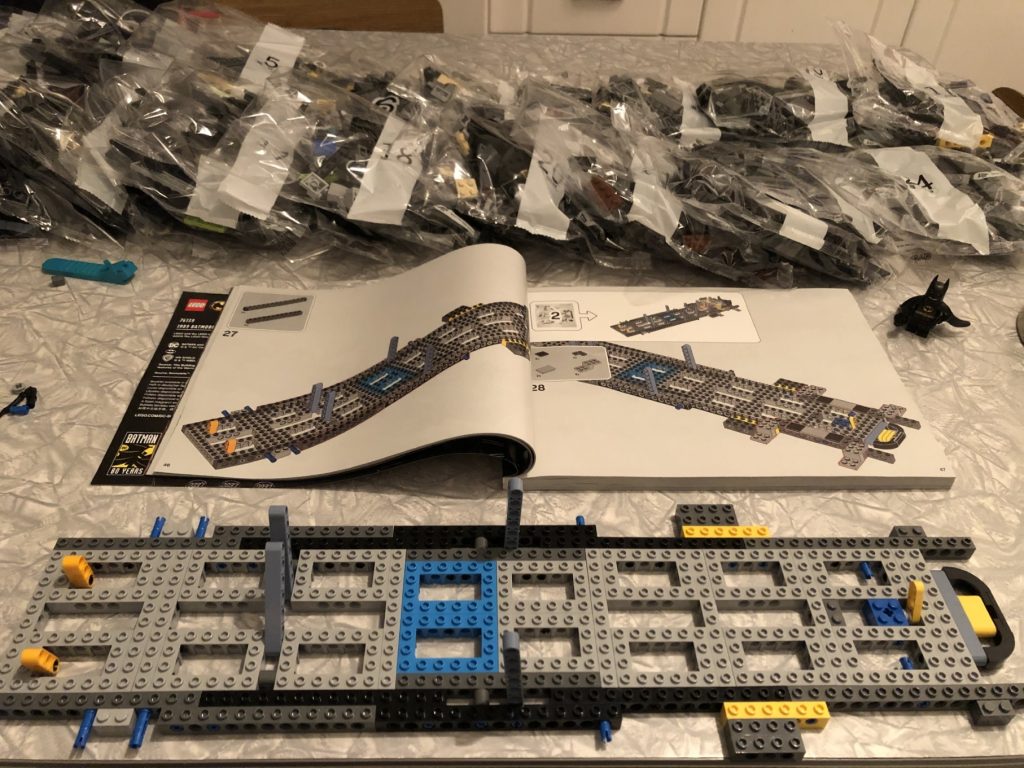
End of bag one and that’s about as much excitement as I can handle on night one! I look at the start of this huge chassis and ponder where I could find an even bigger kitchen table.
DAY 2
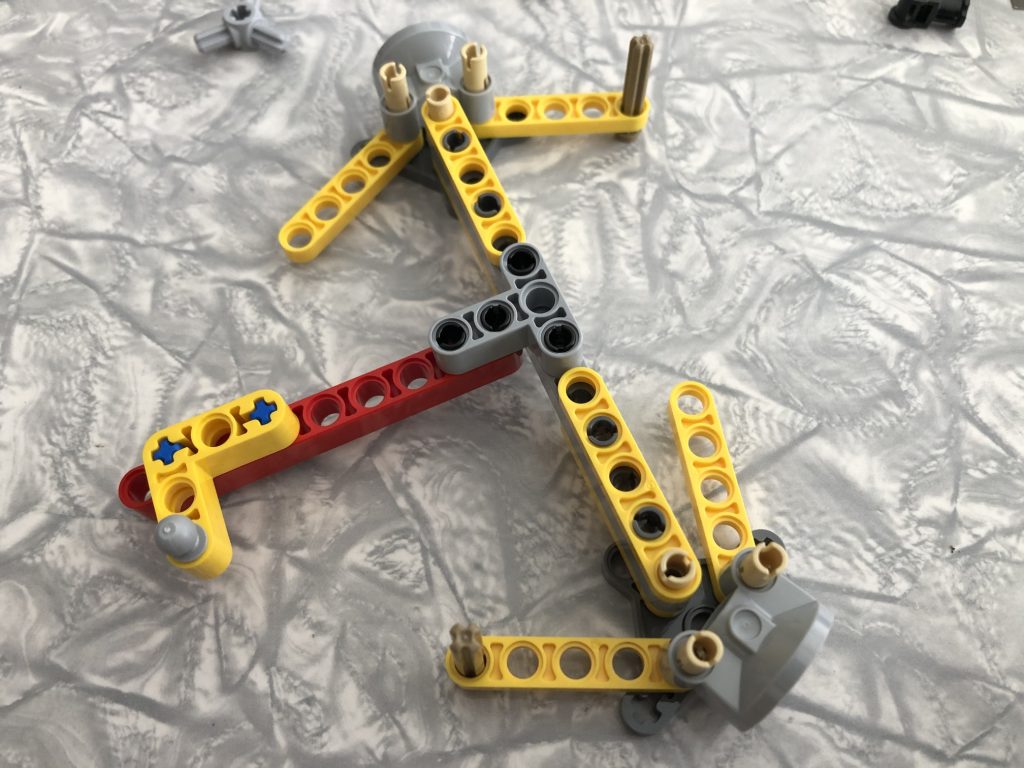
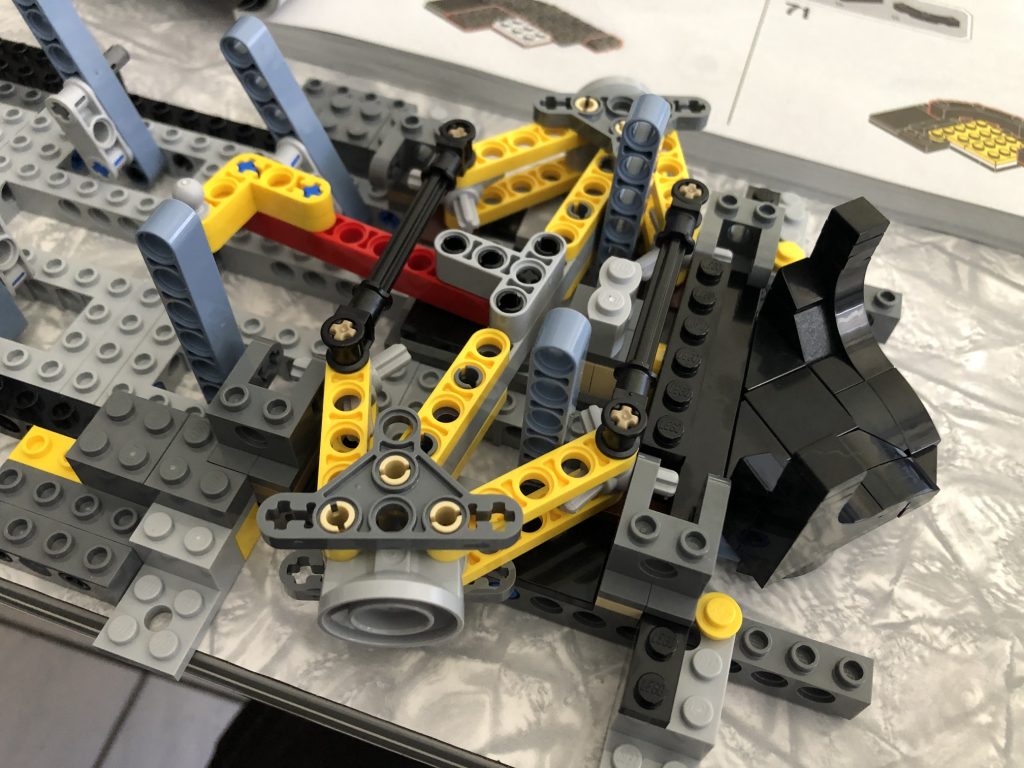
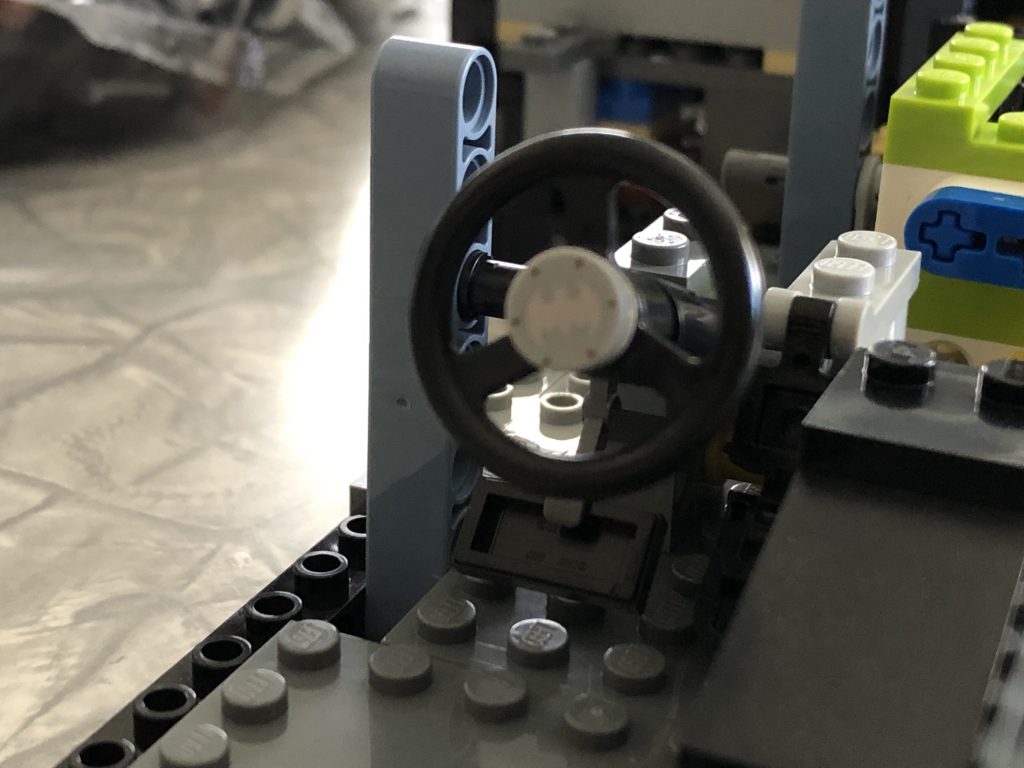
It has quickly become evident that this is definitely not a build for amateurs. Having never assembled a steering column type setup before, getting this right was challenging to say the least.
So much of this shaping is truly next level! Such clever use of parts to sit seamlessly flush whilst creating amazing form.
Such ingenious use of jumpers and half stud offsets that I can’t even keep track anymore. Just following those instructions to a “T” and trusting that everything will work out. A mad man designed this I tell you, a mad man!!
There are modified plates used in strange new ways (to me anyway) helping to maintain a flush fit whilst keeping those half stud offsets in line, incredible!
Staring at the bones of the front end assembly I can’t even imagine how much thinking and rethinking just this part of the design must have taken.
As with the smaller version, creation of the wheel wells is just outstanding, fascinating to watch as the shapes all come together.
I keep glancing at that functional steering column and wondering about the possibilities for Power Functions. Might have to put a call into our good friend Alfred if I ever have the balls to rebuild this beast.
Awe inspiring detail with such clever use of freely available parts! The angled “gouge” on the side behind front wheel well!!
As the sun sets on day two, I find myself hopelessly addicted to this build now. Every time I tell myself “that’s the last step now, must go be productive” I find that I cannot help adding a few more bits as the excitement of seeing this beautiful piece completed grows.
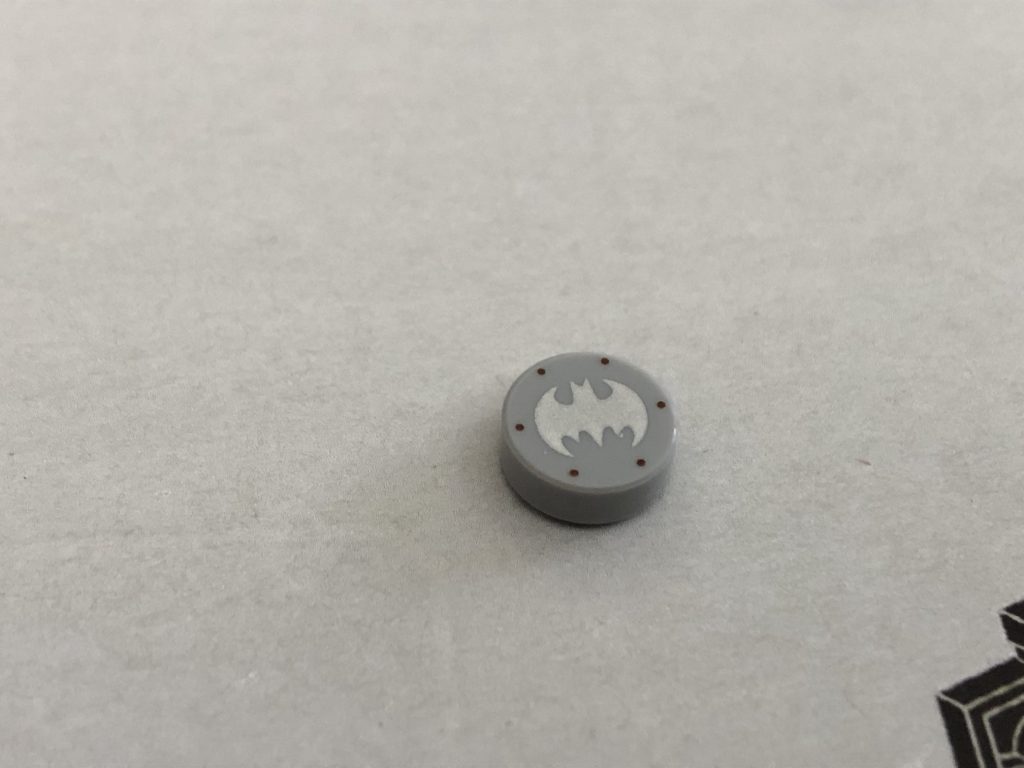
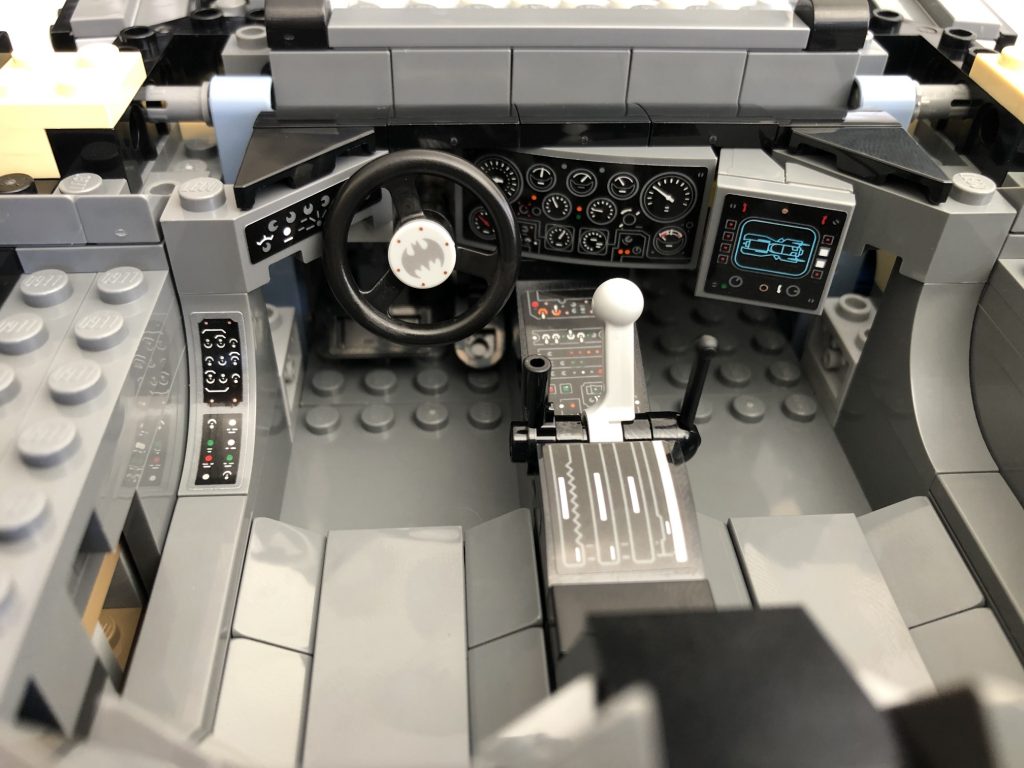
Seriously classy having the Batman logo on the horn (Bat horn?), and… they give you a spare!
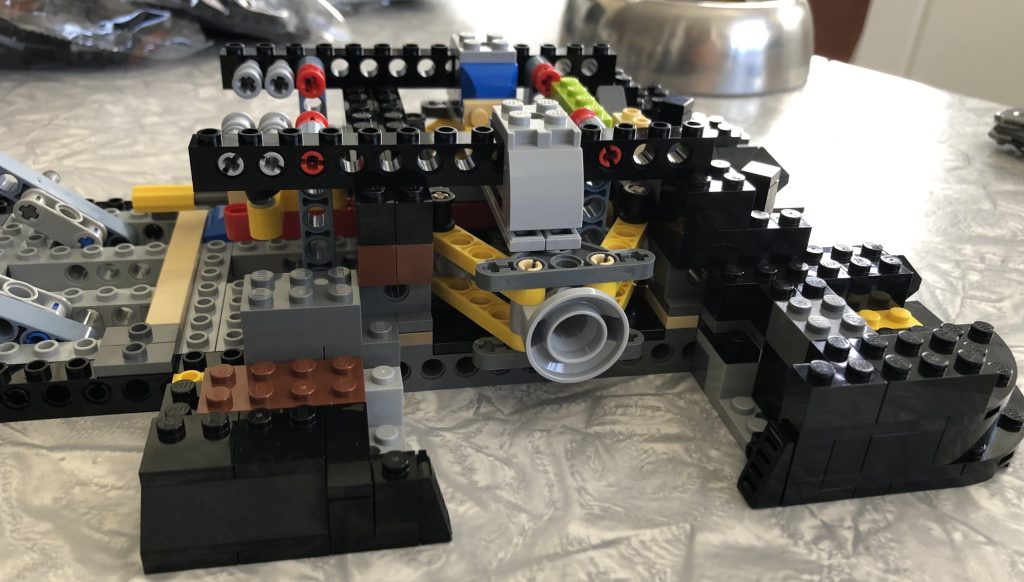
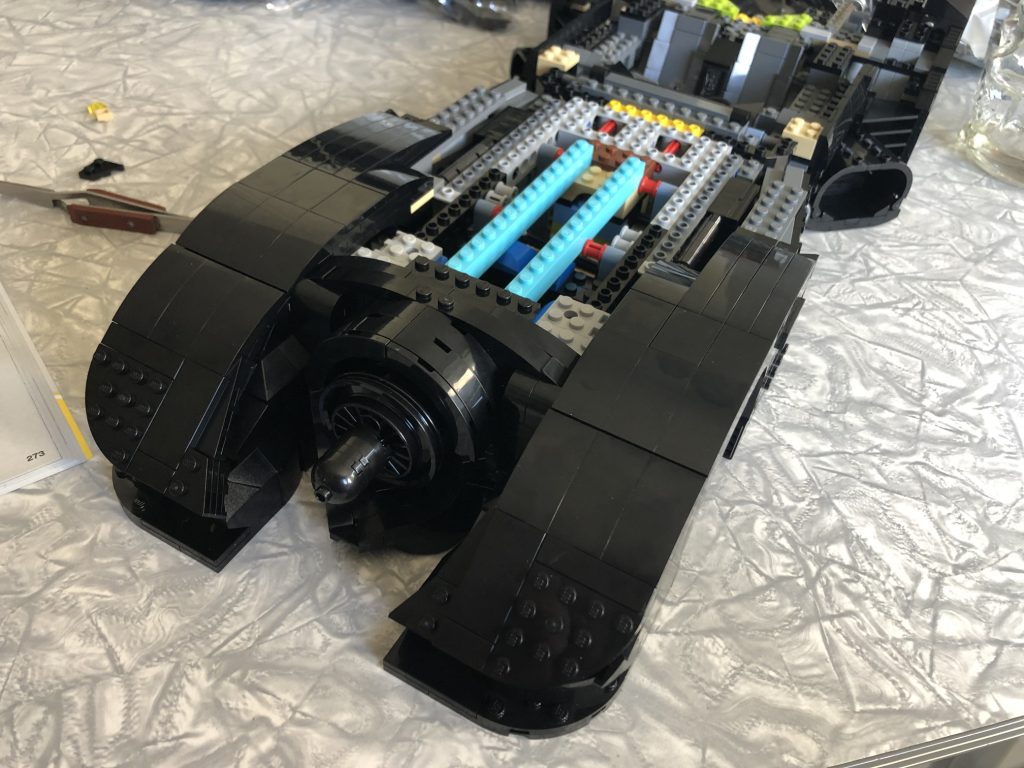
Six bags down and there are some very interesting mechanical systems built in.
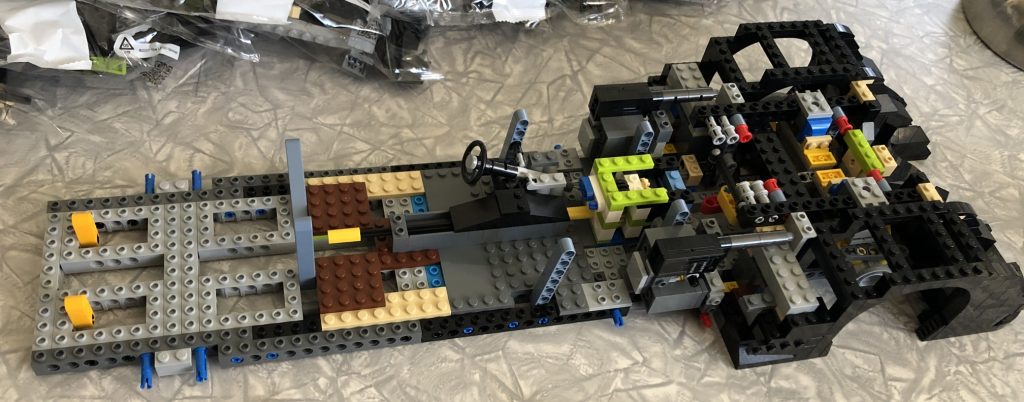
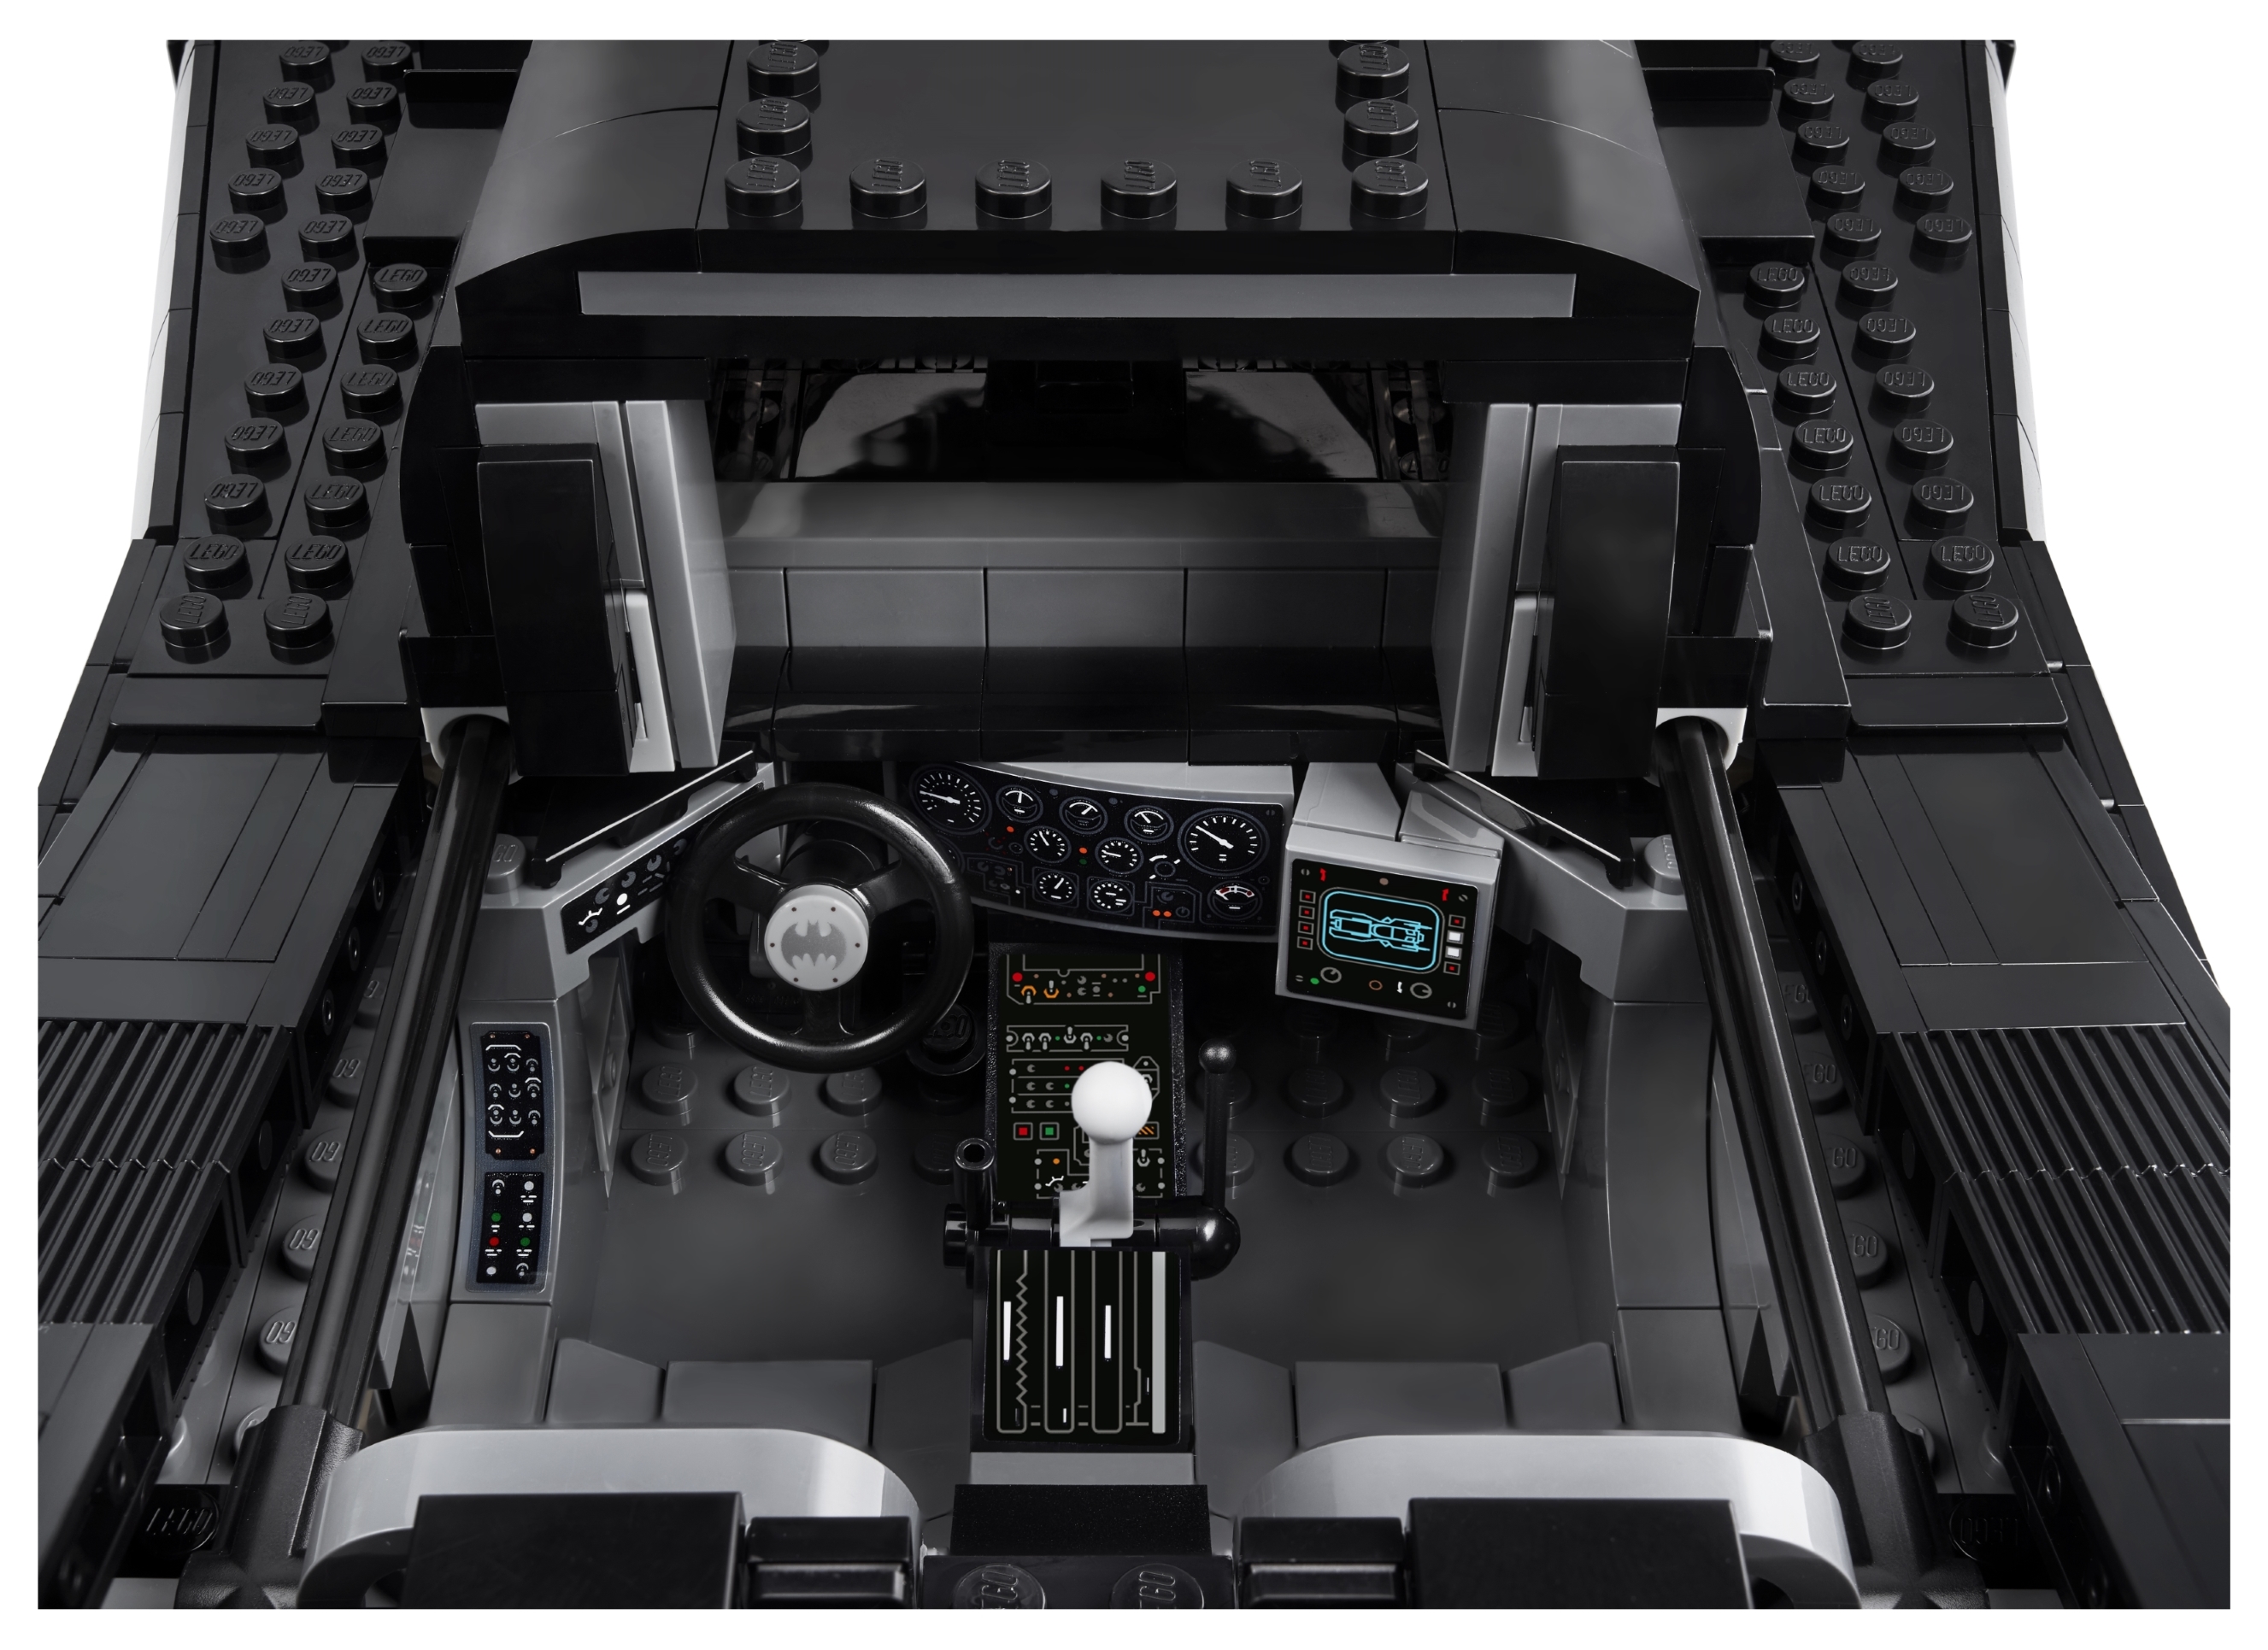
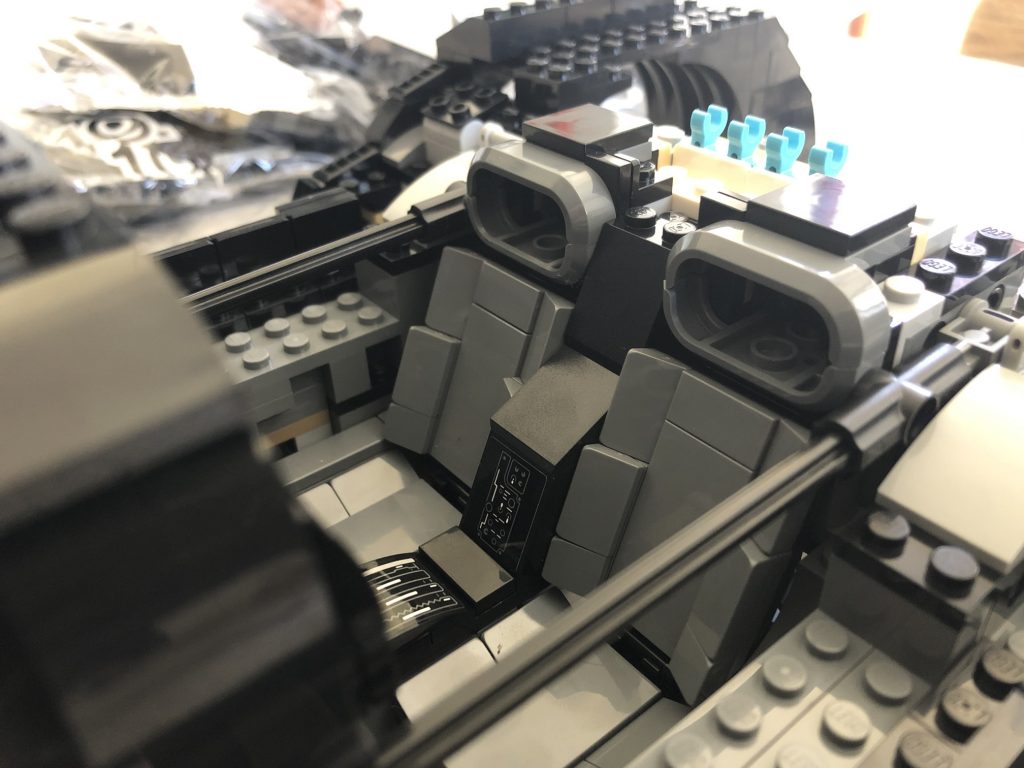
Really love the gas and brake pedals, and I’m very excited to see the fully realized cabin
DAY 3
With my wife heading off to work and my child still sleeping, I get to work JUST like Batman! Alone… in the dark…
134 pages and almost 200 steps in. If you ever wanted a serious stash of silver roller skates… this is the set for you! Step 193 requires me to pick out 12.
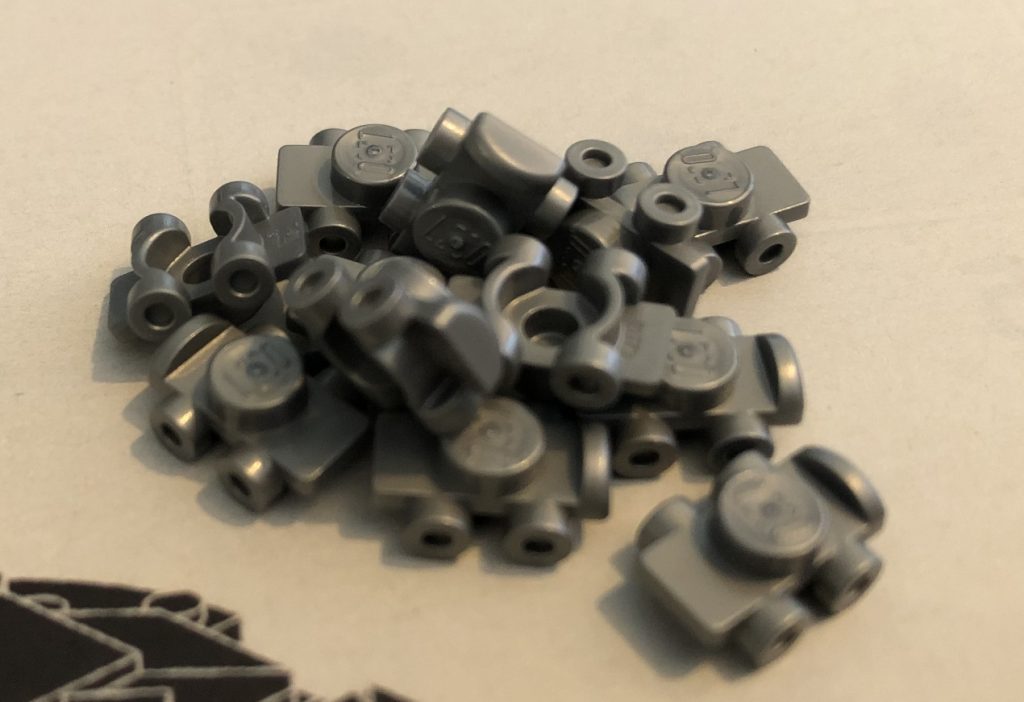
There is very clever use of gunmetal grey in the form of some studs and ingots to add subtle contrast against the black.
Pondering the build so far I note that there are a fair number more new pieces in this build than the smaller version. New triangular tiles, modified brackets and the trusty 1x1x2 brick with studs on the side as well as 1×3 jumper plates in black. More variety of new pieces but not excessive use indicates this is still potentially mostly doable from sourced parts, but many more stickers add crucial detail which would need to be sourced to get the look right.
Despite one side effectively being a mirror build, it’s not repetitive or boring as they work through both sides with each step as opposed to having you build one side first then turning it around for the other. This is extremely challenging though as often the far side of the build is not clearly visible in the instructions and it is necessary to build and place parts on the right side to work out exactly how they should fit on the left. Gotta pay attention folks!
As I pass the 200 step mark officially, I’m not even sure what I’m building but I’m LOVING it! I can only hope that I retain a fraction of what I’m learning for future MOCs but there is a LOT of genius to appreciate here.
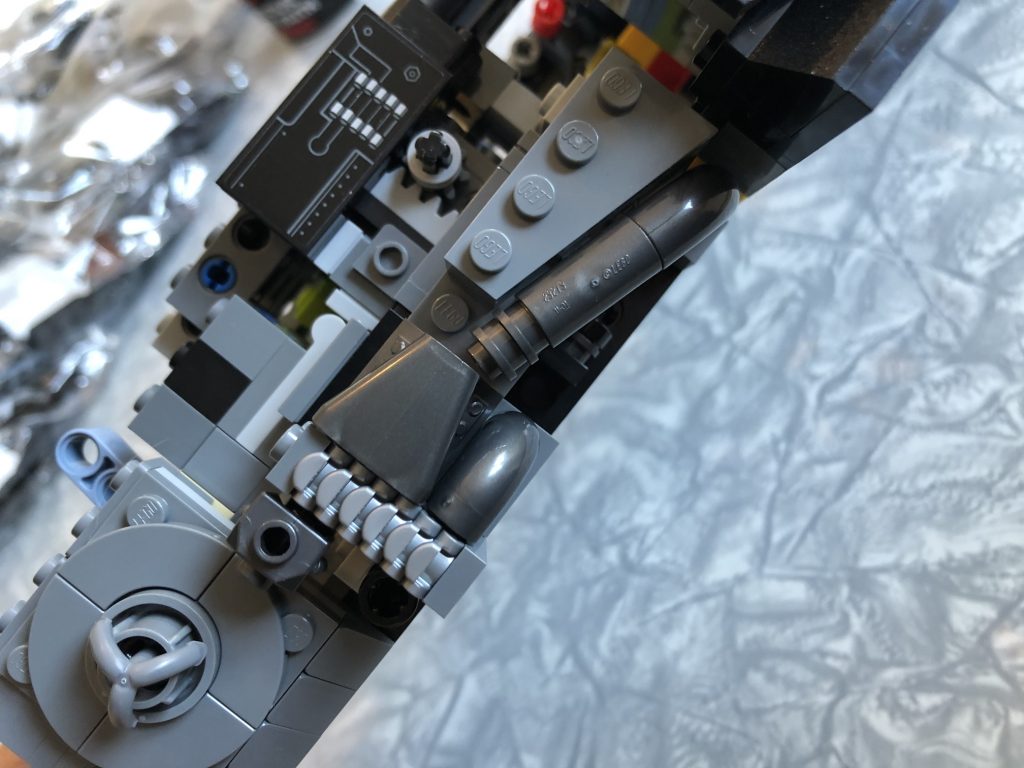
Outstanding use of macaroni curves in gunmetal grey to simulate parts of the exhaust system on the side.
Second cup of coffee, second cigar, quick BrickLink order, check on snoozing cat and then back to work in a style that would make Alfred smile.
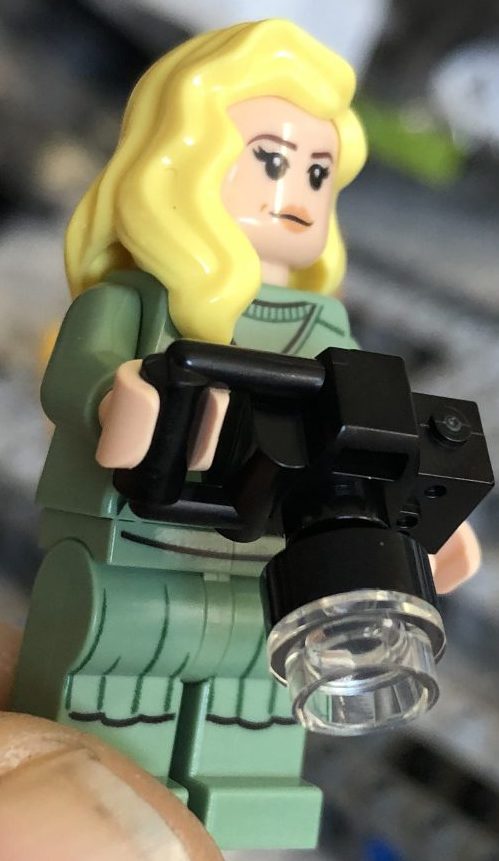
My return to “work” is rewarded with the inclusion of a new minifig in bag 9. Miss Vicky Vale now joins the Dark Knight to supervise construction. Just like the original actress, this minifig comes with a fairly standard hairpiece in blonde and a face print that borders on generic, but the sand green outfit is accurate and the telephoto lens on the camera is very clever!
Simple but effective use of aeroplane support struts to create fins.
Some of the smaller parts are so hard to place with my fat fingers that I find myself reaching for my tweezers on the regular.
The exhaust vents are not only an incredible design, but the mounting points and angles are almost incomprehensible to my mere mortal brain.
Opening bag twelve there is a very real sense of accomplishment at having made it halfway. I take a moment to reflect on life and then get back to detailing the cabin.
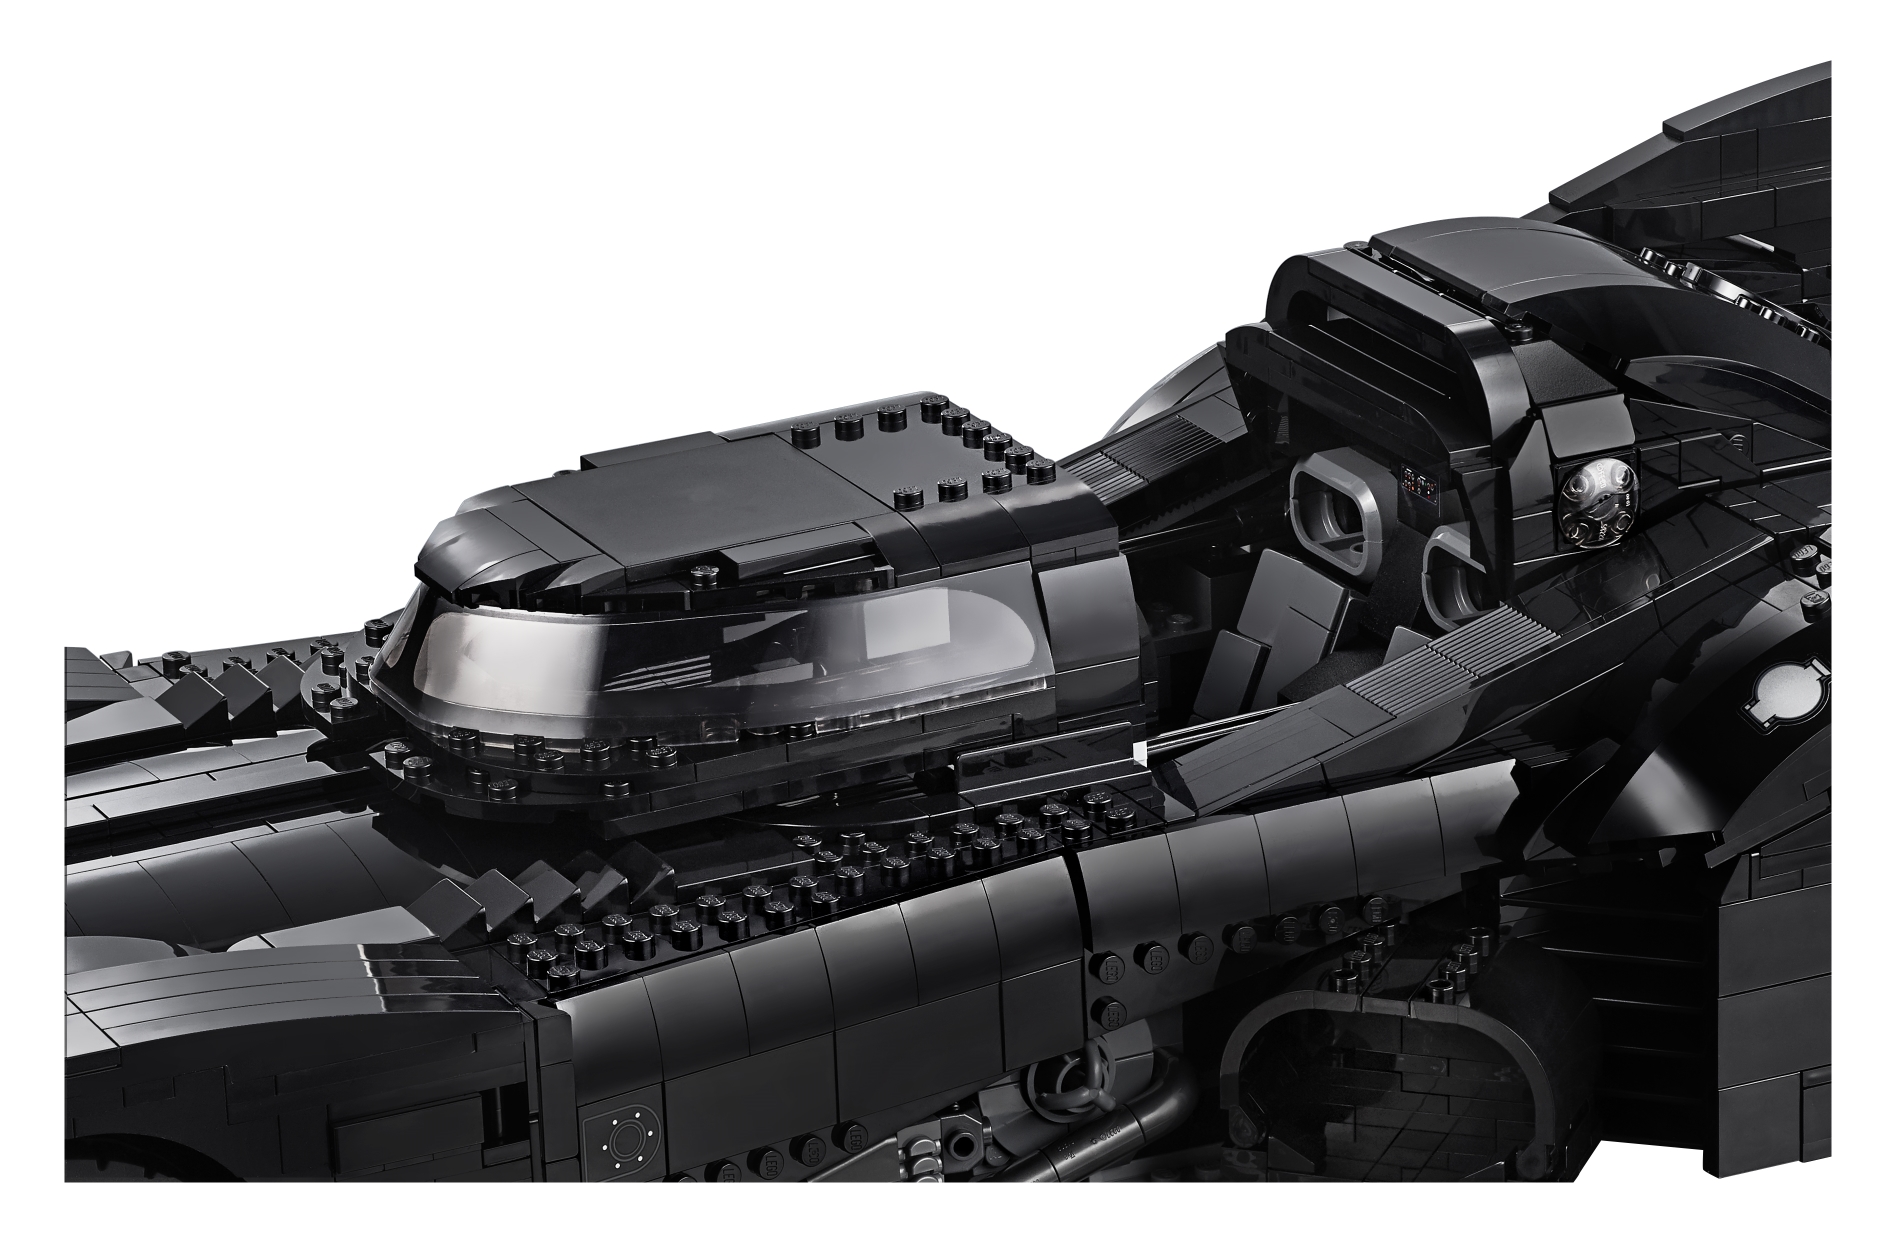
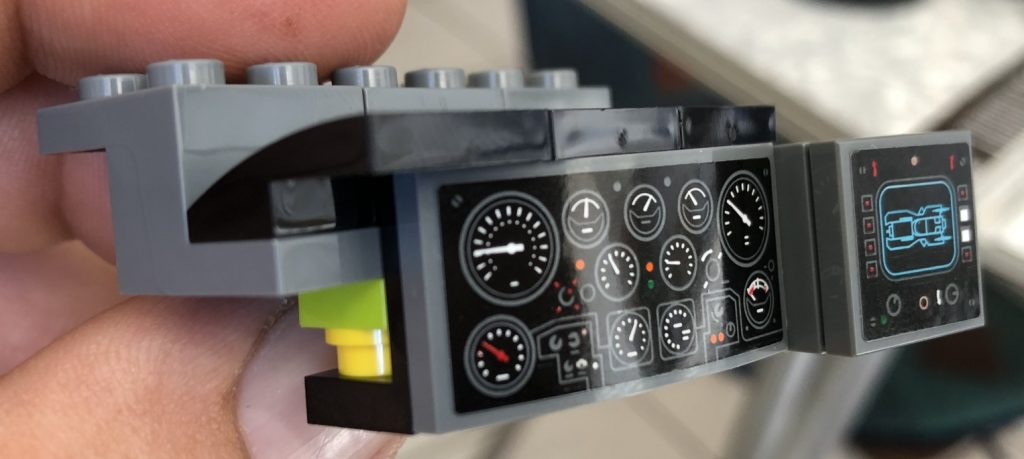
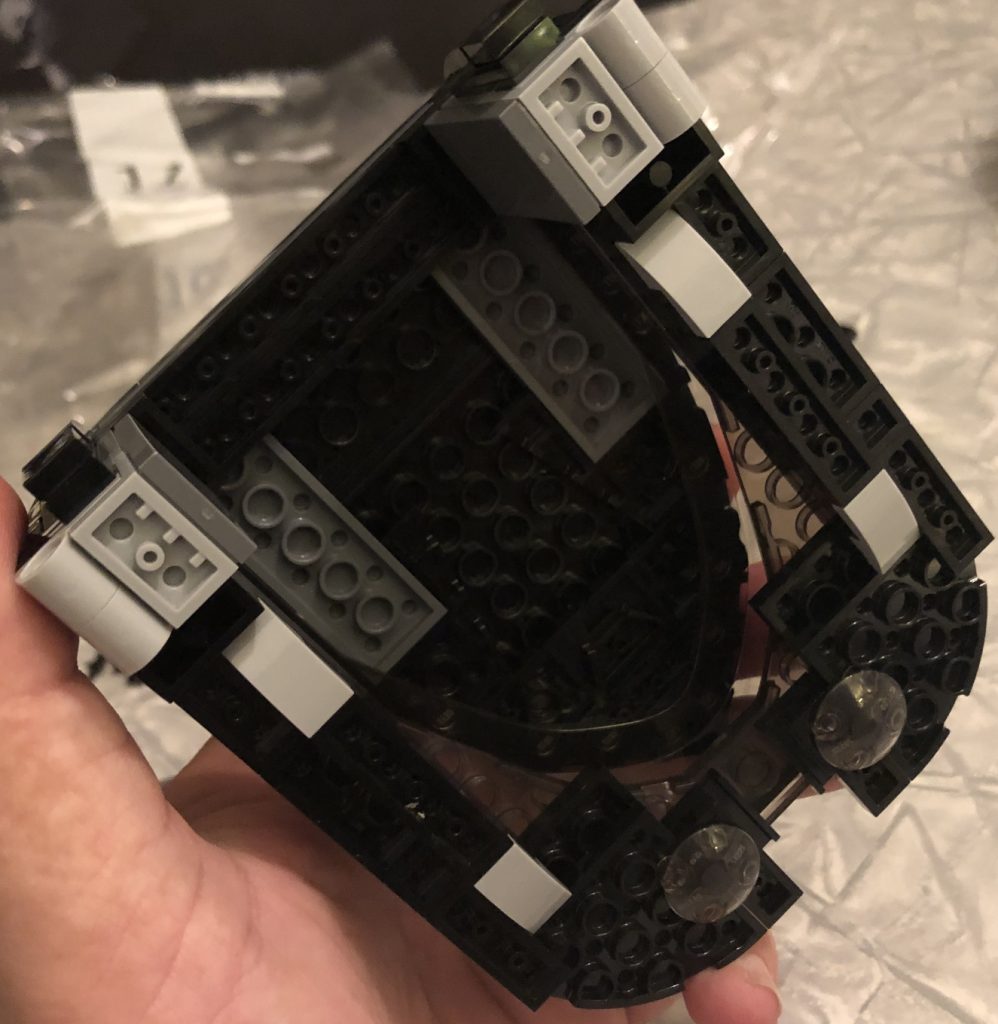
The dashboard detail is utterly jaw dropping! Good use of stickers but excellent use of curved slope 2×2’s “backwards” to get that sleek, flush curve and slight overhang, amazing!
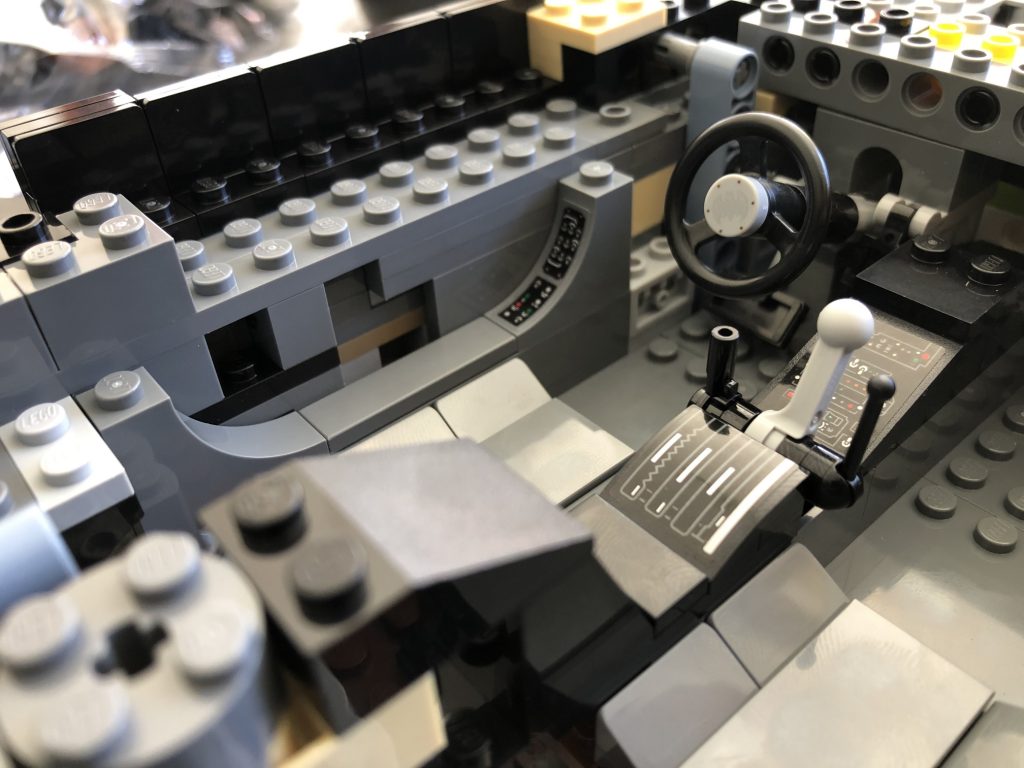
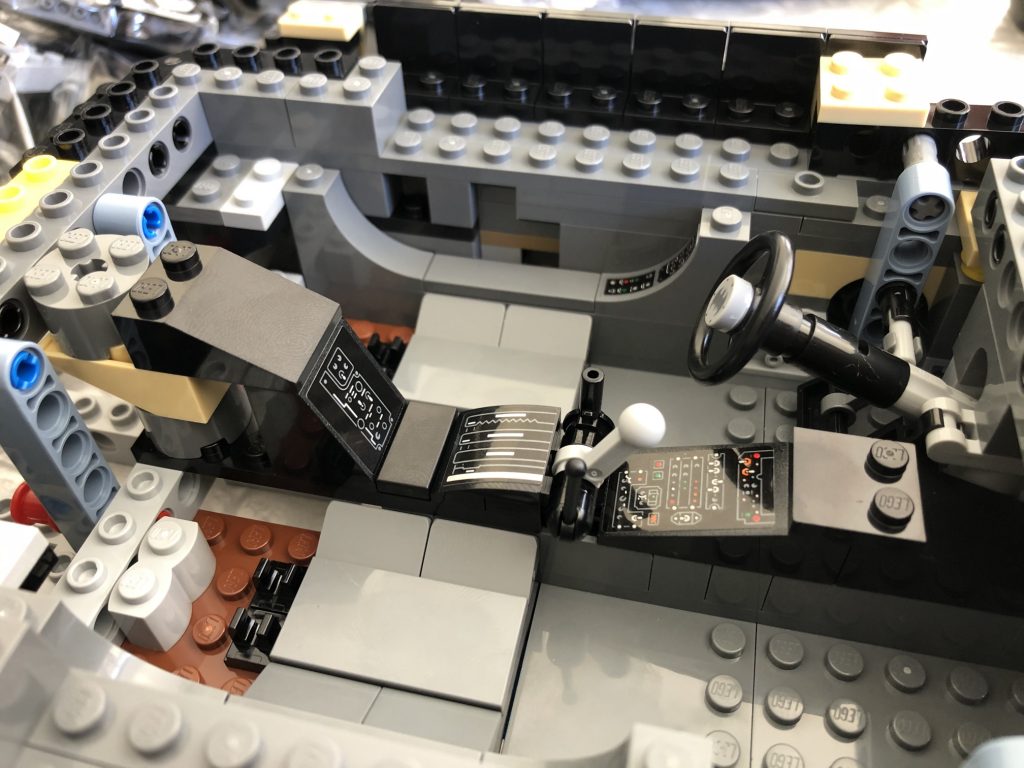
Completion of the cabin detailing yields spectacular results! The entire console and dash is perfectly accurate and has me gagging to build a Batman figure which would be the correct scale to pilot this beast.
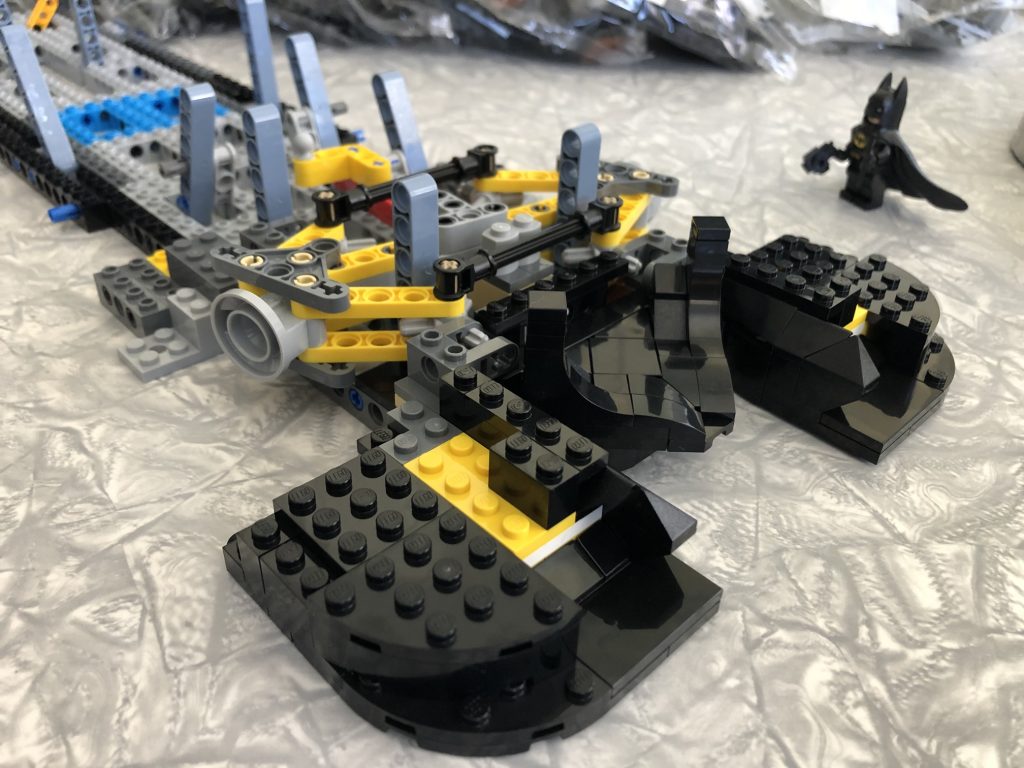
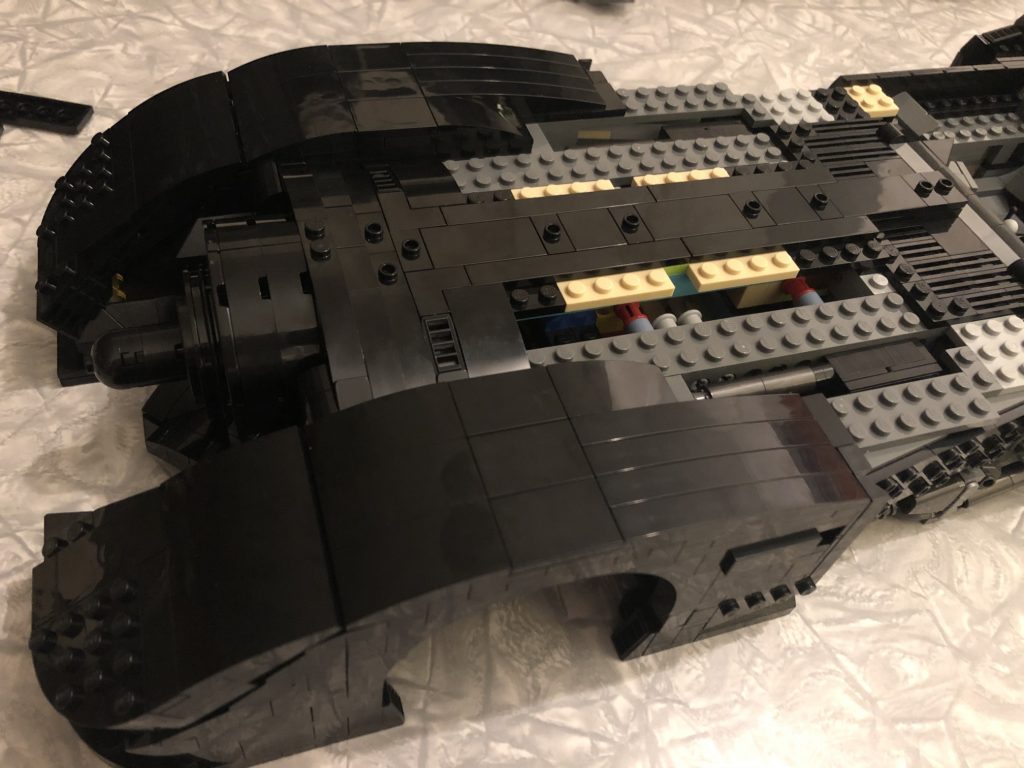
By the end of bag twelve the shape and volume of the model is starting to really become apparent, this is one beautiful behemoth!
Another indication that this is not a build for amateurs is that I MUST check the parts list for every step. Usually I just “spot the difference” and find the parts I need but there is so much going on here that my usual method is clearly ineffectual.
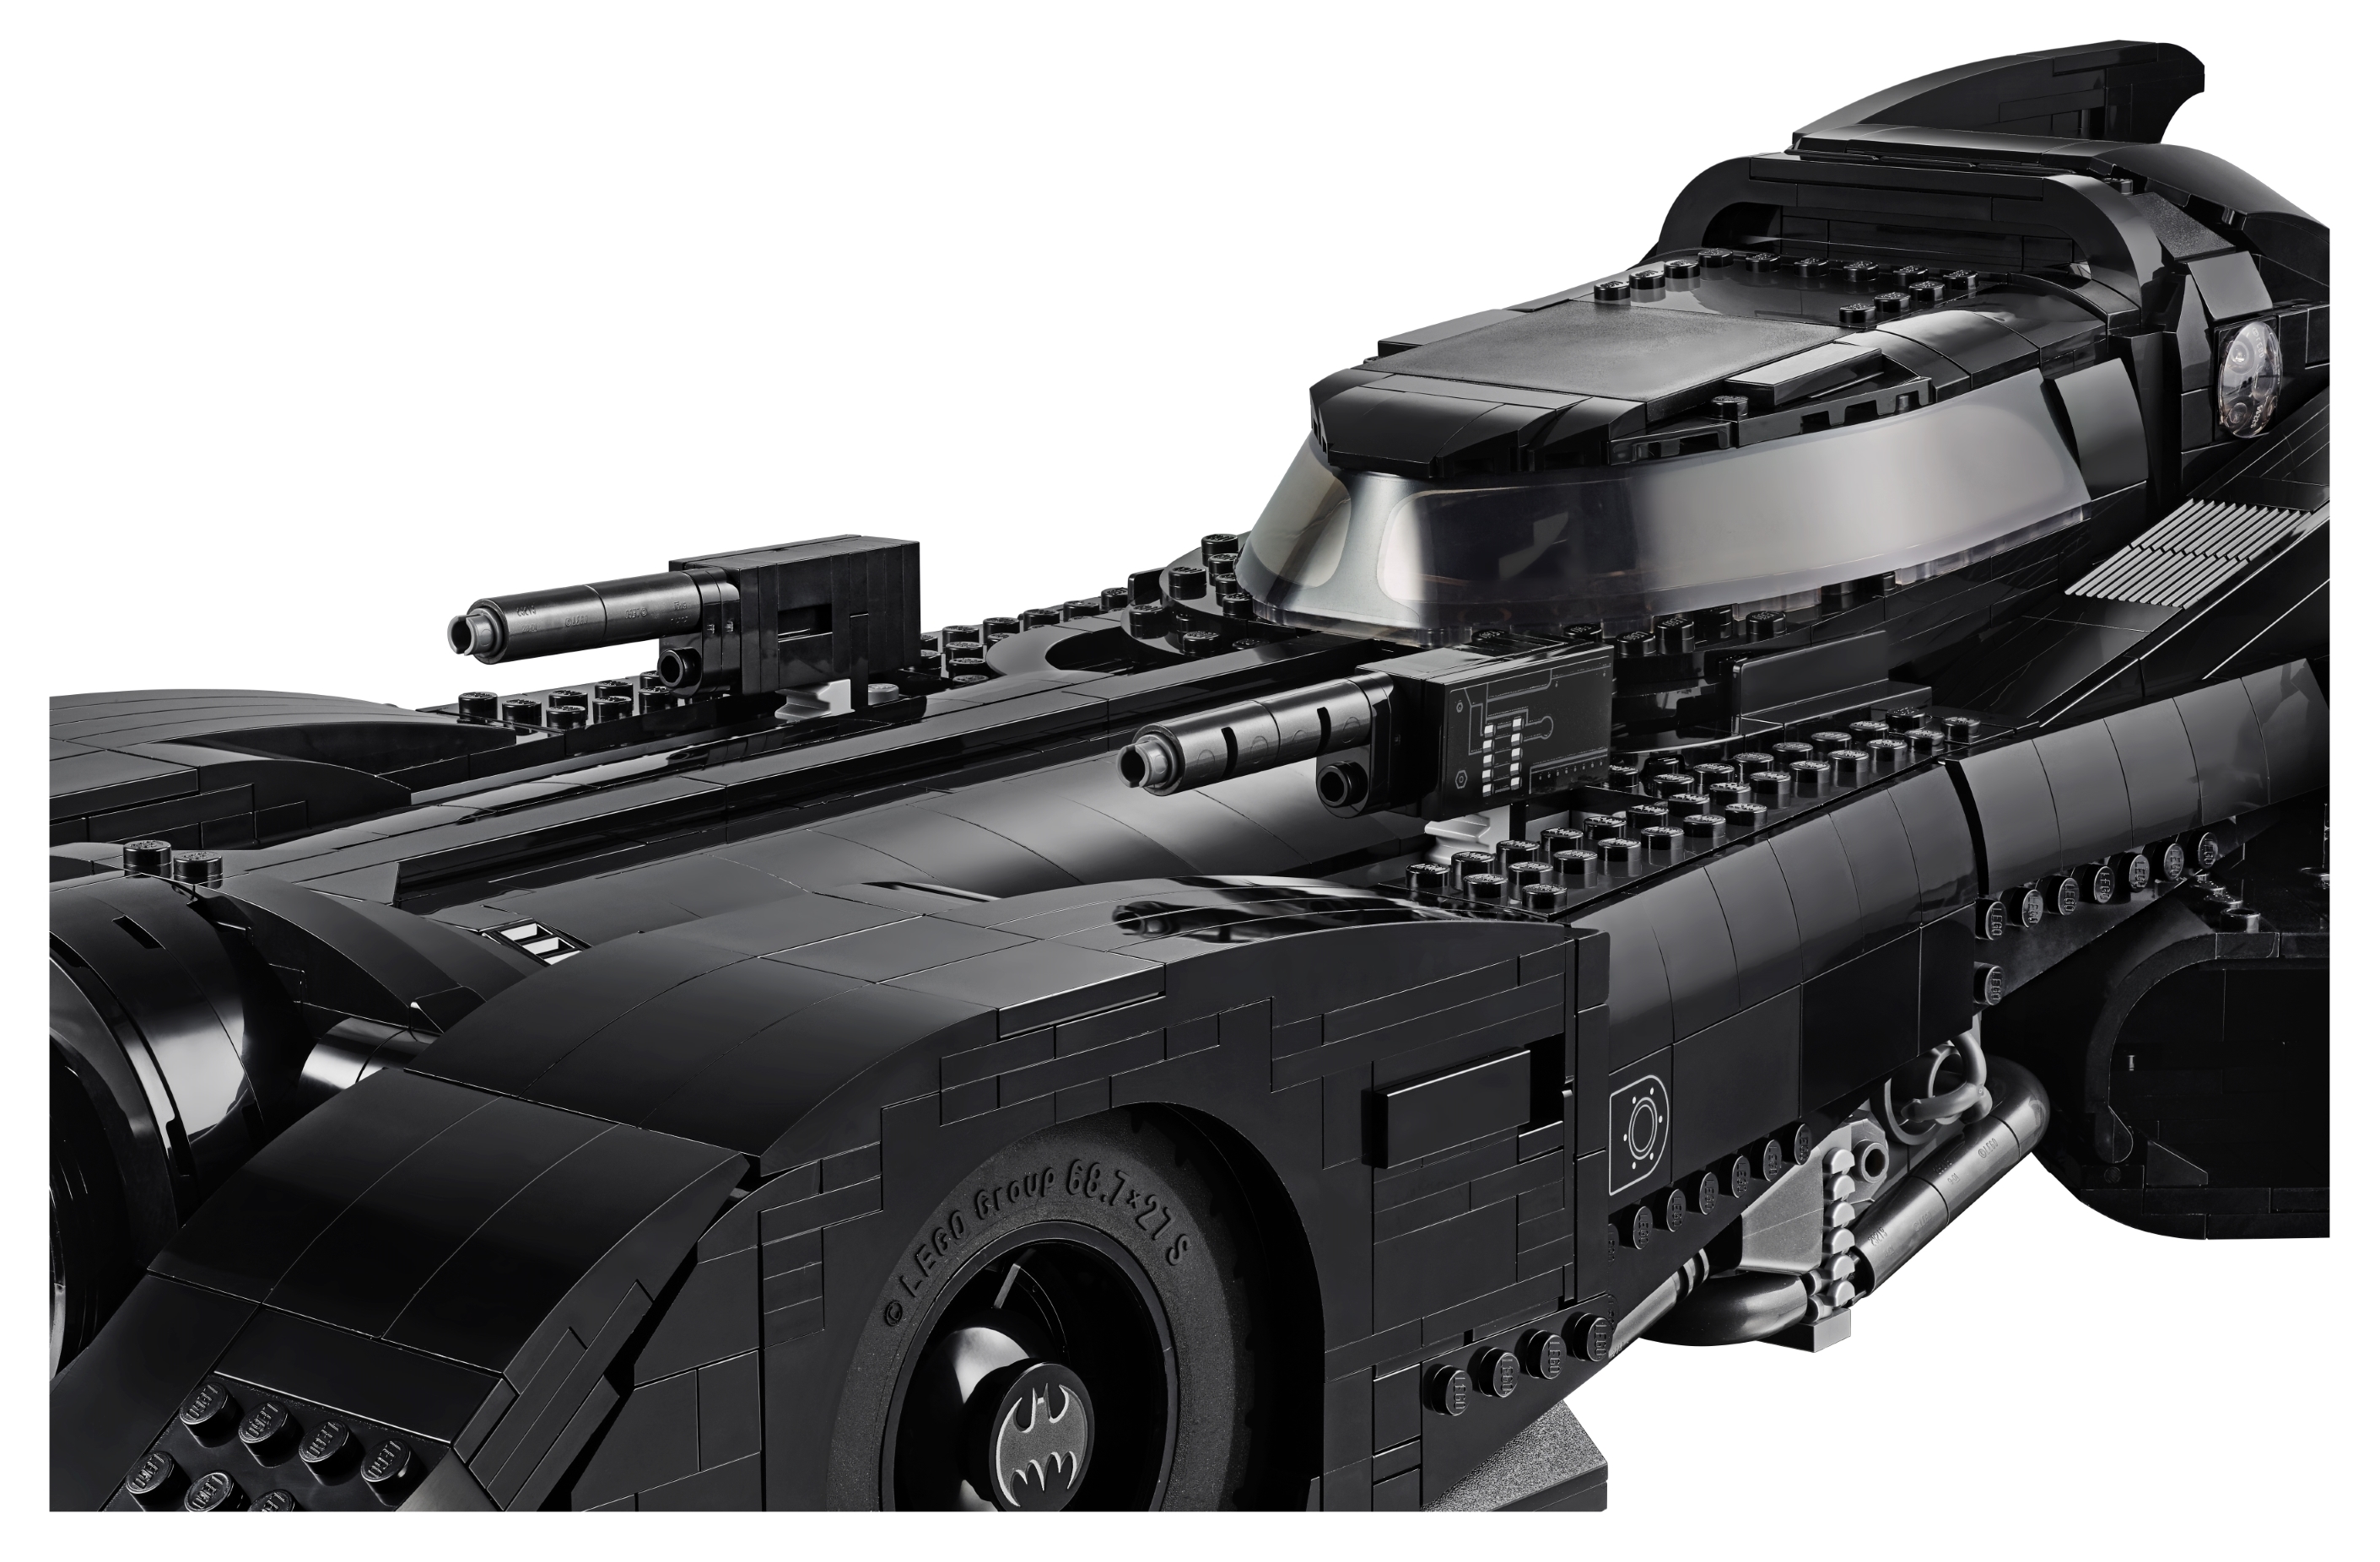
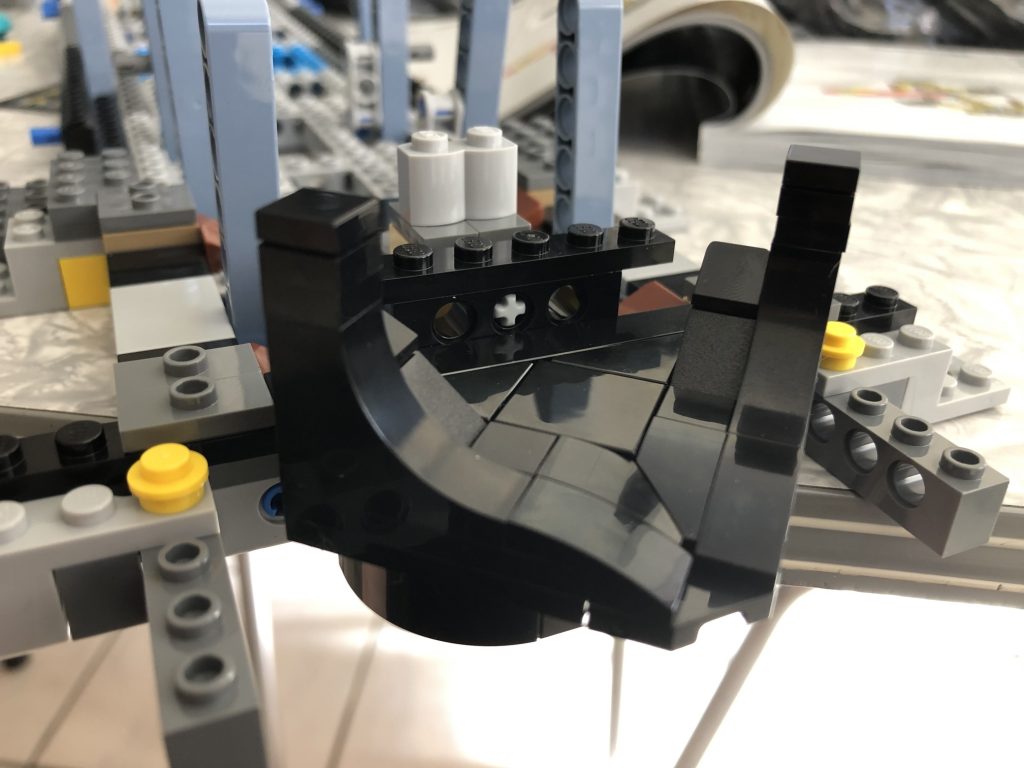
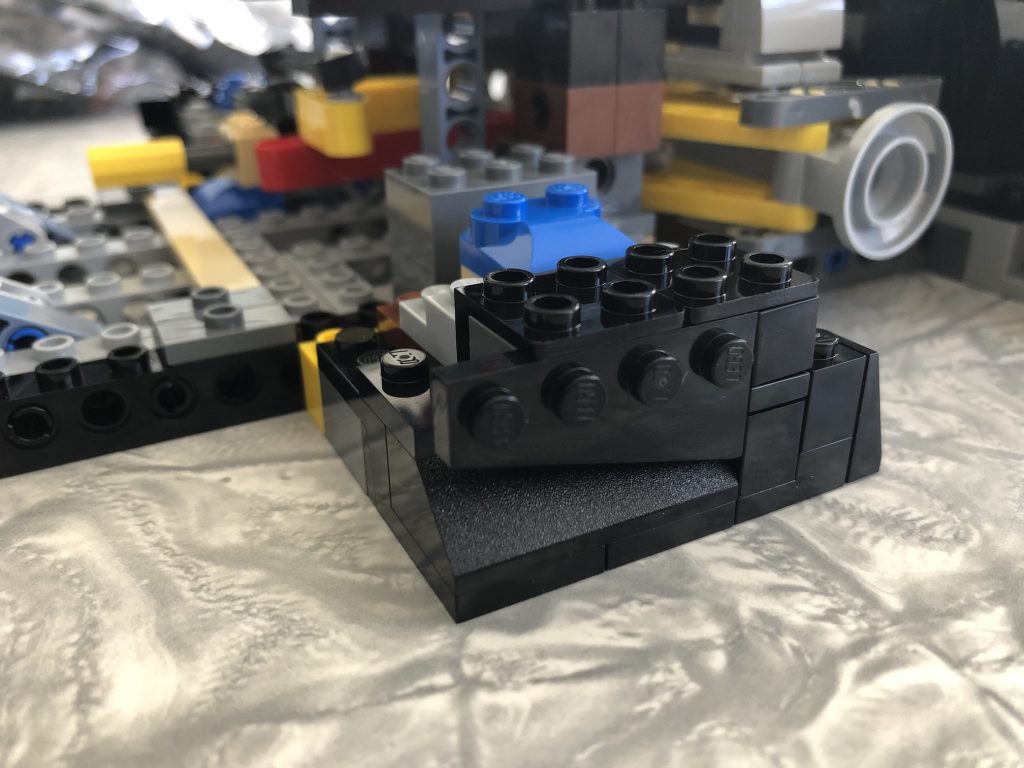
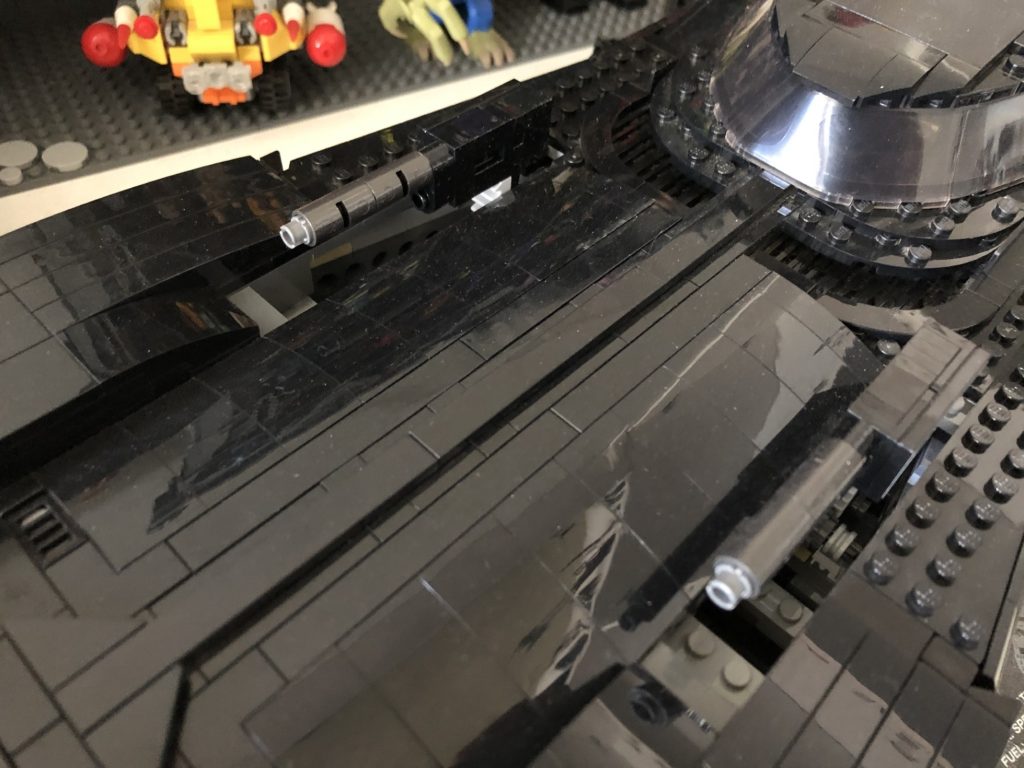
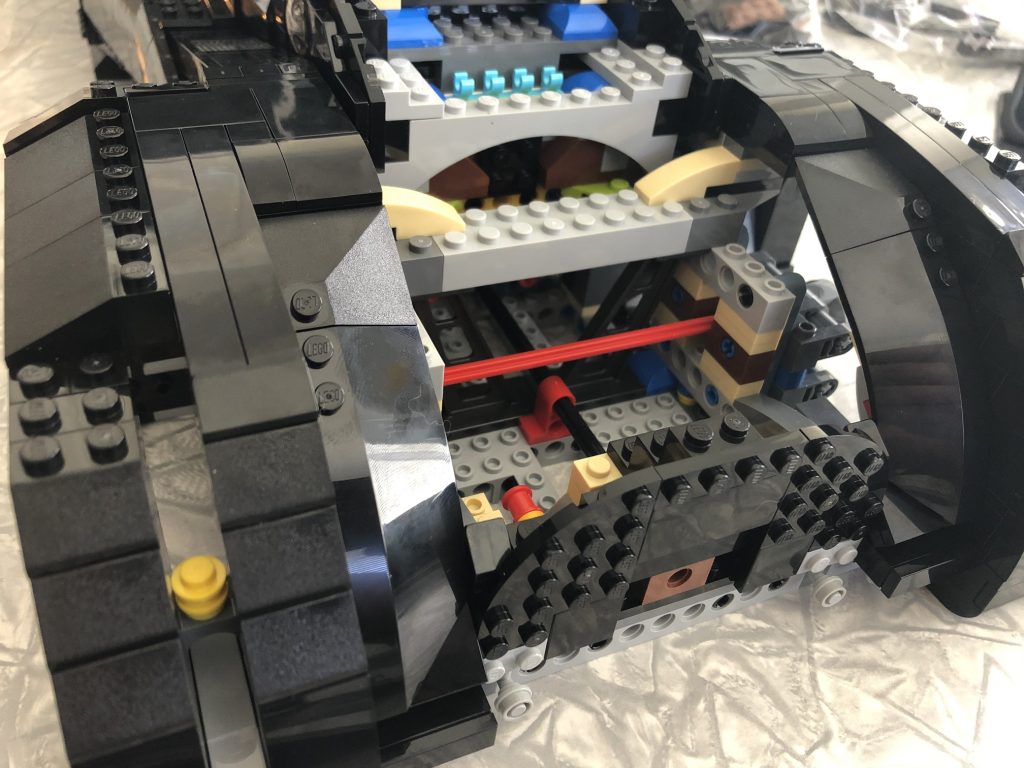
This mechanism at the back that raises the guns is BLACK MAGIC I tell you! Also… did I mention? The guns pop out of the bonnet, discarding the panels that hide them completely just like in the movie!

Bag 14. After mucking about with various support elements in garish colours, this bag seems to have us “back in black”
Modified 1 x 3 Inverted Black Tile with a Hole ?!?
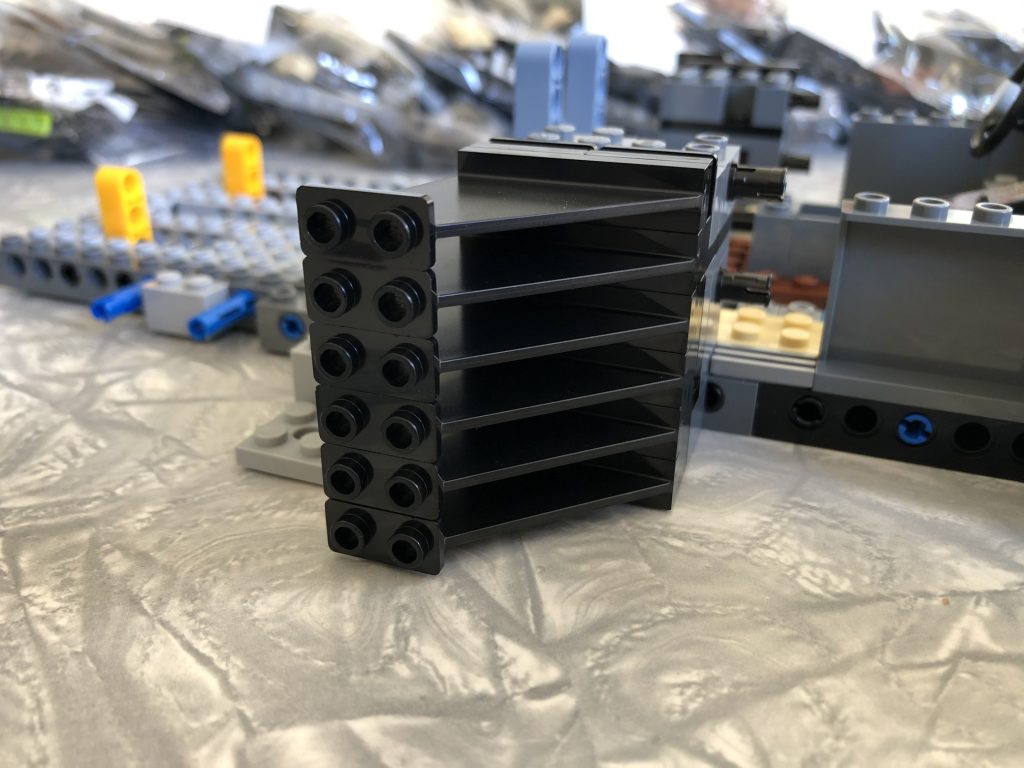
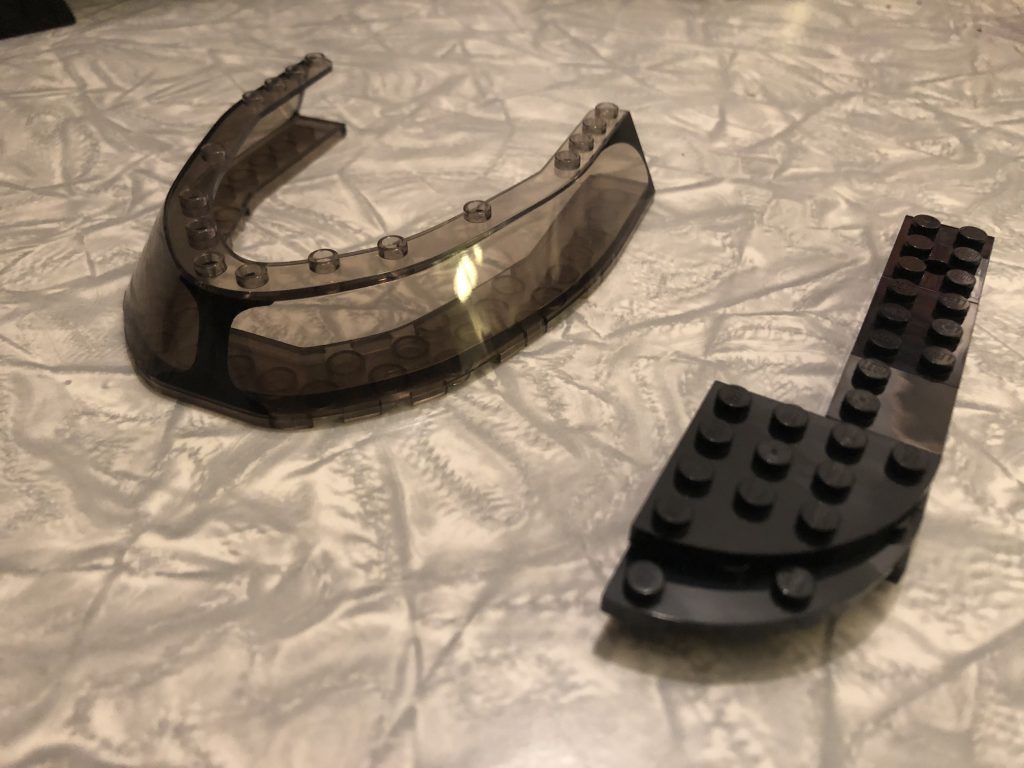
16 black arch bricks anyone?!? And all this only for one step (365)
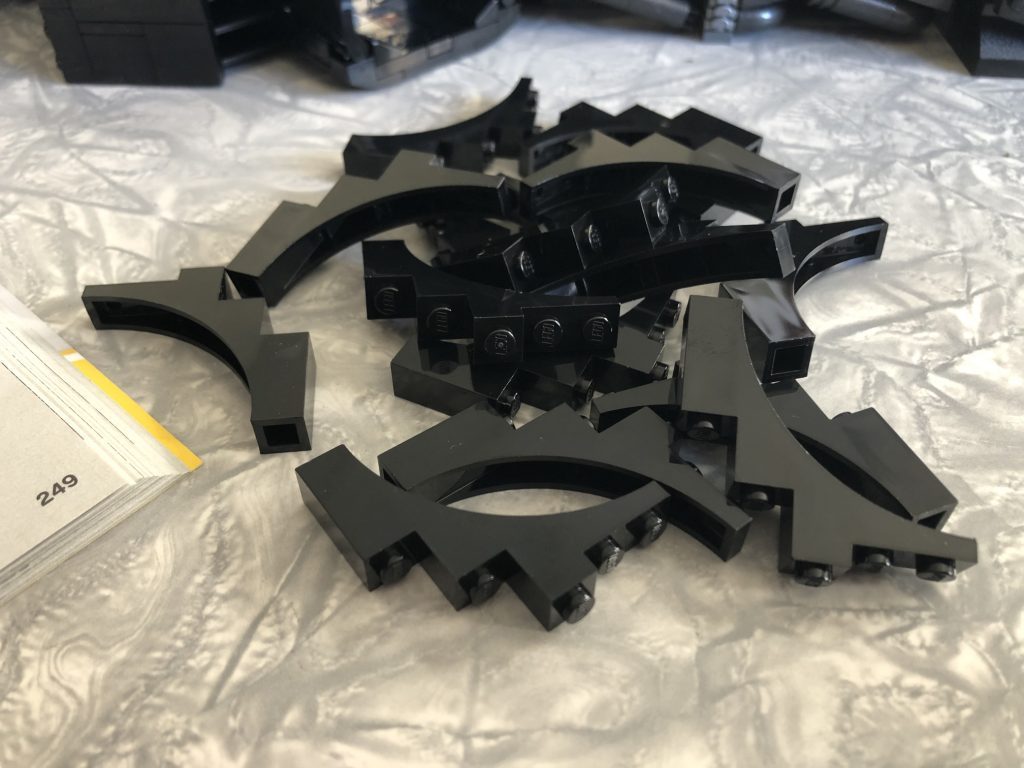
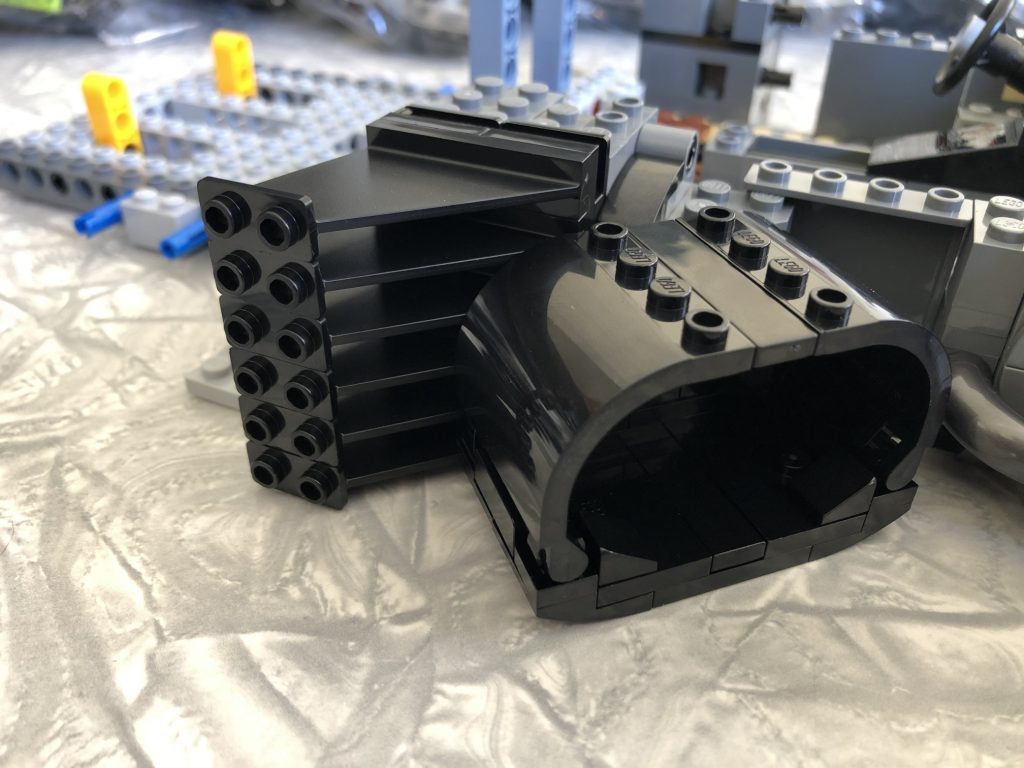
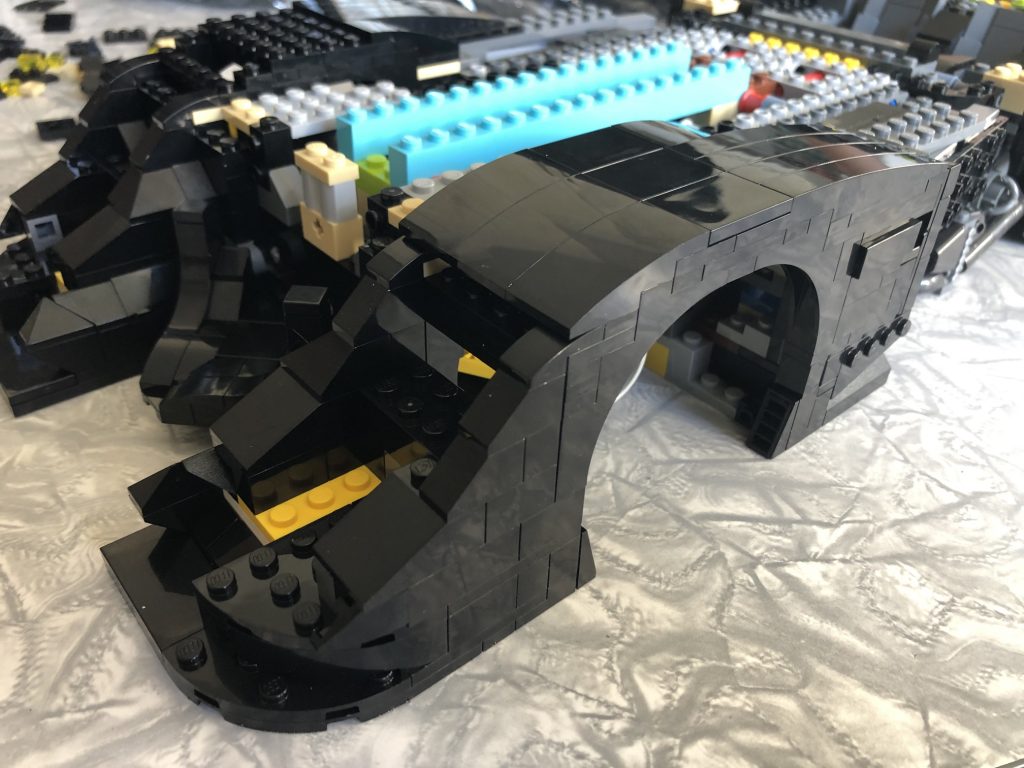
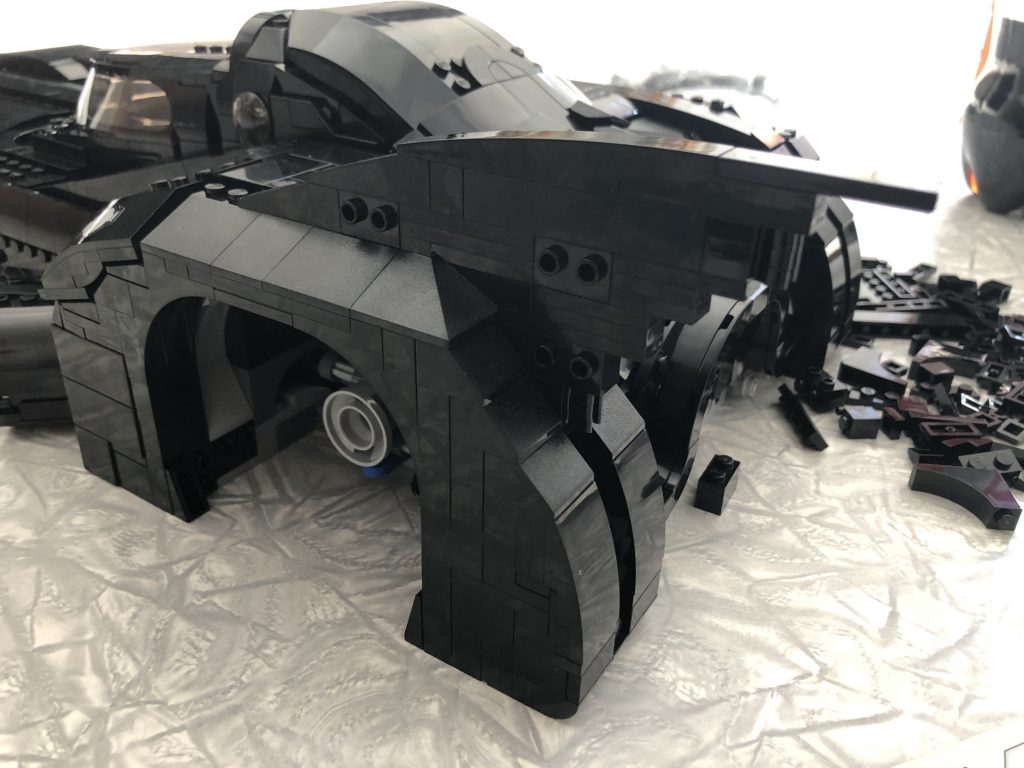
Turns out those 16 arches make up the bulk of the rear wheel well arches… and it is truly beautiful to behold.
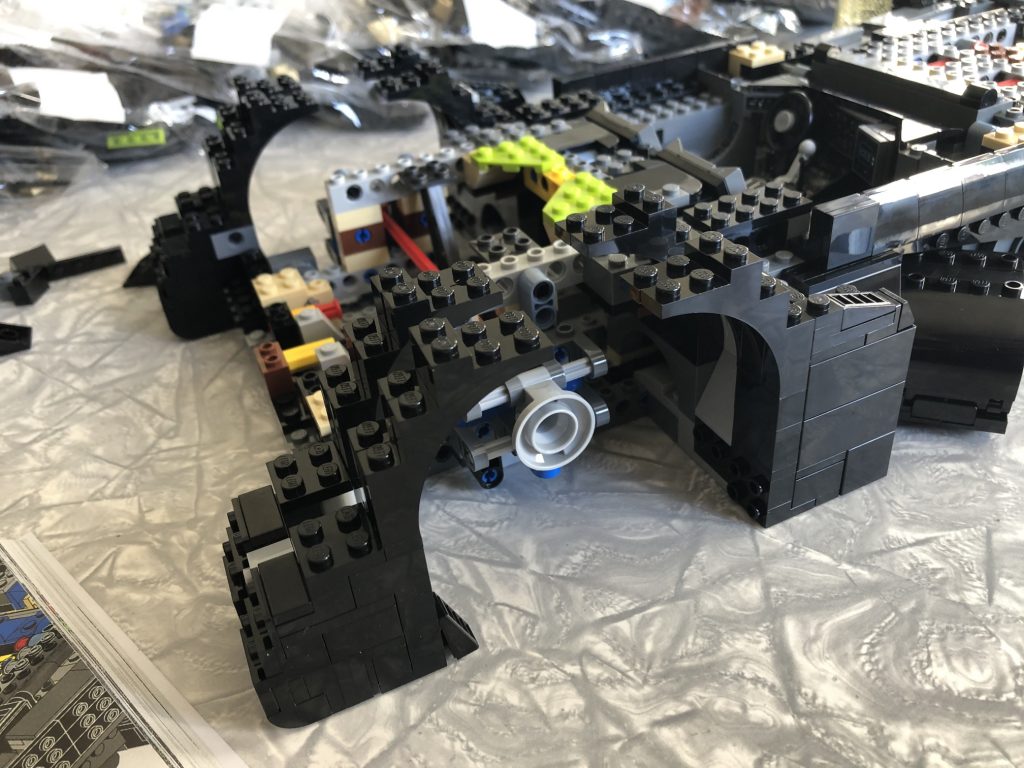
Back on the front end and those classic lines are starting to show as I clad the support structure with smooth curved slopes.
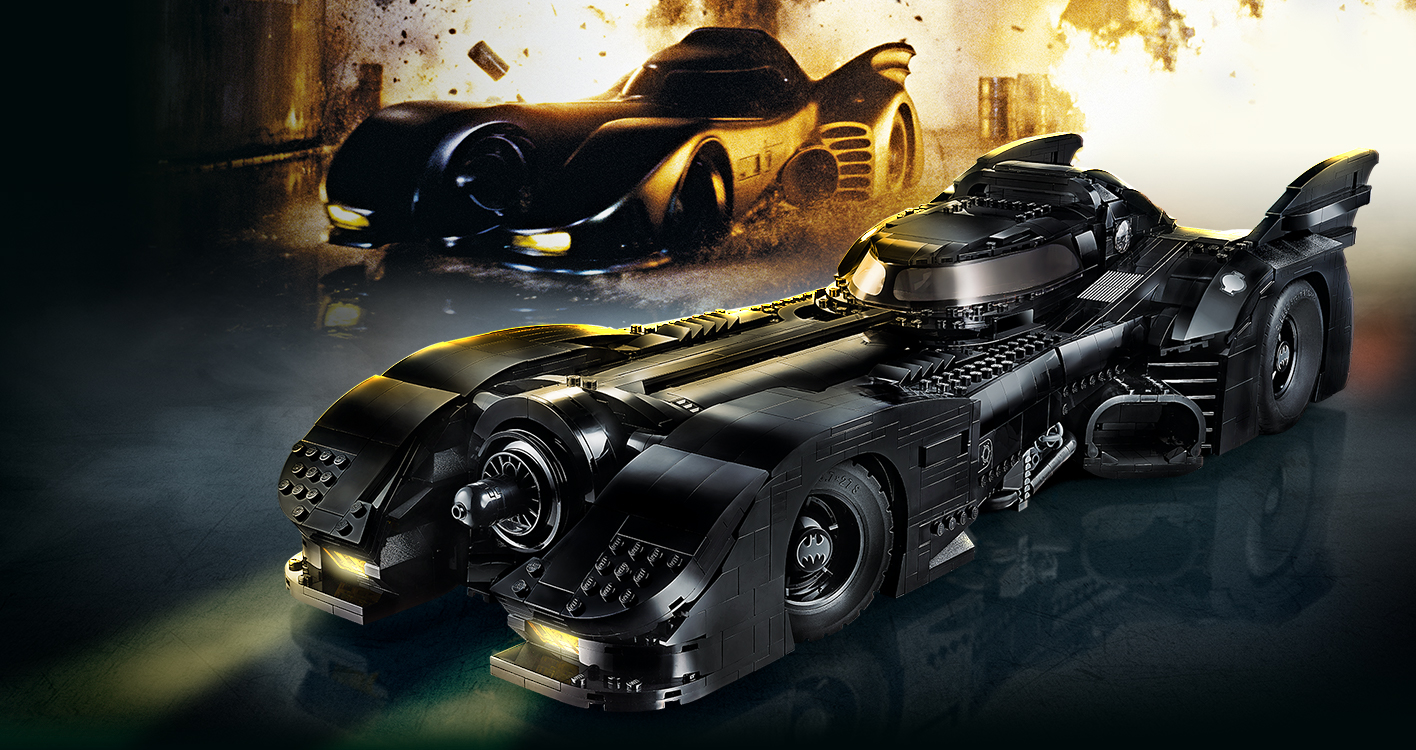
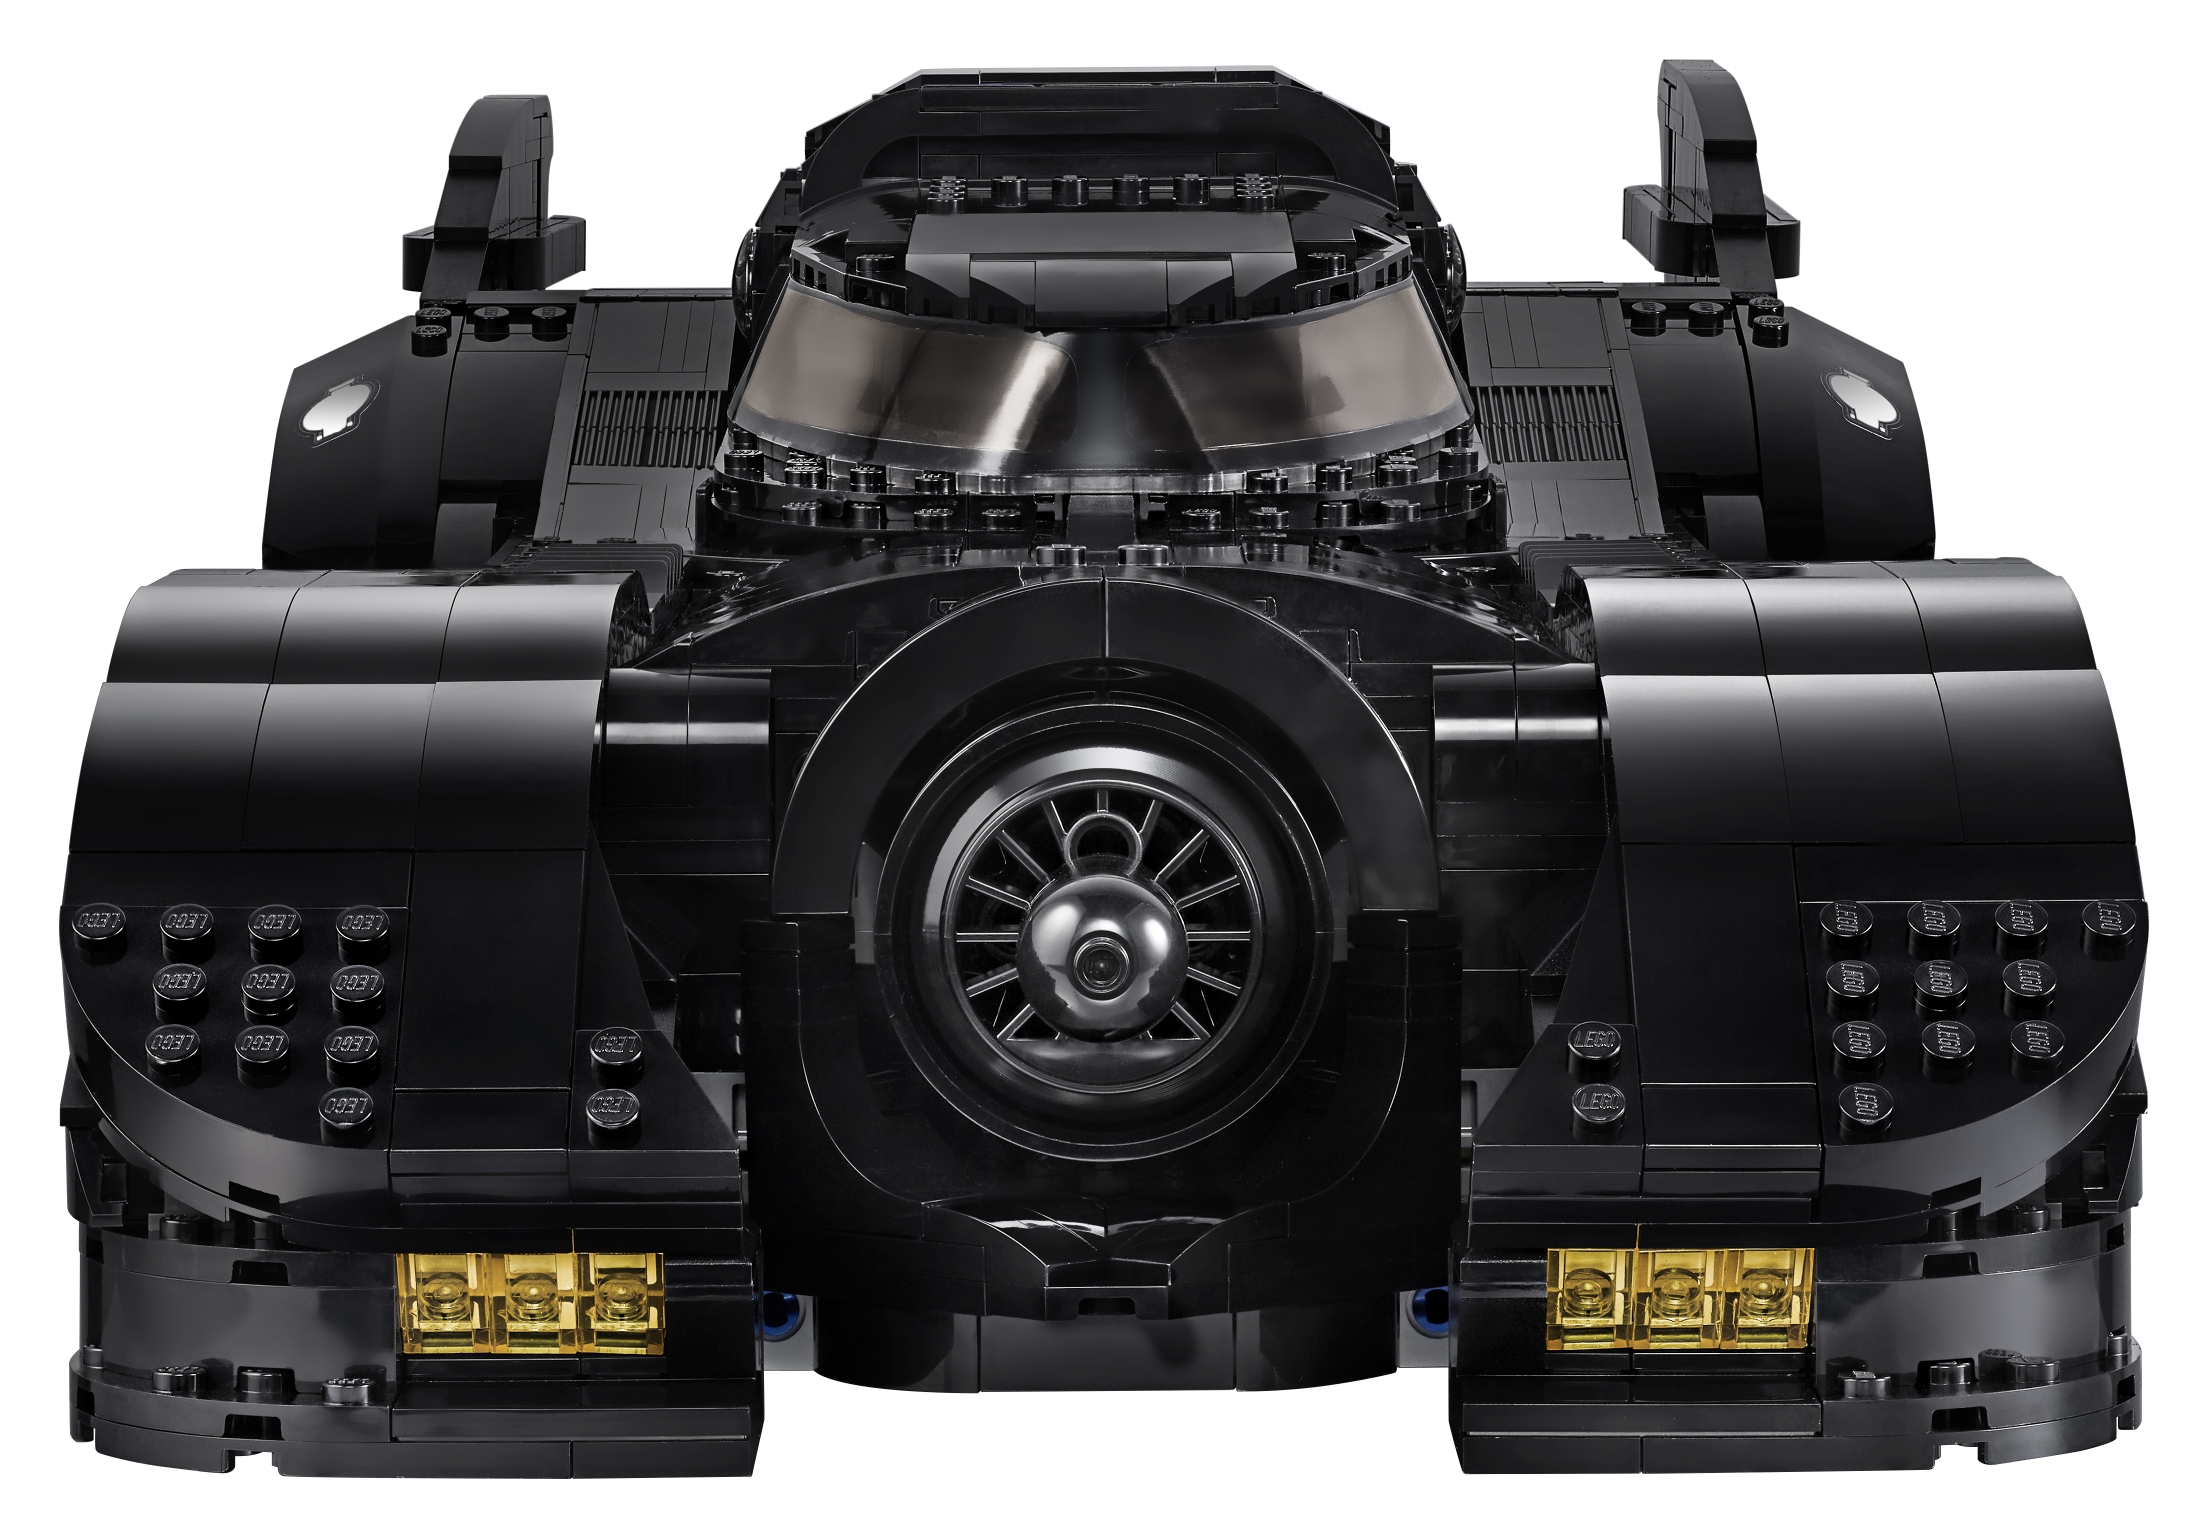
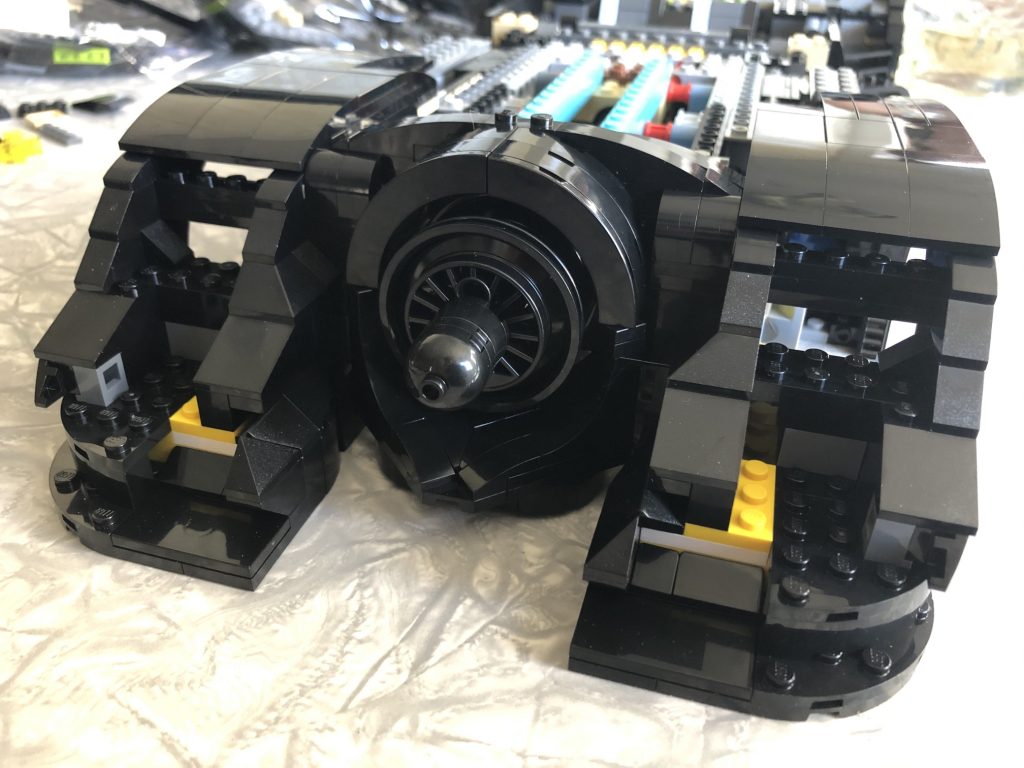
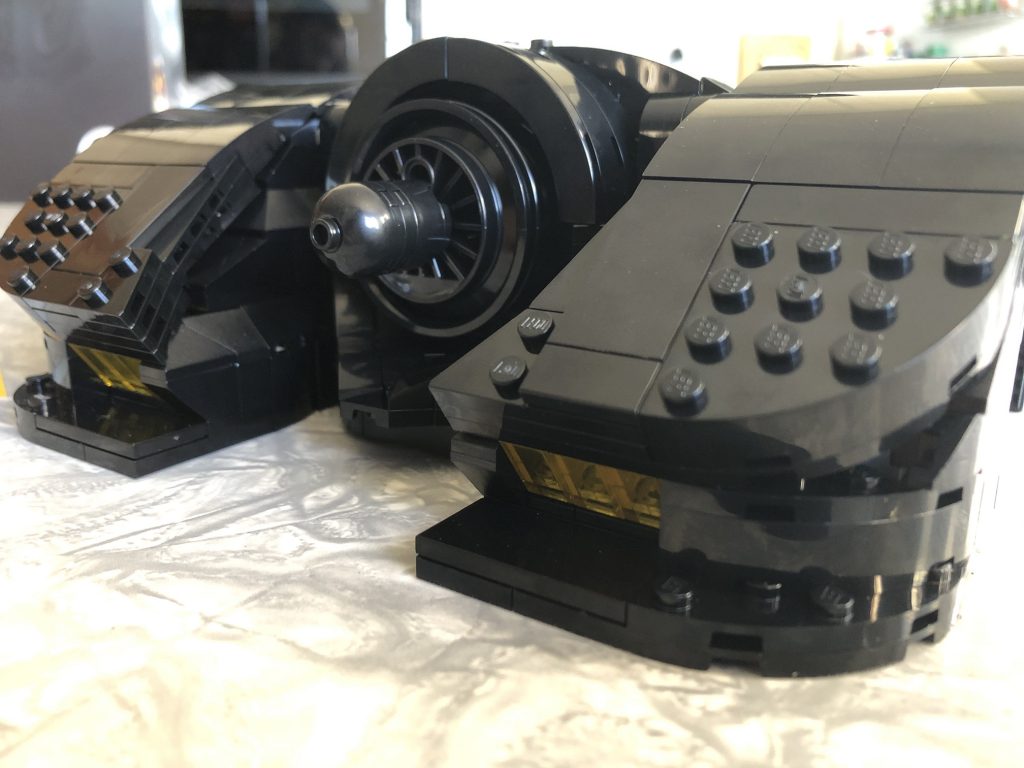
As the front end comes together and the turbine is installed the effect is awe inspiring.
The lights are in and they deliver perfectly given the parts available and concessions that needed to be made for the format. The curvature on the front end as the final panel sub builds are installed is a LOT more sleek than it appears on the box art, natural light makes the progression between the slopes a lot less noticeable than the heavy spot effect evident in the pictures.
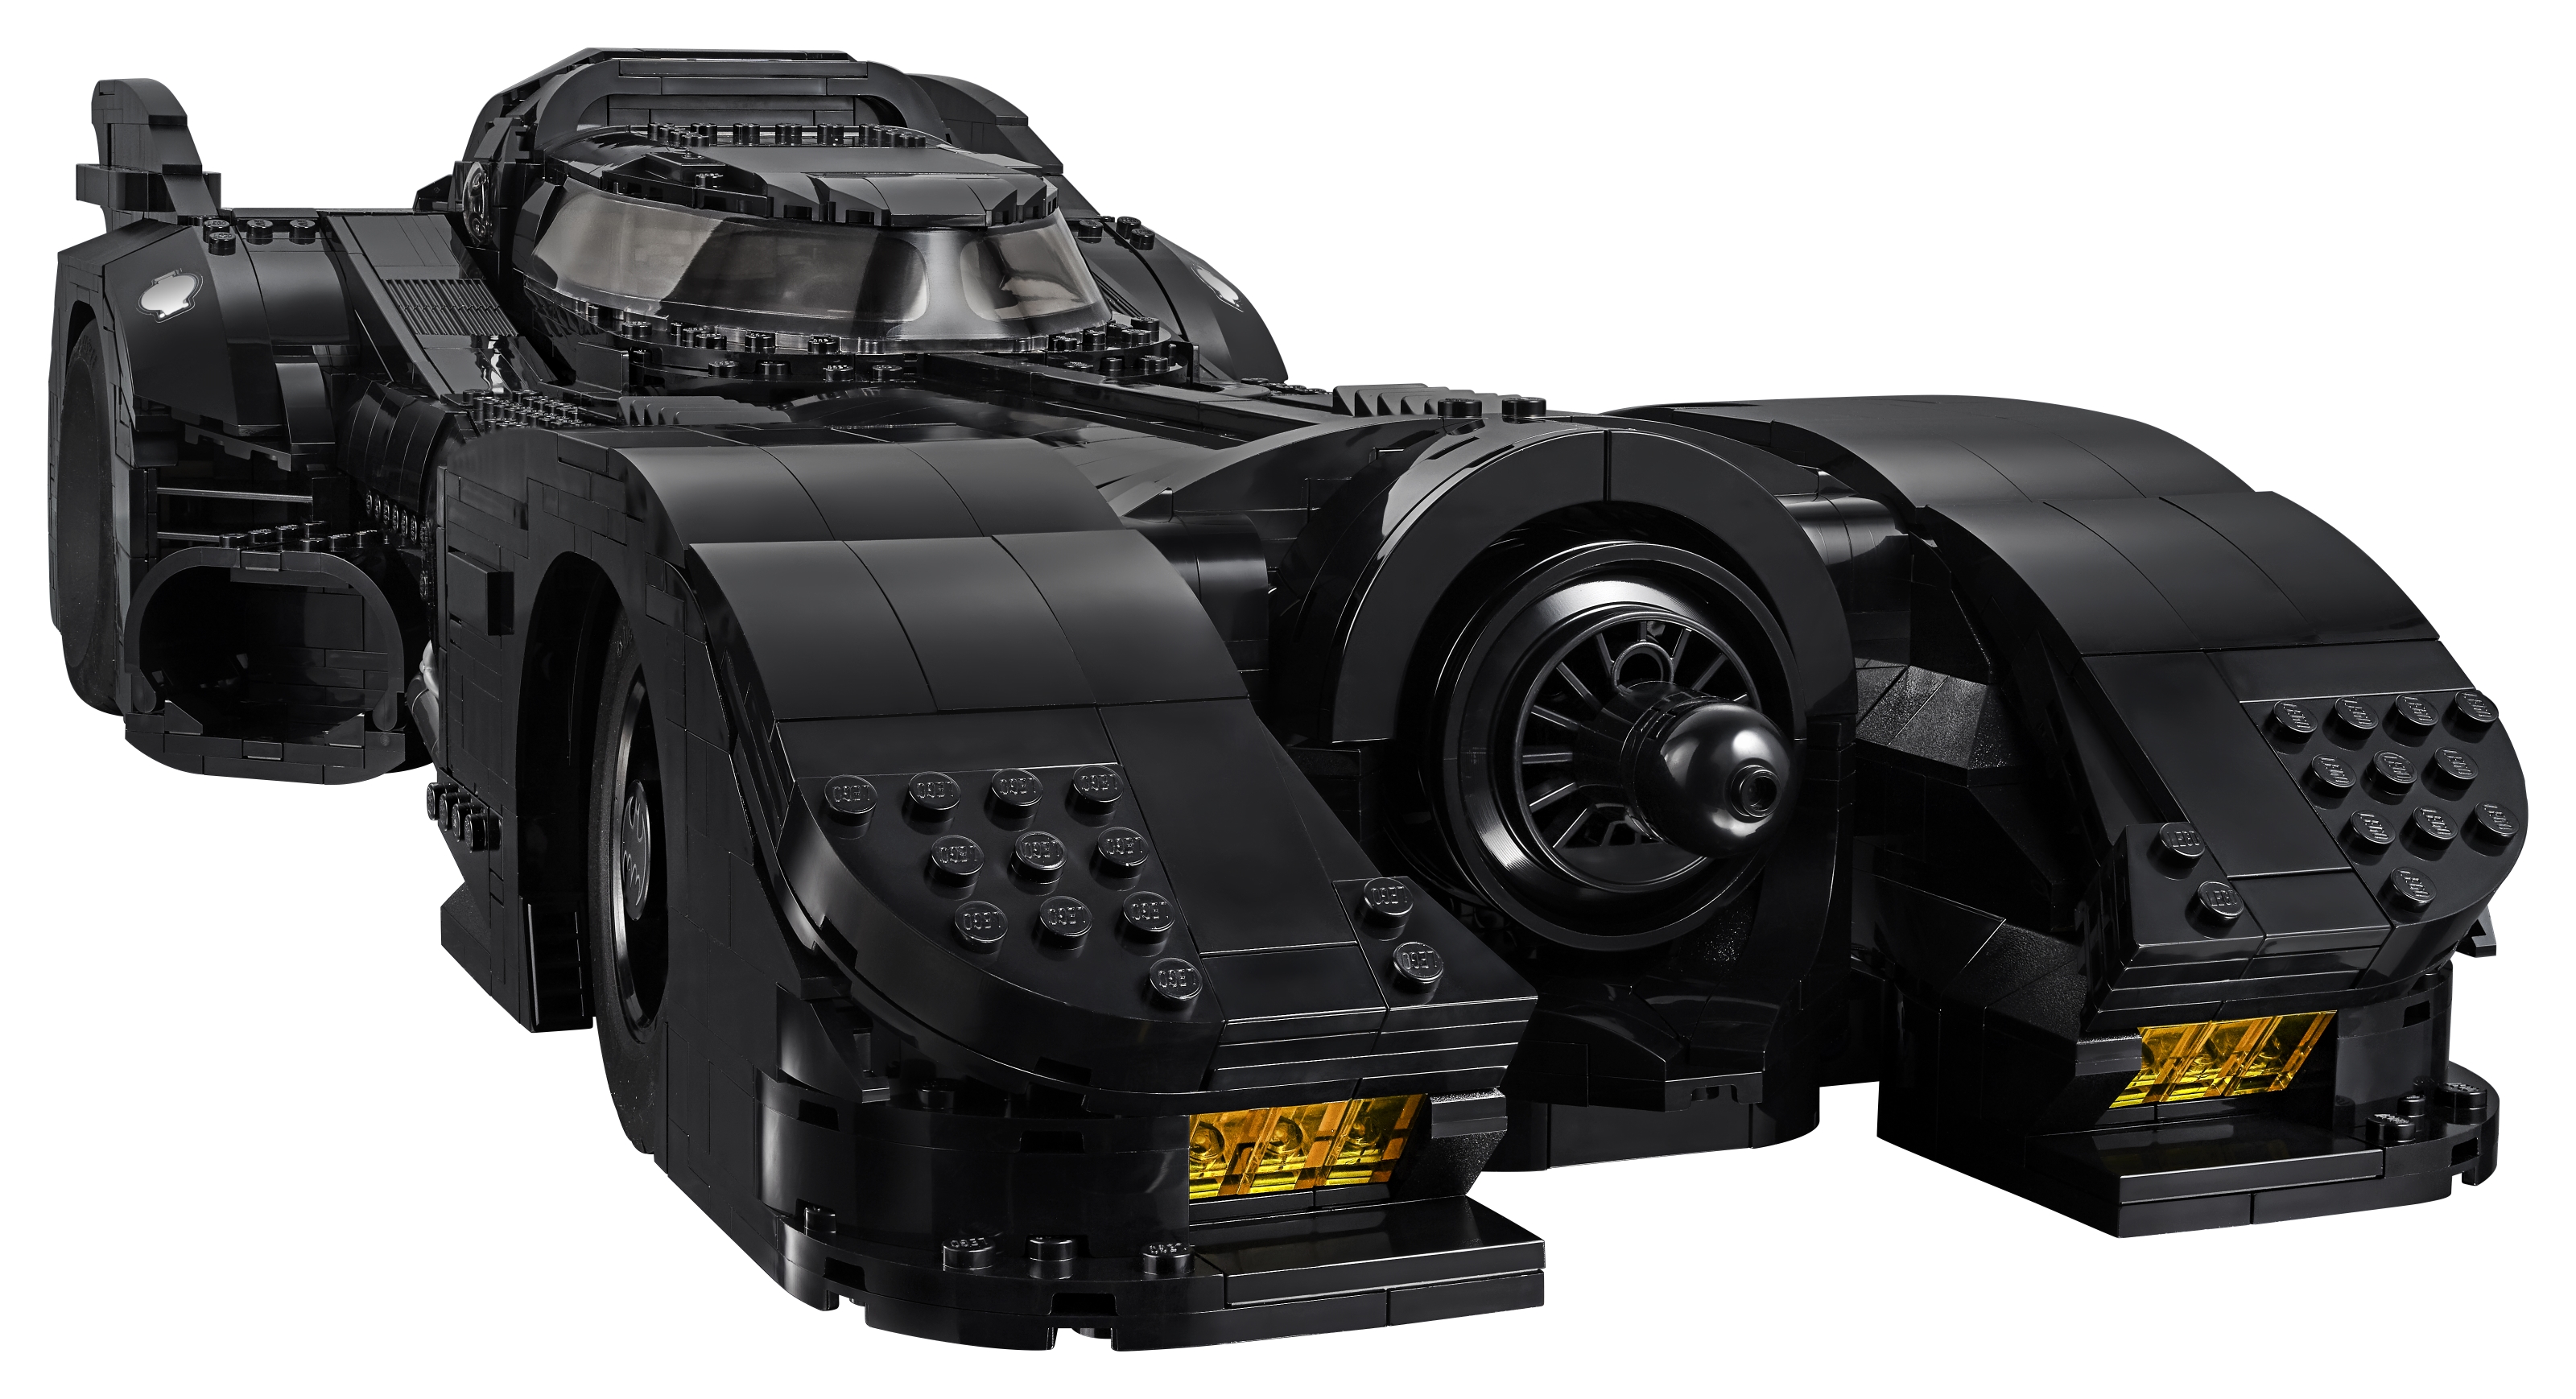
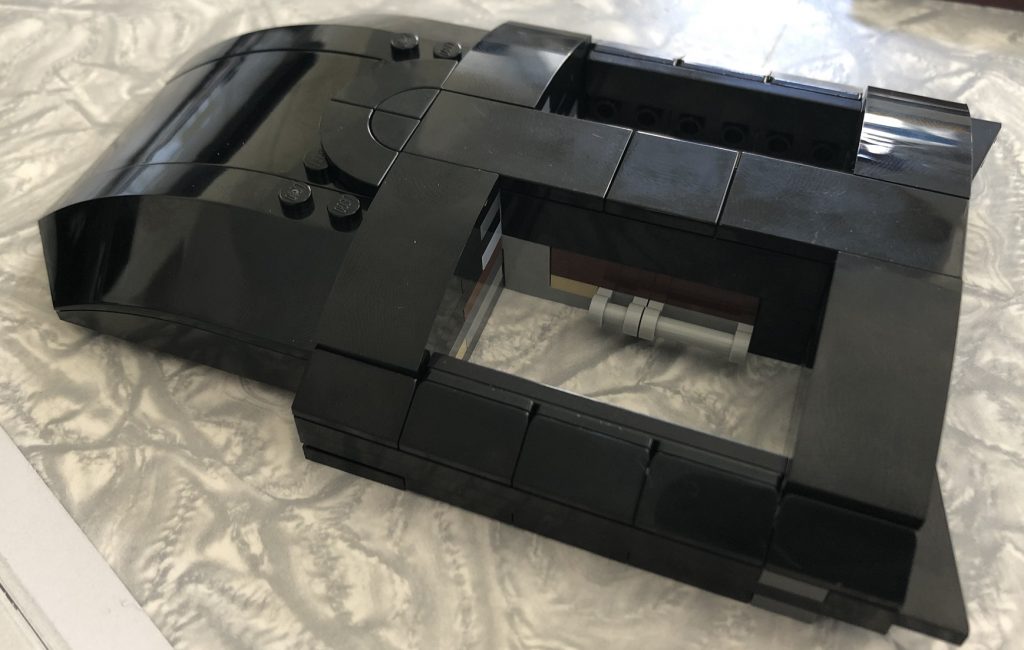
Having prepped the surface area of the bonnet, I excitedly begin construction on one of the most recognizable and key elements of this movie vehicle recreation!
The bonnet quickly takes shape and looks exquisite.
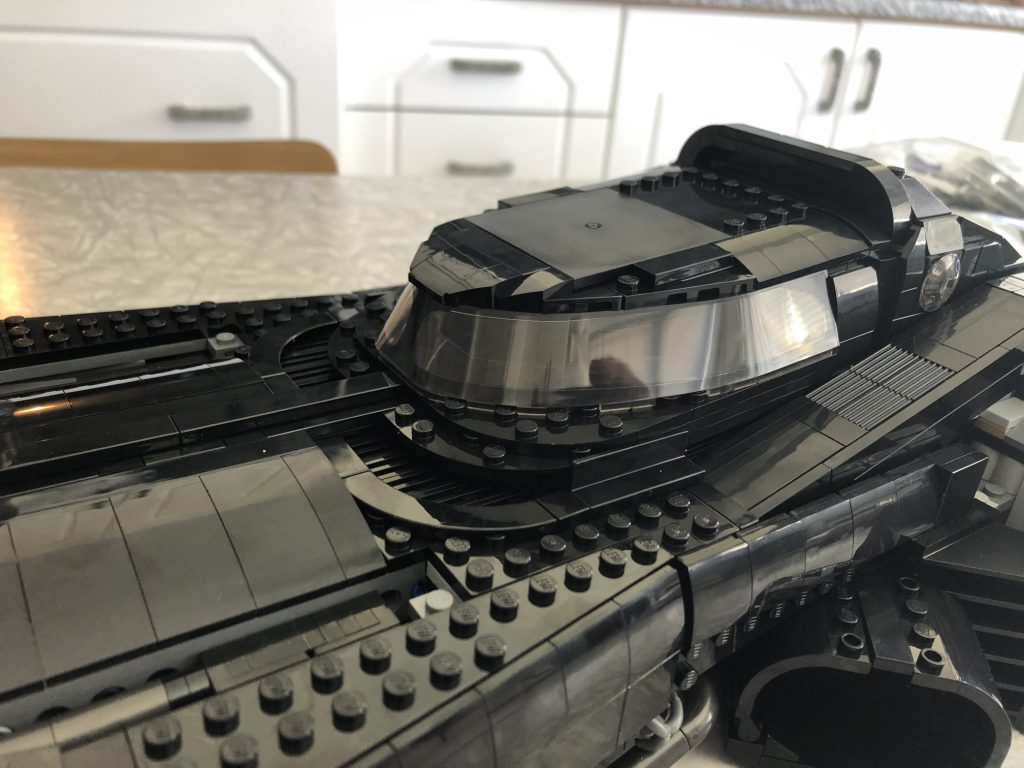
Taking the windshield element out of its plastic is almost a holy moment. Is that a choir of angelic beings chanting softly? Nope, still just a bunch of gargoyles having a smoke while they natter on a nearby rooftop.
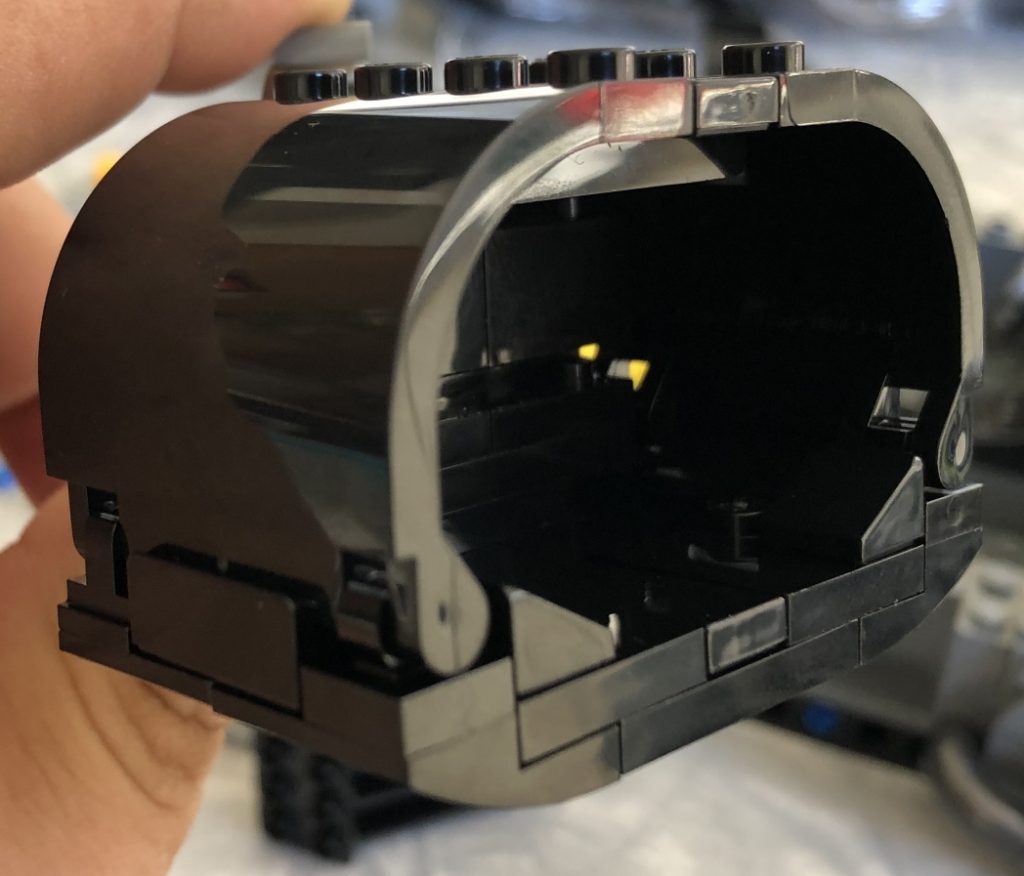
Assembling the windshield and roof I start getting that feeling of awe deep in my bones as I slowly realize that this thing SLIDES open! It also appears at this point to flip back to open as an option but only completing the final bags will tell if there will be enough space left to retain that feature.

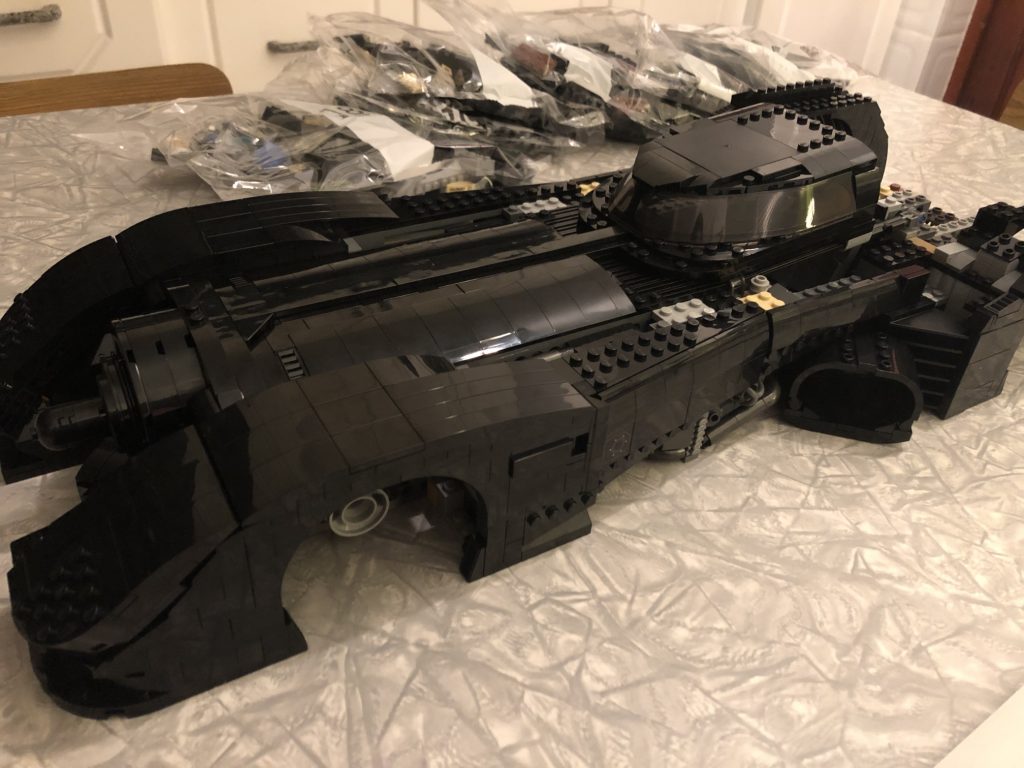
Day three was by far the most productive day to date. With a large portion of the build now under my belt, I decide to rest my head and my throbbing fingers for the night. Tomorrow shall be the final day, and I seriously cannot wait!
DAY 4
Like a kid on Christmas morning I awake and my excitement levels are off the charts! Grabbing a fresh coffee, I eagerly head to the table to finish this amazing build.
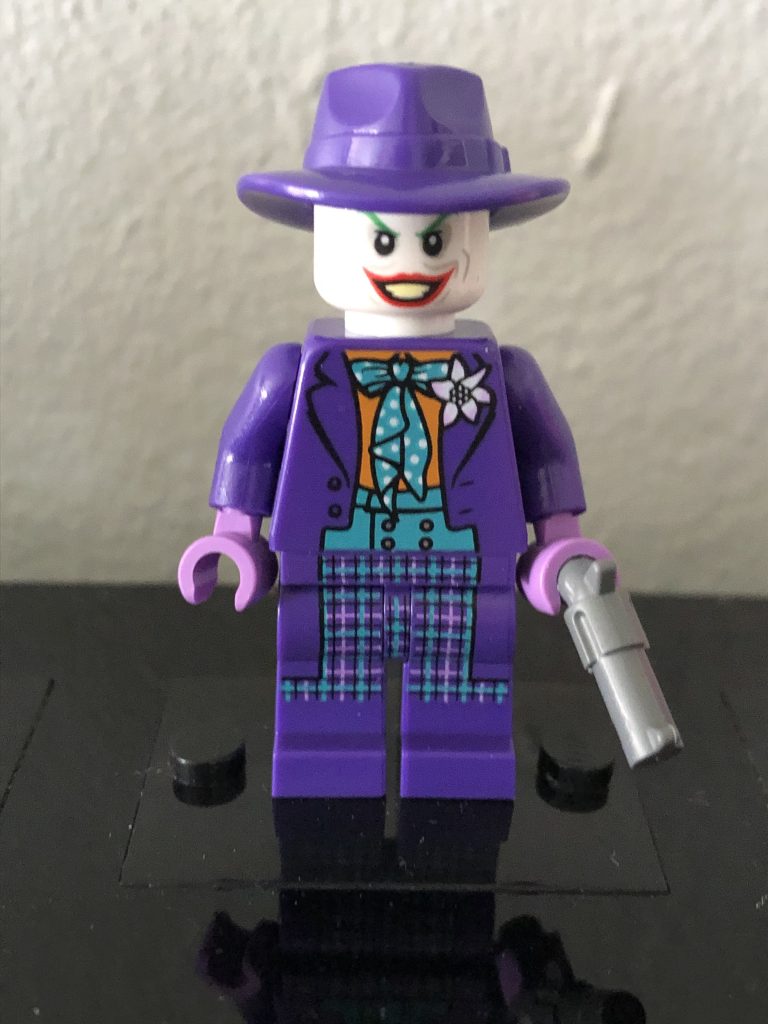
Getting myself ready for the day I see that I have seven bags left to get through and that elusive little trickster, the Joker, seems to be my prize for getting to the final bag. Holy holidays Batman! Let’s get to building.
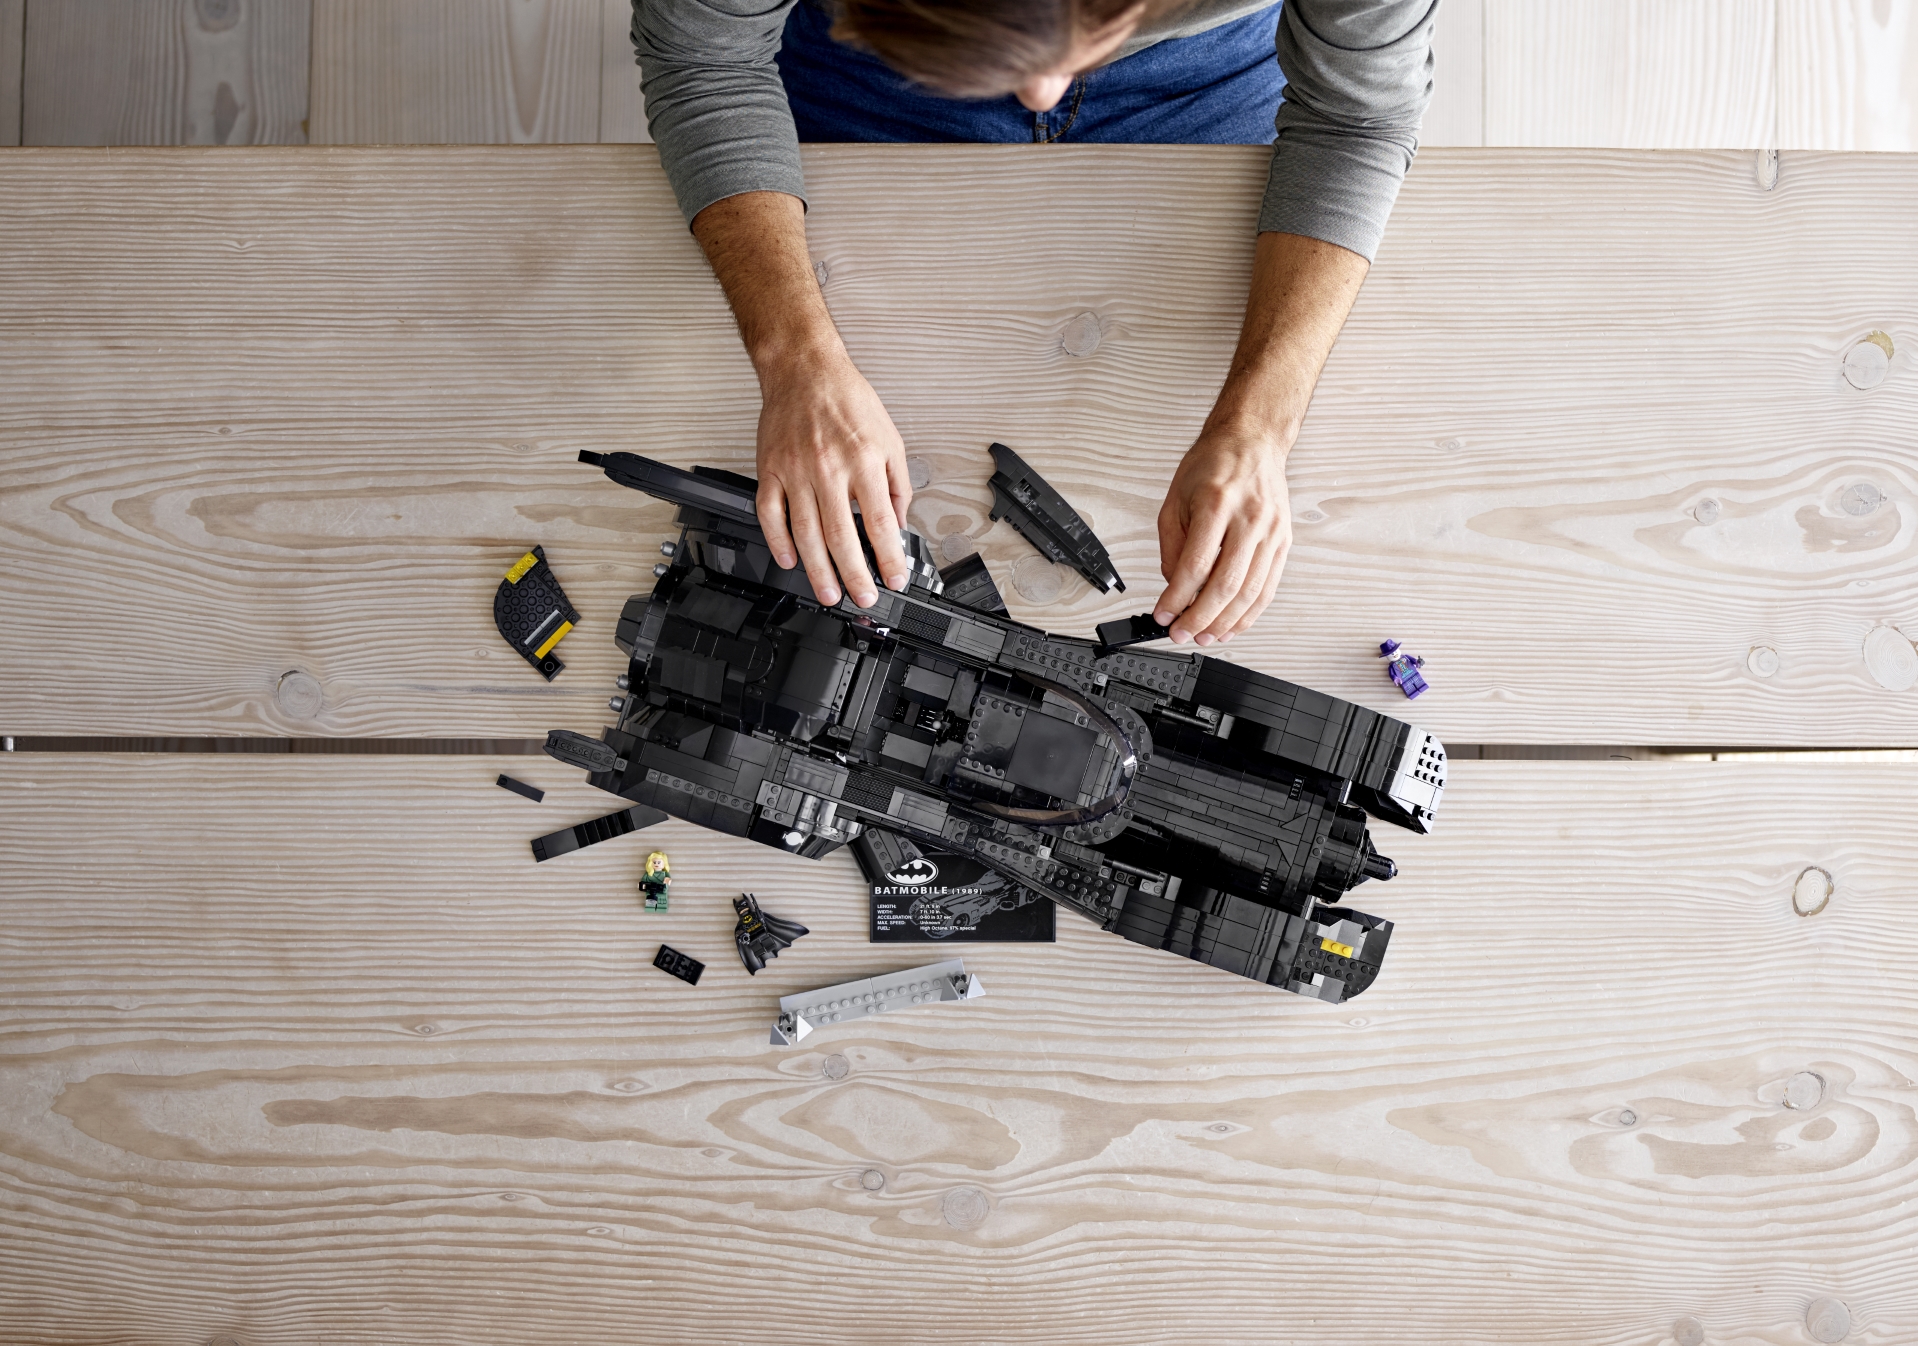
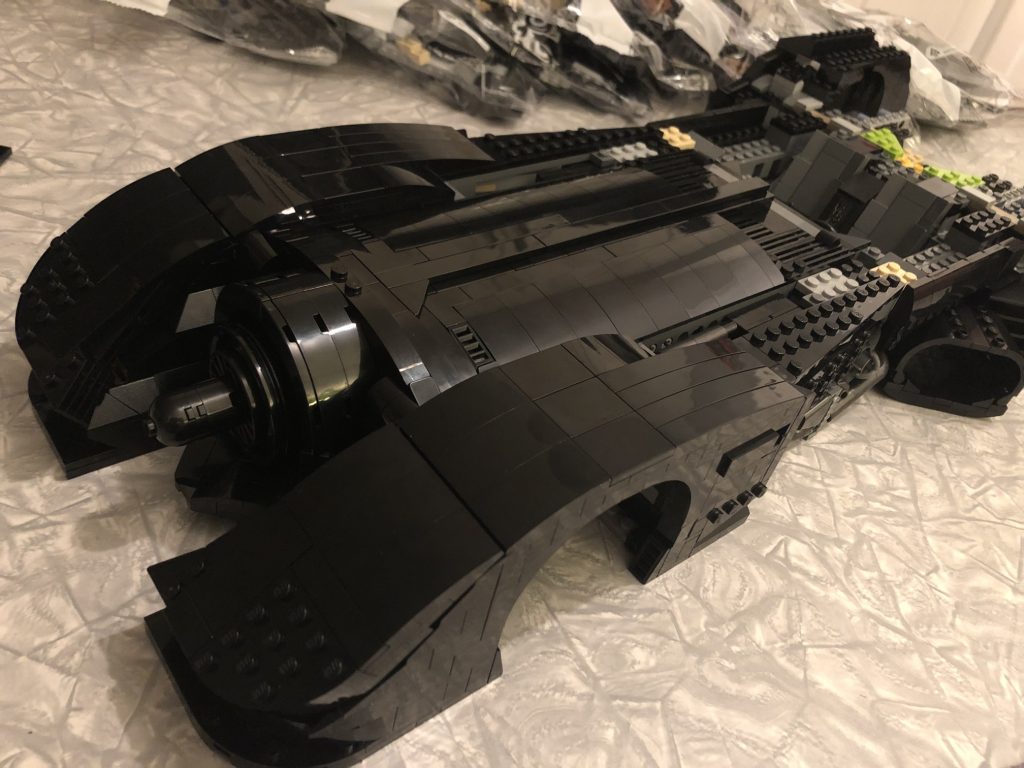
At this point it’s worth noting that manoeuvring the main build around to match the orientation of the instructions is getting trickier and trickier. Whilst stunningly beautiful, this behemoth is most unwieldy so I would really recommend a LOT of space for building.
The headrest design is surprisingly a highlight. Simple yet effect use of parts once again, and such beautiful end results!
This build has been challenging the whole way through, but as the model nears completion I seriously cannot stress enough how this is NOT a set for beginners. Some of the sub assemblies are quite fragile in places until they are in position on the main build and the construction of them is often devilishly clever and mind bending. I say this as someone who has many hundred hours of experience building both with and without a manual, so you know… use it, don’t use it.
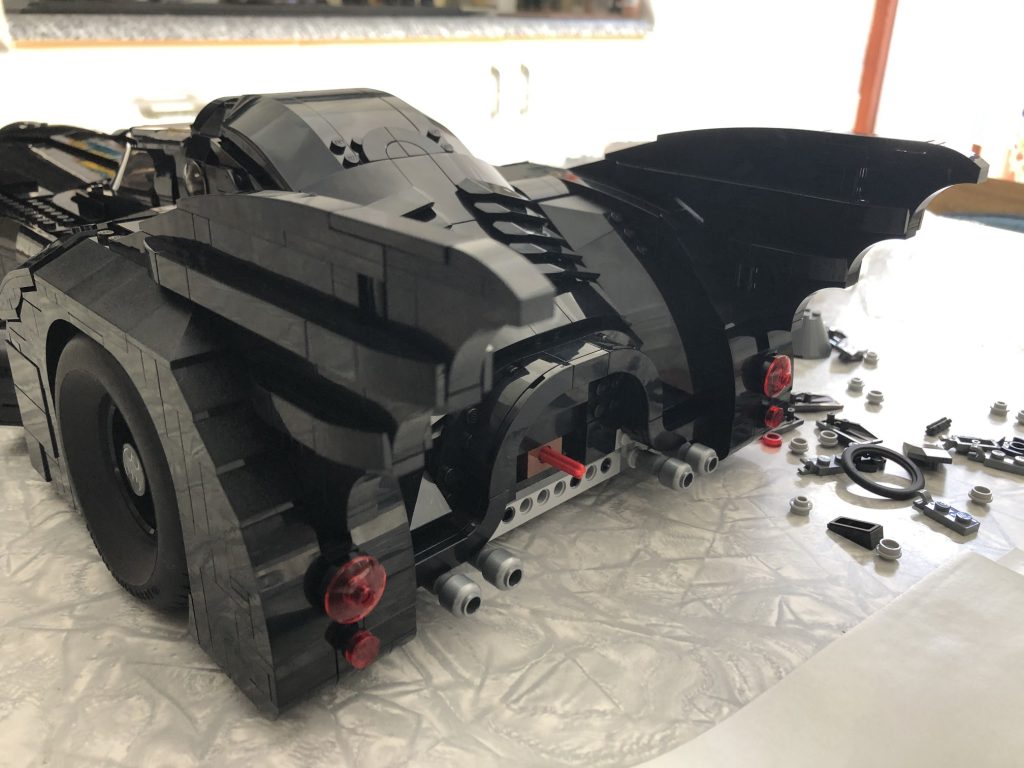
Working on the back end and it seems there could be enough of a cavity to fit a motor for the real axle, my mind is a flutter as I have almost no experience with power functions, but for this guy I’d be willing to learn!

The back end of the canopy is a pleasure to build. As more of the sub assemblies are fitted I realize now that the ability to flip the hood and windshield up is definitely no longer an option. This saddens me slightly but honestly if I had to choose one method of opening the cabin area it would be the rail system with the more authentic sliding action, amazing work from the designers.
Excellent use of sideways construction for the panels leading from the back end to the lower elevation either side of the cabin.
Once the petrol cap stickers are applied there is only one of the 13 left, and it’s the big‘un.

The rear end still seems to have enough clearance inside to take a battery pack and motor, and the panels creating the various shapes are elegantly genius.
I really like how the rear carapace takes shape!
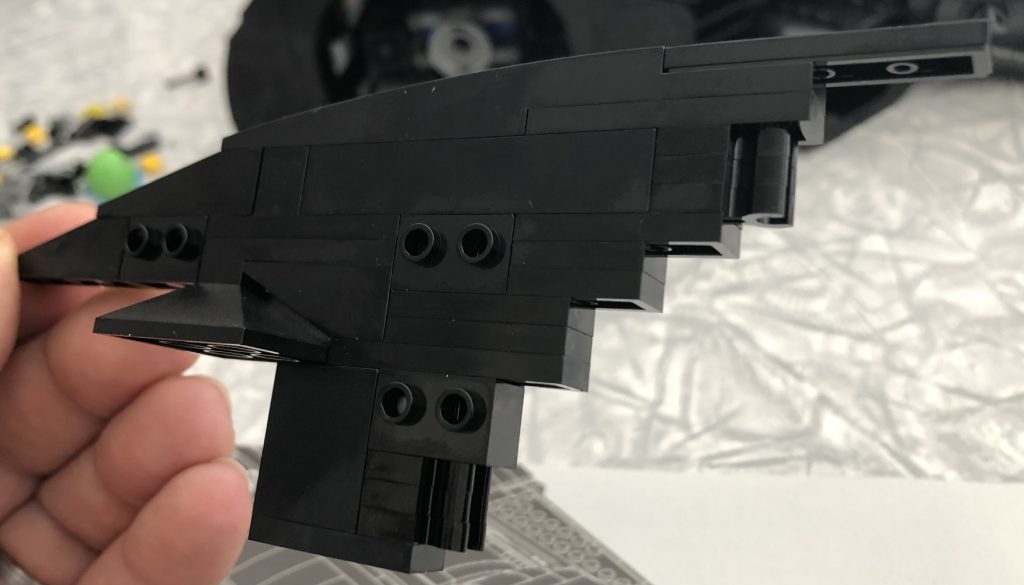
Bag 22 exists JUST for wings. The wings are cleverly constructed from two main sub assemblies, one being built completely upside down and then clipped in with 1×1 modified bricks with bar protrusions.
It’s taken four days to get to the final bag, and it seems it was definitely worth the wait! Not only does the first representation of Nicholson’s Joker in minifig form await my grubby mitts, but it also looks like there is a stand yet to be built! And just like the smaller version I built earlier… this one seems to rotate as well.
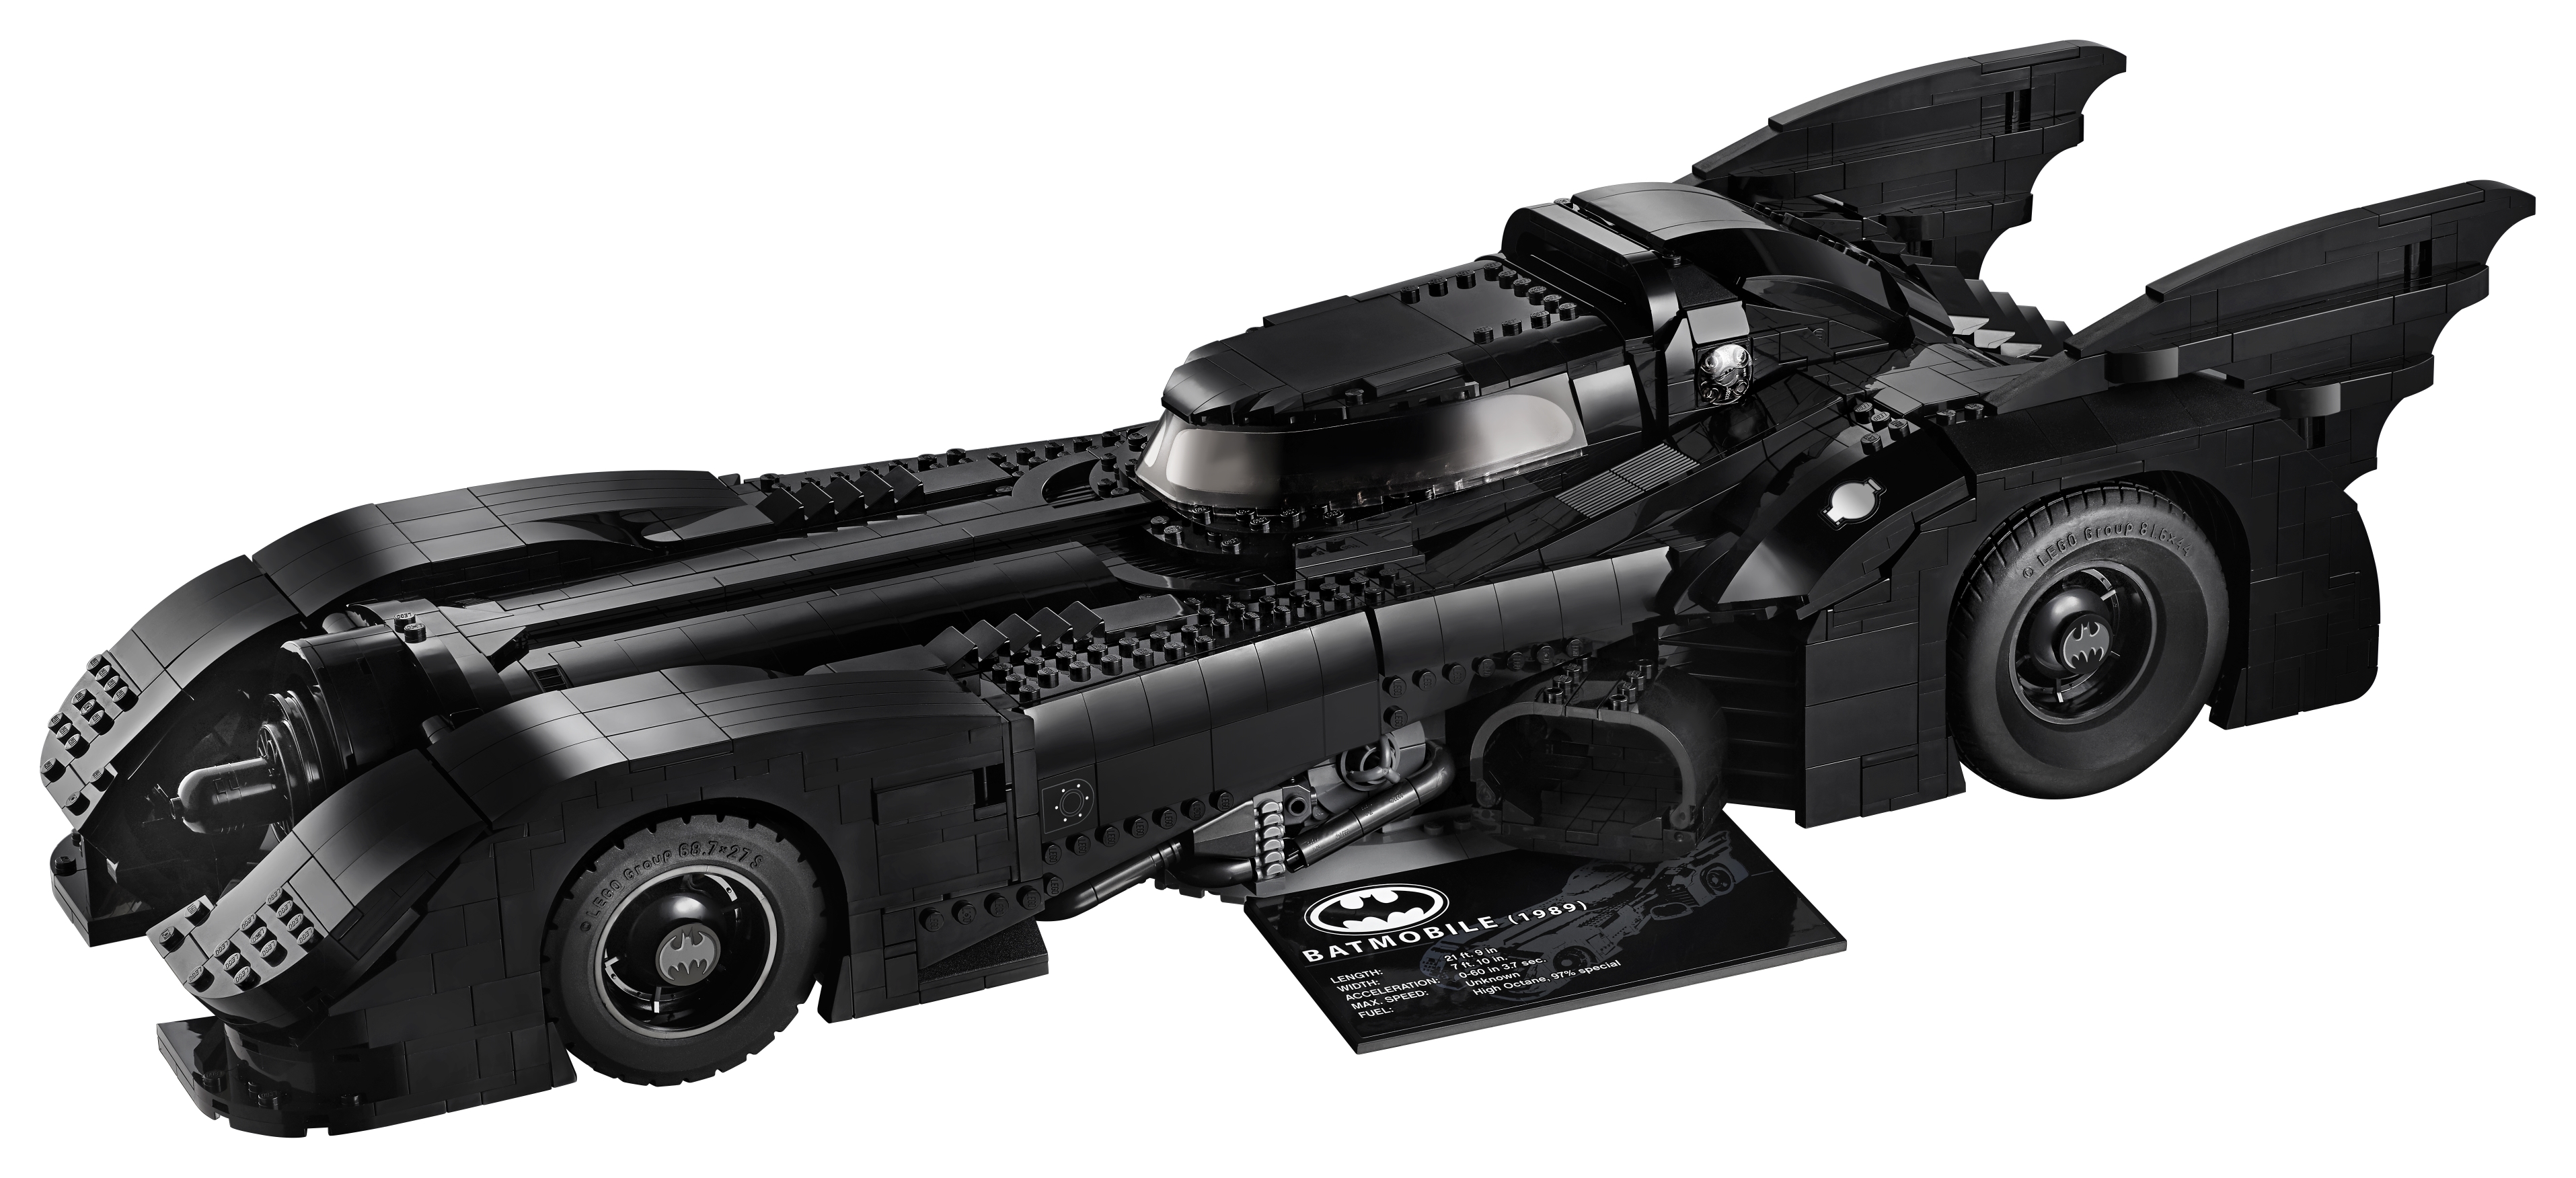
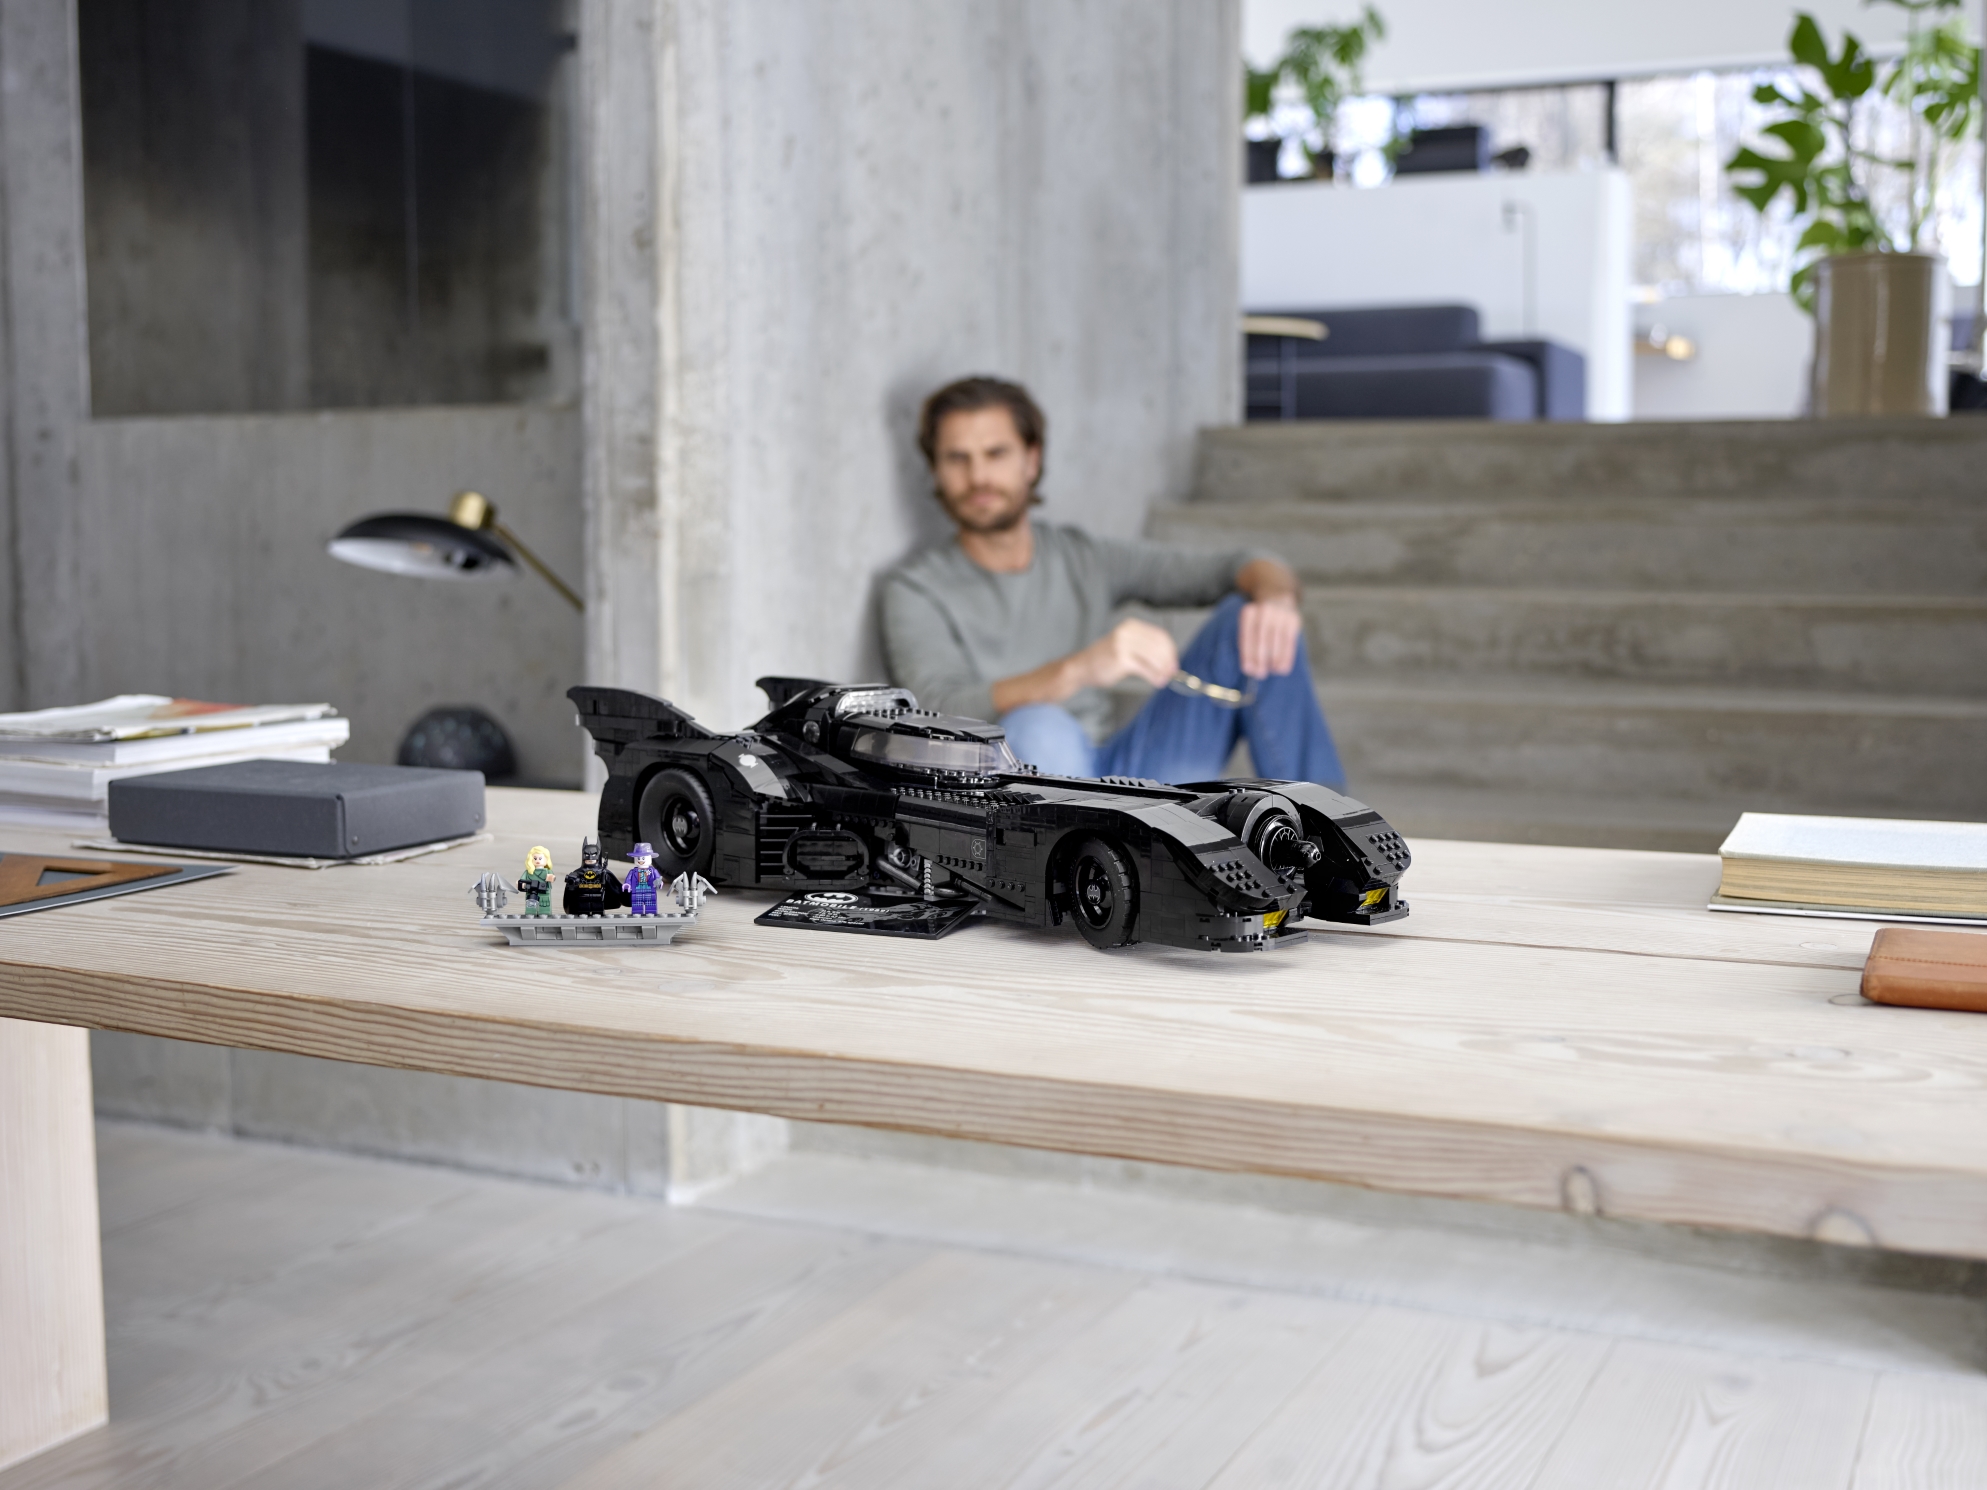
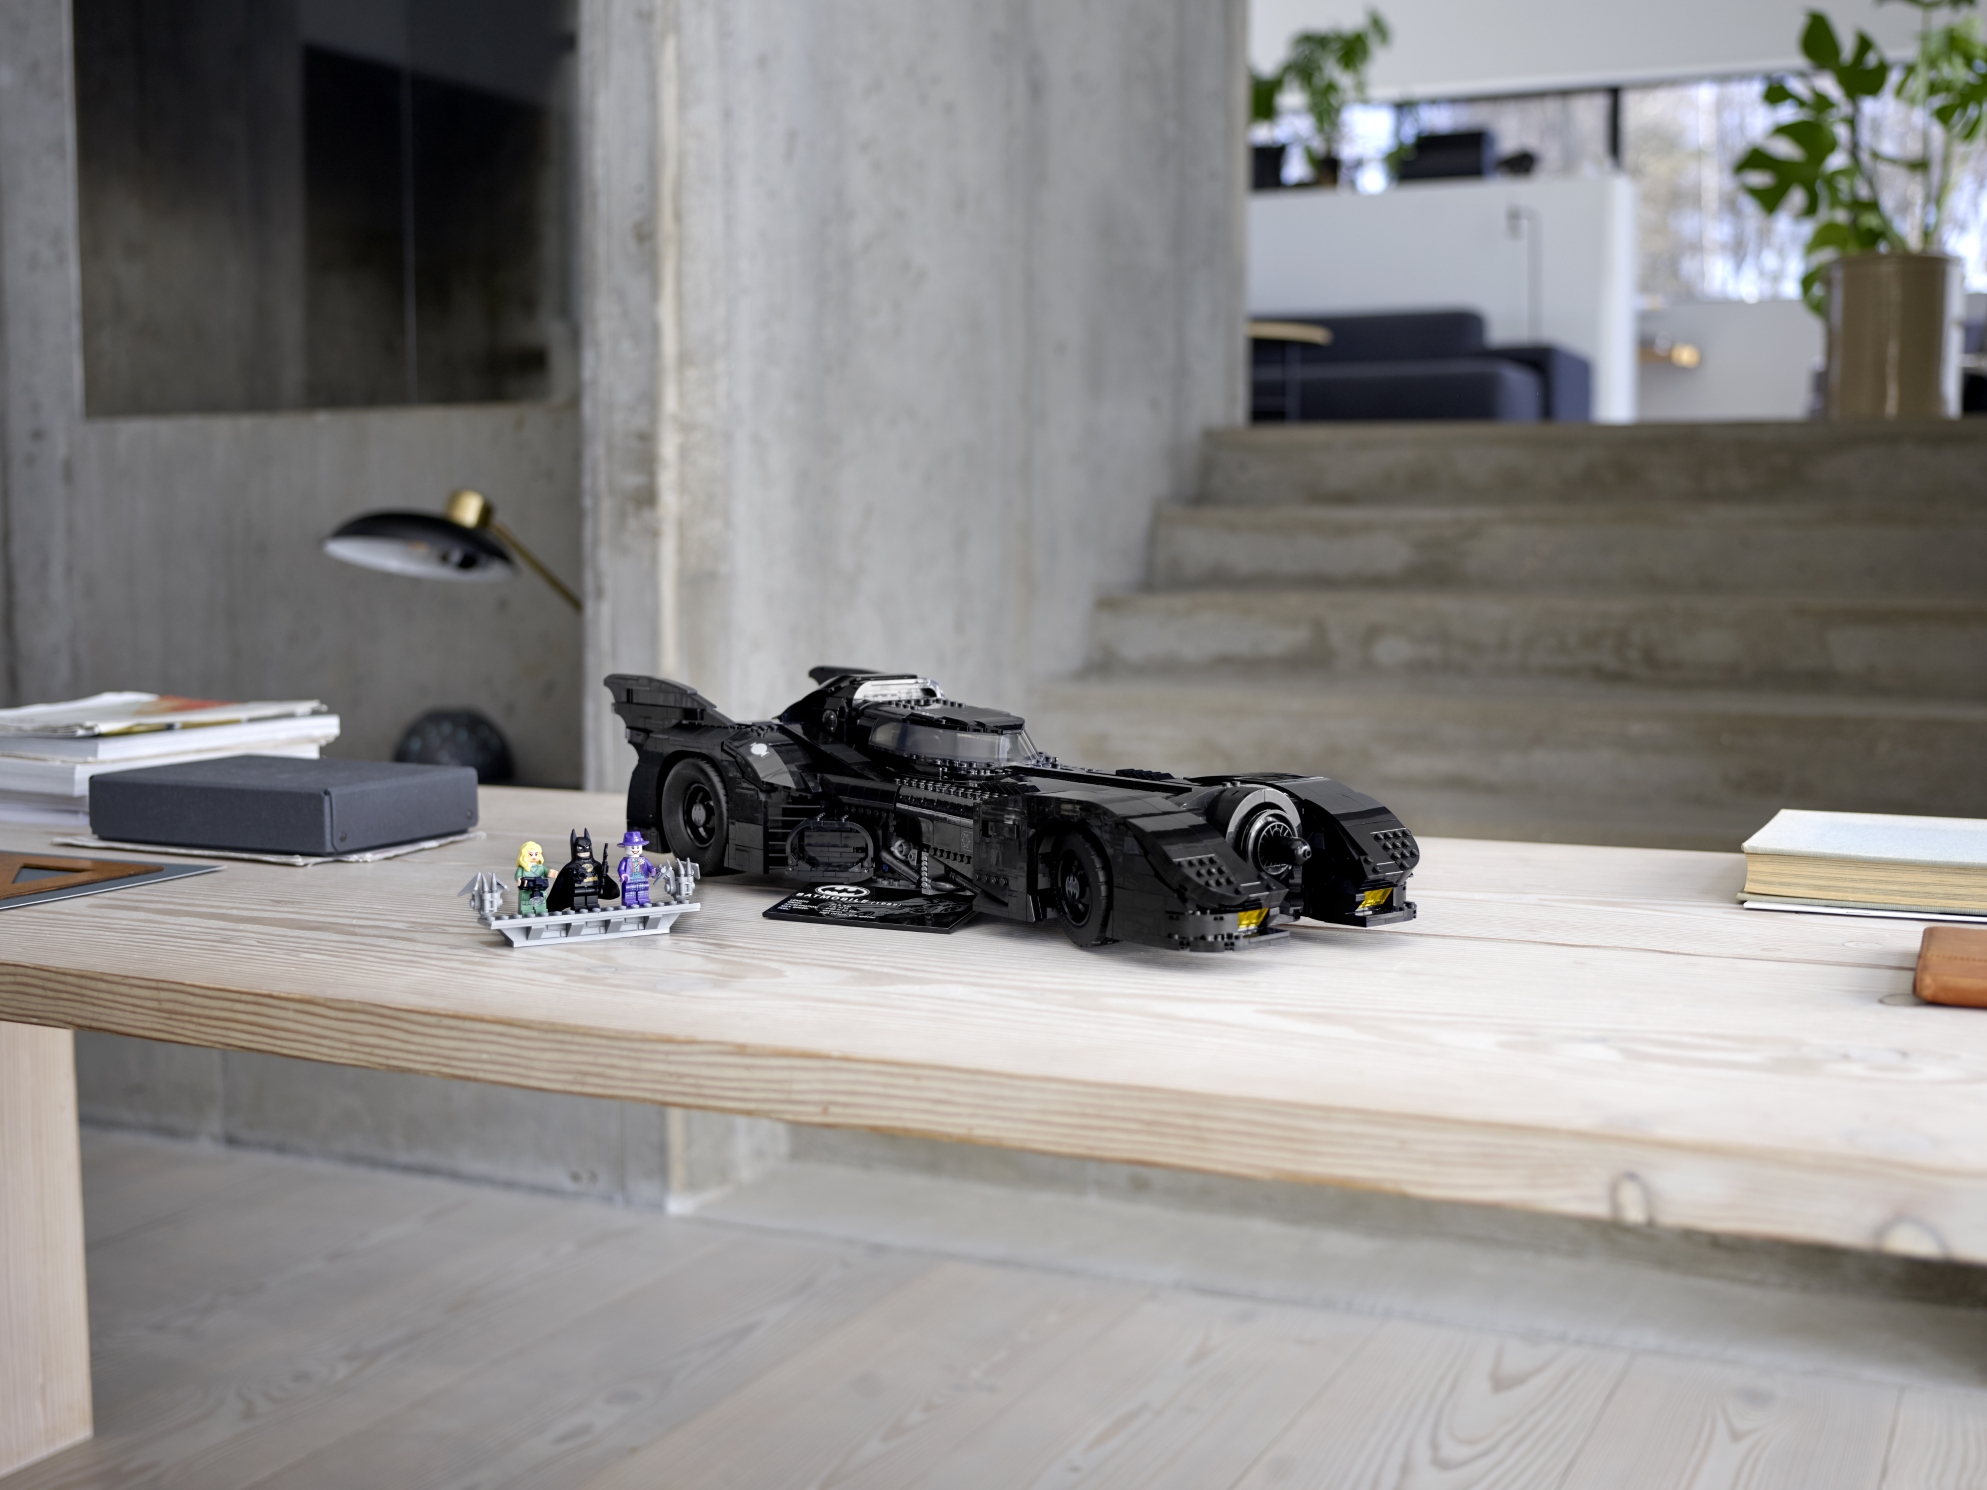
As I croon over the final build, silently gliding around in a 360 arc on its stylish base, I feel blessed just to have it in my life. The price point, as I’ve pointed out before, is relatively high but I can say without a doubt that whether or not you are a Batman fan it is worth every single cent. This set is jaw droppingly gorgeous both for the exterior shaping as well as the underlying form which keeps it structurally sound and accommodates all those tiny offsets and interesting angles. There is a little something here for everyone, from the amazing minifigs to the clever use of Technic parts and techniques. I feel very confident in my recommendation that this is a LEGO® set of the highest quality currently possible.
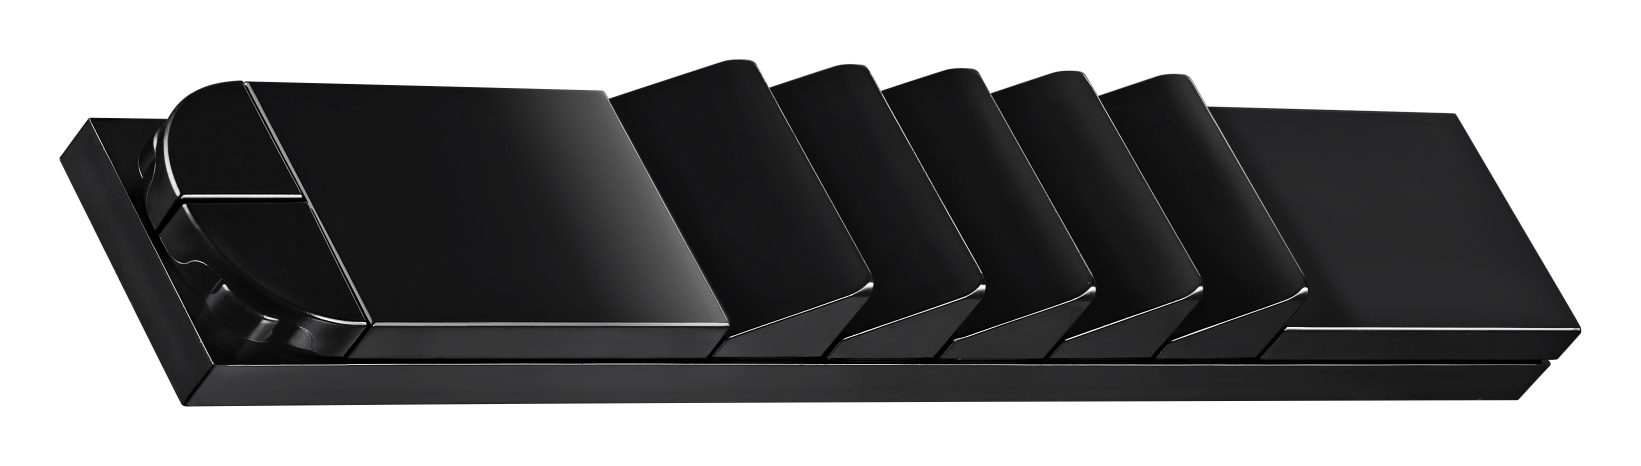
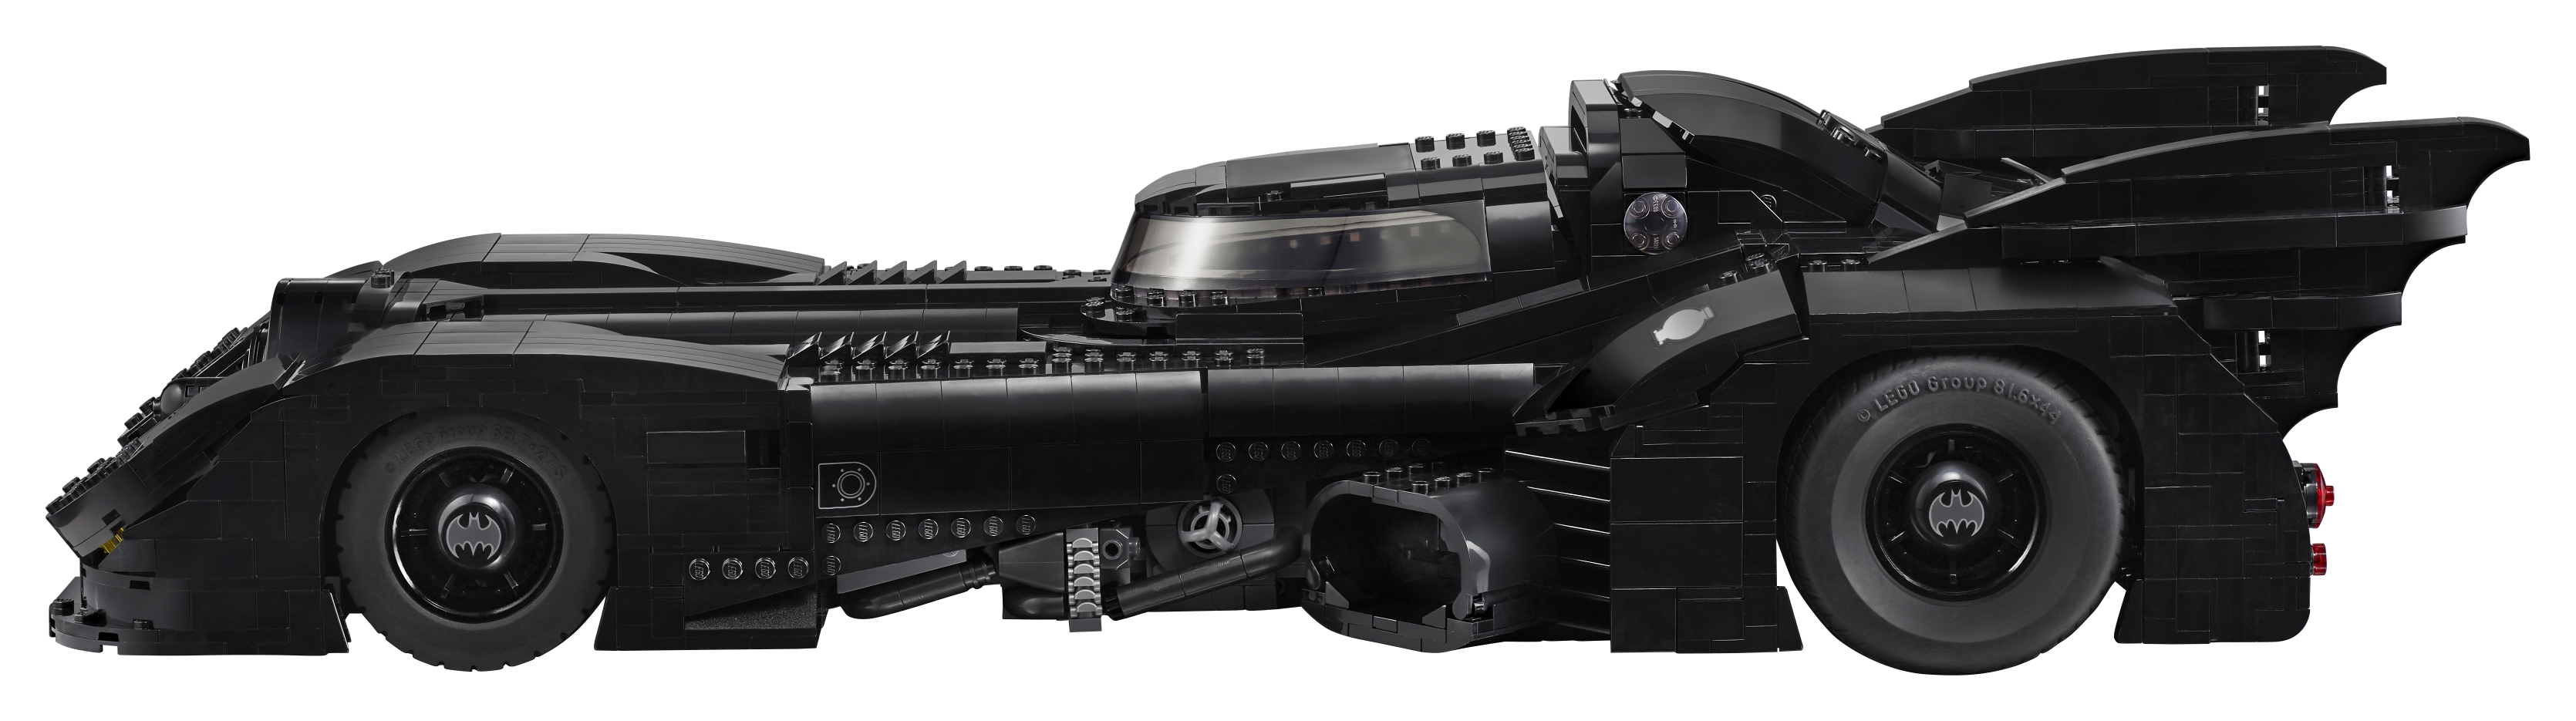
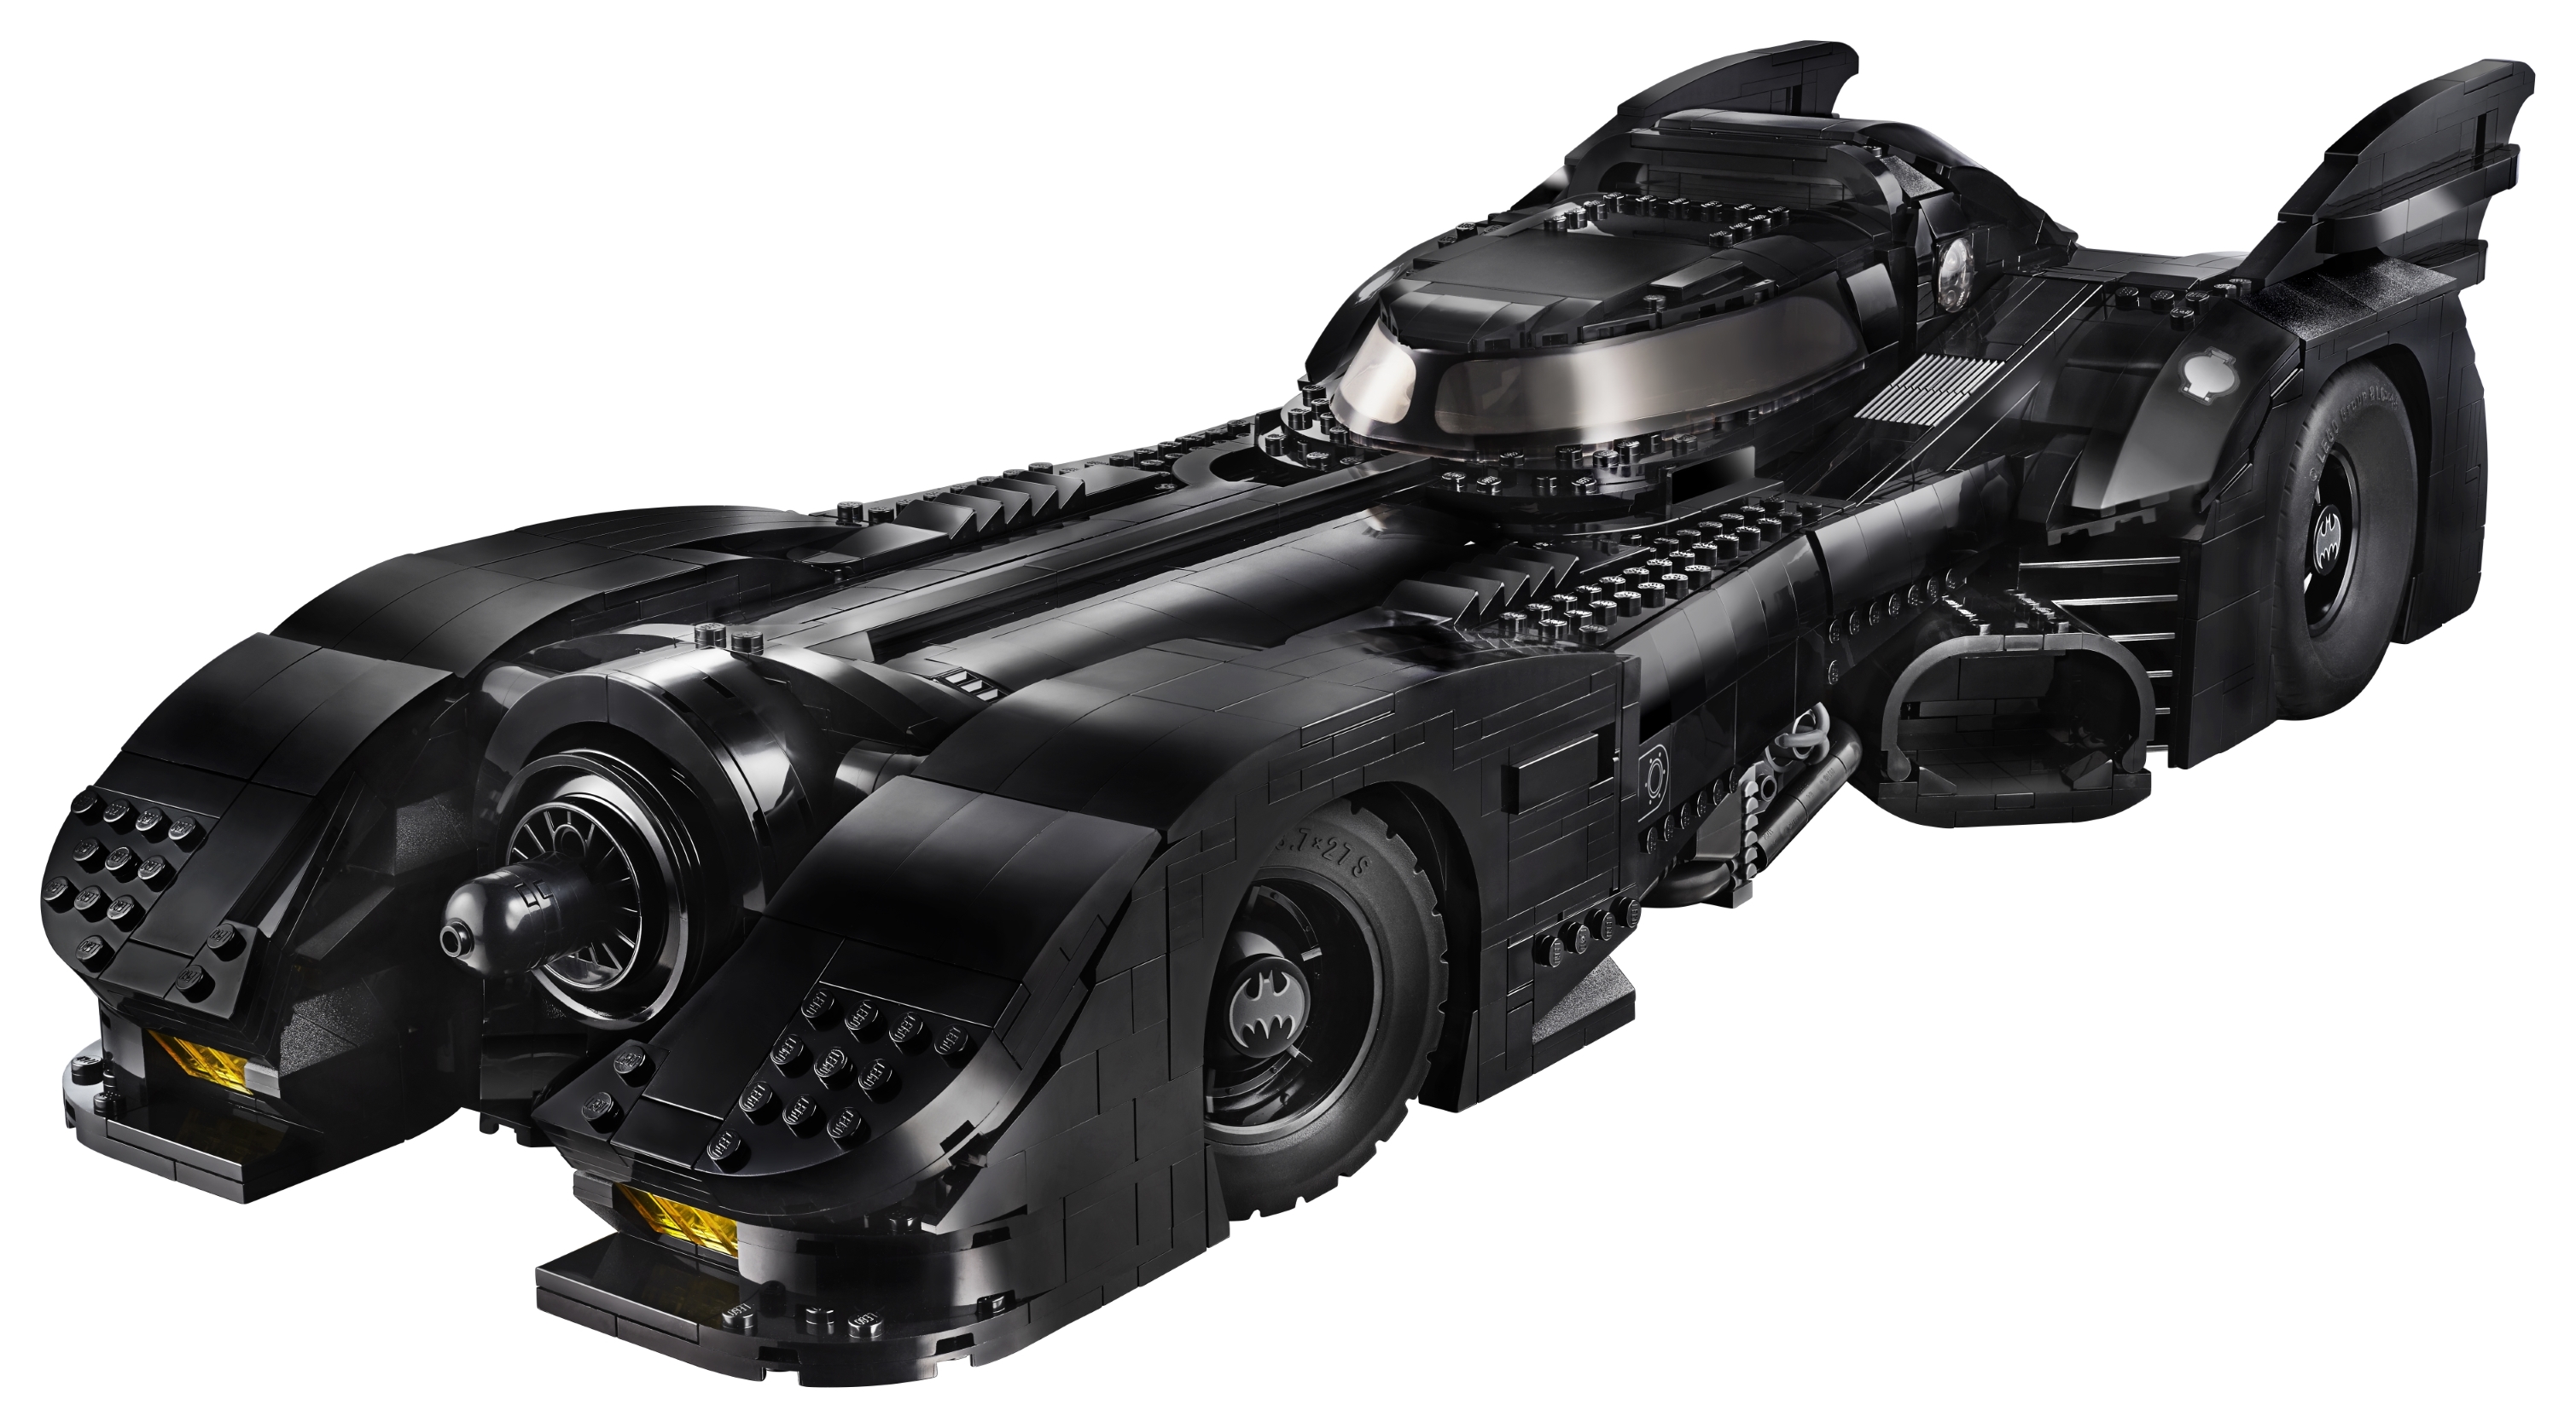
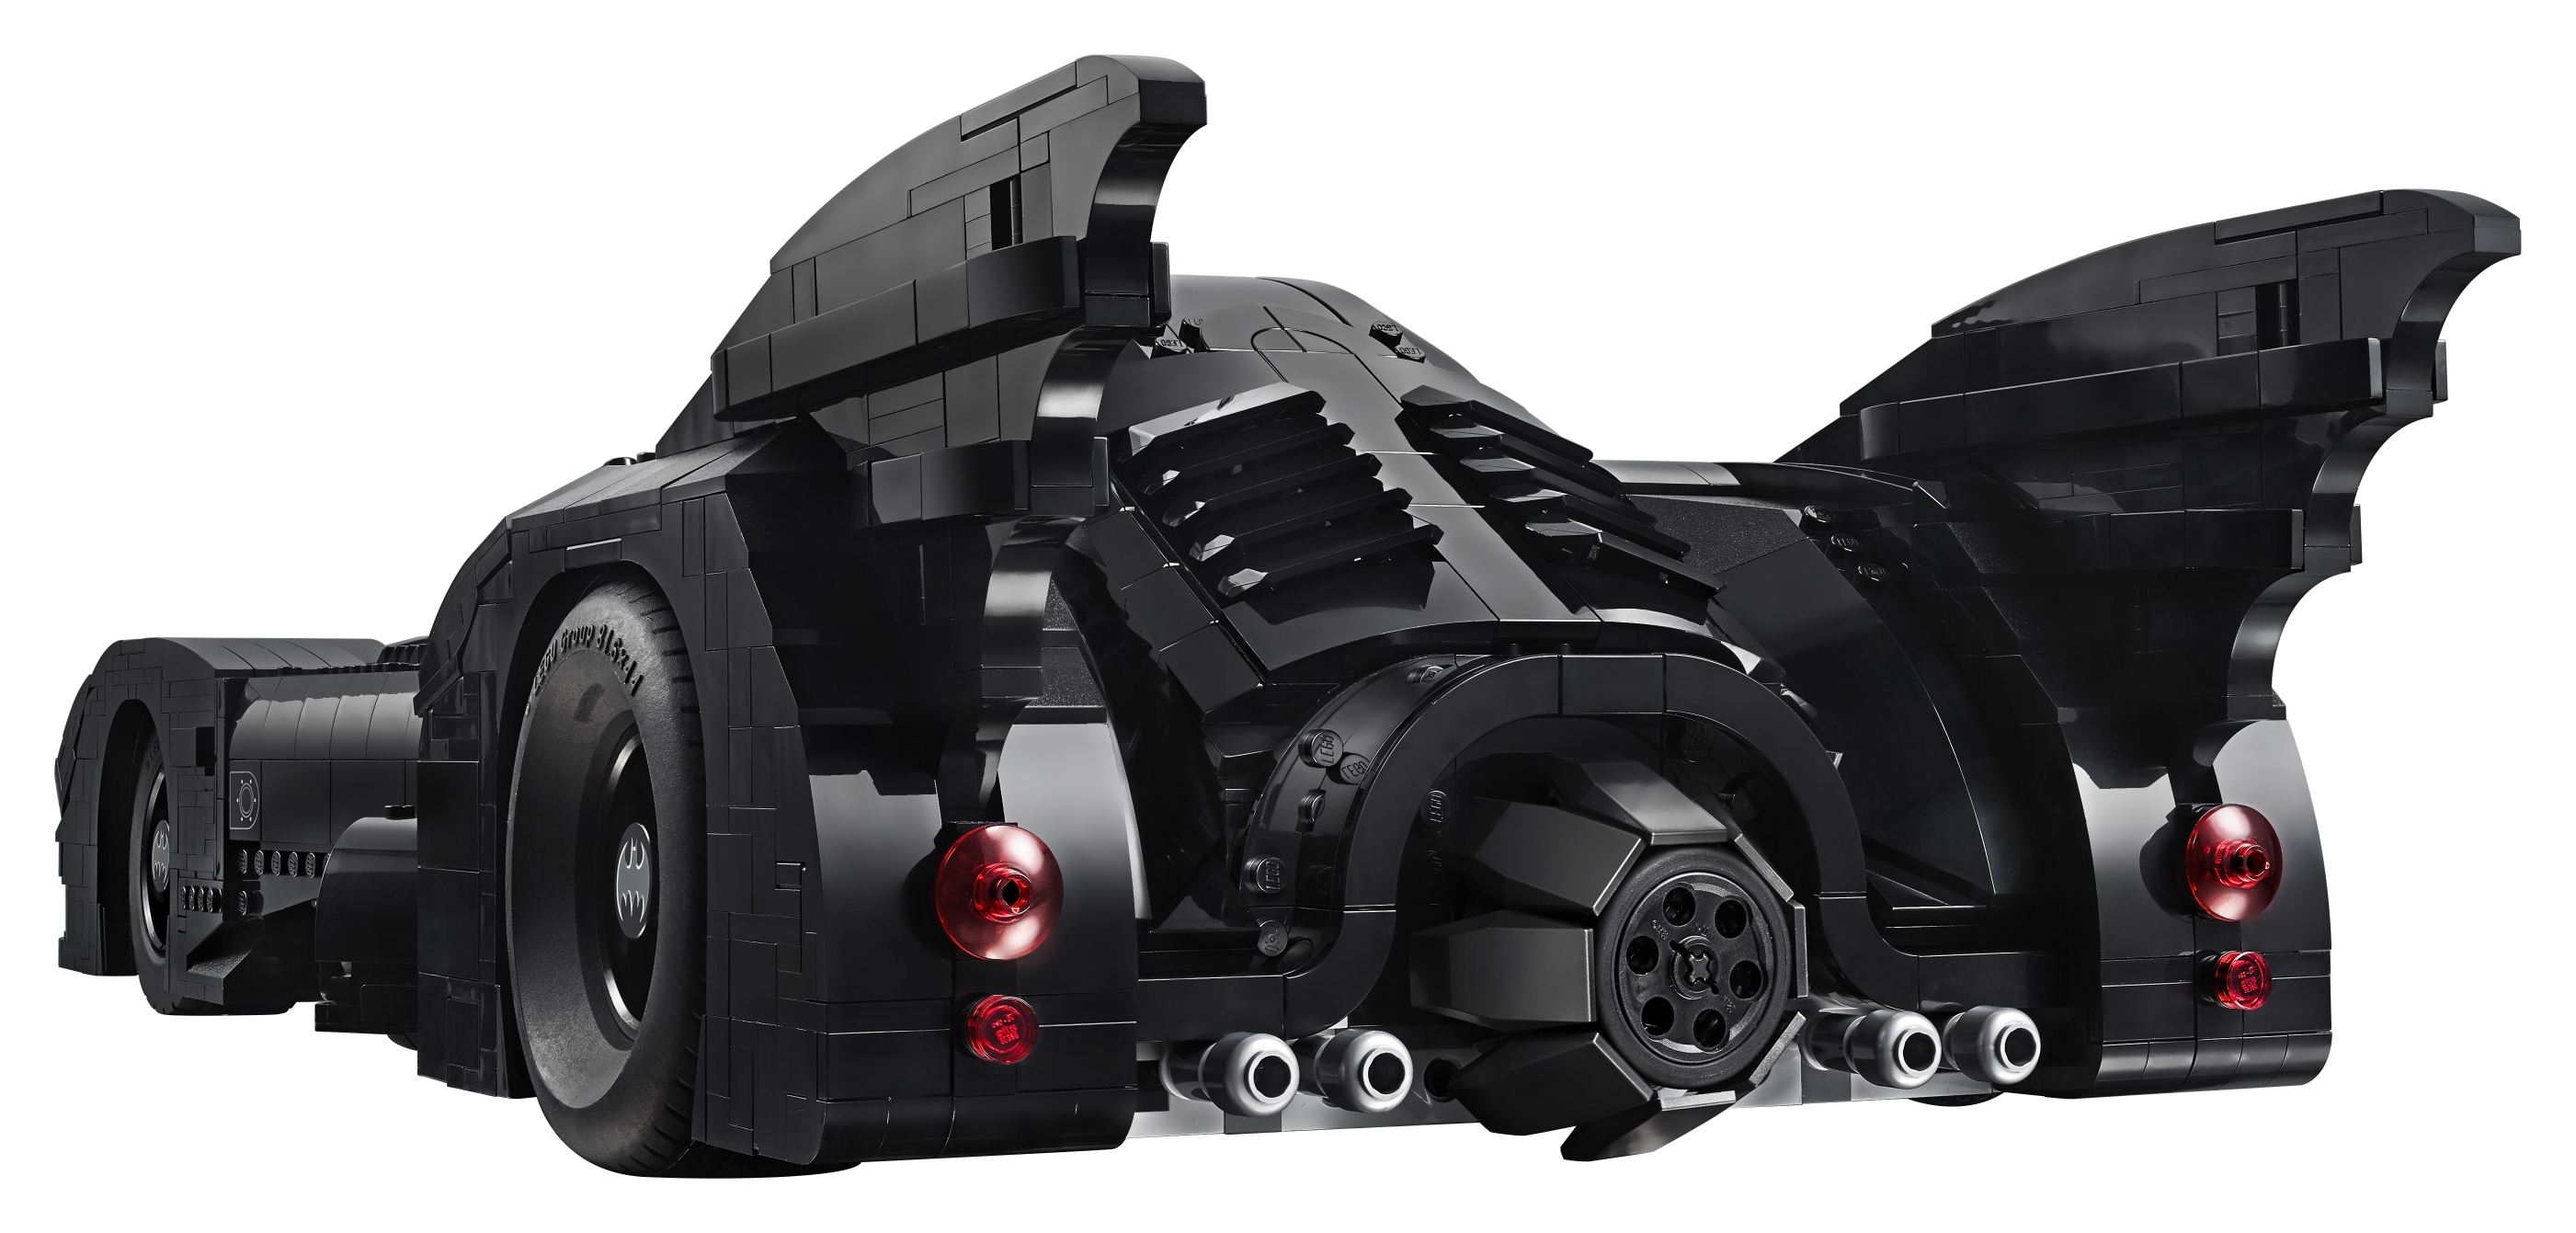
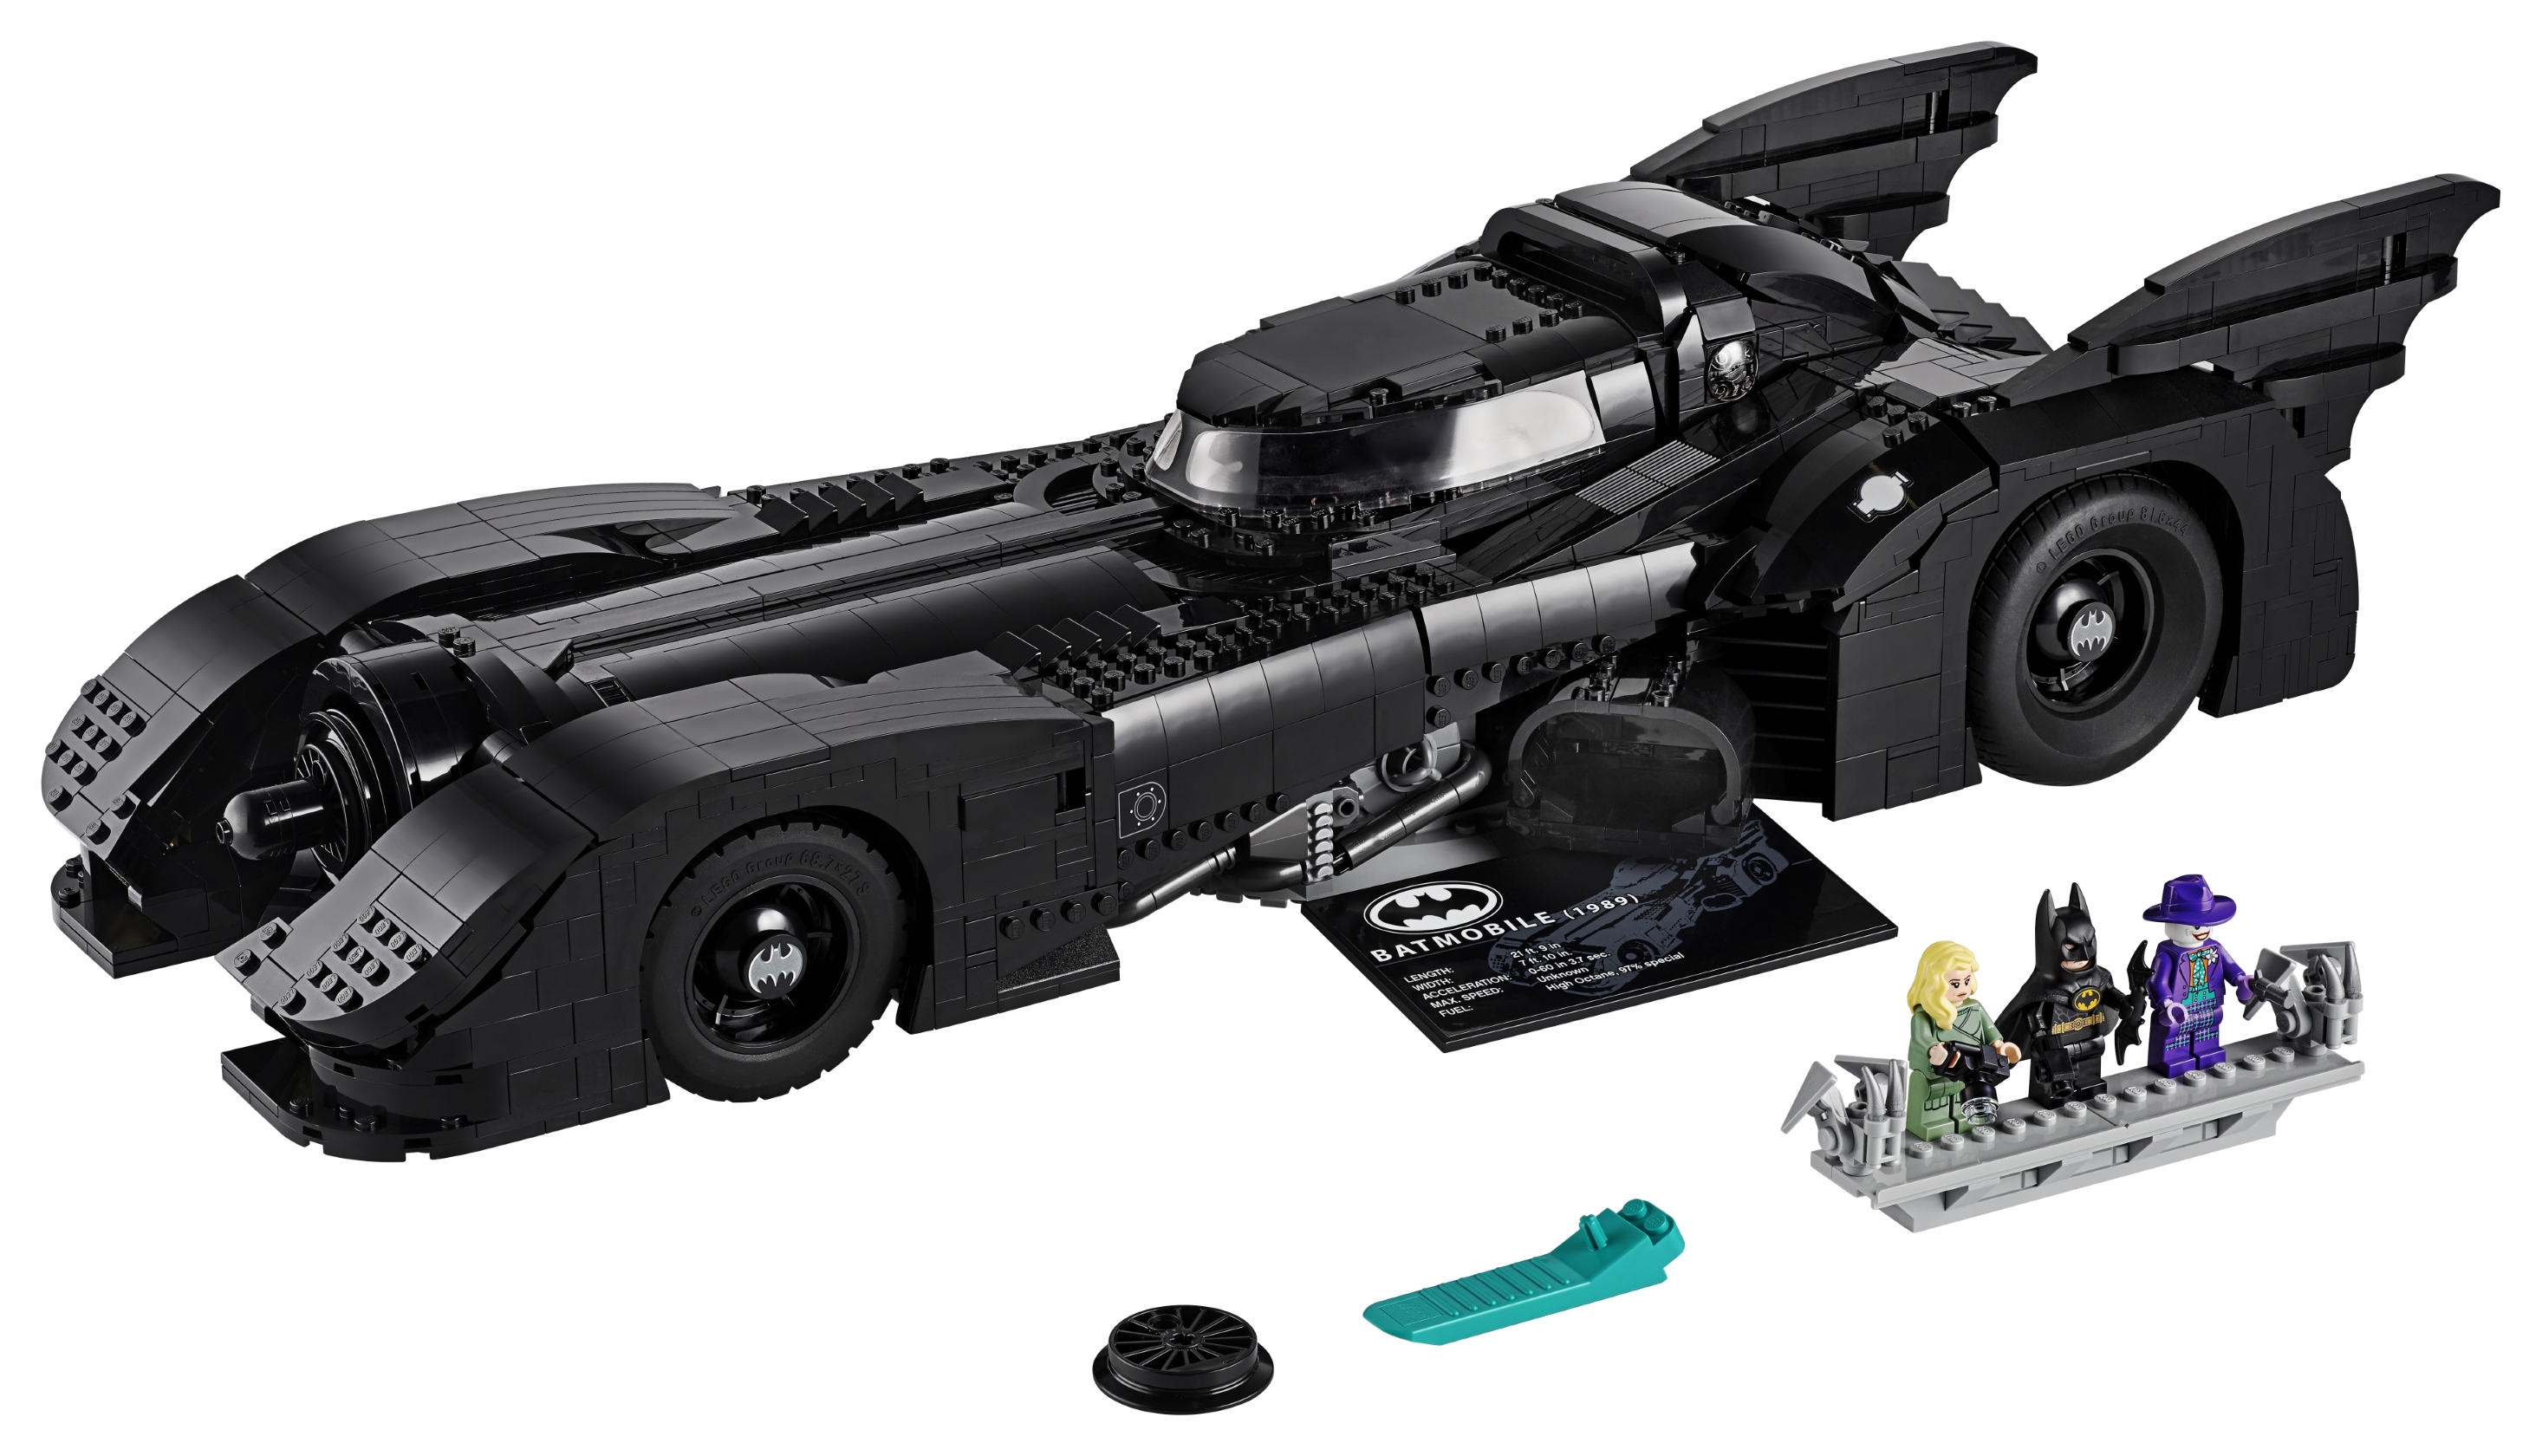
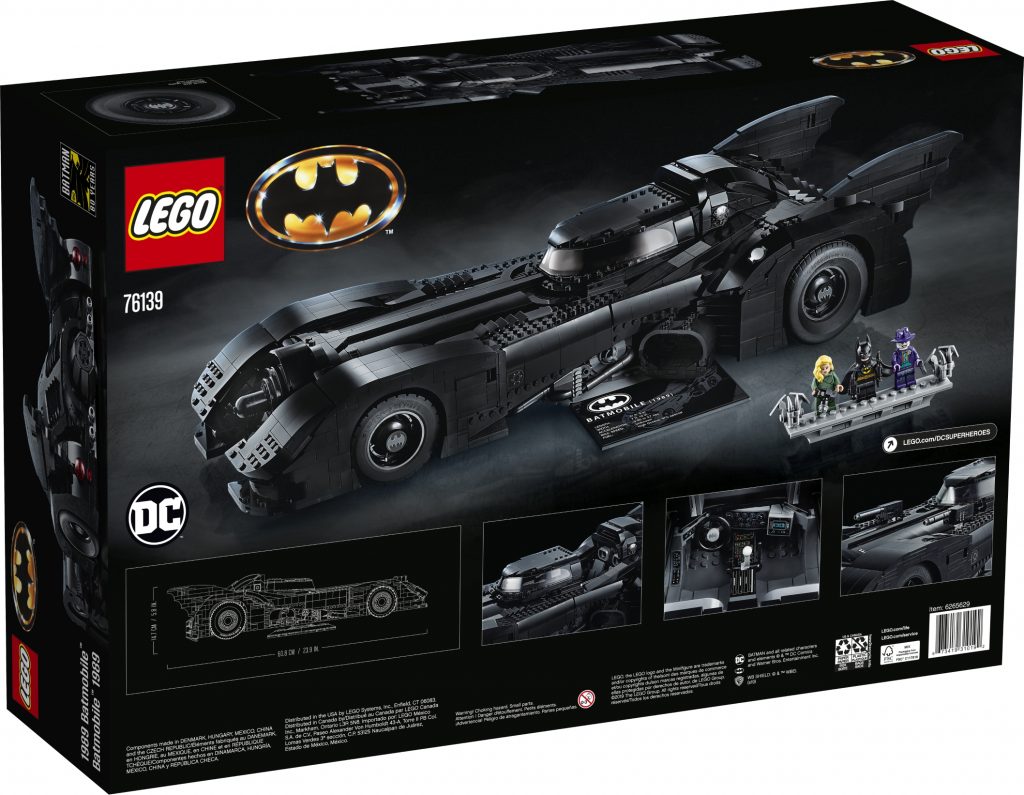
Press Release Images.